
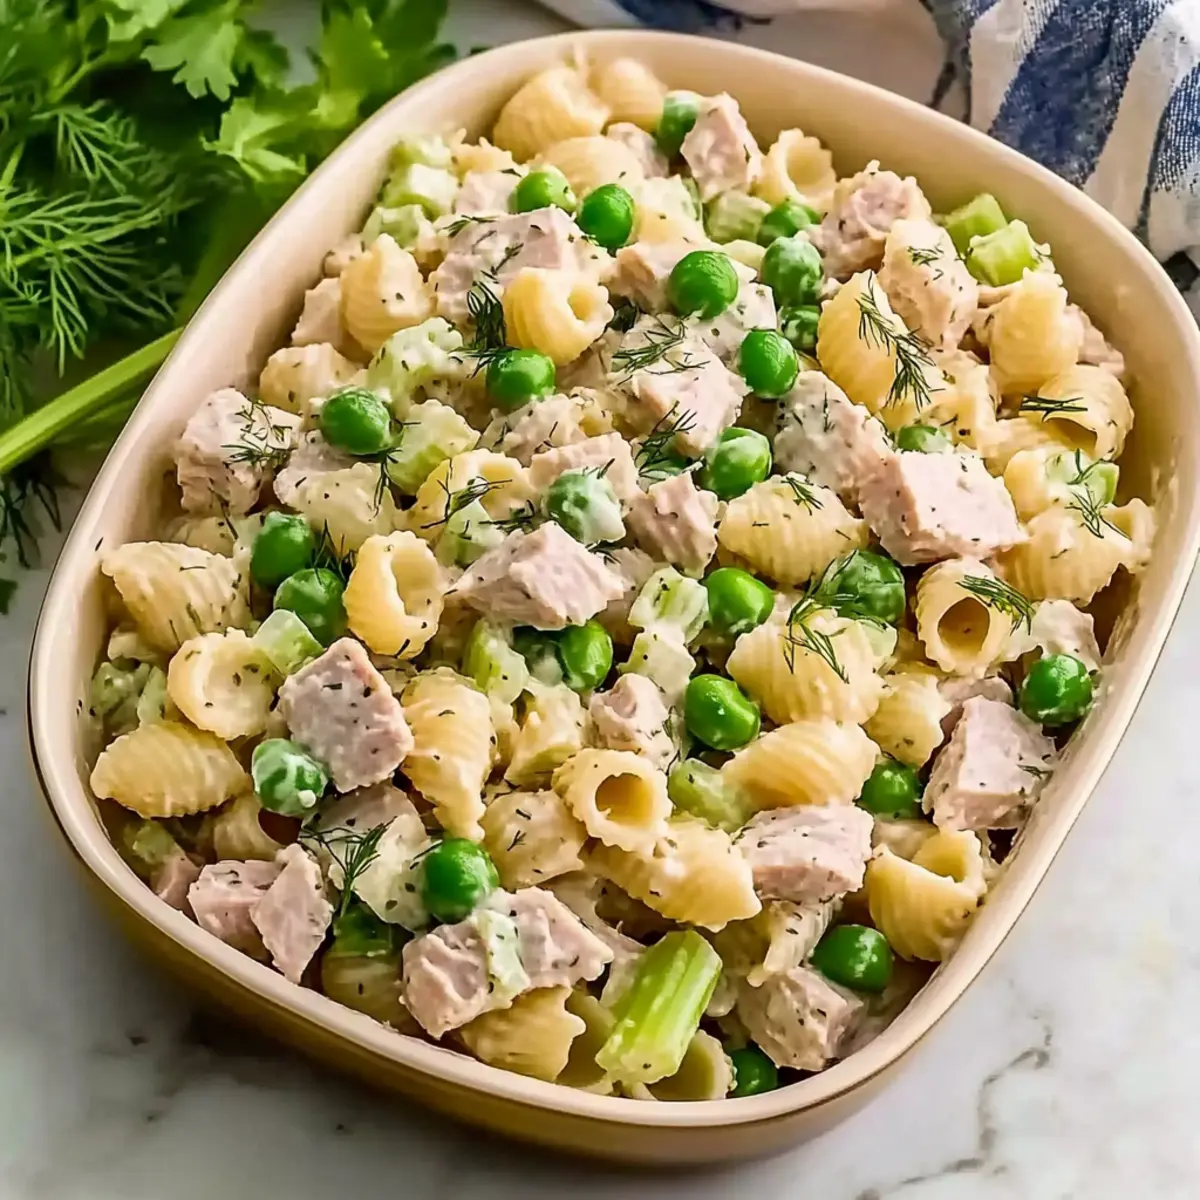
As I stirred the pot on a sun-drenched afternoon, I couldn’t shake the feeling of nostalgia that washed over me. The vibrant colors of this Creamy Dill Tuna Pasta Salad not only catch the eye but also stir memories of family gatherings and sunny picnics. With just 20 minutes to whip up this refreshing dish, it becomes the perfect sidekick for any meal or a standout star at potlucks. What I love most is its lightened-up dressing made with Greek yogurt and mayonnaise, offering a creamy texture without the guilt. It’s a delightful way to enjoy a classic favorite that everyone—young and old—will adore. Ready to take your homemade meals to the next level with this simple recipe? Let’s dive in!
Why is This Tuna Salad So Special?
Quick and Easy: In just 20 minutes, you can whip up a dish that’s perfect for busy weeknights or unexpected gatherings.
Creamy and Tangy: The unique blend of Greek yogurt and mayonnaise delivers a luscious dressing that’s both refreshing and satisfying.
Crowd-Pleasing Appeal: Whether at a picnic or potluck, this salad is sure to be a hit. For a delightful combo, consider serving it with Savory Dill Salad or some crispy crackers.
Versatile Options: Feel free to substitute ingredients to match your taste! Try swapping tuna for shredded chicken or chickpeas for a new twist.
Healthier Choice: With lightened-up ingredients, you can enjoy a comforting dish without the usual guilt. This salad is a fantastic light lunch option that leaves you feeling great.
Dill Tuna Pasta Salad Ingredients
For the Salad
• Shell Pasta – Use Barilla for best texture and to prevent mushiness.
• Tuna – Choose either chunk light or solid white albacore based on preference and budget; drain well before use.
• Celery – Finely diced into 1/4-inch pieces for best texture and crunch.
• Red Onion – Can be substituted with green onions for a milder flavor; adds a pop of color.
• Peas – Frozen peas can be used directly without thawing, adding sweetness and vibrant color.
For the Dressing
• Mayonnaise – Hellmann’s is recommended for its rich flavor and creaminess.
• Greek Yogurt – Lightens the dressing and adds tang; could be swapped with sour cream.
• Dijon Mustard – Enhance flavor depth; adjust to taste for a subtle kick.
• Dill – Fresh or dried can be used depending on availability, adding an herbaceous touch.
• Salt & Pepper – Essential for seasoning and balancing flavors in the creamy dill tuna pasta salad.
Step‑by‑Step Instructions for Dill Tuna Pasta Salad
Step 1: Cook Pasta
Bring a large pot of salted water to a rolling boil over high heat. Add the shell pasta and cook for 8-10 minutes until al dente, stirring occasionally. Once cooked, drain the pasta in a colander, and rinse it under cold water to stop the cooking process. Allow the shells to cool completely, ensuring they are tender but firm enough to hold the creamy dressing in the dill tuna pasta salad.
Step 2: Prep Ingredients
While the pasta cools, prepare the fresh ingredients. Finely dice the celery into 1/4-inch pieces and mince the red onion for a mild bite. Open the tuna cans and drain thoroughly, then use a fork to flake the tuna into bite-sized pieces. Measure out the frozen peas directly from the bag, as they can be added without thawing, keeping the salad fresh and vibrant.
Step 3: Make Dressing
In a medium mixing bowl, whisk together the mayonnaise, Greek yogurt, and Dijon mustard until smooth and creamy. This dressing will form the base for your dill tuna pasta salad, offering a delightful tang and richness. Taste and adjust the mustard for your preferred level of spice, ensuring each spoonful of salad will burst with flavor.
Step 4: Combine Ingredients
In a large mixing bowl, combine the cooled pasta, diced celery, minced red onion, flaked tuna, and frozen peas. Pour in half of the dressing and season the mixture with salt and pepper to taste. Gently stir everything together until well coated, allowing the flavors to mingle and ensuring each ingredient is beautifully integrated within the creamy dill tuna pasta salad.
Step 5: Refrigerate
Cover the bowl tightly with plastic wrap or transfer the salad to an airtight container. Refrigerate for at least 30 minutes, allowing the dill tuna pasta salad to chill and the flavors to meld together beautifully. This resting period enhances the overall taste, creating a refreshing dish perfect for serving at your next gathering.
Step 6: Final Touch
Just before serving, give the salad a good stir to fluff it up and mix the ingredients again. Incorporate the remaining dressing to ensure a creamy texture that clings to every shell. Adjust seasoning again if necessary, and then serve it alongside your favorite sides or enjoy it on its own as a delightful and light meal.
Make Ahead Options
These Creamy Dill Tuna Pasta Salad are ideal for busy home cooks looking to save time during the week! You can prepare the pasta and chop the celery and red onion up to 24 hours in advance; just be sure to keep the pasta completely cool to prevent it from becoming soggy. Store the prepped ingredients in separate airtight containers in the refrigerator. The peas can be added directly before serving for a fresh pop of color. When you’re ready to serve, simply combine your prepped ingredients, stir in the dressing, and adjust seasoning as needed. This way, you’ll enjoy all the flavors and freshness with minimal effort—perfect for family dinners or last-minute gatherings!
Dill Tuna Pasta Salad Variations
Customize this creamy delight to fit your taste and pantry staples for an even greater culinary experience!
-
Shredded Chicken: Swap tuna for shredded chicken for a hearty alternative that’s equally satisfying.
-
Chickpeas: For a plant-based option, substitute tuna with chickpeas, adding fiber and a different texture.
-
Bell Peppers: Toss in chopped bell peppers for a colorful crunch that brightens every bite.
-
Olives: Add sliced black or green olives to introduce a briny flavor that enhances the salad’s overall profile.
-
Lemon Juice: Incorporate a tablespoon of fresh lemon juice into the dressing for a zesty twist that awakens your palate.
-
Greek Feta: Crumble Greek feta cheese into the mix for a creamy burst of flavor that pairs wonderfully with the dill.
-
Spicy Kick: Sprinkle in some red pepper flakes or diced jalapeños to take this dish up a notch with heat.
-
Creamy Avocado: For a smooth, rich texture, fold in diced avocado just before serving; it adds creaminess and healthy fats.
Feel free to explore these variations, and you might even find yourself inspired to create your own signature twist on this classic dish. For a complete meal, you might enjoy pairing this salad with Baked Feta Pasta or Savory Dill Salad.
What to Serve with Creamy Dill Tuna Pasta Salad
Elevate your dining experience with these thoughtfully chosen sides that enhance the freshness and flavors of this delightful pasta salad.
-
Crispy Garlic Bread: The buttery, garlicky crunch pairs beautifully with the creamy texture of the salad, making each bite a delightful contrast.
-
Steamed Asparagus: Bright green spears add a vibrant color and earthy flavor to the meal. Drizzle with lemon to bring out the fresh dill in the salad.
-
Mixed Green Salad: A light and refreshing crisp salad tossed with a lemon vinaigrette complements the richness of the tuna pasta. The acidity will enhance all the flavors.
-
Fruit Salad: A sweet and tangy fruit medley provides a refreshing balance to the savory pasta salad. Consider adding berries, melon, or citrus for a touch of brightness.
-
Potato Chips: Simple yet satisfying, crispy chips offer a delightful crunch that echoes the creaminess of the dish—a perfect snack or side.
-
White Wine Spritzer: A chilled spritzer with refreshing hints of citrus and fizz cleanses the palate and complements the flavors beautifully—a delightful drink pairing.
How to Store and Freeze Dill Tuna Pasta Salad
Fridge: Keep your dill tuna pasta salad in an airtight container for up to 3 days. This salad actually improves in flavor as it sits, making it perfect for meal prep!
Freezer: For longer storage, freeze individual portions in airtight containers. The salad can last up to 2 months, but note that texture may change upon thawing.
Reheating: If desired, gently thaw in the refrigerator overnight before enjoying it cold again. Avoid microwaving to preserve the creamy texture of the dressing.
Freshness Tip: Add frozen peas just before serving; they’re a great way to maintain crispness and color in your irresistible dill tuna pasta salad!
Helpful Tricks for Dill Tuna Pasta Salad
- Cool Completely: Ensure the pasta is completely cooled after cooking; this prevents the creamy dressing from separating and maintains a delightful texture.
- Don’t Overlook Cooling Steps: Rinsing the pasta under cold water after draining stops the cooking process and helps achieve the perfect al dente bite.
- Embrace Resting Time: Allow the salad to chill for at least 30 minutes; this step is crucial for flavor absorption in your Dill Tuna Pasta Salad.
- Retain Tuna Moisture: Leave a bit of liquid in the tuna before adding it to the salad to prevent the mixture from becoming too dry or thick.
- Adjust to Taste: Taste as you go, especially the dressing; don’t hesitate to adjust the Dijon mustard for personal preference and to boost flavor.
Dill Tuna Pasta Salad Recipe FAQs
How do I choose the right pasta for this salad?
Absolutely! For the best texture in your Dill Tuna Pasta Salad, I recommend using Barilla shell pasta. Its shape helps hold onto the creamy dressing while preventing mushiness. Look for pasta that is firm with no visible dark spots, which can indicate age.
How long does the salad stay fresh in the fridge?
You can keep your dill tuna pasta salad in an airtight container in the fridge for up to 3 days. The flavors actually improve as it mingles, so it’s fantastic for meal prep. Just make sure to give it a good stir before serving!
Can I freeze this tuna pasta salad?
Yes, you can! To freeze, portion the salad into airtight containers and store them in the freezer for up to 2 months. When you’re ready to enjoy it again, thaw in the refrigerator overnight. Remember to add fresh peas before serving to maintain that great texture!
What should I do if my pasta is too mushy?
If your pasta becomes mushy, it can be a bit tricky, but fear not! Here’s what you can do: try not to overcook it next time. If you noticed it’s already mushy, you might add more solid ingredients like extra vegetables or canned beans to balance the texture. Rinsing it thoroughly under cool water after cooking can also help prevent mushiness in the future.
Is this tuna salad suitable for those with allergies?
Great question! This Dill Tuna Pasta Salad contains common allergens like wheat (from the pasta), fish (tuna), and dairy (mayonnaise and yogurt). If you’re preparing it for someone with allergies, consider using gluten-free pasta and swapping the dressing for a dairy-free alternative. Be sure to check ingredient labels for any hidden allergens!
How do I make this salad more zesty?
For a zesty twist in your Dill Tuna Pasta Salad, I often add a tablespoon of lemon juice to the dressing. This brightens up the flavors significantly! Alternatively, you can mix in a small amount of finely chopped dill pickles or capers for an extra zing. Enjoy experimenting!
Creamy Dill Tuna Pasta Salad: A Quick & Tasty Delight
Ingredients
Equipment
Method
- Bring a large pot of salted water to a rolling boil. Add the shell pasta and cook for 8-10 minutes until al dente, then drain and rinse under cold water.
- Finely dice the celery and mince the red onion. Drain and flake the tuna.
- In a medium bowl, whisk together the mayonnaise, Greek yogurt, and Dijon mustard until smooth.
- In a large bowl, combine the cooled pasta, celery, onion, tuna, and peas. Add half of the dressing and season with salt and pepper.
- Cover the salad and refrigerate for at least 30 minutes.
- Before serving, stir the salad and mix in the remaining dressing. Adjust seasoning and serve.
Leave a Reply