
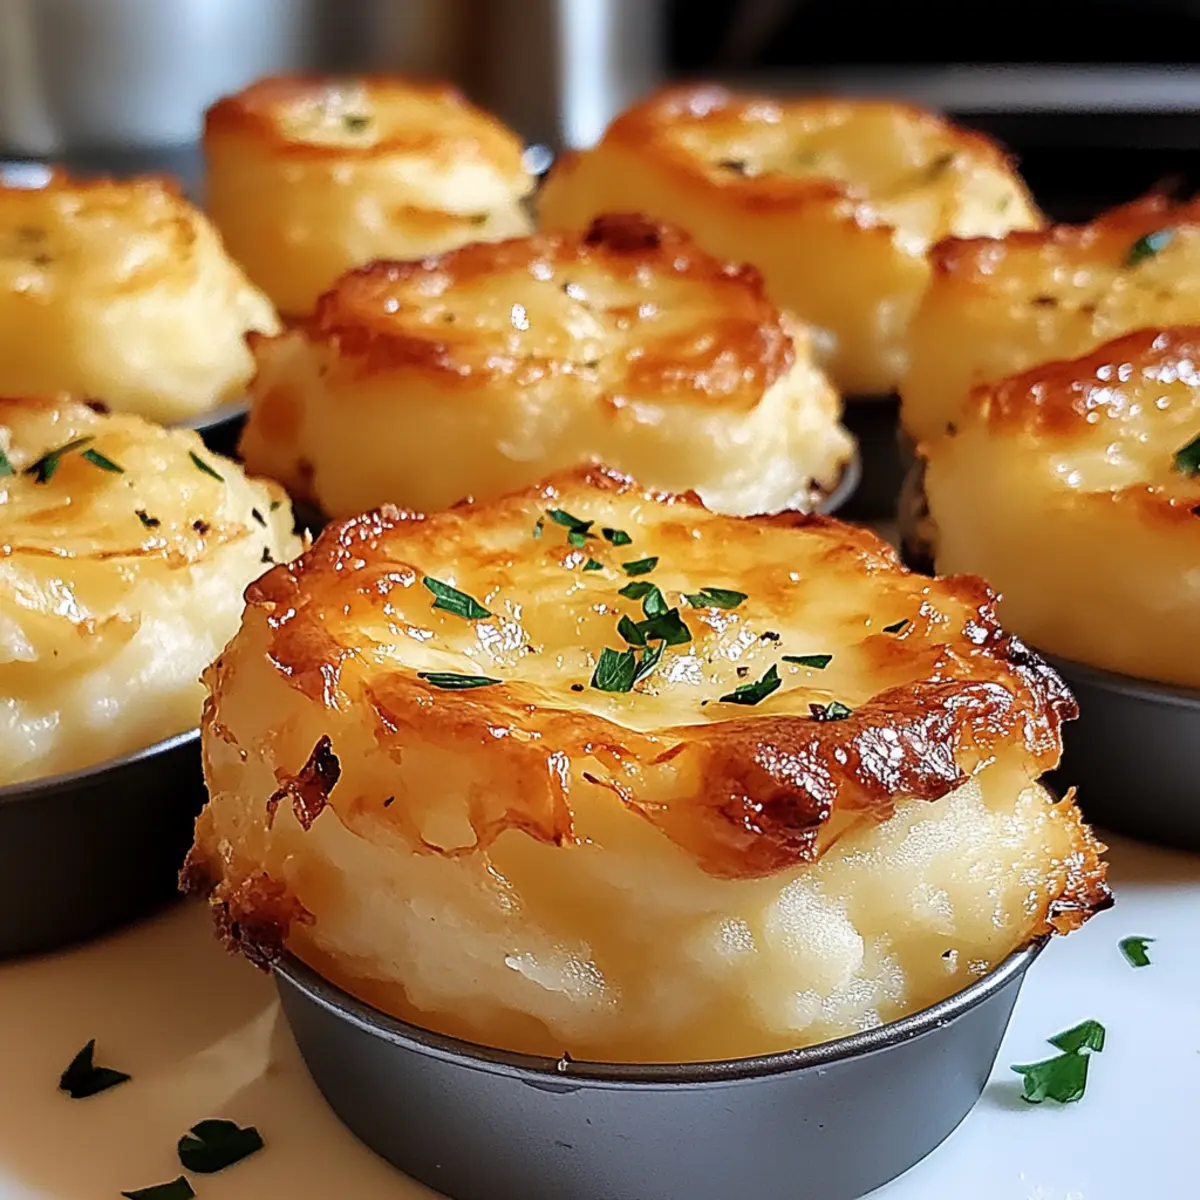
There’s something truly magical about turning leftovers into something extraordinary, and that’s exactly what we’re diving into today! Meet my Crispy Cheesy Mashed Potato Puffs—a delightful way to elevate those extra mashed potatoes sitting in your fridge. These puffs, golden and crispy on the outside yet soft and creamy on the inside, are perfect for a quick weeknight treat or an impressive appetizer for guests. With just a handful of ingredients, they’re a creative twist on comfort food that saves time and reduces waste. Plus, customizing the toppings allows for endless variations to please every palate. Are you ready to transform your leftovers into a gourmet snack?
Why Will You Love These Puffs?
Transformative: You can turn leftover mashed potatoes into a sensational treat that everyone will rave about.
Crispy Yet Creamy: The delightful contrast of a golden exterior with a fluffy, cheesy center makes these puffs a standout comfort food.
Customizable Toppings: Whether you prefer a sprinkle of bacon, a dash of garlic powder, or a different cheese blend, you can easily make these puffs your own.
Easy to Make: With just a few simple steps and ingredients, these puffs are perfect for both novice cooks and seasoned chefs alike.
Crowd Pleaser: Perfect as an appetizer or a side dish, they are sure to impress your family and guests at any occasion.
Time-Saving: Making use of leftovers not only saves time but also helps reduce food waste—what’s not to love?
Cheesy Mashed Potato Puffs Ingredients
For the Base
• Eggs – Provide binding and structure; substitute with a flax egg (1 tablespoon flaxseed meal + 2.5 tablespoons water) for a vegan option.
• Mashed Potatoes – The heart of the recipe; use any leftover mashed potatoes that are at room temperature to ensure perfect mixing.
For the Cheese Mixture
• Monterey Jack Cheese – Adds creaminess and flavor; feel free to swap with cheddar or mozzarella for a different taste.
• Chives – Brings a fresh, mild onion flavor; you can use green onions or parsley if you need alternatives.
For Seasoning
• Salt and Pepper – Essential for elevating the flavors; adjust to your taste preferences.
• Sour Cream – Optional but delicious; serves as a tasty dipping sauce for these cheesy mashed potato puffs.
Step‑by‑Step Instructions for Cheesy Mashed Potato Puffs
Step 1: Preheat and Prepare the Tin
Begin by preheating your oven to 400°F (200°C). While the oven is heating up, generously grease a 24-cup mini muffin tin with cooking spray or butter. This will ensure your Cheesy Mashed Potato Puffs come out easily and maintain a lovely golden color.
Step 2: Mix the Ingredients
In a large mixing bowl, add your room temperature mashed potatoes, two beaten eggs, 3/4 cup of shredded Monterey Jack cheese, and chopped chives. Season the mixture with salt and pepper to taste. Stir gently until well combined; take care not to overmix, as this helps keep the texture light and fluffy for your delicious puffs.
Step 3: Fill the Muffin Tin
Using a spoon or a small ice cream scoop, portion the creamy potato mixture into each greased muffin cup, filling them nearly to the top. The mixture should be slightly heaped to ensure a nice volume in each Cheesy Mashed Potato Puff. This step is crucial to achieve that delightful puff you’re aiming for!
Step 4: Add the Cheese Topping
Once all the cups are filled with the potato mixture, sprinkle the remaining 1/4 cup of shredded cheese evenly over the top of each portion. This creates a delicious cheesy crust as they bake, adding extra flavor and that irresistible golden finish to your Cheesy Mashed Potato Puffs.
Step 5: Bake to Perfection
Carefully place the muffin tin in the preheated oven and bake for 15-20 minutes. You’ll know they’re ready when the puffs are golden brown and set. Keep an eye on them towards the end to avoid over-baking. The aroma wafting through your kitchen will be mouthwatering!
Step 6: Cool and Serve
After baking, remove the tin from the oven and let it cool for about 5 minutes. This resting period allows the puffs to firm up, making it easier to remove them from the tin. Use a small spatula to gently lift out each Cheesy Mashed Potato Puff, then serve warm with a garnish of chopped chives and a side of sour cream for dipping, if desired.
Make Ahead Options
These Cheesy Mashed Potato Puffs are a fantastic choice for meal prep, making busy weeknights a breeze! You can prepare the potato mixture up to 3 days in advance; simply store it covered in the refrigerator. For the best results, ensure the mashed potatoes are chilled to prevent any browning. When you’re ready to enjoy these puffs, scoop the mixture into the greased muffin tin, top with cheese, and bake directly from the fridge—there’s no need to bring them to room temperature. This way, you’ll have an easy, delicious side dish or appetizer ready to impress your family, all with minimal effort!
How to Store and Freeze Cheesy Mashed Potato Puffs
Fridge: Store baked cheesy mashed potato puffs in an airtight container for up to 3 days. They can be enjoyed cold or gently reheated in the oven.
Freezer: For longer storage, freeze the baked puffs on a baking sheet until firm, then transfer to a freezer-safe bag. They can be frozen for up to 3 months.
Reheating: To restore their crispy texture, reheat frozen puffs in the oven at 350°F for about 15-20 minutes, or until heated through.
Make-Ahead: You can prepare the potato mixture up to 2 days in advance and keep it in the fridge, making it easy to whip up your cheesy mashed potato puffs.
Cheesy Mashed Potato Puffs Variations
Feel free to mix things up and personalize your cheesy mashed potato puffs with these delightful variations!
-
Herb-Infused: Add a tablespoon of fresh herbs, like dill or thyme, to the potato mixture for an aromatic twist. The fresh flavors will brighten each bite and elevate your puffs to new heights.
-
Spicy Kick: Incorporate diced jalapeños or a few shakes of crushed red pepper flakes for a zesty touch. The heat from the spices will complement the creamy potatoes, leaving your taste buds excited.
-
Bacon Lover’s Delight: Fold in crispy crumbled bacon or diced ham before scooping the mixture into the muffin tin. This savory addition will provide a smoky flavor that pairs perfectly with the cheesy goodness.
-
Vegetarian Medley: Mix in finely chopped veggies like spinach, bell peppers, or mushrooms for an added nutritional boost. These colorful additions will not only enhance the flavor but also add a lovely texture.
-
Cheese Swap: Experiment with different cheese varieties like gouda, pepper jack, or even feta for a unique flavor profile. Each choice will create a distinctively delicious puff, perfect for a themed dinner night.
For an extra side dish, consider serving your cheesy mashed potato puffs alongside some Spicy Southern Cheesy Chicken Spaghetti Casserole or Cheesy Ranch Potatoes to round out your meal.
-
Sweet Potato Version: Swap half of the mashed potatoes with sweet potatoes for a hint of natural sweetness. This healthy twist will surprise your guests and give you a colorful dish!
-
Nutty Crunch: Top your puffs with panko breadcrumbs mixed with a sprinkle of parmesan before baking. This will create an irresistible, crunchy topping that contrasts beautifully with the fluffy interior.
These variations not only allow you to cater to various taste preferences but also bring creativity to your cooking. Enjoy experimenting and crafting your perfect cheesy mashed potato puff!
Expert Tips for Cheesy Mashed Potato Puffs
-
Cool Your Potatoes: Ensure your mashed potatoes are completely cool before mixing. Warm potatoes can curdle the eggs, ruining your puffs.
-
Mix Gently: Avoid overmixing the potato mixture. Gentle folding will keep your puffs light and airy, rather than dense and heavy.
-
Choose the Right Tin: For extra crispiness, opt for a regular muffin tin instead of a mini one. This allows more surface area for browning.
-
Rack Position Matters: Place your muffin tin on the lower rack of the oven to achieve optimal browning on the bottoms of your cheesy mashed potato puffs.
-
Serve Immediately: These puffs are best enjoyed fresh from the oven while they’re warm and cheesy. Reheating can diminish the crispiness.
What to Serve with Cheesy Mashed Potato Puffs
There’s nothing quite like turning a simple recipe into a full family feast, and these delightful puffs are your starting point!
- Crispy Roasted Brussels Sprouts: Their earthy flavor and crispy texture provide a wonderful contrast that balances the creaminess of the puffs.
- Grilled Chicken Skewers: Juicy and flavorful skewers add protein and aroma, making this duo a fantastic meal option for gatherings.
- Tangy Greek Salad: The freshness of cucumbers, tomatoes, and feta creates a light, refreshing side that complements the richness of the puffs beautifully.
- Creamy Tomato Soup: Dip these cheesy bites into a warm bowl of tomato soup for a comforting, nostalgic pairing that elevates both dishes.
- Savory Marinara Sauce: Serve alongside a zesty marinara for a delicious dipping experience that brings an Italian flair to your meal.
- Warm Garlic Bread: Crunchy on the outside, soft on the inside, garlic bread pairs perfectly with cheesy puffs, adding a satisfying crunch and depth of flavor.
- Chilled White Wine Spritzer: A refreshing drink that enhances the flavors of your meal, its crispness complements the fluffy texture of the puffs.
- Chocolate Lava Cake: End your meal on a sweet note with a rich, gooey dessert that contrasts nicely with the savory bites of cheesy goodness.

Cheesy Mashed Potato Puffs Recipe FAQs
How should I choose the right leftover mashed potatoes?
Absolutely! When selecting your leftover mashed potatoes, aim for those that have been stored properly and are at room temperature for mixing. Ideally, they should be fluffy and not watery. If they have dark spots or an off smell, it’s best to discard them.
What’s the best way to store Cheesy Mashed Potato Puffs?
Very simply! Place your baked Cheesy Mashed Potato Puffs in an airtight container and store them in the refrigerator for up to 3 days. They can be enjoyed cold or reheated gently in the oven at 350°F for a few minutes to restore their crispiness.
Can I freeze the puffs for later use?
Absolutely, freezing is a great option! To freeze your puffs, first, allow them to cool completely. Then, arrange them on a baking sheet, making sure they aren’t touching, and freeze until solid. Afterward, transfer them to a freezer-safe bag and store for up to 3 months. When you’re ready to enjoy them again, reheat in the oven at 350°F for about 15-20 minutes, and they’ll taste almost freshly made!
What if my puffs are too dense?
If your Cheesy Mashed Potato Puffs turn out dense, it usually means they were overmixed. To achieve that light and fluffy texture, mix the ingredients gently just until combined. Also, make sure your mashed potatoes are at room temperature to avoid curdling the eggs!
Are there any dietary concerns I should consider?
For sure! If you’re cooking for someone with egg allergies, you can easily substitute the eggs with a flax egg (mix 1 tablespoon flaxseed meal with 2.5 tablespoons water and let sit for a few minutes). Additionally, always check the cheese label for dairy allergies. You can also use dairy-free cheese alternatives for a vegan option.
How far ahead can I prepare the mixture?
Absolutely! You can prepare the potato mixture up to 2 days in advance. Store it covered in the fridge, and when you’re ready to bake, simply scoop it into your greased mini muffin tins and follow the baking instructions. This makes for a convenient and delicious last-minute appetizer!
Crispy Cheesy Mashed Potato Puffs You’ll Love to Make
Ingredients
Equipment
Method
- Preheat your oven to 400°F (200°C) and grease a 24-cup mini muffin tin.
- In a large bowl, combine room temperature mashed potatoes, beaten eggs, shredded cheese, and chopped chives. Season with salt and pepper. Mix gently.
- Spoon the mixture into the greased muffin cups, filling them nearly to the top.
- Sprinkle the remaining shredded cheese over each portion.
- Bake for 15-20 minutes until golden brown and set.
- Let cool for 5 minutes, then gently lift out puffs and serve warm with chives and sour cream if desired.
Leave a Reply