
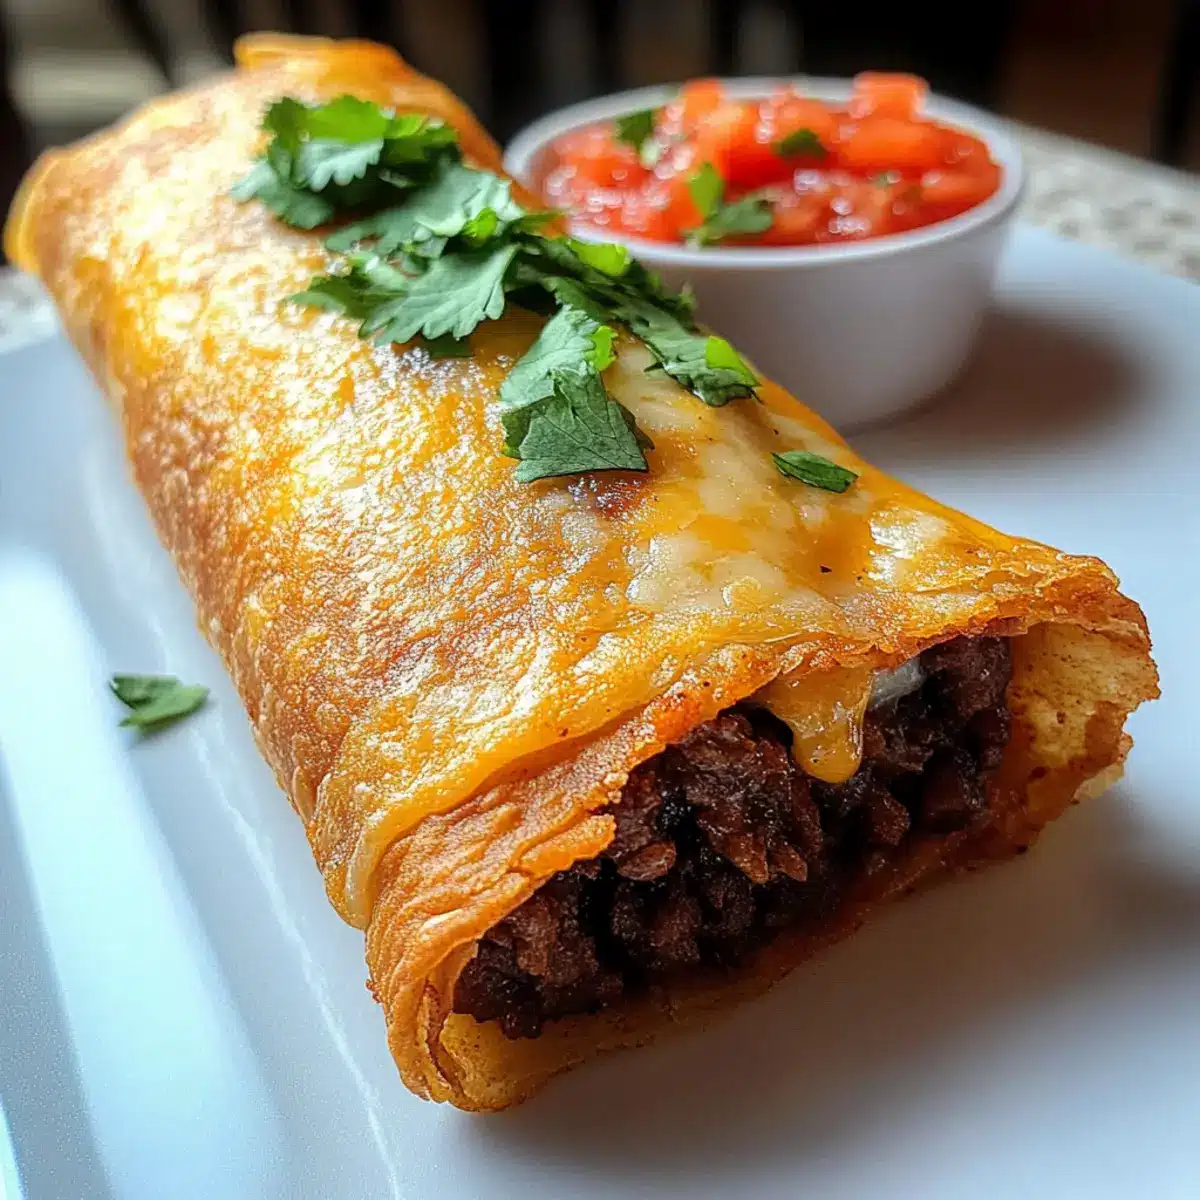
As I stood in my kitchen, the enticing aroma of cumin and sizzling beef filled the air, instantly transporting me to a cozy Mexican cantina. This is where my journey to crafting the perfect Crispy Beef & Cheese Chimichangas began. Packed with a mouthwatering blend of seasoned ground beef and gooey cheese, these golden delights not only bring a taste of indulgence to any casual dinner but are surprisingly easy to whip up any day of the week. Whether you’re seeking a satisfying snack or a hearty meal, they are an irresistible treat that will have you waving goodbye to takeout for good. Join me as we explore tips to make these chimichangas flawlessly crispy, plus some fun variations that’ll cater to all your cravings. Are you ready to dive into this delicious adventure?
Why Are These Chimichangas So Irresistible?
Crispy Texture: The golden-brown exterior provides the perfect crunch, giving way to a savory filling that’s simply addicting.
Flavor Explosion: Seasoned ground beef blends beautifully with melty cheese, creating a comfort dish bursting with flavor.
Easy to Customize: Substitute beef with chicken or beans, or try different cheeses like Monterey Jack for a twist.
Quick to Prepare: In just 30 minutes, you can have these delicious, homemade chimichangas ready to serve—perfect for busy weeknights!
Crowd-Pleaser: These chimichangas are a hit at gatherings; serve them alongside tasty sides like guacamole or salsa for a complete experience.
Versatile Cooking Methods: Bake them for a lighter option or fry them for a traditional crispy finish. Want to explore more delicious fillings? Check out Pimento Cheese Hash for a delightful twist!
Crispy Beef & Cheese Chimichanga Ingredients
For the Filling
• Ground Beef – Provides the savory protein filling; feel free to substitute with ground turkey or chicken for a leaner option.
• Cheddar Cheese – Adds creaminess and flavor; other cheese options include Monterey Jack or Pepper Jack for a bit of heat.
For the Wrap
• Tortillas – The base structure for the chimichangas; opt for large flour tortillas for better wrapping.
For Spice Enhancement
• Cumin – Infuses unique flavor; adjust based on your taste preference.
• Chili Powder – Adds warmth and depth; increase for a spicier kick.
For Frying
• Oil (Vegetable or Canola) – Essential for achieving that perfect crispy texture; heat it to between 350-375°F for optimal frying.
• Flour (optional) – Can be used to seal edges; this is helpful if you experience any filling leaks.
These ingredients will come together to create mouthwatering Crispy Beef & Cheese Chimichangas, sure to delight your family and friends!
Step‑by‑Step Instructions for Crispy Beef & Cheese Chimichangas
Step 1: Prepare the Filling
In a skillet over medium heat, brown 1 pound of ground beef, breaking it apart as it cooks for about 5-7 minutes. Once the beef is fully cooked and no longer pink, drain excess fat. Sprinkle in cumin and chili powder to taste, stirring well. Add 1 cup of shredded cheddar cheese, mixing until it melts and becomes irresistibly gooey, then remove the pan from heat.
Step 2: Assemble the Chimichangas
Lay a large flour tortilla on a clean surface. Spoon about ⅓ cup of the cheesy beef filling into the center. Fold the sides inward, then roll the tortilla from the bottom up, securing the filling inside. Make sure to roll tightly but not overly snug to prevent bursting. Repeat this process with the remaining tortillas and filling, preparing each chimichanga for frying.
Step 3: Heat the Oil
In a deep skillet, pour in enough vegetable or canola oil to cover the bottom by about an inch. Heat the oil to 350-375°F, using a thermometer for accuracy. This ensures your Crispy Beef & Cheese Chimichangas achieve that sought-after golden-brown exterior. Avoid overcrowding the pan to maintain the perfect oil temperature, which promotes an ideal crunch.
Step 4: Fry the Chimichangas
Carefully place each assembled chimichanga seam-side down into the hot oil, frying them in batches to prevent crowding. Cook for 3-5 minutes on one side, or until they are golden and crispy. Gently flip them using tongs to fry the opposite side for an additional 3-5 minutes. Keep an eye on them, ensuring they achieve that beautiful golden hue.
Step 5: Drain Excess Oil
Once each chimichanga is perfectly browned, use tongs to remove them from the hot oil. Place them on a plate lined with paper towels to absorb any excess oil. This will keep your Crispy Beef & Cheese Chimichangas from becoming greasy while also enhancing their delightful crunch.
Step 6: Serve and Enjoy
Serve your crispy creations warm, garnishing with toppings of your choice like sour cream, guacamole, or fresh salsa. Arrange them on a colorful platter for a festive presentation and let everyone customize their chimichangas with fresh toppings. These Crispy Beef & Cheese Chimichangas are sure to impress and satisfy any hungry crowd!
Crispy Beef & Cheese Chimichangas Variations
Customize your chimichangas to suit your taste buds and dietary needs, creating new flavor experiences every time!
-
Lean & Tasty: Substitute ground beef with ground turkey or chicken for a lighter, healthier option. You’ll still get that satisfying flavor without the guilt!
-
Vegetarian Delight: Use a mix of black beans, corn, and bell peppers as a filling. This colorful medley not only tastes vibrant but is also packed with nutrients.
-
Spicy Twist: Add diced jalapeños or a sprinkle of cayenne pepper to the beef filling for an extra kick. If you adore heat, this variation will send your taste buds into orbit!
-
Cheesy Fusion: Mix in other cheeses like Monterey Jack or Pepper Jack for an exciting twist in flavor. Each cheese offers its unique taste, making your chimichangas even more irresistible.
-
Baked Goodness: Instead of frying, brush your assembled chimichangas with oil and bake at 375°F for a healthier version. They’ll still come out crispy and golden!
-
Flavored Tortillas: Swap traditional flour tortillas for spinach or tomato basil tortillas for a colorful and flavorful presentation. They add a delightful surprise to each bite!
-
Sour Cream & Spice: Serve with a drizzle of spicy sour cream or chipotle crema. This creamy topping enhances your chimichangas and brings a contrast that will have everyone reaching for more.
If you adore exploring delicious twists, don’t forget to check out my recipe for Blueberry Grilled Cheese for another fun take on comfort food!
Expert Tips for Crispy Beef & Cheese Chimichangas
- Stock Oil Temperature: Keep oil between 350-375°F for a perfectly crispy exterior. Use a thermometer to avoid scorching and sogginess.
- Avoid Overfilling: Stick to about ⅓ cup of filling per chimichanga. Overfilling can lead to bursting during frying.
- Frying in Batches: Don’t overcrowd the pan; this helps maintain the oil temperature and ensures a crispy finish for every chimichanga.
- Seal Edges Properly: Use a little flour if needed to seal the edges of the tortillas, preventing any filling leaks during cooking.
- Freeze for Later: Prepare uncooked chimichangas ahead of time, freeze them, and fry from frozen, adding a few extra minutes to the cooking time.
- Customization: Feel free to swap out ground beef for chicken, beans, or vegetables to create your perfect version of Crispy Beef & Cheese Chimichangas.
How to Store and Freeze Crispy Beef & Cheese Chimichangas
Fridge: Store leftover chimichangas in an airtight container for up to 3 days. Reheat in the oven or air fryer to keep that crispy texture.
Freezer: Place uncooked chimichangas on a baking sheet, freeze until firm, then transfer to a freezer bag. They can be kept for up to 3 months and fried straight from frozen.
Reheating: For optimal crispiness, reheat cooked chimichangas in the oven at 375°F for about 10-15 minutes, or use an air fryer to revive their crunch.
Wrapping: If storing cooked chimichangas, wrap them in foil or parchment paper to maintain their integrity and avoid sogginess.
Make Ahead Options
These Crispy Beef & Cheese Chimichangas are perfect for meal prep enthusiasts looking to save time during busy weeknights! You can prepare the filling with ground beef and cheese up to 24 hours in advance; simply store it in an airtight container in the refrigerator. Additionally, you can assemble the chimichangas ahead of time and refrigerate them (make sure to wrap them tightly in plastic wrap to prevent them from drying out). When you’re ready to serve, simply heat the oil and fry them from cold. They will still be just as delicious, with a crispy exterior and melty interior, making your mealtime a breeze!
What to Serve with Crispy Beef & Cheese Chimichangas
Imagine a feast that will tantalize your taste buds, delivering an explosion of flavors and textures alongside those delightful chimichangas.
-
Sour Cream: A dollop of this creamy delight cools the heat from spices while adding a rich, tangy flavor that perfectly balances the crispy filling.
-
Guacamole: This smooth and creamy avocado dip adds a refreshing touch and a hint of zest that elevates every bite of chimichanga.
-
Pico de Gallo: Fresh tomatoes, onions, and cilantro create a zesty salsa bursting with flavors. The crunch of veggies complements the crispy chimichangas beautifully!
-
Elote Salad: This Mexican street corn salad brings vibrant flavors and textures, with sweet corn, tangy lime, and creamy cheese pairing well with your savory chimichangas.
-
Mexican Rice: Fluffy and flavorful, this side dish adds a comforting touch that is perfectly filling. The spices in the rice complement the seasoned beef and cheese.
-
Black Beans: Hearty and nutritious, black beans provide a satisfying texture contrast, while their mild flavor lets the chimichangas shine.
-
Ice-Cold Horchata: To wash it all down, this refreshing rice milk drink is sweet, creamy, and a delightful treat that pairs exquisitely with the crispy flavors of the meal.
-
Churros: For a sweet finish, these crispy, sugary treats served with chocolate sauce offer a deliciously indulgent contrast to your savory chimichangas.
Consider these options for a complete, mouthwatering spread that your family and friends will love!
Crispy Beef & Cheese Chimichangas Recipe FAQs
How do I select the right tortillas for my chimichangas?
Absolutely! Opt for large flour tortillas as they provide a sturdy base that holds up well during frying. When choosing, look for tortillas that feel slightly soft and flexible. Avoid any that have dark spots or appear dried out, as these can lead to cracking when you roll them.
How can I store leftover chimichangas?
Very! Place any leftover chimichangas in an airtight container and store them in the refrigerator for up to 3 days. When you’re ready to enjoy them again, reheat in the oven at 375°F for about 10-15 minutes, or use an air fryer to retain that delightful crunch.
Can I freeze uncooked chimichangas?
Absolutely! To freeze, assemble your uncooked chimichangas and place them on a baking sheet without touching. Freeze until firm, then transfer them to a freezer bag, sealing tightly. They can be stored for up to 3 months. When you’re ready to cook them, simply fry them straight from frozen, adding a couple of extra minutes to your frying time.
What if my chimichangas burst while frying?
Don’t worry, it happens! To prevent bursting, ensure you’re not overfilling each chimichanga—stick to about ⅓ cup of filling. Additionally, you can use a bit of flour to seal the edges tightly. If they do burst, simply enjoy them as a tasty, crispy deconstructed chimichanga!
Are these chimichangas safe for my pets?
While it may be tempting to share, it’s best to keep these chimichangas away from pets. The spices, oils, and cheeses can upset their stomachs. If your furry friends are eyeing your meal, why not whip up a simple pet-friendly treat instead?
What cheese alternatives work well in chimichangas?
Very! While cheddar is delightful, you can switch it up with Monterey Jack for a milder taste or Pepper Jack for some extra heat. You could even mix in cream cheese for a creamy texture or vegan cheese alternatives for a plant-based version. The more the merrier when it comes to your flavor choices!
Crispy Beef & Cheese Chimichangas You'll Crave Every Time
Ingredients
Equipment
Method
- In a skillet over medium heat, brown the ground beef for about 5-7 minutes until fully cooked. Drain excess fat.
- Sprinkle cumin and chili powder to taste, and add cheddar cheese, mixing until melted, then remove from heat.
- Lay a tortilla on a clean surface. Spoon about ⅓ cup of filling into the center, fold sides in, and roll tightly.
- Heat oil in a deep skillet to 350-375°F.
- Fry each chimichanga seam-side down in batches for 3-5 minutes until golden brown, flipping halfway.
- Remove from oil and place on paper towels to drain excess oil.
- Serve warm with toppings like sour cream, guacamole, or salsa.
Leave a Reply