
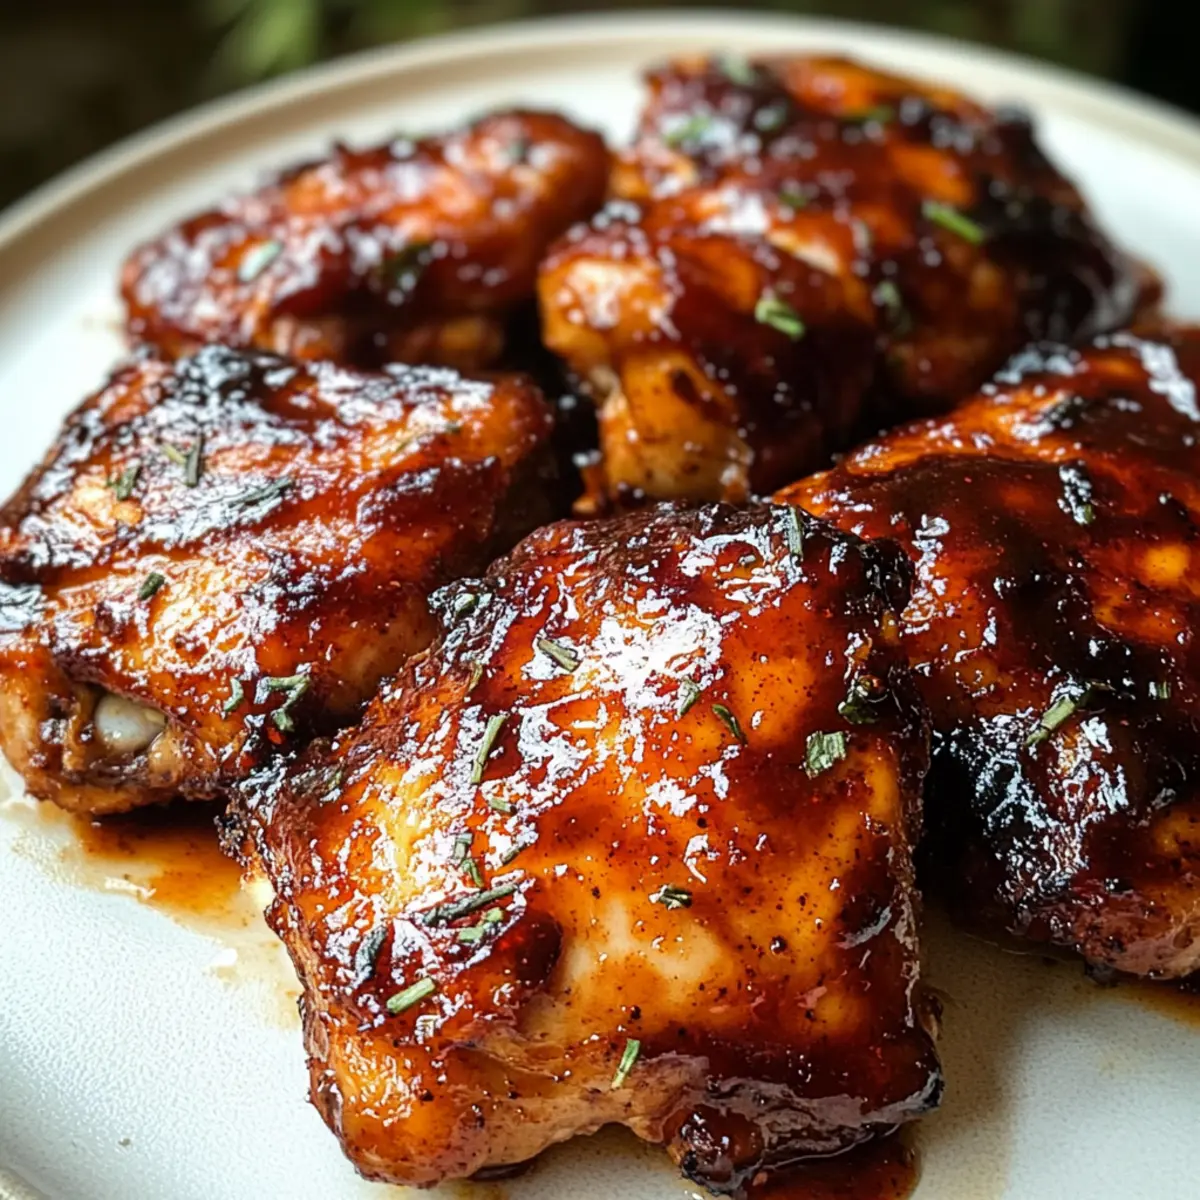
As the aroma of caramelized BBQ fills the kitchen, the anticipation begins to swirl, evoking memories of backyard cookouts and cozy family dinners. If you’ve been dreaming of a dish that effortlessly combines flavor and health, look no further than these Caramelized BBQ Chicken Thighs. This easy oven-baked delight features minimal ingredients and is adaptable for gluten-free, dairy-free, Whole30, and paleo diets, making it a fantastic option for anyone seeking wholesome, homemade meals. Not only do these thighs deliver a satisfying crunch with a sticky, sweet glaze, but they also provide a hearty protein punch to fuel your day. Curious about how to bring this crowd-pleaser to your table? Let’s dive into the recipe that’s sure to impress!
Why are Caramelized BBQ Chicken Thighs a must-try?
Unforgettable Flavor: The sweet and tangy BBQ sauce creates a deliciously sticky glaze that elevates chicken thighs to a new level of yum.
Diet-Friendly Delight: This recipe is gluten-free, dairy-free, and fits perfectly within Whole30 and paleo guidelines, accommodating various dietary needs without compromising taste.
Effortless Preparation: Minimal ingredients and simple steps make these oven-baked chicken thighs a breeze to whip up, perfect for weekday dinners or last-minute gatherings!
Ultimate Juiciness: Baking locks in the moisture, resulting in tender, juicy thighs that are anything but dry—just the way chicken should be!
Versatile Pairings: Serve with coleslaw, corn on the cob, or roasted veggies for a balanced meal, just like with my Garlic Parmesan Chicken or Honey BBQ Chicken for a complete feast!
Caramelized BBQ Chicken Thighs Ingredients
-
For the Chicken
• Boneless Skinless Chicken Thighs – The primary protein source; skinless works best for a tender result. -
For the BBQ Sauce
• BBQ Sauce – Select a gluten-free variety to maintain dietary compliance and achieve that signature flavor. -
For the Seasoning
• Garlic Powder – Adds a wonderful depth of flavor to the chicken.
• Onion Powder – Enhances the umami taste without the actual onions.
• Smoked Paprika – Provides a subtle smokiness that complements the BBQ sauce beautifully.
• Black Pepper – Freshly cracked gives a nice kick.
• Salt – Essential for bringing all the flavors together; adjust to taste. -
Optional for Serving
• Additional BBQ Sauce – A delicious addition for drizzling over the chicken before serving, amplifying the flavor of these Caramelized BBQ Chicken Thighs.
Step‑by‑Step Instructions for Caramelized BBQ Chicken Thighs
Step 1: Preheat the Oven
Begin by preheating your oven to 400°F (200°C). This is the ideal temperature for achieving perfectly caramelized BBQ Chicken Thighs. While waiting, line a large baking sheet with parchment paper, which will make cleanup a breeze and prevent the chicken from sticking.
Step 2: Prepare the Chicken
In a mixing bowl, combine garlic powder, onion powder, smoked paprika, black pepper, and salt to create a flavorful seasoning blend. Generously rub this seasoning mixture over the boneless skinless chicken thighs, ensuring a nice even coating on both sides for maximum flavor as they bake.
Step 3: Sauce the Thighs
Next, take your favorite gluten-free BBQ sauce and generously coat the seasoned chicken thighs with it, making sure each piece is thoroughly covered. This not only adds that signature sweet and tangy flavor but also helps achieve the beautiful caramelization that will make these thighs irresistible.
Step 4: Bake the Chicken
Place the sauced chicken thighs on the prepared baking sheet, ensuring they’re spaced out for even cooking. Bake in the preheated oven for about 35 minutes, or until the internal temperature reaches 165°F (75°C). The thighs should be golden brown and glistening, indicating they’re ready to come out.
Step 5: Broil for Extra Caramelization
For an added touch of perfection, switch your oven to broil and let the chicken cook for another 2-3 minutes. Keep a close eye on the thighs during this step, as broiling can rapidly enhance caramelization but may also burn if left unattended.
Step 6: Rest and Serve
Once the chicken thighs are beautifully caramelized, remove them from the oven and let them rest for a few minutes. This resting period allows the juices to redistribute for optimal tenderness. Serve your Caramelized BBQ Chicken Thighs with extra BBQ sauce on the side, if desired, to elevate the flavor even further.
What to Serve with Caramelized BBQ Chicken Thighs
As you savor the sticky, smoky goodness of this oven-baked delight, consider these delicious side dishes to round out your meal.
-
Creamy Coleslaw: The cool, crisp cabbage adds a refreshing crunch that pairs beautifully with the warm, sticky chicken. It’s a classic side that adds texture and balances flavors.
-
Sweet Corn on the Cob: This crowd-favorite brings a burst of sweetness that complements the rich BBQ flavors beautifully. Grilled or boiled, it’s an easy side that evokes summer vibes.
-
Garlic Roasted Vegetables: A medley of seasonal veggies roasted to perfection offers vibrant colors and layers of flavor, enhancing the wholesome aspect of your meal.
-
Quinoa Salad: Nutty quinoa mixed with fresh herbs and a light vinaigrette provides a healthy option full of protein and fiber. Its fluffy texture creates a wonderful contrast to the sticky chicken.
-
Baked Sweet Potatoes: The natural sweetness and creamy texture of baked sweet potatoes make them a wholesome, comforting choice. Top with a hint of cinnamon for an extra flavor kick.
-
Icy Lemonade or Iced Tea: A refreshing drink such as homemade lemonade or iced tea works wonders to cleanse your palate and complement the bold BBQ flavors.
-
Chocolate Chip Cookies: For dessert, warm, chewy chocolate chip cookies will satisfy any sweet tooth. Their gooeyness is the perfect way to finish your meal on a high note.
Feel free to mix and match these suggestions to create your perfect feast alongside Caramelized BBQ Chicken Thighs!
Caramelized BBQ Chicken Thighs: Customization Ideas
Let your creativity shine as you explore these delightful variations, each promising to enhance your Caramelized BBQ Chicken Thighs experience!
-
Gluten-Free: Use a certified gluten-free BBQ sauce to keep this dish compliant with gluten-free diets while still maintaining that signature flavor.
-
Dairy-Free: This recipe is naturally dairy-free, but you can serve your chicken with a dairy-free coleslaw for a refreshing side option.
-
Whole30 & Paleo: Make your own BBQ sauce using compliant ingredients, ensuring you stay on track with Whole30 or paleo guidelines while enjoying the sweet and smoky taste.
-
Spicy Kick: Add a pinch of cayenne pepper or a drizzle of hot sauce to the BBQ sauce for an unforgettably fiery flavor twist. This can truly elevate your dish to another level!
-
Smoke Infusion: Incorporate a hint of liquid smoke into your seasoning mix to mimic that traditional barbecue flavor—not just on the grill but beautifully baked in your oven.
-
Herb Flair: Fresh herbs like cilantro or parsley can add a burst of freshness when sprinkled on the finished dish. They lend a vibrant touch to your family table!
-
Crispy Skin: If you’re after that crispy texture, try broiling for an extra 3-5 minutes at the end and keep the skin on for added crunch, reminiscent of your outdoor cookouts.
-
Sauce Amplification: Pair your thighs with a side of homemade honey mustard or ranch dipping sauce—this adds another layer of taste and makes meal time exciting, just like with my Sticky Garlic Chicken!
So get inventive with your Caramelized BBQ Chicken Thighs and turn mealtime into a flavorful adventure.
Expert Tips for Caramelized BBQ Chicken Thighs
-
Perfect Temperature: Use a meat thermometer to ensure chicken reaches 165°F (75°C) to avoid undercooking or dry meat.
-
Broil with Care: Keep a close watch while broiling to maximize caramelization without burning; just a minute can make a big difference!
-
Flavor Boost: Consider adding a sprinkle of fresh herbs or a splash of lemon juice after baking to enhance the freshness of your Caramelized BBQ Chicken Thighs.
-
Storage Made Easy: Store leftovers in an airtight container for up to 3-4 days. For longer storage, freeze in a freezer-safe container for up to 2-3 months.
-
Reheating Tips: Gently reheat in the oven or microwave to retain juiciness—avoid reheating on high to prevent toughness.
Storage Tips for Caramelized BBQ Chicken Thighs
Fridge: Store leftovers in an airtight container for up to 3-4 days to maintain freshness and flavor.
Freezer: For longer storage, freeze the chicken thighs in a freezer-safe container for up to 2-3 months. Ensure they’re well-wrapped to prevent freezer burn.
Reheating: When ready to enjoy leftovers, reheat gently in the oven or microwave. Aim for low or medium heat to keep the chicken juicy and delicious.
Serving Suggestions: Add extra BBQ sauce after reheating for a burst of flavor that enhances your Caramelized BBQ Chicken Thighs!
Make Ahead Options
These Caramelized BBQ Chicken Thighs are perfect for meal prep enthusiasts looking to save time during busy weeknights! You can season the chicken thighs up to 24 hours in advance by rubbing the spice mixture on them and storing them in an airtight container in the refrigerator. Additionally, you can coat the thighs with BBQ sauce up to 3 days ahead of time, ensuring the flavors meld beautifully. When you’re ready to cook, simply preheat the oven and bake following the usual instructions. This prep-ahead strategy keeps the quality intact, so your chicken will be just as delicious when it hits the plate!
Caramelized BBQ Chicken Thighs Recipe FAQs
How do I select the best chicken thighs for this recipe?
Absolutely! Opt for boneless skinless chicken thighs—they’re tender and cook evenly. Look for thighs that are plump and moist with no dark spots. Always choose fresh over processed for the best flavor.
How should I store leftovers of Caramelized BBQ Chicken Thighs?
For sure! Store your leftovers in an airtight container in the fridge, where they’ll stay fresh for up to 3-4 days. If you want to keep them longer, place them in a freezer-safe container, and they can last up to 2-3 months. Just make sure to label them with the date!
Can I freeze Caramelized BBQ Chicken Thighs?
Absolutely! To freeze, let the cooked chicken thighs cool completely. Wrap each piece in plastic wrap and then place them in a freezer-safe bag or container. This prevents freezer burn and helps keep them flavorful. When you’re ready to eat, thaw overnight in the fridge before reheating.
What if my chicken thighs are not caramelizing properly?
Very good question! If your thighs aren’t caramelizing, it may be due to not enough BBQ sauce or the oven temperature being too low. Ensure you’re using a generous coat of sauce and don’t skip the broiling step at the end! Just remember to watch closely while broiling to avoid burning.
Are there any dietary considerations for this recipe?
Yes! This recipe is fantastic because it is gluten-free, dairy-free, and compliant with Whole30 and paleo diets. For those with allergies, simply check the ingredients in your BBQ sauce, as many store-bought versions can contain hidden gluten or dairy. You can also make a homemade sauce to control all the ingredients.
Can I adjust the spices used for a different flavor profile?
Definitely, the more the merrier! You can tweak the spice blend to suit your palate. If you love heat, add cayenne pepper or chili powder. For a bit of sweetness, consider a touch of brown sugar in the seasoning mix. Just remember to keep adjusting little by little and tasting as you go for the perfect flavor!
Caramelized BBQ Chicken Thighs: Your Easy Oven-Savory Star
Ingredients
Equipment
Method
- Preheat your oven to 400°F (200°C) and line a large baking sheet with parchment paper.
- In a mixing bowl, combine garlic powder, onion powder, smoked paprika, black pepper, and salt. Rub this mixture over the chicken thighs.
- Coat the seasoned chicken thighs with BBQ sauce until thoroughly covered.
- Place the sauced chicken thighs on the baking sheet and bake for about 35 minutes until the internal temperature reaches 165°F (75°C).
- Switch to broil and cook for another 2-3 minutes until caramelized, watching closely.
- Remove from the oven and let the thighs rest for a few minutes before serving.
Leave a Reply