
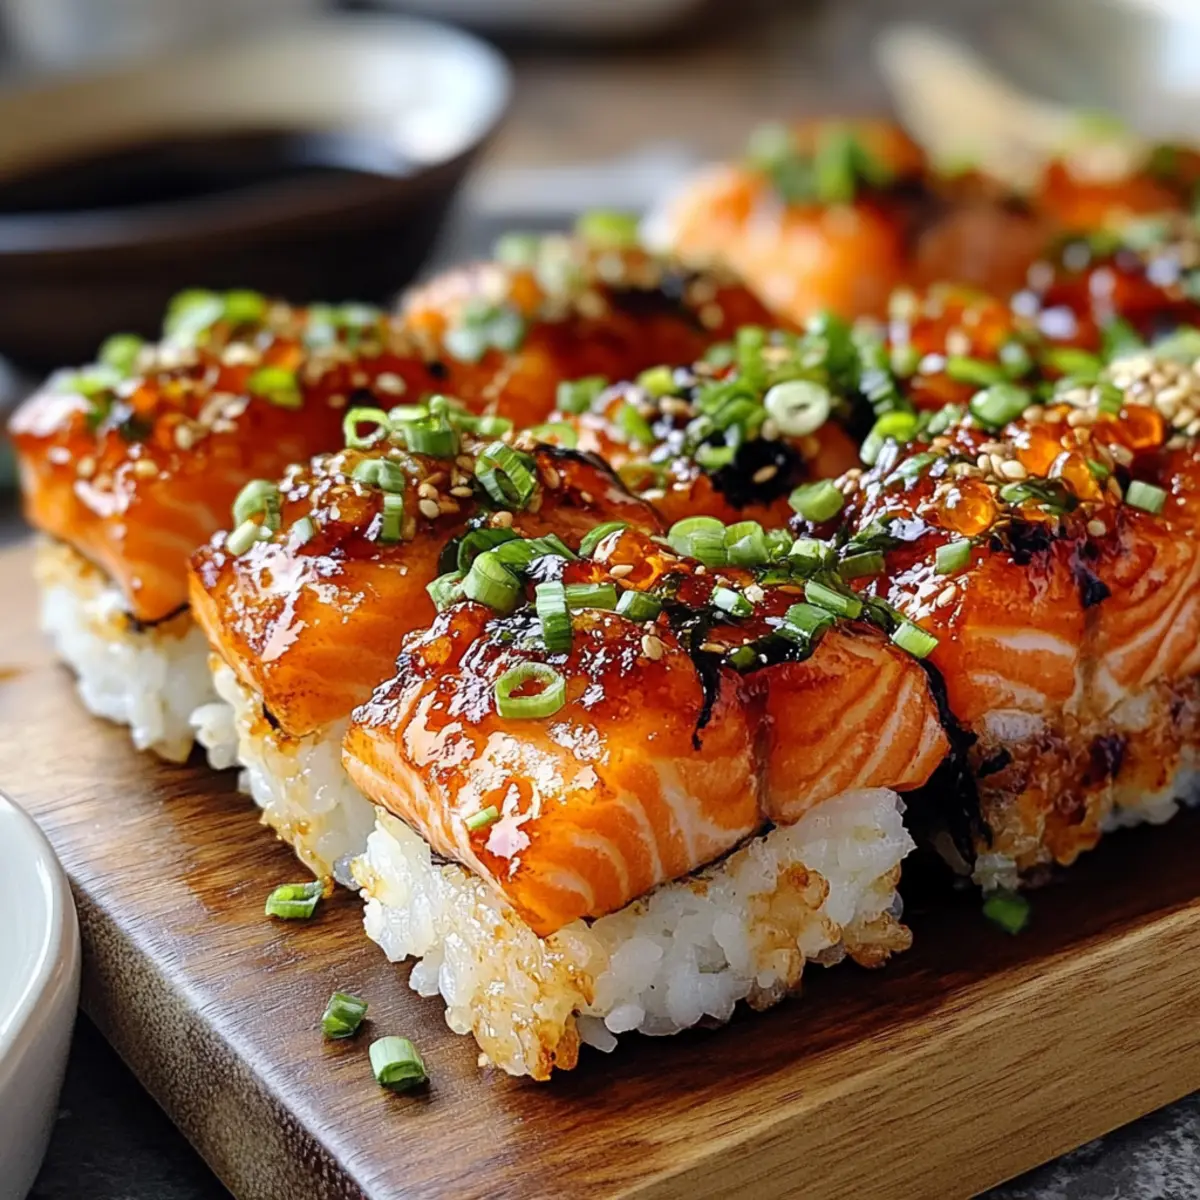
As I stirred the bubbling pot of sushi rice, the aroma transported me to my favorite sushi bar, where the vibrant flavors made my heart race. Today, I’m thrilled to share my take on a beloved classic—the Spicy Salmon Sushi Bake! This dish captures all the cherished elements of sushi yet lends itself to a cozy, satisfying dinner experience. Not only is it easy to prepare, but it’s also an impressive crowd-pleaser that brings friends and family together around the table. With tender, flaky salmon nestled over warm, seasoned rice and topped with a creamy Sriracha mayo, every bite balances delicious comfort and culinary adventure. Curious about how to make this delightful fusion dish? Let’s dive in!
Are You Ready to Love Sushi Bake?
Unique Flavor Fusion: This Spicy Salmon Sushi Bake marries the best of sushi with the warmth of a baked casserole, giving you a taste that’s both familiar and exciting.
Customizable Spice: Adjust the heat to your liking with Sriracha—mild or spicy, the choice is yours!
Perfect for Any Occasion: Whether it’s a family dinner or a potluck, this dish is sure to impress guests and loved ones alike.
Effortless Preparation: With simple steps and easy-to-find ingredients, you’ll be serving up restaurant-quality sushi flavor from the comfort of your home without the fuss.
Delicious Leftovers: Enjoy a quick reheatable meal the next day—just pop it in the oven, add fresh toppings, and it’s ready to go!
Spicy Salmon Sushi Bake Ingredients
For the Rice Base
- Sushi Rice – Essential for structure; rinse well to remove excess starch for the best texture.
- Water – Necessary to cook the rice until fluffy and tender.
- Rice Vinegar – Adds a delightful acidity to enhance the rice’s flavor after cooking.
- Sugar – Balances out the tartness of the rice vinegar perfectly.
- Salt – Brings out all the flavors in the dish wonderfully.
For the Salmon Mixture
- Salmon Fillet – The star of the dish; ensure it’s skinless and cut into even pieces for cooking. You can also try tuna or cooked shrimp as alternatives!
- Mayonnaise – Provides a creamy topping that helps create that delightful caramelized crust.
- Sriracha Sauce – Adds a spicy kick, so feel free to adjust it according to your preference!
- Sesame Oil – Introduces a nutty flavor that complements the dish beautifully.
- Green Onions – Freshness meets crunch and shouldn’t be skipped—they’re reserved for a beautiful garnish.
For Garnish
- Nori – Adds a lovely texture and flavor that enhances the overall sushi experience; serve as strips on top for a beautiful presentation.
- Tobiko – Optional but adds an extra touch of flavor and eye-catching color!
This Spicy Salmon Sushi Bake is not just a meal; it’s a flavorful journey that ignites the spirit of sushi in a warm and inviting dish. Get ready to impress your family and friends with this scrumptious recipe!
Step‑by‑Step Instructions for Spicy Salmon Sushi Bake
Step 1: Preheat the Oven
Begin your cooking adventure by preheating your oven to 375°F (190°C). This ensures that your Spicy Salmon Sushi Bake will be perfectly cooked and golden on top. While the oven heats up, gather all your ingredients and have your baking dish ready to go, making the process smooth and enjoyable.
Step 2: Prepare the Sushi Rice
Rinse your sushi rice under cold water until the water runs clear, removing excess starch for that ideal texture. Next, cook the rice according to your rice cooker or pot’s instructions, typically taking about 20 minutes until fluffy and tender. The rice is ready when it’s soft yet slightly sticky, creating the perfect base for your casserole.
Step 3: Season the Rice
Once your rice is fluffy, transfer it to a large mixing bowl and let it cool slightly. In a small bowl, combine rice vinegar, sugar, and salt until dissolved. Fold this mixture gently into the warm rice, ensuring each grain is coated and adding a delightful tang. This seasoned base enhances your Spicy Salmon Sushi Bake’s flavor profile beautifully.
Step 4: Spread the Rice
Now it’s time to layer your seasoned rice! Spread the rice mixture evenly into your prepared baking dish, pressing it down lightly to create a solid base. Allow it to cool for about 5-10 minutes. This step ensures that the rice fuses well with the salmon topping and gives it the structure necessary for serving.
Step 5: Make the Salmon Mixture
In a separate bowl, combine the diced skinless salmon fillet with mayonnaise, Sriracha, sesame oil, and half of the chopped green onions. Mix until everything is well combined, creating a creamy and flavorful topping. This mixture will serve as the star component of your Spicy Salmon Sushi Bake, adding richness and a spicy kick.
Step 6: Layer the Salmon Mixture
Carefully spread the salmon mixture over the cooled rice layer, smoothing it out evenly to ensure every bite is delightful. The colors should be vibrant and inviting, making you eager to taste this amazing fusion dish. You are now one step closer to baking this savory creation!
Step 7: Bake the Dish
Place the dish in the preheated oven and bake for 25-30 minutes, or until the salmon is cooked through and the top turns a beautiful golden brown. Keep an eye on it in the last few minutes—your Spicy Salmon Sushi Bake will smell delightful and tempting as it finishes!
Step 8: Garnish and Serve
Once baked, let the Spicy Salmon Sushi Bake cool briefly before garnishing with the remaining green onions and strips of nori for added texture and flavor. Serve this delicious dish warm, allowing everyone to appreciate the cozy flavors reminiscent of traditional sushi in a convenient baked format.
What to Serve with Spicy Salmon Sushi Bake
Embrace a delightful dining experience with side dishes that enhance every bite of your comforting casserole.
-
Edamame Hummus: Creamy and protein-packed, this dip adds a delightful freshness and pairs beautifully with the spicy richness of the bake. Scoop it up with crispy rice crackers for added texture!
-
Cucumber Salad: Crisp and refreshing, a lightly dressed cucumber salad perfectly balances the rich flavors of the baked dish, providing a crunchy contrast.
-
Miso Soup: A warm bowl of miso soup filled with umami flavors complements the Spicy Salmon Sushi Bake and adds a cozy, traditional touch to your meal.
-
Sticky Rice: Soft and slightly sweet, sticky rice makes a great accompaniment, enhancing the overall sushi experience and offering a unique texture to savor.
-
Grilled Vegetables: Toss seasonal vegetables on the grill for a smoky flavor that contrasts with the baked dish. The charred goodness brightens the plate and enhances your dining adventure.
-
Sake or Green Tea: Pair your meal with a chilled glass of sake or a warm cup of green tea, both enhancing the Japanese flavors and adding authenticity to the experience.
-
Ginger Sorbet: For dessert, a refreshing ginger sorbet cleanses the palate and compliments the savory notes of the casserole, finishing the meal on a light, vibrant note.
-
Seaweed Salad: This salty, tangy dish brings another layer of ocean flavor, rounding out your sushi-inspired menu and reminding everyone of traditional sushi bars.
Let these sides accompany your Spicy Salmon Sushi Bake for a fully satisfying meal that will please all your guests!
Make Ahead Options
These Spicy Salmon Sushi Bake components are perfect for meal prep enthusiasts! You can prepare the sushi rice and salmon mixture up to 24 hours in advance. To do this, simply cook and season the rice, let it cool, and then refrigerate it in an airtight container. For the salmon mixture, combine the diced salmon, mayonnaise, Sriracha, sesame oil, and green onions, and store it in the fridge as well. When you’re ready to bake, layer the chilled rice in a baking dish, spread the salmon topping evenly over it, and then pop it in the oven at 375°F (190°C) for about 25-30 minutes. This method keeps each component just as delicious, saving you valuable time during busy weeknights!
How to Store and Freeze Spicy Salmon Sushi Bake
Fridge: Store leftovers in an airtight container and keep them in the fridge for up to 3 days. Reheat in the oven for best results.
Freezer: Wrap portions tightly in plastic wrap and foil, then freeze for up to 2 months. Thaw in the fridge overnight before reheating.
Reheating: For the freshest taste, reheat in the oven at 350°F (175°C) until heated through, about 15-20 minutes. You can also microwave, but the texture may vary.
Serving Suggestions: Top with fresh green onions or additional Sriracha sauce after reheating to brighten up the flavors of your Spicy Salmon Sushi Bake.
Spicy Salmon Sushi Bake Variations
Feel free to get creative with your Spicy Salmon Sushi Bake and make it your own!
-
Seafood Swap: Replace the salmon with cooked crab or shrimp for a delightful twist; both options bring a unique flavor that pairs beautifully with the rice. Craving something different? The luscious creaminess enhances the seafood’s sweetness and creates a memorable dish!
-
Heat Adjustments: Modify the amount of Sriracha to suit your spice level; you can make it mild or turn up the heat. For those who love a fiery kick, add some crushed red pepper flakes for an extra bold flavor that tantalizes the taste buds.
-
Veggie Boost: Incorporate roasted vegetables like zucchini or bell peppers into your salmon mixture for added nutrition and a fresh taste. This extra texture not only enhances the aesthetic but makes every bite more satisfying!
-
Dairy-Free Delight: Swap mayonnaise with a dairy-free alternative like avocado or vegan mayo to enjoy a creamy topping that’s still rich and delicious. It adds a whole new dimension of flavor while catering to dietary preferences!
-
Herb Infusion: Sprinkle in fresh herbs like cilantro or basil into the salmon mixture for a burst of fresh flavor. The aromatic notes can elevate this dish to a whole new level, taking your sushi bake experience up a notch!
-
Topping Variations: Experiment with different toppings like crushed seaweed snacks or sesame seeds for added crunch and flavor. These extras might seem small, but they can bring a delightful texture and depth to your dish.
For even more delightful dishes, consider trying out this Spicy Southern Cheesy bake or the savory flavors of One Pot Spicy. Each recipe packs a delicious punch, perfect for those who love home-cooked meals.
Expert Tips for Spicy Salmon Sushi Bake
-
Pat the Salmon Dry: Always pat the salmon dry before mixing it with the other ingredients to achieve the perfect browning and a delicious, caramelized top.
-
Rest the Rice: Allow the cooked rice to rest for a few minutes before seasoning. This helps maintain a firm texture, ensuring your Spicy Salmon Sushi Bake won’t turn mushy.
-
Monitor the Broiler: If you choose to broil the dish for a crispier finish, stay close and monitor it carefully to prevent burning. Adjust the placement if necessary for even browning.
-
Customize Your Spice: Adjust the amount of Sriracha according to your preference to make the flavor just right for you and your guests.
-
Use Fresh Ingredients: Opt for fresh green onions and quality salmon for the best flavor. Fresh ingredients elevate your Spicy Salmon Sushi Bake to a gourmet experience.
Spicy Salmon Sushi Bake Recipe FAQs
How do I choose the right salmon for this recipe?
Absolutely! When selecting salmon, look for fresh fillets that are bright in color without any dark spots or dry edges. Skinless fillets are preferred for even cooking and a smoother texture in the bake. Fresh salmon should smell like the ocean—not fishy. If you can’t find fresh, high-quality frozen salmon is also a great alternative!
What’s the best way to store leftovers?
Very easy! Simply transfer any uneaten Spicy Salmon Sushi Bake to an airtight container and pop it into the refrigerator. It will stay fresh for up to 3 days. When you’re ready to enjoy the leftovers, reheat them in the oven at 350°F (175°C) for about 15-20 minutes, or until warmed through, to help restore that lovely texture.
Can I freeze the Spicy Salmon Sushi Bake?
Certainly! To freeze, first wrap individual portions tightly in plastic wrap, followed by aluminum foil. This will keep them safe from freezer burn. You can store them in the freezer for up to 2 months. When you’re ready to indulge, thaw the portions in the fridge overnight before reheating the bake in the oven for optimal taste!
What if my rice is too sticky or mushy?
No worries! If your sushi rice turns out too sticky or mushy, it may be due to excess water during cooking. To prevent this, always rinse the rice until the water runs clear before cooking, and let it rest after cooking as it will help to firm up. If you’ve found yourself in a sticky situation, try mixing in a bit of extra rice vinegar and folding gently to enhance flavors without compromising texture.
Are there any dietary considerations for this dish?
For sure! If you or your guests have allergies, be cautious with ingredients like mayonnaise and Sriracha, which can contain allergens like egg and soy. You can substitute the mayo with a vegan version if preferred, and opt for low-sodium or no-Sriracha if watching sodium intake. Also, make sure to check your fish source for sustainability and freshness to minimize allergens in case of seafood allergies.
How can I adjust the spiciness level?
Absolutely! When mixing the Sriracha into the salmon, start with a smaller amount, and taste the mixture before spreading it onto the rice. This way, you can gradually adjust the heat to your preference—more for a kick or less for a milder flavor. Alternatively, serve additional Sriracha on the side so everyone can customize their own portions!
Spicy Salmon Sushi Bake: A Cozy Twist on Classic Sushi
Ingredients
Equipment
Method
- Preheat your oven to 375°F (190°C). Gather your ingredients and baking dish.
- Rinse the sushi rice under cold water until clear. Cook according to instructions until fluffy, about 20 minutes.
- Combine rice vinegar, sugar, and salt in a small bowl until dissolved, then fold into the warm rice.
- Spread the seasoned rice evenly in the baking dish, pressing lightly. Cool for 5-10 minutes.
- In a bowl, mix the salmon, mayonnaise, Sriracha, sesame oil, and half the green onions until combined.
- Spread the salmon mixture over the cooled rice layer evenly.
- Bake in the preheated oven for 25-30 minutes until cooked through and golden brown.
- Let cool briefly, garnish with remaining green onions and nori, then serve warm.
Leave a Reply