
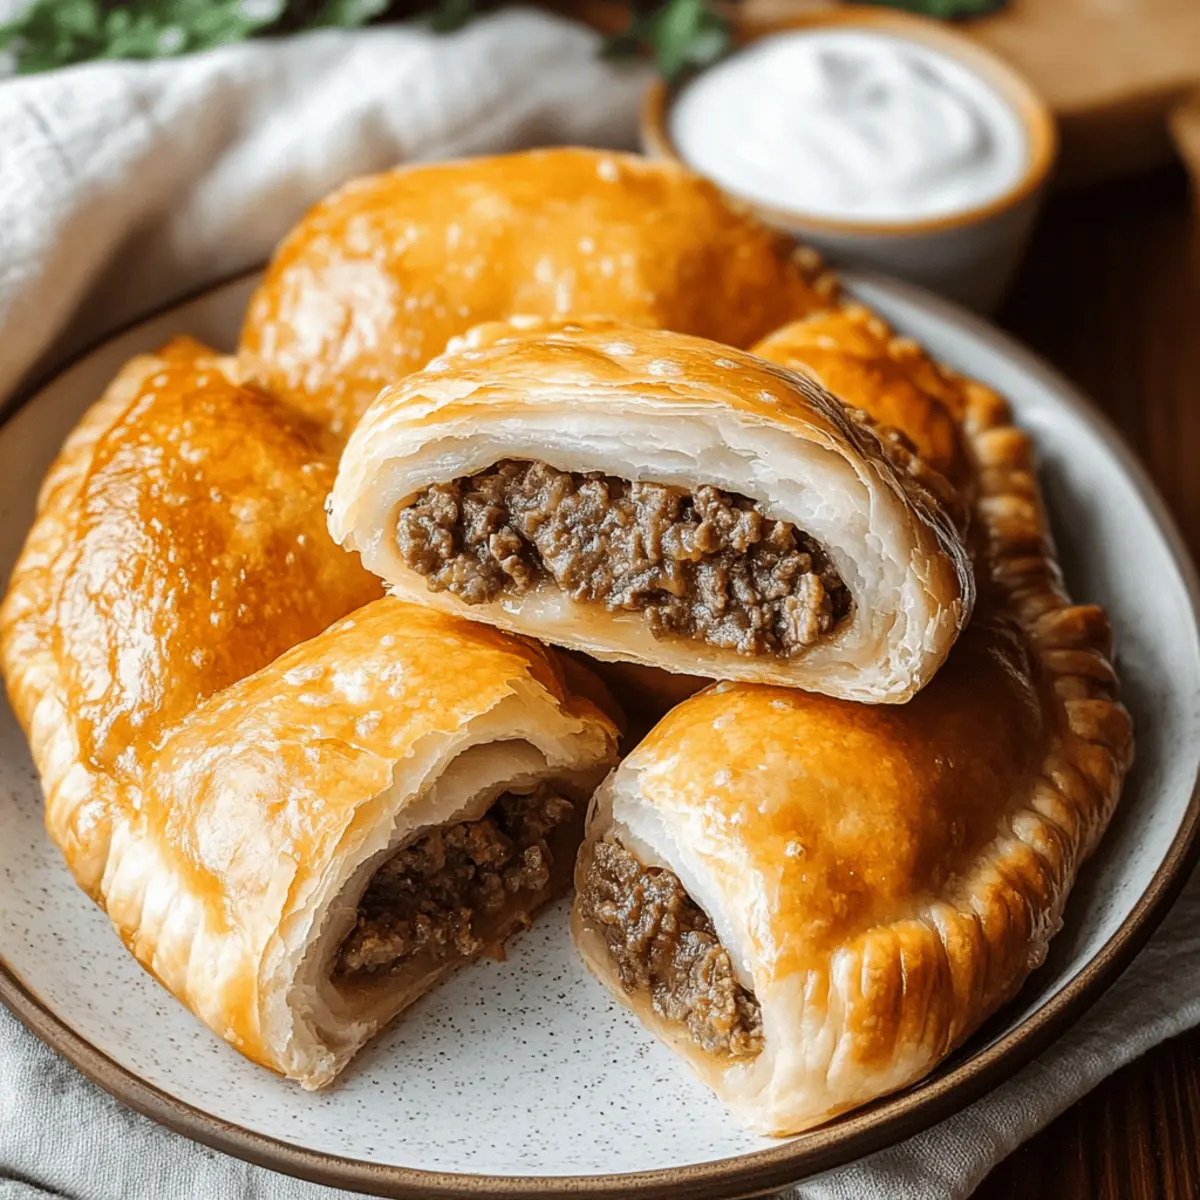
As I stood in my kitchen, the aroma of sizzling ground beef and caramelized onions filled the air, instantly transporting me to a bustling Russian market. There’s something truly magical about crafting homemade Russian piroshki (meat hand pies), where each golden pocket is a treasure waiting to be devoured. Not only are these savory beauties a fantastic way to bond with friends and family during cozy gatherings, but they also allow for creative customization with various fillings—beef, chicken, or even sweet options! With this recipe, you’ll discover how effortless it is to enjoy traditional comfort food right at home. Are you ready to take your taste buds on a delightful journey?
Why Love Russian Piroshki?
Comforting Fare: These Russian piroshki (meat hand pies) are the perfect blend of crispy and soft, delivering a delightful texture that embraces warmth and comfort in every bite.
Endless Variations: Whether you prefer beef, chicken, or veggies, this recipe allows you to adapt the filling to suit your cravings.
Gathering Essential: Perfect for sharing during family gatherings or cozy nights in, these hand pies are sure to impress any crowd!
Easy Preparation: With straightforward steps and simple ingredients, you can whip up these tasty treats without spending all day in the kitchen.
Freezer-Friendly: Make a big batch and freeze them for quick snacks or meals—just bake from frozen for an effortless dinner option.
Dive into the deliciousness of tradition with these piroshki and check out my tips on serving suggestions to elevate your meal. Enjoy every savory bite!
Russian Piroshki (Meat Hand Pies) Ingredients
For the Dough
- All-Purpose Flour – provides structure for the dough; substitute with gluten-free flour mix for a gluten-free option.
- Salt – enhances flavor; no substitutions necessary.
- Sugar – adds a hint of sweetness to the dough; can be omitted for a less sweet flavor.
- Instant Yeast – causes dough to rise, providing a light texture; active dry yeast may be substituted with slight adjustment in water temperature.
- Warm Milk – adds moisture and richness; for lactose-free, substitute with almond or soy milk.
- Warm Water – hydrates the dough, ensuring proper texture.
- Vegetable Oil – contributes to dough softness; can be replaced with melted butter or olive oil.
- Egg – for the dough and egg wash, adds richness; can be substituted with a flax egg for a vegan version.
For the Filling
- Ground Beef (or Mix of Beef and Pork) – primary filling ingredient; alternatives include ground chicken, turkey, or plant-based meat.
- Onion, finely chopped – adds flavor to the filling; shallots can be a good substitute.
- Mushrooms, finely chopped (optional) – enhances filling texture and flavor; omit if not preferred.
- Salt and Pepper – seasoning to taste; adjust according to personal preference.
- Butter for Frying – adds flavor during filling preparation; can use olive oil as a healthier alternative.
- Egg (for egg wash) – for a golden crust; a plant-based milk wash can be used for vegan options.
With these ingredients, you’re one step closer to enjoying homemade Russian piroshki (meat hand pies) that deliver comfort and warmth in every bite!
Step‑by‑Step Instructions for Russian Piroshki (Meat Hand Pies)
Step 1: Prepare the Dough
In a large mixing bowl, combine the all-purpose flour, salt, sugar, and instant yeast. Pour in the warm milk and warm water, followed by the vegetable oil and one egg. Use your hands or a stand mixer with a dough hook to knead the mixture for 5-7 minutes until the dough is smooth and elastic, forming a soft ball that slightly springs back when pressed.
Step 2: Let the Dough Rise
Cover the dough with a clean kitchen towel or plastic wrap, placing it in a warm location for about 1 hour. As it sits, the dough will rise and double in size, becoming fluffy and light. Look for a soft, airy texture, which is crucial for creating delightful Russian piroshki (meat hand pies).
Step 3: Cook the Filling
While the dough is rising, heat a skillet over medium heat and melt butter. Add the finely chopped onion (and mushrooms, if using) to the pan and sauté them for 5-7 minutes until they soften and become translucent. Stir in the ground beef, seasoning with salt and pepper; cook until the meat is browned and fully cooked, about 8-10 minutes.
Step 4: Roll Out the Dough
After the dough has risen, lightly flour a clean surface and turn the dough out onto it. Roll the dough out to about ¼-inch thickness. Using a pizza cutter or a sharp knife, cut the dough into 12 equal squares for a perfect foundation for your Russian piroshki meat hand pies.
Step 5: Assemble the Piroshki
Take a square of dough and place a spoonful of the beef filling in the center. Carefully fold the sides over to enclose the filling and pinch the edges firmly to seal. Repeat with the remaining squares and filling, making sure each piroshki is well-sealed to prevent leaks during cooking.
Step 6: Preheat the Oven
While assembling the piroshki, preheat your oven to 375°F (190°C). Line a baking sheet with parchment paper to prevent sticking and ensure even cooking. As the oven heats, get ready to brush the piroshki for a beautiful golden finish.
Step 7: Brush and Bake
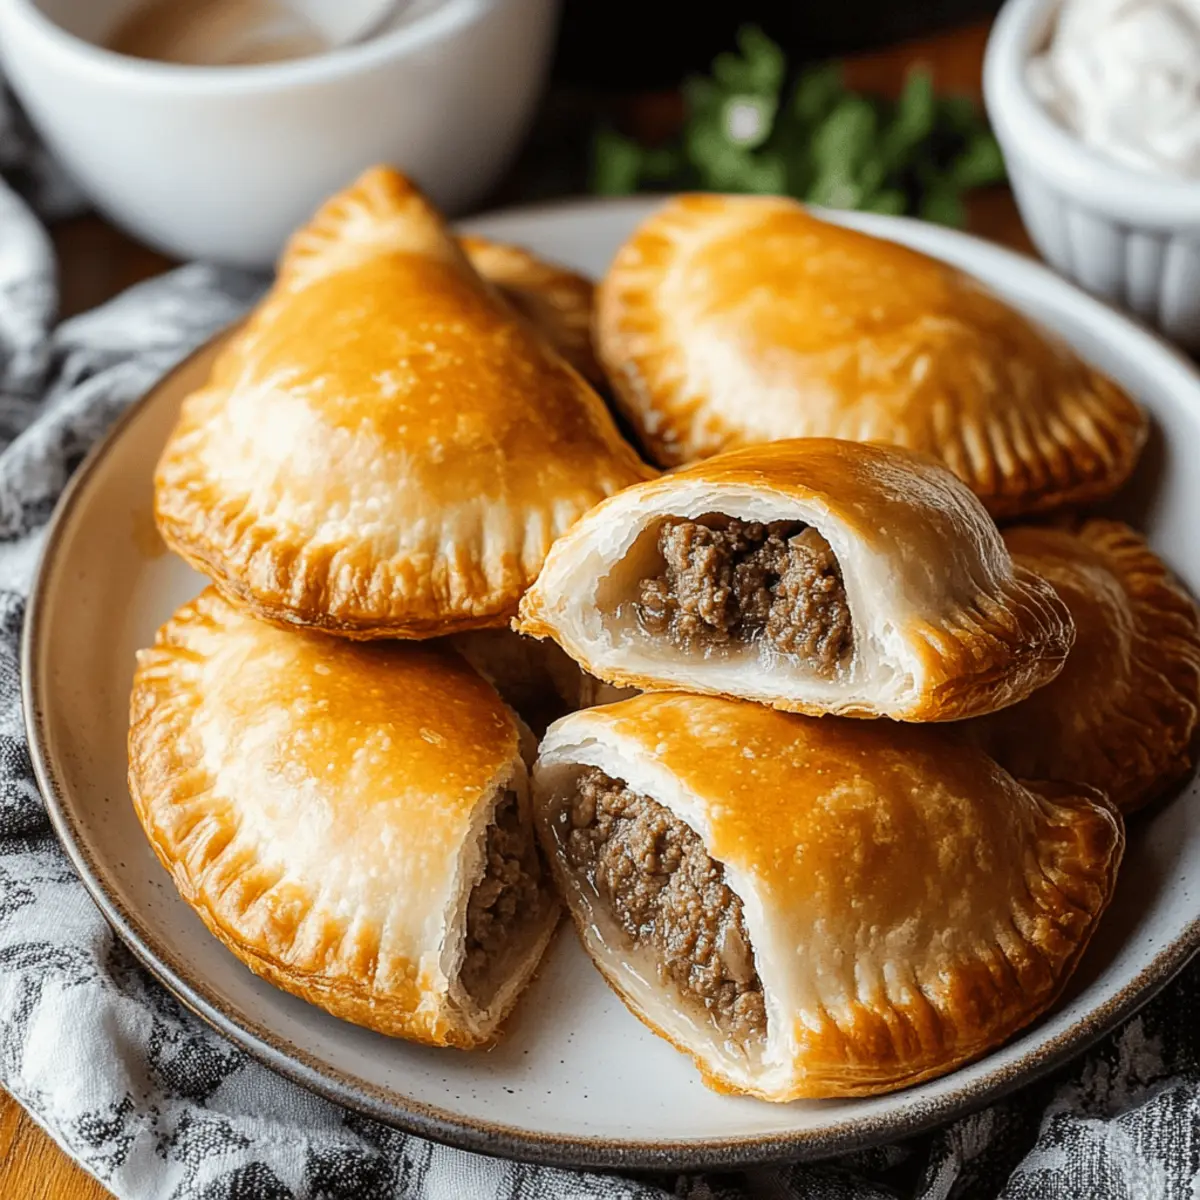
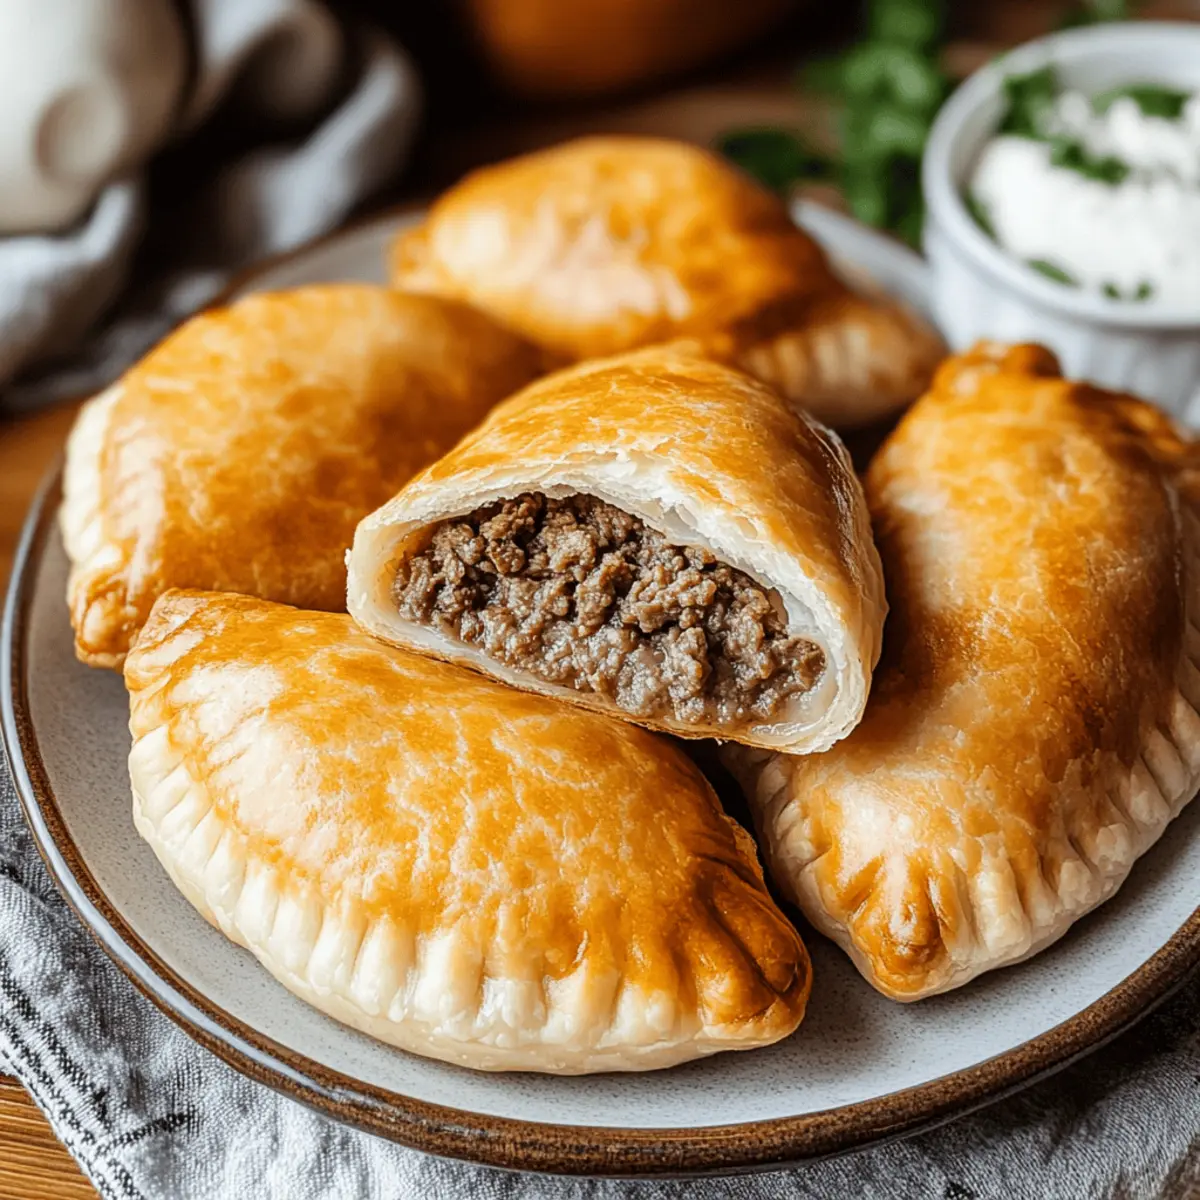
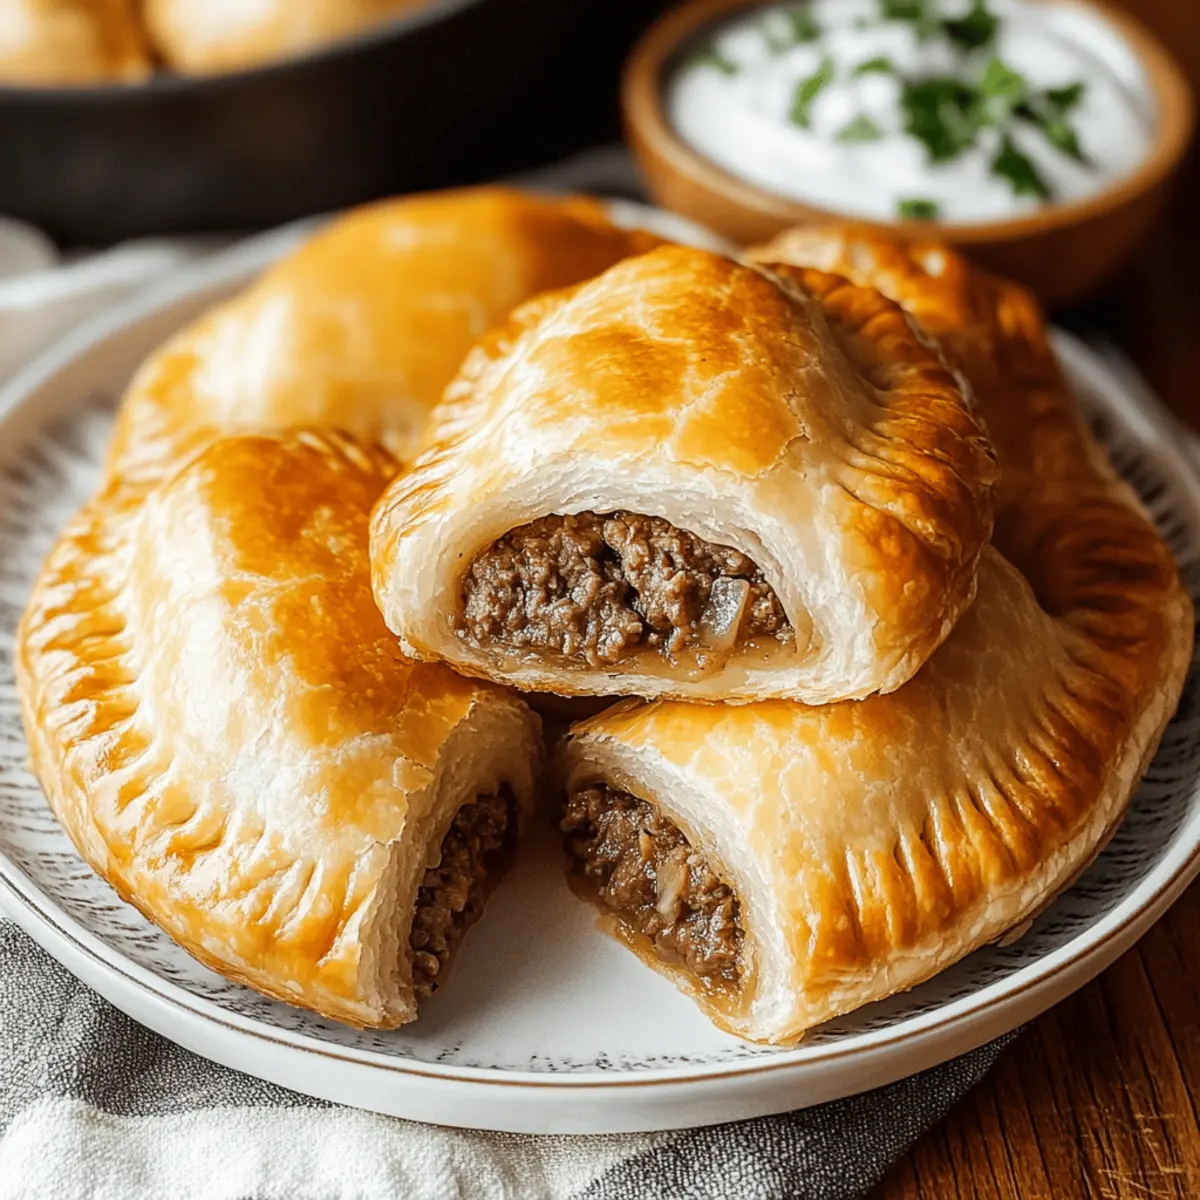
Place the assembled piroshki on the prepared baking sheet, spacing them apart. In a small bowl, beat the second egg and brush the tops of the piroshki with the egg wash for that lovely shine. Bake in the preheated oven for 15-20 minutes, until they are golden brown and puffed up beautifully, ready to be enjoyed!
Step 8: Cool and Serve
Once baked, remove the Russian piroshki from the oven and let them cool on a wire rack for a few minutes. This allows the filling to set slightly. Serve them warm with your favorite dipping sauce or fresh salad for a delightful meal everyone will love!
Storage Tips for Russian Piroshki
Room Temperature: Store leftover piroshki in an airtight container at room temperature for up to 2 days. Enjoy them warm or at room temperature for a delightful snack.
Fridge: If you want to keep them longer, store piroshki in the fridge for up to 4 days. Reheat them in the oven to regain their crispiness, which is essential for savory meat hand pies.
Freezer: You can freeze uncooked piroshki for up to 3 months. Lay them out on a baking sheet until firm, then transfer to a freezer bag. Bake from frozen with an additional 5-10 minutes cooking time.
Reheating: When reheating, preheat your oven to 350°F (175°C), and warm the piroshki for about 10-15 minutes to keep that signature crispy exterior and flavorful filling fresh.
What to Serve with Irresistibly Golden Russian Piroshki?
Elevate your dining experience with perfect pairings that enhance the warmth and satisfaction of these delightful meat hand pies.
-
Creamy Mashed Potatoes: The smooth and buttery texture complements the piroshki perfectly, providing a rich contrast to the crispy exterior. Delight in a comforting plateful that feels like a warm hug with every bite.
-
Fresh Cucumber Salad: Crisp, cool cucumbers add a refreshing crunch to your meal, balancing the savory flavor of the piroshki and cleansing the palate.
-
Hearty Borscht: This traditional beet soup is a stunning accompaniment, with its earthy sweetness enhancing the robust flavors of the meat pies while offering a beautiful color contrast on your plate.
-
Pickled Vegetables: Their tangy bite provides a delightful contrast to the rich filling, elevating each bite of piroshki and bringing an added zing that’s simply irresistible.
-
Roasted Root Vegetables: Sweet, caramelized veggies like carrots and parsnips add hearty, earthy flavors that harmonize with the meat filling, making for a satisfying and rustic meal.
-
Herbal Tea: The delicate notes of herbal tea, such as chamomile or mint, serve as a gentle palate cleanser, allowing the inherent flavors of the piroshki to shine.
-
Chocolate Croissant: For dessert, indulge in a flaky chocolate croissant to satisfy your sweet tooth. This classic French treat adds a touch of elegance to your meal’s conclusion while keeping with the theme of comfort food.
Explore these wonderful pairings and let your gathering be enriched by the warmth and flavor they bring alongside your Russian piroshki!
Variations & Substitutions for Russian Piroshki
Feel free to get creative with these Russian piroshki, as customizing the fillings can elevate your culinary adventure!
-
Vegetarian Filling: Swap out ground meat for sautéed potatoes or mixed veggies. You can use epazote for a delicious twist.
-
Sweet Option: Fill with fruit preserves or sweetened cottage cheese. A sprinkle of cinnamon can add a warm touch that’s simply irresistible!
-
Sourdough Twist: For a more artisanal approach, substitute some of the all-purpose flour with sourdough starter for a tangy depth of flavor.
-
Wrap Variety: Use a different type of dough, such as puff pastry or phyllo, for a unique texture. Just watch the baking time, as they’ll cook quicker!
-
Spicy Kick: Incorporate chopped jalapeños or crushed red pepper into the meat filling for an added heat that’ll make your taste buds dance.
-
Global Flavors: Experiment with different cuisines by using curry-spiced lentils or barbecue pulled pork as fillings. It’s a fantastic way to blend traditions!
-
Herb-Infused Dough: Add fresh herbs like dill or parsley to the dough for an aromatic twist. It pairs beautifully with savory fillings.
-
Nut-Based Filling: For a vegetarian protein source, try a mixture of nuts and spices, such as walnuts with a hint of cinnamon, for a hearty yet unique piroshki.
Don’t hesitate to explore and combine these ideas to find your favorite filling. Whether you’re trying classic flavors or adventurous combinations, your piroshki will surely impress friends and family. For a delightful serving suggestion, consider pairing these hand pies with a refreshing salad or a warm bowl of borscht for the perfect meal experience!
Expert Tips for Russian Piroshki
Knead Well: Ensure the dough is kneaded thoroughly until it’s smooth and elastic to avoid tough piroshki.
Warm Environment: Let the dough rise in a warm spot; a cold area can hinder the yeast’s ability to double in size.
Variable Fillings: Don’t hesitate to mix up the filling; ground chicken or vegetarian options are fantastic alternative choices.
Seal Securely: Pinch the edges tightly when sealing the piroshki to prevent filling leaks during baking.
Watch the Bake: Keep an eye on the baking time to achieve that perfect golden color without burning, enhancing your Russian piroshki experience.
Taste Test First: Before filling all dough squares, fry one piroshki to check the seasoning of your filling; adjust accordingly for maximum flavor.
Make Ahead Options
These Russian piroshki (meat hand pies) are absolutely perfect for meal prep, saving you time on busy weeknights! You can prepare the dough and filling up to 24 hours in advance by storing the dough wrapped in plastic wrap in the refrigerator and keeping the filling in an airtight container. To maintain quality, allow the dough to come to room temperature before rolling and shaping. When you’re ready to enjoy, simply assemble the piroshki and bake them according to the recipe instructions. Alternatively, you can freeze assembled piroshki for up to 3 months; bake them straight from the freezer, adding a few extra minutes to the cooking time for delicious, fresh-from-the-oven comfort food!
Russian Piroshki (Meat Hand Pies) Recipe FAQs
How do I choose ripe ingredients for my filling?
Absolutely! When selecting onions, opt for firm, smooth-skinned ones without any dark spots. For ground beef, look for bright red, fresh meat with a bit of marbling; it ensures a flavorful filling. If you’re using mushrooms, select ones that are firm and not dried out. Fresh ingredients make a world of difference!
How should I store leftover piroshki?
For optimal freshness, store leftover piroshki in an airtight container at room temperature for up to 2 days. If you need more time, you can keep them in the refrigerator for up to 4 days. When ready to enjoy, simply reheat them in a preheated oven at 350°F (175°C) for about 10-15 minutes to restore their crispy exterior.
Can I freeze Russian piroshki? How?
Yes, you can freeze uncooked piroshki for up to 3 months! Assemble them as directed, then place them on a baking sheet lined with parchment paper, ensuring they aren’t touching. Freeze until firm, about 1-2 hours, then transfer them to a freezer bag. When ready to bake, just pop them in straight from the freezer, adding about 5-10 minutes to the baking time.
What should I do if my dough doesn’t rise?
Very! If your dough hasn’t risen, it could be due to inactive yeast. Ensure your yeast is fresh—always check the expiration date before using. If the dough is in a cold kitchen, try placing it in a warmer spot, like an oven with just the light on. If all else fails, you can knead in a little bit more flour and let it rest; sometimes, an extra rise helps!
Are there allergen considerations for Russian piroshki?
Absolutely! These piroshki can be easily adapted to accommodate allergies. For a gluten-free option, substitute the all-purpose flour with a gluten-free blend. If dairy is an issue, use plant-based milk for both the dough and the egg wash. For vegans, use a flax egg in the dough and opt for vegetable fillings instead of meat—you won’t miss out on flavor!
What are some popular filling options besides beef?
The more the merrier! Sweet fillings like berries, sweet potatoes, or cottage cheese are delightful alternatives. For savory options, consider sautéed potatoes, spinach, or lentils mixed with spices. The versatility of Russian piroshki allows for endless creativity—let your taste guide you!
Delicious Russian Piroshki: Savory Meat Hand Pies to Savor
Ingredients
Equipment
Method
- In a large mixing bowl, combine the all-purpose flour, salt, sugar, and instant yeast. Pour in the warm milk and warm water, followed by the vegetable oil and one egg. Knead for 5-7 minutes until smooth and elastic.
- Cover the dough and let it rise in a warm location for about 1 hour until it doubles in size.
- Heat a skillet over medium heat and melt butter. Sauté the onion (and mushrooms, if using) for 5-7 minutes until softened. Stir in the ground beef and cook until browned.
- Lightly flour a surface and roll the dough to ¼-inch thickness. Cut into 12 equal squares.
- Place a spoonful of the beef filling in the center of each square, fold over, and pinch edges firmly to seal.
- Preheat oven to 375°F (190°C). Brush the piroshki with the egg wash and bake for 15-20 minutes until golden brown.
- Let the piroshki cool on a wire rack for a few minutes before serving.
Leave a Reply