
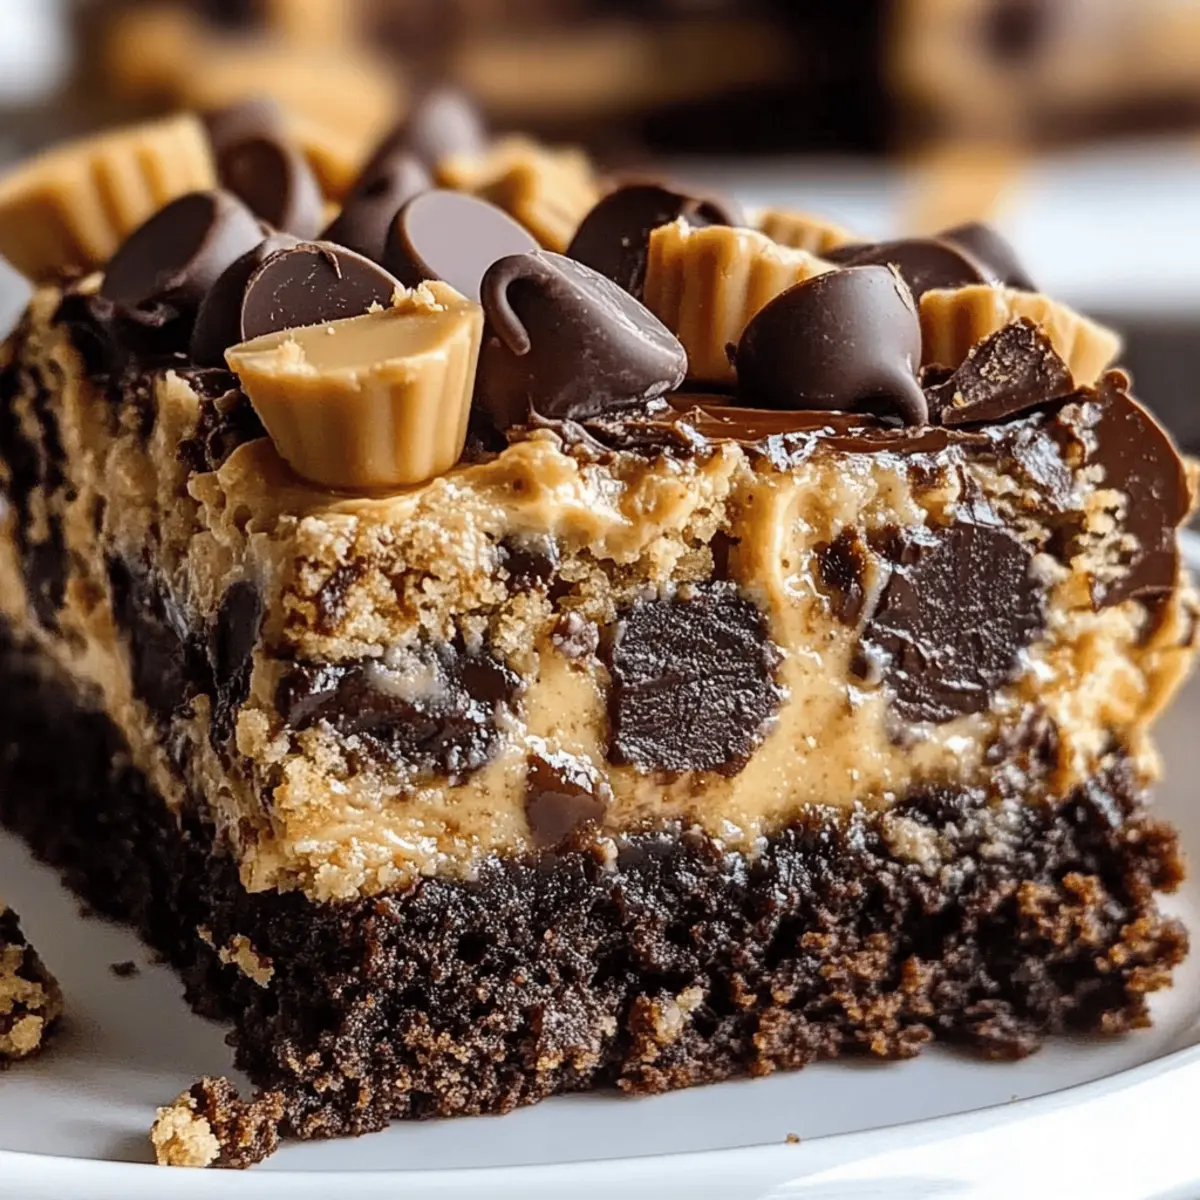
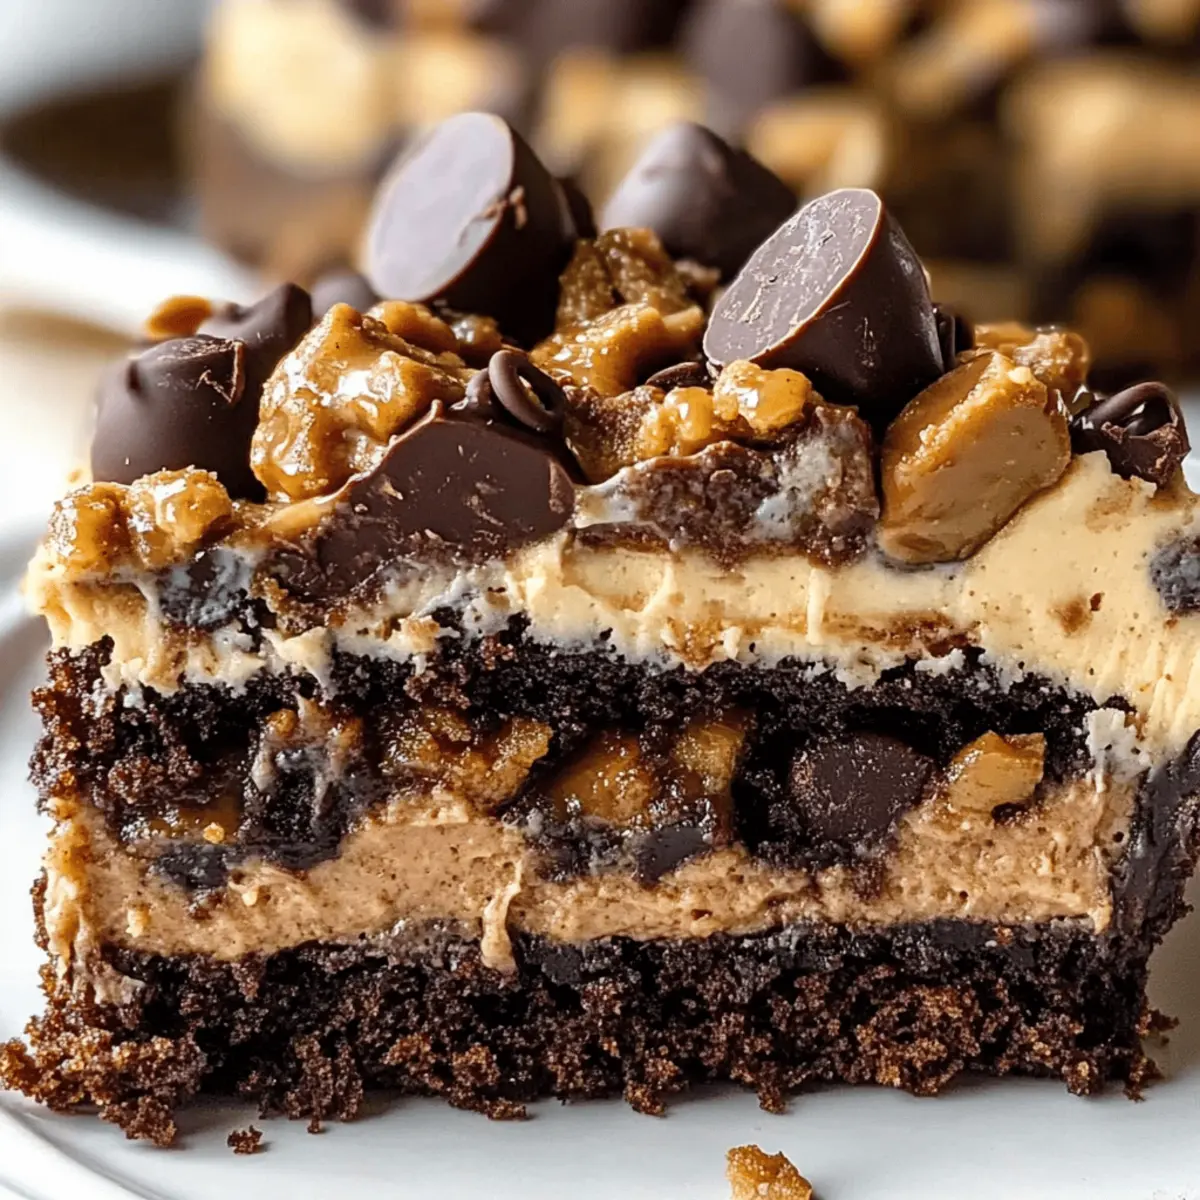
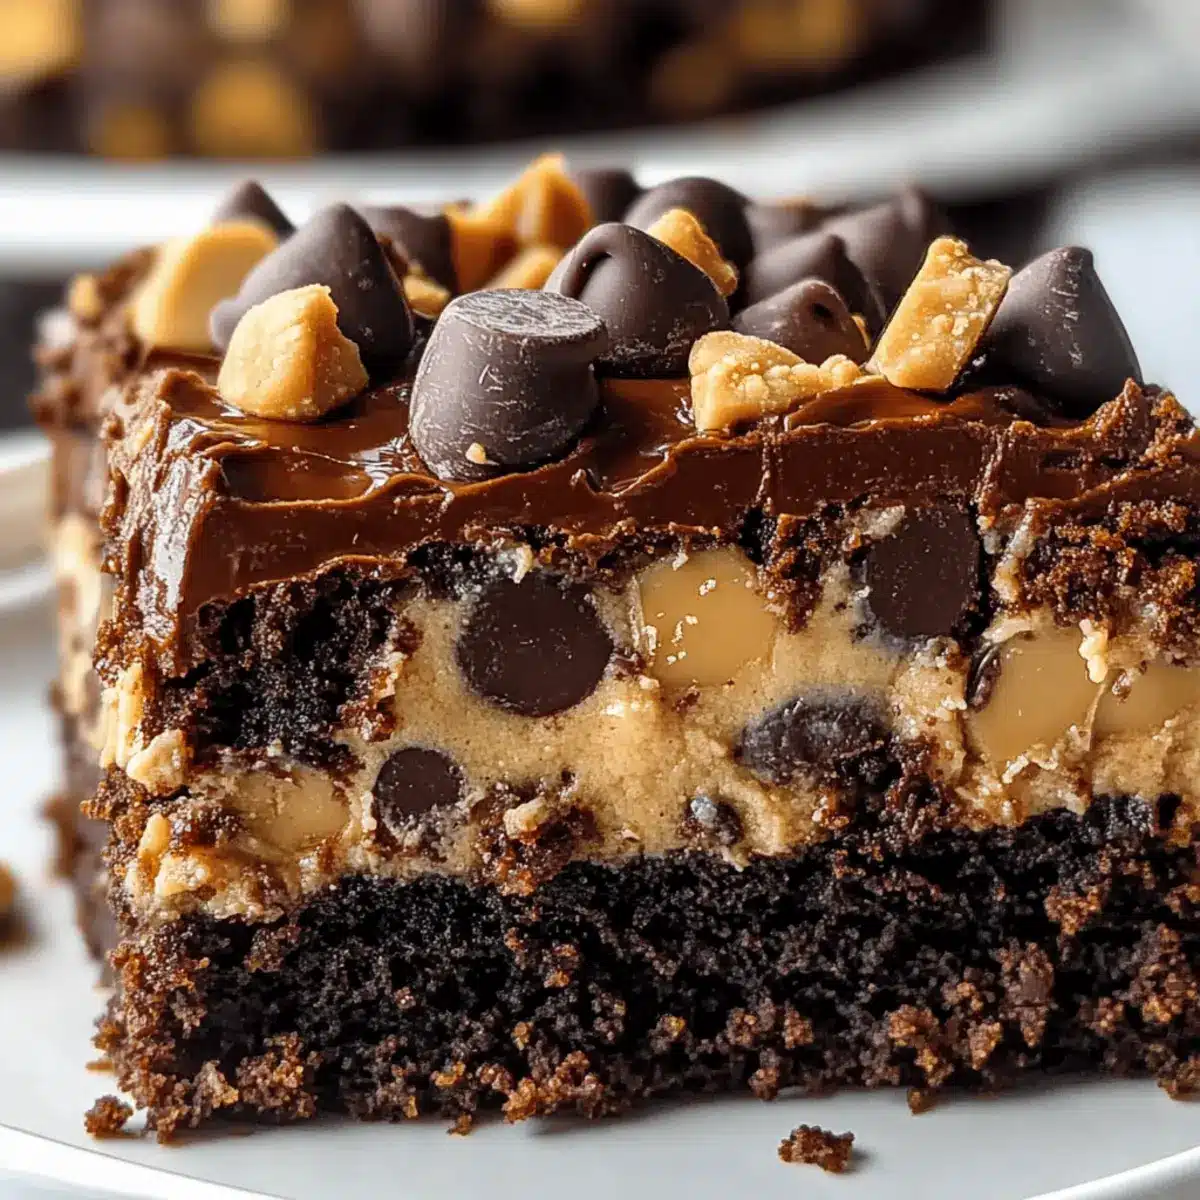
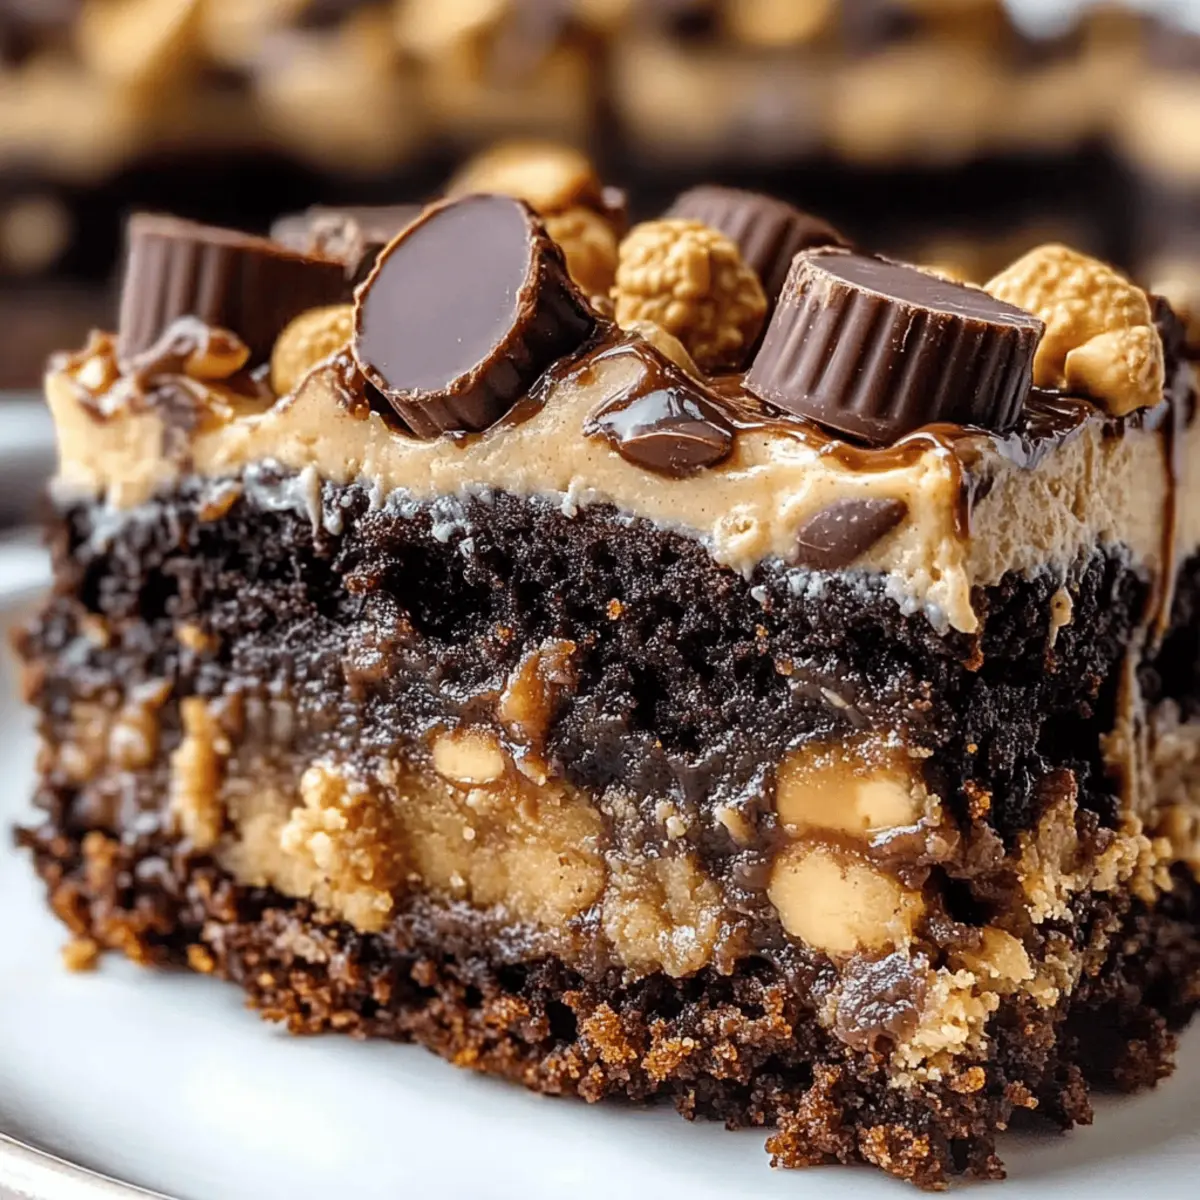
The aroma of warm chocolate and melted peanut butter fills the air as I pull out my latest creation—Peanut Butter Cup Dump Cake. This recipe is a total game changer, combining creamy peanut butter with gooey layers of chocolate, effortlessly melding into a sugary hug with every bite. One of the best things about this dump cake is how incredibly easy it is to whip up, allowing you to spend less time in the kitchen and more time delighting your friends and family. Plus, with options for nut-free and gluten-free adaptations, everyone can join in on the indulgence! Ready to elevate your dessert game? Let’s dive into the layers of happiness waiting in this delectable cake.
Why Is This Cake a Must-Try?
Simplicity at its finest: With minimal steps and no mixer required, this Peanut Butter Cup Dump Cake is perfect for bakers of all skill levels.
Decadent flavors come alive as creamy peanut butter and rich chocolate meld seamlessly, creating an irresistible treat.
Versatile options are available, whether you’re looking for nut-free alternatives or gluten-free mixes. Customize it to suit your dietary needs!
Ideal for gatherings, this dessert is sure to impress your guests, turning any occasion into an unforgettable celebration—just like my delightful Crab Cake Egg Rolls.
Gooey goodness awaits as you serve it warm with whipped cream or ice cream, making it a comforting indulgence. Get ready to savor joy in every bite!
Peanut Butter Cup Dump Cake Ingredients
-
For the Cake Base
-
Creamy Peanut Butter – Provides a rich, nutty base; swap with crunchy peanut butter for added texture or sunflower seed butter for a nut-free option.
-
Chopped Peanut Butter Cups – Adds sweetness and chocolatey flavor; try mini peanut butter cups or other chocolate candies as substitutes.
-
Sweetened Condensed Milk – Helps bind the layers together and enriches flavors, resulting in a gooey texture; no direct substitutions recommended.
-
Chocolate Cake Mix (Dry) – Forms the cake layer without the mixing hassle; use a gluten-free chocolate cake mix for a gluten-free alternative.
-
Unsalted Butter (Melted) – Enhances richness and moisture; ensure it’s melted for even distribution.
-
Milk Chocolate Chips – Offers extra chocolate flavor and texture; consider dark chocolate chips for a richer taste.
-
For Serving
-
Optional: Whipped Cream or Vanilla Ice Cream – Perfect to top this dessert, providing a delightful contrast to the warm cake; dairy-free options are available if needed.
This Peanut Butter Cup Dump Cake is a delightful treat that combines simple ingredients into an irresistible dessert experience. Enjoy baking!
Step‑by‑Step Instructions for Peanut Butter Cup Dump Cake
Step 1: Preheat and Prepare
Begin by preheating your oven to 350°F (175°C). While the oven warms up, generously grease a 9×13-inch baking dish with butter or non-stick spray to prevent any sticking. This is a crucial step to ensure your Peanut Butter Cup Dump Cake releases perfectly, allowing for easy serving and savoring later.
Step 2: Create the Peanut Butter Layer
Take your creamy peanut butter and evenly spread it across the bottom of the prepared baking dish. Use a spatula to create a smooth and uniform layer, ensuring that every square inch is covered. This rich base layer will provide an irresistible nutty flavor that complements the chocolate layers above.
Step 3: Add the Candy Layer
Sprinkle half of the chopped peanut butter cups evenly over the layer of peanut butter. This will introduce a delightful sweetness and chocolatey goodness that melts beautifully during baking. Make sure to spread them out to create an even distribution for maximum flavor in each bite of your Peanut Butter Cup Dump Cake.
Step 4: Drizzle with Sweetened Condensed Milk
Next, drizzle the sweetened condensed milk meticulously over the candy layer, ensuring that it seeps into the gaps between the peanut butter cups. This step is essential for binding the layers together, contributing to the luscious gooeyness that makes this dessert so special.
Step 5: Sprinkle Chocolate Cake Mix
Now, evenly sprinkle the dry chocolate cake mix over the condensed milk layer. Do not mix or stir; let the cake mix sit on top to form the cake layer as it bakes. This simple addition creates the foundation of your Peanut Butter Cup Dump Cake, culminating in a delightful texture contrast.
Step 6: Drizzle with Melted Butter
Pour the melted unsalted butter over the cake mix, aiming to cover as much of the surface as possible. Allowing the butter to drench the cake mix will enhance the richness and moisture, leading to a decadent dessert experience. Visualize it soaking in, preparing for the oven’s warmth.
Step 7: Top with More Candy and Chocolate Chips
Finish assembling your cake by sprinkling the remaining chopped peanut butter cups and milk chocolate chips generously over the top. This final touch not only enhances the flavor but also adds an appealing visual element, making your Peanut Butter Cup Dump Cake look irresistibly inviting.
Step 8: Bake to Perfection
Place the baking dish in the preheated oven and bake for 35 to 40 minutes. Keep an eye on it; the top should appear bubbly and slightly crisped when done. A golden-brown surface signals the cake is ready, while a gooey center is exactly what you want for this indulgent dessert.
Step 9: Cool and Serve
Allow your Peanut Butter Cup Dump Cake to cool for 10–15 minutes after removing it from the oven. This cooling period not only helps set the layers but also ensures you won’t burn your mouth on the gooey goodness. Serve warm with a dollop of whipped cream or a scoop of vanilla ice cream for the ultimate treat!
How to Store and Freeze Peanut Butter Cup Dump Cake
Room Temperature: Store leftovers in an airtight container at room temperature for up to 3 days to maintain freshness.
Fridge: For longer storage, refrigerate the cake in an airtight container for up to 1 week, keeping it moist and delicious.
Freezer: To freeze, slice the cake into individual portions and wrap each slice tightly in plastic wrap, then place them in a freezer-safe bag for up to 3 months.
Reheating: When ready to enjoy, reheat individual servings in the microwave for 15-30 seconds or until warm and gooey, restoring the delightful texture of your Peanut Butter Cup Dump Cake.
Make Ahead Options
These Peanut Butter Cup Dump Cakes are perfect for busy weeknights or gatherings! You can prepare the entire cake up to 24 hours in advance by assembling the layers, covering the dish tightly with plastic wrap, and refrigerating. This helps maintain the gooey texture and enhances the flavors. When you’re ready to serve, simply bake straight from the fridge for about 40-45 minutes, adding a few extra minutes if it’s cold. For individual servings, consider baking them in smaller dishes and reheating just the portions needed in the microwave. With this make ahead prep, you’ll enjoy delicious, homemade dessert without the last-minute rush!
What to Serve with Peanut Butter Cup Dump Cake
Indulge in a delightful experience by complementing your dessert with these delicious pairings that heighten every bite.
- Creamy Whipped Cream: Adds a light, airy contrast to the rich, gooey cake, making each mouthful a balanced delight.
- Vanilla Ice Cream: The smoothness of cold vanilla ice cream melts beautifully over the warm cake, enhancing its decadent chocolate flavors.
- Fresh Berries: Serve a handful of fresh raspberries or strawberries on the side for a tart freshness that cuts through the sweetness.
- Chocolate Sauce: Drizzling warm chocolate sauce over the top creates a satisfyingly chocolatey overload that is simply irresistible.
- Salted Caramel Drizzle: A drizzle of salted caramel elevates the cake with a sweet and savory twist, adding sophistication to your dessert.
- Coffee or Espresso: The rich flavors of coffee complement the chocolate and peanut butter, creating a delightful pairing for a cozy evening at home.
- Milkshake: Pair it with a creamy milkshake – think peanut butter or chocolate – for a fun and nostalgic treat reminiscent of your favorite diner experience.
- Nutty Trail Mix: For a crunchy contrast, serve a bowl of nutty trail mix on the side; it adds texture and a touch of salty flavor.
- Coconut Whipped Cream: For a dairy-free option, try coconut whipped cream to add a tropical flair that complements the cake beautifully.
- Hot Tea: A warm cup of herbal or chai tea pairs wonderfully, providing a soothing balance to the sweet indulgence of this delectable dessert.
Expert Tips for Peanut Butter Cup Dump Cake
- Even Spread: Ensure the creamy peanut butter is evenly spread across the bottom for consistent layers and flavor throughout the cake.
- Watch the Bake: Avoid overbaking; you want the edges bubbly while keeping the center gooey for that signature dump cake texture.
- Make-Ahead Magic: Prepare the cake in advance and store it. Simply reheat individual servings to enjoy that fresh-out-of-the-oven taste.
- Custom Toppings: Consider sprinkling sea salt on top before serving for a delightful sweet and salty contrast that elevates your Peanut Butter Cup Dump Cake.
- Substitution Guidance: If using sunflower seed butter for nut-free options, double-check that any candies you select are allergy-friendly to avoid cross-contamination.
Peanut Butter Cup Dump Cake Variations
Feel free to get creative with this recipe—there are endless possibilities to make it your own!
-
Nut-Free: Replace peanut butter with sunflower seed butter and choose allergy-safe chocolate candies for a deliciously safe alternative.
-
Texture Twist: Use crunchy peanut butter instead of creamy for added texture, or try mixing in half chocolate chips and half chocolate peanut butter chips for an enticing surprise.
-
Gluten-Free: Swap out the chocolate cake mix for a gluten-free version to cater to gluten-sensitive family members without compromising on taste.
-
Decadent Drizzle: Add a drizzle of caramel or chocolate sauce before serving to elevate the sweetness and provide an extra layer of indulgence.
-
Flavor Boost: Experiment with different flavored chips; dark chocolate offers richness, while milk or white chocolate can add delightful contrasting sweetness.
-
Sea Salt Sparkle: Sprinkle a pinch of flaky sea salt on top just before serving for a sweet and salty flavor explosion that pairs beautifully with the chocolate.
-
Candy Surprise: Mix in crushed cookies or different types of candy bars like Snickers or Twix between the layers for an exciting flavor punch.
-
Serving Suggestions: Why not serve this warm cake with a generous dollop of homemade whipped cream or a scoop of vanilla ice cream? It’s a match made in dessert heaven, just like my delightful Apple Biscuits with Honey Butter Glaze!
The best part is, with each variation, you’re creating your own unique experience with this mouthwatering dessert. Enjoy the fun of reinventing this cozy cake!
Peanut Butter Cup Dump Cake Recipe FAQs
What should I look for when selecting peanut butter?
Absolutely! When choosing peanut butter, look for creamy varieties free of added sugars or hydrogenated oils to keep it natural. If opting for a crunchy version, make sure it also has simple ingredients. If you need a nut-free option, sunflower seed butter works beautifully too.
How should I store leftover Peanut Butter Cup Dump Cake?
To keep your delicious Peanut Butter Cup Dump Cake fresh, store leftovers in an airtight container at room temperature for up to 3 days. If you want to extend its delicious life, refrigerate it for up to 1 week. Just make sure to wrap it well to maintain moisture!
Can I freeze Peanut Butter Cup Dump Cake?
Yes, you can! Slice the cake into individual portions and wrap each slice in plastic wrap, then place them in a freezer-safe bag. This method allows you to enjoy this delightful treat for up to 3 months. When you’re ready to indulge, simply reheat in the microwave for 15-30 seconds and enjoy!
What if my Peanut Butter Cup Dump Cake turns out too dry?
If your cake ends up dry, it might be because it was baked too long. Be sure to watch it closely towards the end of the baking time, looking for a bubbly, slightly crisped top while ensuring a gooey center. If you find yourself with a dry cake despite following, try serving it warm with a scoop of ice cream or whipped cream to add moisture back!
Are there any allergy considerations for this recipe?
Yes, the Peanut Butter Cup Dump Cake contains peanuts, milk, and gluten, so always check labels for specific allergen details. To make it nut-free, replace peanut butter with sunflower seed butter and ensure the candies are allergy-friendly. Gluten-free alternatives also exist for cake mix, so everyone can enjoy this delightful dessert.
Irresistible Peanut Butter Cup Dump Cake That's So Easy to Make
Ingredients
Equipment
Method
- Preheat your oven to 350°F (175°C) and grease a 9x13-inch baking dish with butter or non-stick spray.
- Spread creamy peanut butter evenly across the bottom of the prepared baking dish.
- Sprinkle half of the chopped peanut butter cups evenly over the peanut butter layer.
- Drizzle sweetened condensed milk over the candy layer.
- Sprinkle the dry chocolate cake mix evenly over the condensed milk layer.
- Drizzle melted unsalted butter over the cake mix.
- Top with the remaining chopped peanut butter cups and milk chocolate chips.
- Bake for 35 to 40 minutes until bubbly and slightly crisped on top.
- Allow to cool for 10–15 minutes before serving warm with whipped cream or vanilla ice cream.
Leave a Reply