
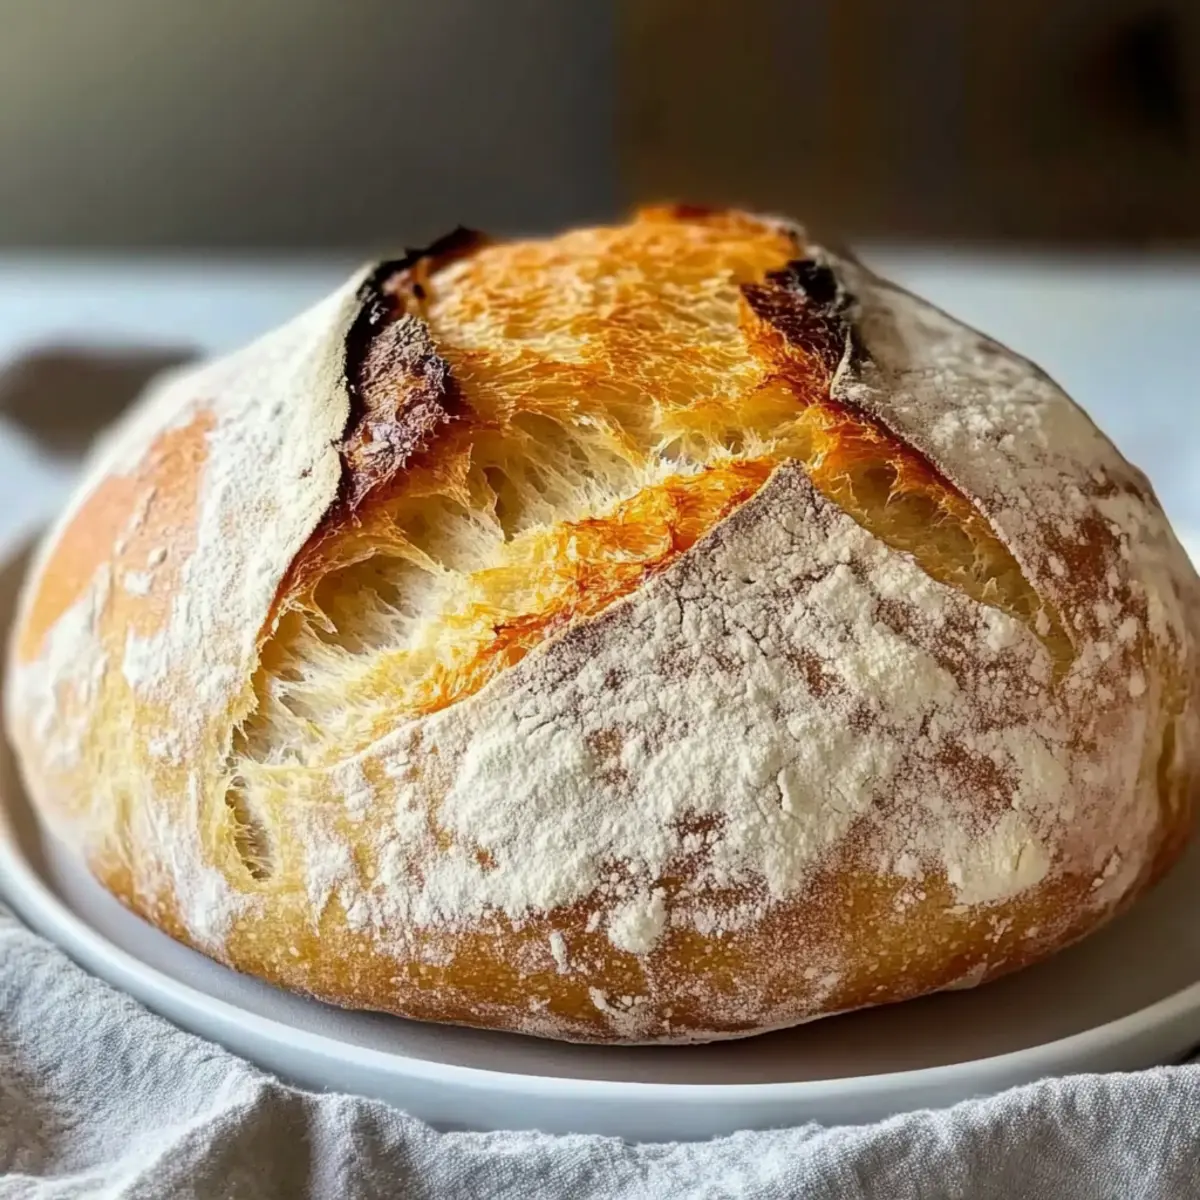
There’s something incredibly heartwarming about the scent of freshly baked bread that fills the air, isn’t there? With my No Knead Gluten Free Bread recipe, you can bring that comforting aroma right into your kitchen without the need for hours of kneading or complicated techniques. This easy homemade bread has a wonderfully soft texture and a crust that’s just the right amount of chewy, making it a go-to companion for any meal. Plus, it’s perfect for those who are on a gluten-free diet but still crave the joy of artisan bread. Whether you’re enjoying it warm with a pat of butter or using it for hearty sandwiches, this recipe will quickly become a staple in your home. Ready to discover the secrets of delicious, no-knead bread? Let’s get baking!

Why is this bread a must-try?
Simplicity at Its Best: You’ll love how easy it is—no kneading or complicated steps required!
Flavorful Experience: The blend of gluten-free ingredients creates a deliciously soft bread that rivals your favorite artisanal loaves.
Versatile Pairing: Perfect for sandwiches, toast, or simply enjoyed with a bit of butter while warm.
Time-Saving Delight: With minimal active time, you can whip this up while managing your day.
Health-Conscious Choice: Ideal for gluten-free diets, this bread doesn’t skimp on taste or texture, ensuring everyone can enjoy it.
Check out my Herb Cheese Bread or Strawberry Banana Bread for more delightfully easy baking ideas!
No Knead Gluten Free Bread Ingredients
• For the Dough
- Gluten Free All-Purpose Flour Blend – Provides the main structure of the bread. Choose a high-quality blend for the best results.
- Instant Yeast – Offers quick rise without the need for proofing. Substitute with active dry yeast if needed, but adjust the activation time.
- Sea Salt – Enhances flavor and controls fermentation. No direct substitute, however, table salt can be used.
- Olive Oil – Adds moisture and richness. Substitute with melted coconut oil or vegetable oil for a different flavor.
- Sugar – Aids the yeast in rising. Honey or maple syrup can act as natural alternatives.
- Warm Water – Hydrates dry ingredients and activates yeast. Ensure it’s around 110°F (43°C) for optimal activation.
- Apple Cider Vinegar – Adds tang and improves the bread’s texture. Lemon juice can be used as a substitute.
Enjoy creating your very own No Knead Gluten Free Bread that will fill your home with warmth and delight!
Step‑by‑Step Instructions for No Knead Gluten Free Bread
Step 1: Whisk the Dry Ingredients
In a large mixing bowl, combine the gluten-free all-purpose flour blend, instant yeast, sea salt, and sugar. Whisk them together thoroughly until well mixed, ensuring there are no lumps. This step is crucial as it sets the foundation for your No Knead Gluten Free Bread, blending in the flavors and activating the yeast.
Step 2: Combine Wet Ingredients
Next, pour in warm water (around 110°F or 43°C), olive oil, and apple cider vinegar into the dry mixture. Use a sturdy spoon or spatula to mix everything until a sticky dough forms. The dough should look slightly lumpy, and it’s perfectly fine if it’s not smooth. Scrape down the sides of your bowl as needed to incorporate all the ingredients.
Step 3: Let the Dough Rise
Cover the bowl tightly with plastic wrap and let it rest at room temperature for 1 hour. During this time, the dough will rise slightly, becoming airy and light. You’ll notice it’s a bit puffy upon checking—it’s a sign that the yeast is working its magic, transforming your mixture into a promising bread dough.
Step 4: Preheat the Oven
While the dough is rising, preheat your oven to 425°F (220°C). Also, line a loaf pan with parchment paper, allowing some overhang for easy removal later. This step ensures your oven is hot enough to create that gorgeous crust on your No Knead Gluten Free Bread, giving it a delightful golden brown color.
Step 5: Transfer the Dough
Once the dough has risen, carefully scrape it into your prepared loaf pan, using a spatula to smooth the top. It should be sticky but manageable. Take a moment to shape the top if desired, as this will form the crust. Allow the dough to settle into the pan—it should fill the pan nicely, ready for baking.
Step 6: Bake the Bread
Place the loaf pan into the preheated oven and bake for 55 to 60 minutes. You’ll know it’s ready when the top is golden brown and sounds hollow when tapped. This is the perfect visual cue that your No Knead Gluten Free Bread is baking beautifully, creating that irresistible aroma filling your kitchen.
Step 7: Cool Before Slicing
After baking, remove the bread from the oven, letting it cool in the pan for about 10 minutes. Then, gently lift it out using the parchment paper and transfer it to a wire rack. It’s important to let your bread cool completely before slicing, as this helps set its texture and improves the overall flavor.
What to Serve with No-Knead Gluten Free Bread
Pairing this bread with the perfect sides can elevate your meal to a delightful experience, celebrating its warm, inviting flavors.
-
Creamy Tomato Soup: The rich, tangy essence of tomato soup creates a classic combination that’s warm and comforting.
-
Garlic Herb Butter: Slathering this bread with garlic herb butter enhances its flavor and adds a savory depth, making it irresistible.
-
Mixed Green Salad: A refreshing salad with crisp greens and a light vinaigrette adds a pleasant crunch, balancing the bread’s soft texture beautifully.
-
Cheesy Vegetable Bake: The gooey, melted cheese paired with roasted veggies creates a hearty dish that complements the fluffy bread wonderfully.
-
Savory Dip: Serve it alongside hummus or spinach-artichoke dip for an appetizer that’s perfect for sharing and makes for a savory pairing.
-
Fruit Jam or Honey: A smear of fruit jam or honey brings out the subtle sweetness in the bread, creating a delightful contrast when served warm.
Enjoy your No-Knead Gluten Free Bread with these delicious accompaniments to create a well-rounded and inviting culinary experience!
How to Store and Freeze No Knead Gluten Free Bread
Room Temperature: Keep the bread wrapped in a clean tea towel or in a bread box for up to 2 days to maintain its freshness and texture.
Fridge: For longer storage, place the bread in an airtight container in the fridge; it will stay fresh for up to 5 days, though it may dry out slightly.
Freezer: Slice the No Knead Gluten Free Bread and wrap individual pieces in baking paper, then store in a freezer bag. It can be frozen for up to 3 months for convenience.
Reheating: To enjoy the bread after freezing, simply toast it or warm it in the oven at 350°F (175°C) for about 10 minutes for the best texture.
Expert Tips for No Knead Gluten Free Bread
-
Perfect Dough Consistency: Keep it sticky: Avoid adding too much flour; sticky dough is essential for the right texture in your No Knead Gluten Free Bread.
-
Rising Time Matters: Give it enough time: Ensure the dough rests for a full hour at room temperature to allow proper fermentation and rise.
-
Oven Temperature Check: Preheat properly: An adequately preheated oven is key for achieving a golden crust. Don’t skip this step!
-
Cooling Is Key: Steady does it: Allow your bread to cool completely before slicing; this will enhance its texture and flavor.
-
Flavor Variations: Get creative: Feel free to add herbs or seeds in the dough for extra flavor and flair in your homemade bread.
Make Ahead Options
These No Knead Gluten Free Bread options are wonderful for busy home cooks looking to save time without sacrificing quality! You can mix the dry ingredients (gluten-free flour, yeast, salt, and sugar) and store them in an airtight container for up to 3 days ahead, making the actual baking process quicker. Additionally, you can prepare the wet mixture (water, olive oil, and vinegar) and keep it in the refrigerator for up to 24 hours. When ready to bake, simply combine the dry and wet ingredients, let it rise, and bake according to the instructions. This way, you’ll enjoy freshly baked bread just as delightful as if you made it all at once, perfectly fit for those busy weeknights!
No Knead Gluten Free Bread Variations
Feel free to explore these exciting variations and substitutions to customize your No Knead Gluten Free Bread experience!
-
Add-ins: Consider tossing in a handful of your favorite seeds, like sunflower or pumpkin, for delightful crunch and extra nutrients. The added texture complements the soft bread perfectly!
-
Herbs: For a savory twist, mix in dried herbs such as oregano or rosemary. The delightful aroma of baked herbs will fill your kitchen, inviting everyone to the table.
-
Sweet Twists: Add a pinch of cinnamon and a splash of vanilla extract to create a subtly sweet flavor. This variation works beautifully when served warm with butter or on a breakfast table.
-
Cheesy Delight: Stir in shredded cheese for a cheesy bread experience. This adds both flavor and a lovely savory touch that pairs wonderfully with soups and salads.
-
Spicy Kick: Add crushed red pepper flakes for those who like a little heat. The warmth of spice brings an exciting depth to your bread, perfect for pairing with hearty meals.
-
Dairy-Free: Substitute olive oil with melted coconut oil for a tropical twist, ensuring it remains dairy-free. The subtle coconut flavor adds a unique touch to the bread.
-
Nutty Flavor: Use almond flour mixed with your gluten-free blend for a slightly nutty flavor. This will also enhance the overall texture, making it even more inviting.
-
Storage Tip: Wrap in a clean tea towel or place in a bread box for a couple of days for optimal flavor. Don’t forget—you can freeze slices (with baking paper between) for up to three months; it’s a great grab-and-go option for busy days!
For more inspired baking, check out my Hot Honey Flatbread Pizza or try my delightful Shrimp Scampi Bowls with Garlic Bread for a meal that pairs wonderfully with your fresh bread!
No-Knead Gluten Free Bread Recipe FAQs
What type of gluten-free flour should I use?
Absolutely! For the best results, opt for a high-quality gluten-free all-purpose flour blend. These blends often combine various flours and starches to mimic the texture of traditional bread flour. Look for options that contain xanthan gum or guar gum; they help bind the ingredients and improve the bread’s structure.
How should I store the No-Knead Gluten Free Bread?
To keep your bread fresh, wrap it in a clean tea towel or store it in a bread box at room temperature for up to 2 days. If you want to extend its life, place it in an airtight container in the fridge; it will last for up to 5 days, although it may dry out a bit. Remember, how you store it really influences the texture!
Can I freeze No-Knead Gluten Free Bread?
Yes, you can freeze it! I often slice the bread first for convenience. Wrap each slice in baking paper and then place them in a freezer bag. It can be frozen for up to 3 months. When you’re ready to enjoy it, simply toast it directly from the freezer or warm it in the oven at 350°F (175°C) for about 10 minutes.
What should I do if the dough doesn’t rise?
If your dough hasn’t risen after the resting period, it’s likely that the yeast was inactive. Ensure your warm water was around 110°F (43°C) before mixing, as temperatures that are too hot can kill yeast. If this happens, restart with a fresh batch of warm water and yeast. It’s all about those little details!
Is this recipe safe for those with allergies?
Yes, this No-Knead Gluten Free Bread is a great option for those with gluten intolerances. However, check the labels on all your ingredients to avoid cross-contamination. If you’re cooking for others who may have allergies, be cautious of any additional ingredients or add-ins. Always keep the environment clean to avoid any potential allergens.
No Knead Gluten Free Bread That’s Soft, Fluffy & Easy
Ingredients
Equipment
Method
- Whisk the dry ingredients together in a large mixing bowl until well mixed.
- Combine wet ingredients with dry mixture until a sticky dough forms.
- Cover the bowl and let the dough rise for 1 hour at room temperature.
- Preheat the oven to 425°F (220°C) and line a loaf pan with parchment paper.
- Transfer the sticky dough to the prepared loaf pan and smooth the top.
- Bake in the preheated oven for 55 to 60 minutes until golden brown.
- Cool for 10 minutes in the pan, then transfer to a wire rack.
Leave a Reply