
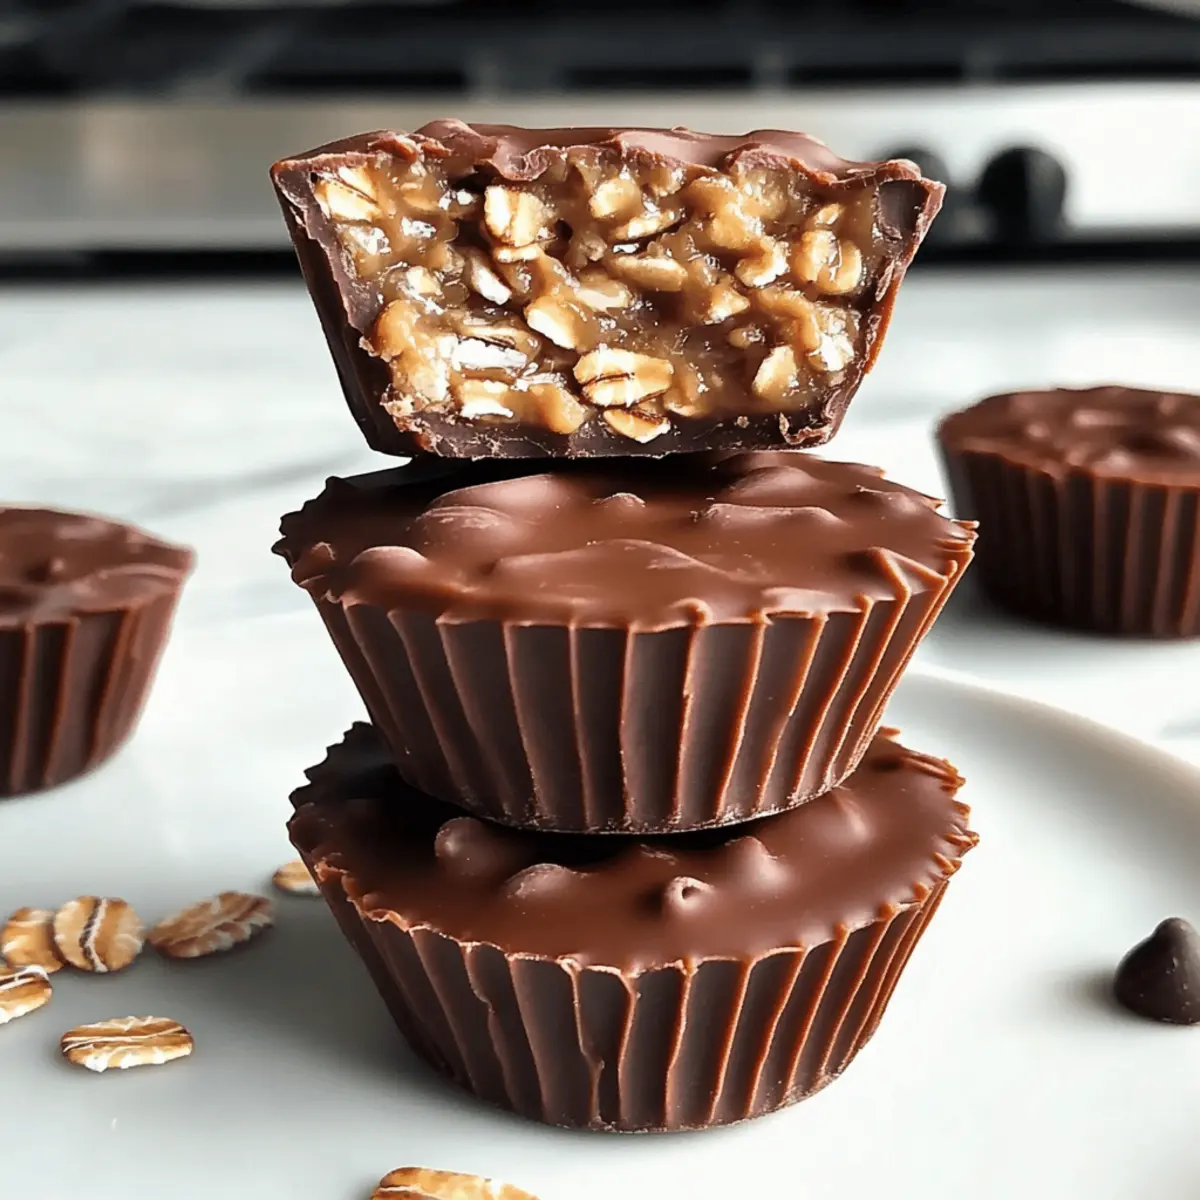
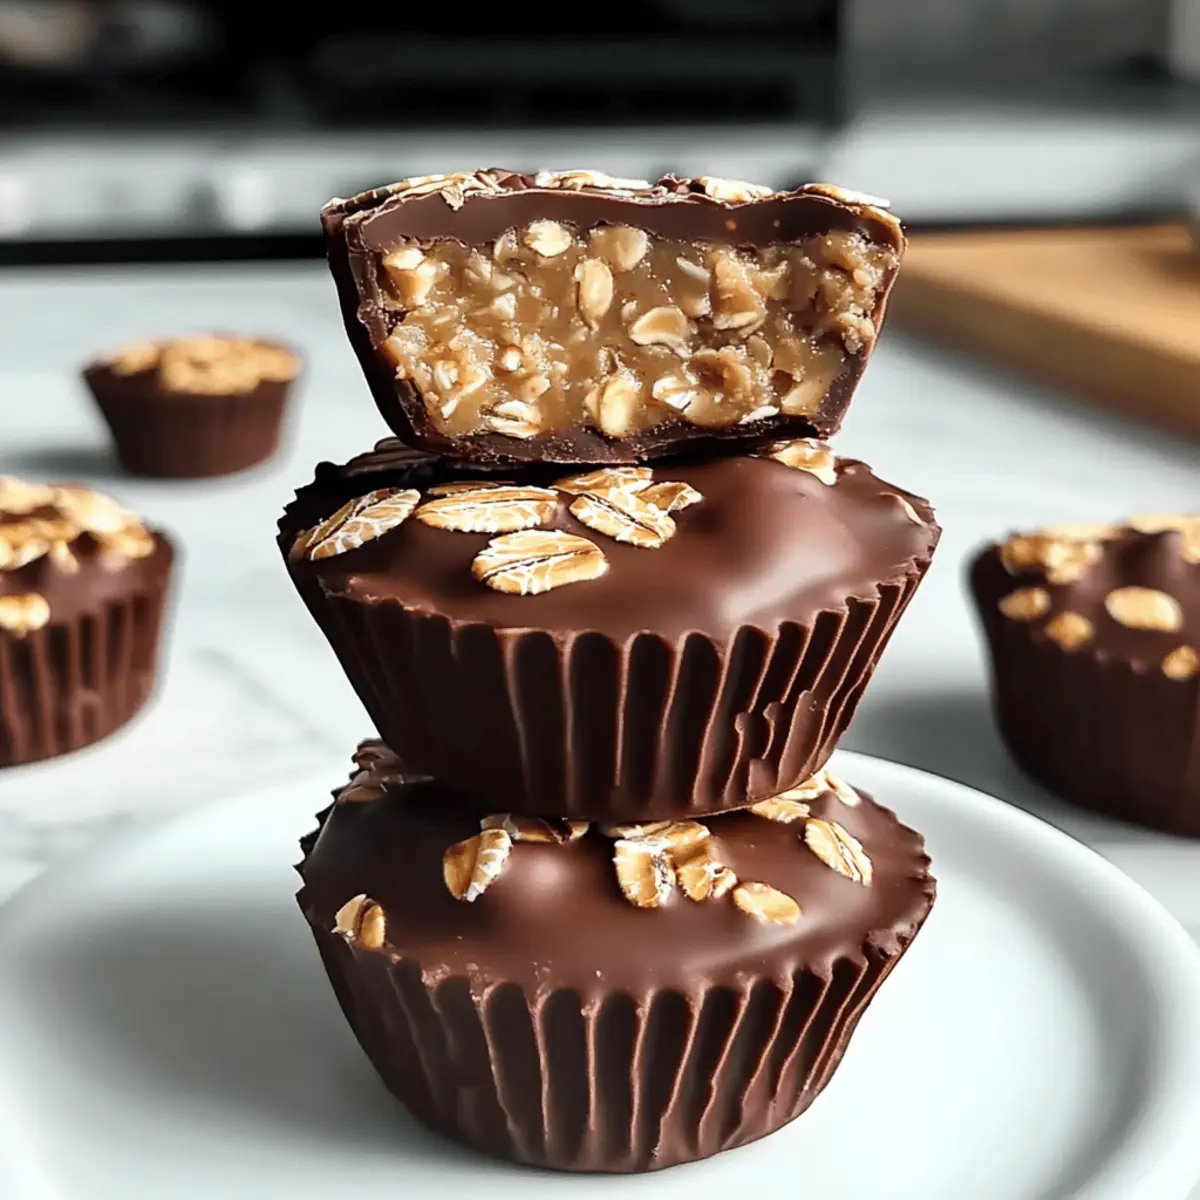
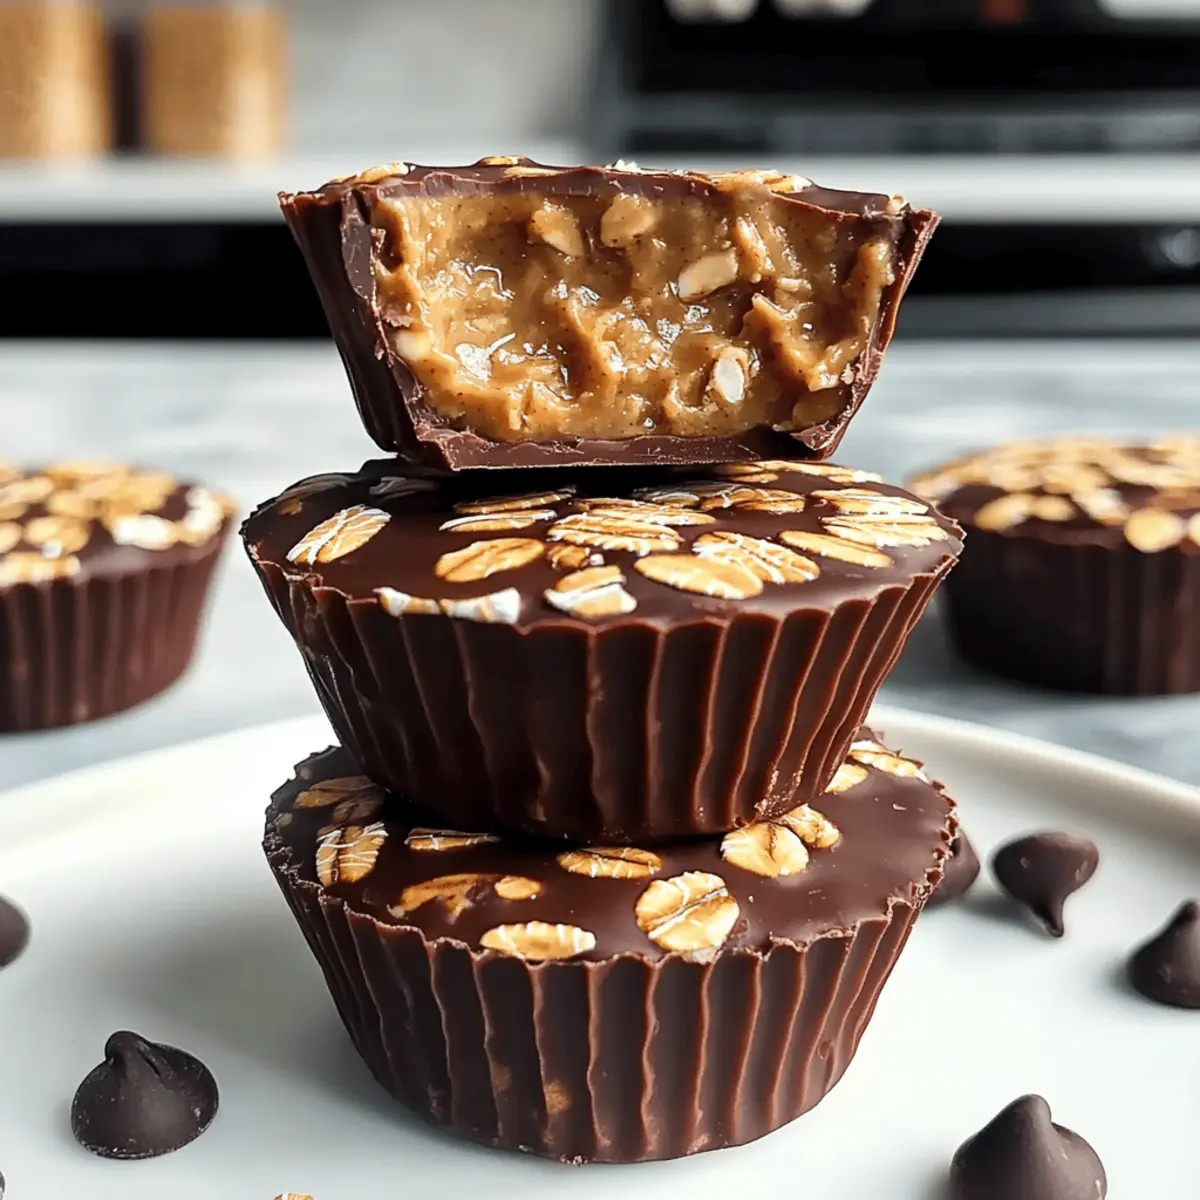
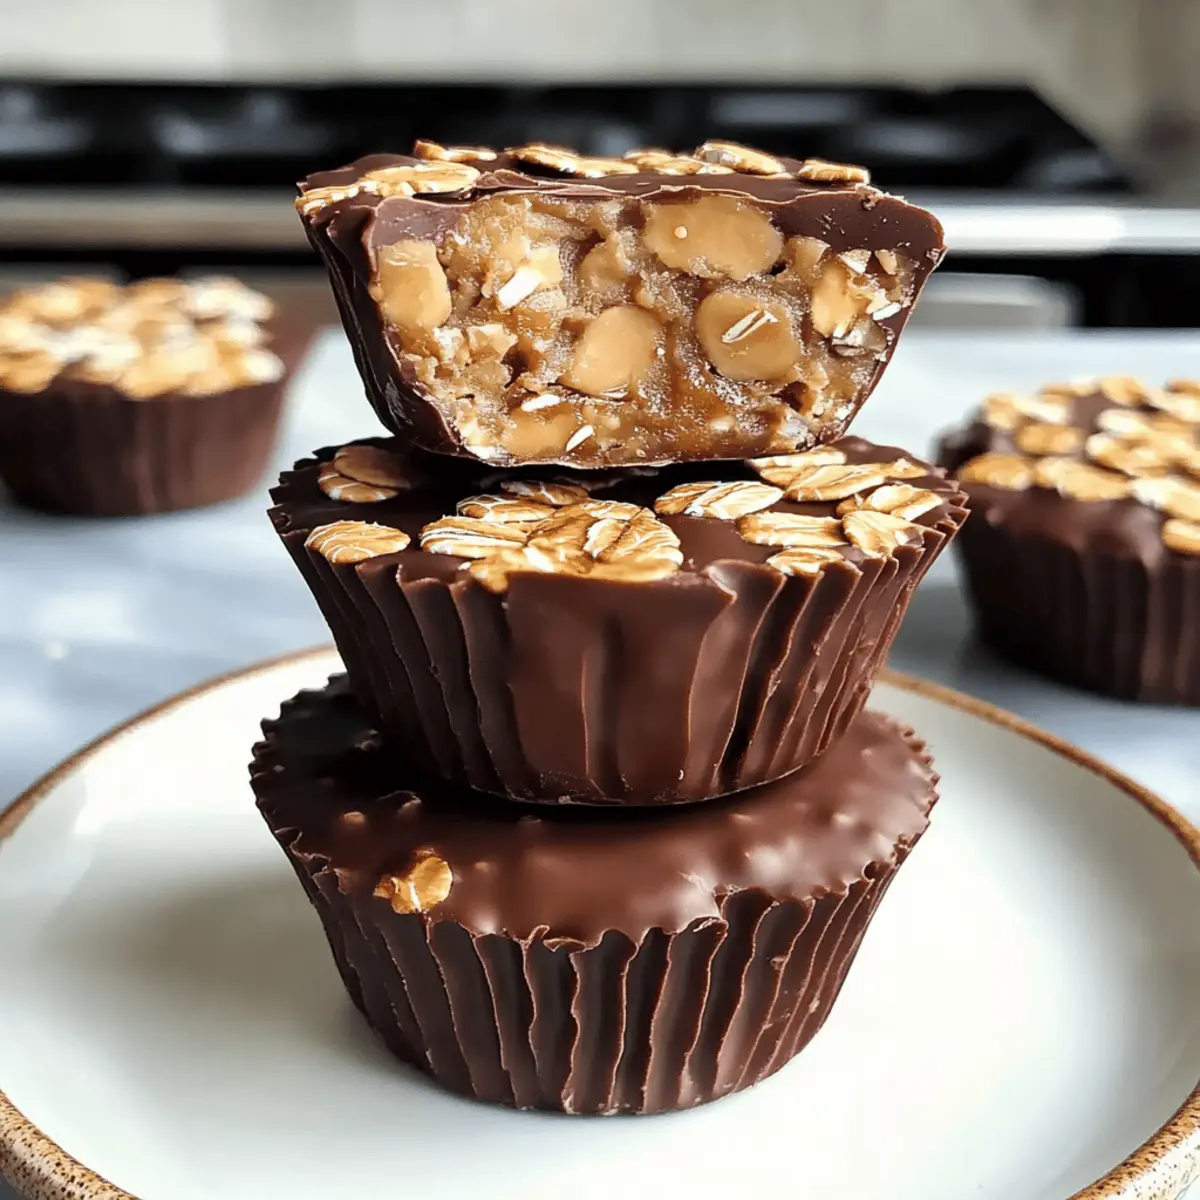
As I was rummaging through my pantry, I stumbled upon a jar of peanut butter that had been sitting there, just waiting for inspiration. That’s when I decided to whip up some No-Bake Peanut Butter Oat Cups! These little gems are your new go-to for satisfying cravings without the hassle of baking or the guilt of heavy indulgence. With just a few simple ingredients, you’ll create a quick dessert that’s both delicious and healthy. Perfect for busy days, these oat cups provide a nutritious snack option, packed with wholesome ingredients and a delightful chewy texture. Plus, they’re easily customizable to suit any palate, and who doesn’t love that? Ready to explore endless variations and treat yourself? Let’s dive into this scrumptious recipe!
Why are No-Bake Peanut Butter Oat Cups perfect?
Quick and Easy: You can whip up these delightful cups in no time, making them the ultimate snack for busy days. Nutritious Ingredients: Packed with rolled oats and natural peanut butter, they offer a healthy alternative to traditional desserts. Customizable Options: Feel free to switch things up! Add nuts, seeds, or dried fruits to make them uniquely yours. Crowd-Pleasing Taste: The creamy peanut butter and sweet honey create a flavor combination that everyone will love—perfect for family gatherings! Plus, if you’re craving something more savory, check out these Bites Garlic Butter for a delicious twist!
No-Bake Peanut Butter Oat Cups Ingredients
For the Base
- Rolled Oats – Provides a chewy texture and acts as the base; opt for gluten-free oats if needed.
- Natural Peanut Butter – Adds creaminess and healthy fats; substitute with almond or sunflower butter for nut-free options.
For Sweetness
- Honey or Maple Syrup – Naturally sweetens and binds ingredients; agave syrup works great for a vegan version.
For Additions
- Dark Chocolate Chips (optional) – Offers richness and visual appeal; omit for a lower sugar treat.
- Vanilla Extract (optional) – Enhances flavor complexity; use almond extract for a distinct twist.
- Pinch of Salt – Balances the sweetness; skip if using salted peanut butter.
These No-Bake Peanut Butter Oat Cups are not just quick and healthy, but also an exciting canvas for your culinary creativity!
Step‑by‑Step Instructions for No-Bake Peanut Butter Oat Cups
Step 1: Mix the Base
In a large mixing bowl, combine rolled oats and natural peanut butter. Stir well using a spatula or wooden spoon until the oats are thoroughly coated with the creamy peanut butter. This should take about 2 minutes of mixing. Ideally, the mix should be sticky and cohesive, indicating it’s the perfect consistency for your No-Bake Peanut Butter Oat Cups.
Step 2: Add Sweetener
Gradually drizzle in your honey or maple syrup, continuing to mix until the ingredients form a thick and sticky texture. This should take another 1-2 minutes. If the mixture looks crumbly, add a bit more syrup until it holds together nicely. The delightful sweetness will perfectly complement the hearty oats and peanut butter.
Step 3: Incorporate Optional Flavors
Now, if desired, mix in the vanilla extract and a pinch of salt. Stir gently for about 1 minute to ensure an even distribution of flavor. The vanilla adds depth, while the salt balances the sweetness. Once mixed, your No-Bake Peanut Butter Oat Cups will have a wonderfully complex taste.
Step 4: Press into Molds
Line your muffin tins or silicone molds with parchment paper for easy removal. Firmly press the mixture into each mold, using the back of a spoon or your fingers to compact it well. This process is crucial for maintaining shape; it should take about 3-5 minutes to ensure each cup is packed securely.
Step 5: Add Toppings if Desired
If you like, sprinkle chocolate chips on top of each cup before refrigerating. This step can be skipped for a lower sugar treat. The chips should be evenly distributed, adding extra decadence to your No-Bake Peanut Butter Oat Cups. Let the treats sit for a moment, ensuring everything is looking fabulous!
Step 6: Chill and Set
Refrigerate the molded cups for at least 30 minutes, allowing them to firm up. This chilling time helps the ingredients meld together, creating a satisfying texture. You’ll know they’re ready when they feel firm to the touch. After chilling, your delicious No-Bake Peanut Butter Oat Cups will be ready to pop out of their molds.
Step 7: Serve and Store
Gently remove the cups from the molds and enjoy immediately or store them in an airtight container. If kept refrigerated, they’ll last about a week, or you can freeze them for up to a month. These delightful No-Bake Peanut Butter Oat Cups make for a healthy snack or a quick dessert option anytime!
Storage Tips for No-Bake Peanut Butter Oat Cups
- Room Temperature: Keep your No-Bake Peanut Butter Oat Cups at room temperature for up to 2 hours if serving, but avoid leaving them out for longer to maintain freshness.
- Fridge: Store the cups in an airtight container in the refrigerator for up to 1 week, ensuring they are well sealed to preserve their delightful texture.
- Freezer: For longer storage, freeze the cups in an airtight container or zip-top bag for up to 1 month; allow them to thaw completely before enjoying as a tasty snack.
- Reheating: These no-bake treats are best served cold or at room temperature, so there’s no need for reheating, simply grab and savor!
What to Serve with No-Bake Peanut Butter Oat Cups
Elevate your snack game and create a delightful spread that perfectly complements the creamy richness of these easy-to-make oat cups.
-
Fresh Fruit Salad: A vibrant mix of seasonal fruits adds a refreshing burst of flavor and color, balancing the sweetness of the oat cups beautifully. Juicy berries, crisp apples, and succulent bananas bring a delightful crunch alongside the soft texture of the cups.
-
Chia Seed Pudding: Creamy and nutritious, chia pudding offers a contrasting texture while remaining light and healthy. Infuse it with vanilla or cocoa for an added flavor twist that’ll resonate with the nuttiness of the cups.
-
Greek Yogurt Parfait: Layering Greek yogurt with honey and granola creates a delightful crunch and creaminess that pairs perfectly with the chewy texture of the peanut butter oat cups. It’s a satisfying option for a hearty breakfast or an afternoon snack.
-
Nutty Granola Bars: Enhance the nutty flavors with homemade granola bars. Their crispy texture complements the chewy softness of the no-bake oat cups, creating a perfect harmony between chewy and crunchy snacks.
-
Iced Herbal Tea: A light, refreshing drink like iced herbal tea or honey green tea echoes the healthy theme of your meal, providing a soothing end. This pairing keeps things light, refreshing, and incredibly satisfying.
-
Smoothie Bowls: Serve your oat cups with colorful smoothie bowls topped with nuts and seeds for the ultimate healthful trio. The creamy smoothie blends beautifully with the hearty oat cups for a balance of flavors and textures.
-
Dark Chocolate Dipped Strawberries: For a touch of indulgence, pair your oat cups with chocolate-covered strawberries. The sweet-tart berries balance the earthy peanut flavor of the cups while adding an elegant flair to your dessert table.
-
Coconut Milk Ice Cream: A scoop of coconut milk ice cream brings a refreshing chill and contrasts nicely with the chewy oat cups, creating a dreamy combination that’s perfectly indulgent yet guilt-free.
Make Ahead Options
These No-Bake Peanut Butter Oat Cups are perfect for meal prep, allowing you to save time on busy days! You can prepare the mixture and press it into molds up to 24 hours in advance. Simply store the filled molds covered in the refrigerator. This will help the oats blend with the peanut butter effectively and prevent any browning. When you’re ready to serve, just sprinkle the chocolate chips on top (if using) and chill for another 30 minutes to firm them up. They’ll be just as delicious and satisfying, making your snacking routine a breeze!
Expert Tips for No-Bake Peanut Butter Oat Cups
-
Compact Mixture: Ensure your oat mixture is compacted firmly in the molds. This prevents the cups from falling apart when you remove them, maintaining their shape.
-
Mix It Up: Toast the rolled oats lightly before mixing for an added layer of flavor. This simple step can enhance the nuttiness of your No-Bake Peanut Butter Oat Cups.
-
Monitor Chocolate Chips: If you choose to add chocolate chips, fold them in just before setting the mixture. Overheating can melt them, so add them towards the end of your mix.
-
Adjust Sweetness: Don’t hesitate to tweak the sweetness to your liking! If you’re not fond of super sweet treats, start with less honey or syrup and adjust gradually.
-
Experiment with Add-ins: Venture beyond the basic recipe! Consider adding chia seeds or shredded coconut for extra texture and nutrition, making your no-bake cups even more fabulous.
-
Keep Stored Properly: Store your No-Bake Peanut Butter Oat Cups in an airtight container in the fridge to maintain freshness and texture. Enjoy them within a week for the best taste!
No-Bake Peanut Butter Oat Cups Customization
Feel free to let your creativity shine by putting your own twist on these delicious no-bake treats!
-
Nut-Free: Substitute natural peanut butter with almond or sunflower butter to make these cups suitable for nut allergies. A creamy base is still guaranteed!
-
Sweetener Swap: Replace honey or maple syrup with agave syrup for a vegan-friendly option, maintaining that sweet flavor without animal products.
-
Extra Crunch: Mix in a handful of chopped nuts or seeds for added texture. Pecans or chia seeds can bring delightful surprises in each bite!
-
Fruity Delight: Dried fruits like cranberries, raisins, or even chopped dried apricots can elevate your oat cups with natural sweetness and vibrant colors. They add a lovely chewy dimension.
-
Chocolate Lovers: For a richer flavor, double the amount of dark chocolate chips or even add white chocolate for a sweet twist. The chocolatey goodness invites a lil’ indulgence!
-
Spice It Up: Add a dash of cinnamon or a sprinkle of cocoa powder into the mix for a warm flavor. It adds depth and makes these treats even cozier.
-
Dairy-Free Option: Skip the chocolate chips, or choose dairy-free varieties to keep it entirely plant-based. You won’t sacrifice taste while pleasing dairy-free palates!
-
Layered Treat: For a dessert-like presentation, layer the mixture with a yogurt or a fruit spread when serving. It gives a fun look and a delightful contrast in taste!
If you’re in the mood for a savory experience, consider trying the One Pot Tortellini for a different but equally satisfying delight!
No-Bake Peanut Butter Oat Cups Recipe FAQs
How do I choose the right oats for No-Bake Peanut Butter Oat Cups?
Absolutely! For the best results, look for rolled oats as they provide the perfect chewy texture. If you’re making a gluten-free version, ensure the oats are certified gluten-free. Avoid instant oats, as they won’t hold the same texture and may lead to a mushy result.
How should I store my No-Bake Peanut Butter Oat Cups, and how long do they last?
Certainly! Store your No-Bake Peanut Butter Oat Cups in an airtight container in the refrigerator for up to 1 week. If you want to keep them longer, they can also be frozen for up to 1 month. Just let them thaw in the fridge overnight before enjoying!
Can I freeze No-Bake Peanut Butter Oat Cups? If so, what’s the best method?
Very much! Freezing is a great option. To freeze, place your No-Bake Peanut Butter Oat Cups in a single layer on a baking sheet and freeze for about 1 hour. Once they’re solid, transfer them to an airtight container or a zip-top freezer bag, separating layers with parchment paper. This prevents them from sticking together.
What should I do if my mixture is too dry and crumbly?
No worries! If the mixture feels too dry, simply drizzle in additional honey or maple syrup, a tablespoon at a time, mixing well until it holds together. Alternatively, you can add a splash of plant-based milk or water to reach the desired consistency. Just remember to mix thoroughly for an even blend!
Are there any dietary considerations for No-Bake Peanut Butter Oat Cups?
Definitely! If you’re concerned about allergies, be cautious with peanut butter; opt for almond or sunflower butter for nut-free alternatives. Also, check the sweetener you choose, as honey is not vegan. Agave syrup makes an excellent substitute. Always be sure to read labels if anyone has food sensitivities.
No-Bake Peanut Butter Oat Cups for Quick, Guilt-Free Snacking
Ingredients
Equipment
Method
- In a large mixing bowl, combine rolled oats and natural peanut butter. Stir well until the oats are thoroughly coated.
- Gradually drizzle in honey or maple syrup, continuing to mix until the mixture is thick and sticky.
- Mix in vanilla extract and a pinch of salt, stirring gently for even distribution of flavor.
- Line muffin tins or silicone molds with parchment paper and press the mixture into each mold.
- If desired, sprinkle chocolate chips on top before refrigerating.
- Refrigerate the cups for at least 30 minutes to firm up.
- Remove the cups from the molds and enjoy or store them in an airtight container.
Leave a Reply