
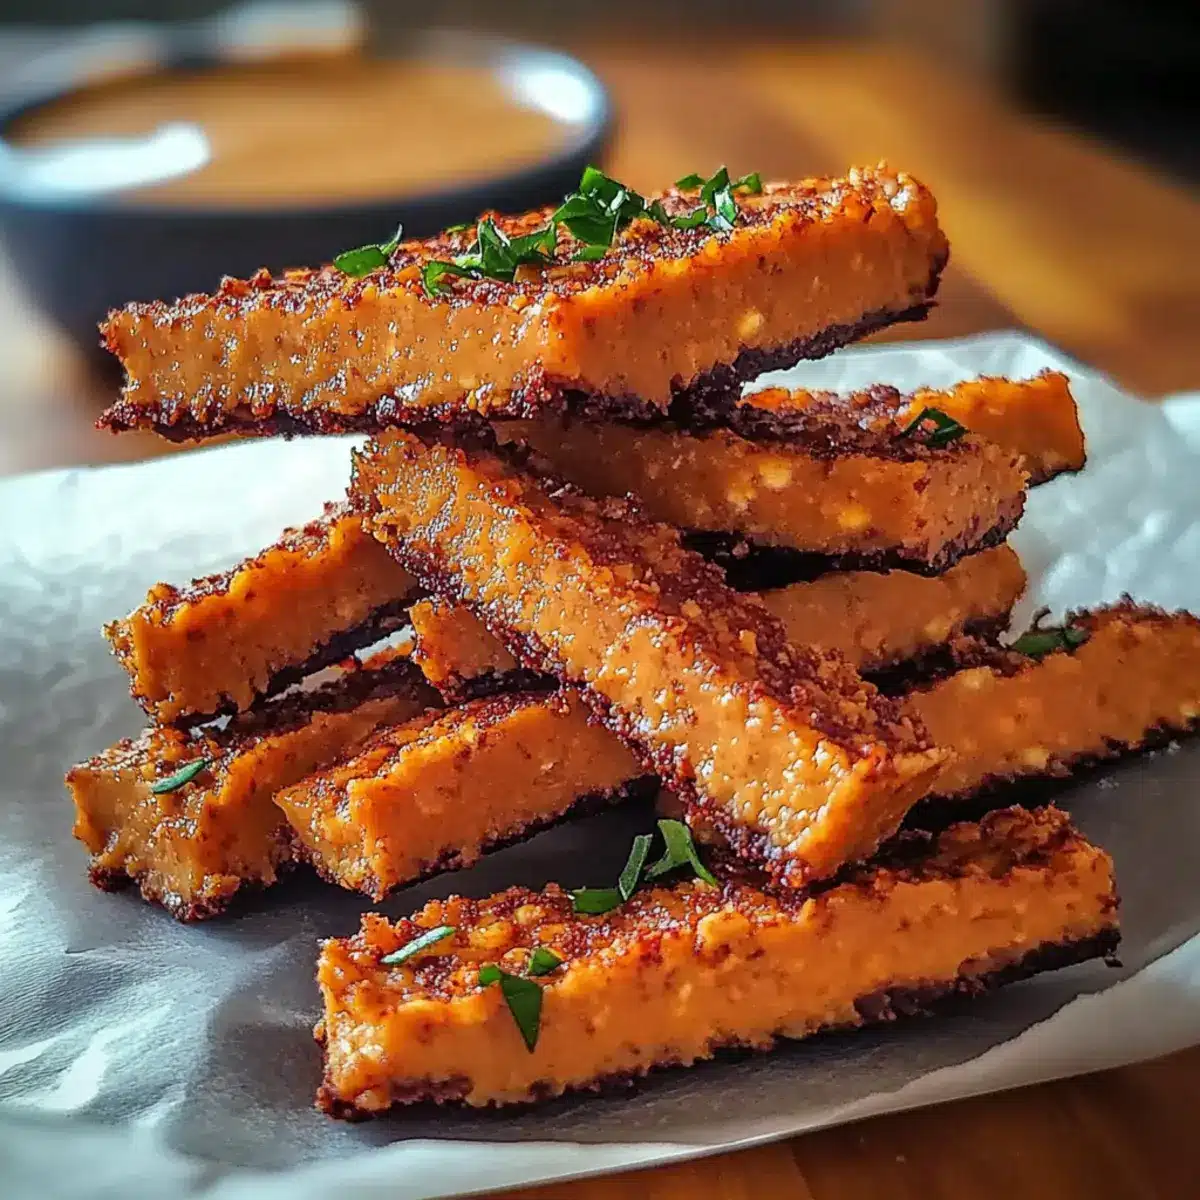
The kitchen was echoing with laughter as I shared my latest snack discovery—No-Bake Chocolate Peanut Butter Oat Bars. Picture a treat that not only satisfies your sweet tooth but is also a breeze to prepare. These bars combine the rich goodness of chocolate with creamy peanut butter, creating a chewy snack that feels indulgent yet is packed with wholesome ingredients. The best part? They need no baking, making them an ideal choice for those of us who want a quick, healthy boost without turning on the oven. Whether you’re prepping for a busy week ahead or craving a guilt-free treat, these bars are here to save the day. Curious about how to whip up this delightful snack? Let’s dive in!
Why Are These Bars a Must-Try?
Quick and Easy: These no-bake bars come together in minutes, making them perfect for busy days when you need a healthy snack in a pinch.
Deliciously Versatile: Feel free to switch up the nut butter with options like almond or cashew butter, or sweeten them with honey or maple syrup—ideal for catering to your taste!
Family-Friendly: Kids love the chocolatey goodness, and you can feel great about giving them a nutritious treat packed with protein and fiber.
Guilt-Free Indulgence: With wholesome ingredients, these bars are a tasty way to satisfy your sweet cravings without derailing your health goals.
Perfect for Meal Prep: Make a batch over the weekend, and you’ll have a week’s worth of snacks ready to grab, similar to how you might prepare Korean Potato Cheese Pancakes for easy lunches!
Whip them up and watch your family fall in love with these bars; they’re truly the perfect balance of flavor and health!
No-Bake Chocolate Peanut Butter Oat Bar Ingredients
• These ingredients blend together to create the ultimate no-bake snack!
For the Base
- Rolled Oats – They form the chewy yet sturdy base; opt for gluten-free oats if needed.
- Peanut Butter – Adds that creamy richness; almond butter can replace it for a nut-free twist.
For Sweetness
- Honey or Maple Syrup – Natural sweeteners that hold everything together; choose maple syrup for a vegan-friendly option.
For Chocolate Flavor
- Cocoa Powder – Delivers a luscious chocolate taste; unsweetened cocoa provides a less sugary alternative.
- Chocolate Chips – Sprinkle in some extra chocolate joy; dark chocolate adds a deeper flavor, or go dairy-free for vegan bars.
With this lineup, you are just moments away from enjoying delightful no-bake chocolate peanut butter oat bars that will wow your taste buds!
Step‑by‑Step Instructions for No-Bake Chocolate Peanut Butter Oat Bars
Step 1: Mix Dry Ingredients
In a large mixing bowl, combine 2 cups of rolled oats, ½ cup of unsweetened cocoa powder, and ½ cup of chocolate chips. Stir the dry ingredients thoroughly until evenly distributed, ensuring the cocoa powder is well incorporated. This mixture will form the deliciously hearty base of your No-Bake Chocolate Peanut Butter Oat Bars.
Step 2: Heat Wet Ingredients
In a small saucepan over low heat, combine 1 cup of peanut butter and ½ cup of honey or maple syrup. Stir continuously for about 2-3 minutes until the mixture is smooth and well combined, making sure not to let it boil. The warmth will blend the flavors beautifully and make it easier to mix into the oats.
Step 3: Combine Mixtures
Pour the warm peanut butter mixture over the dry oat mixture in your large bowl. Using a spatula, stir thoroughly until all the oats are evenly coated and the mixture becomes thick and sticky. This ensures that every bite of your No-Bake Chocolate Peanut Butter Oat Bars is packed with flavor and goodness.
Step 4: Press into Dish
Line an 8×8-inch baking dish with parchment paper for easy removal. Transfer the combined mixture into the dish and use your hands to firmly press it down into an even layer, ensuring it’s tightly packed. This helps the bars hold together well when set and makes for neat, delicious final pieces.
Step 5: Refrigerate to Set
Place the baking dish in the refrigerator and chill for at least 1 hour, or until the mixture is firm. Check after the first hour; if still soft, let it cool for an additional 30 minutes. This refrigeration time is crucial for achieving that perfect chewy texture in your No-Bake Chocolate Peanut Butter Oat Bars.
Step 6: Cut and Store
Once set, remove the bars from the dish using the parchment paper. Cut them into your desired rectangle or square shapes using a sharp knife. Store the cut bars in an airtight container in the refrigerator for up to a week, or freeze for longer storage; this makes it easy to enjoy a quick and healthy snack anytime!
Variations & Substitutions for No-Bake Chocolate Peanut Butter Oat Bars
Customize your no-bake bars to fit your craving or dietary preferences for a delightful twist!
-
Nut Butter Swap: Use almond or cashew butter instead of peanut butter for a different flavor and added nutrients. This switch offers a unique taste that everyone will love!
-
Sweetener Change: Try swapping honey for maple syrup for a vegan-friendly option without compromising sweetness. The richness of maple syrup adds a lovely depth to the bars.
-
Texture Twist: Incorporate chopped nuts like walnuts or pecans for a satisfying crunch. The added texture elevates these bars, making each bite a delightful surprise.
-
Chocolate Flavor Boost: Experiment by mixing in flavored protein powders, like chocolate or vanilla, for an extra protein kick. This not only enhances the flavor but makes the bars even more nutritious.
-
Fruity Addition: Add dried fruit like cranberries or raisins to the mix for a burst of natural sweetness. This twist brings a lovely contrast to the chocolate and peanut butter.
-
Cocoa Variation: Use carob powder instead of cocoa powder for a unique, earthy flavor. Carob also has natural sweetness, making it a great alternative.
-
Spicy Kick: Mix in a pinch of cayenne pepper or cinnamon for a hint of heat or warmth. It’s a subtle touch that takes your bars to the next level, providing a delightful surprise.
-
Chunky Upgrade: Choose crunchy peanut butter instead of creamy for a fun, chunky texture. The contrast between smooth and crunchy adds an unexpected delight with every bite.
These variations offer an opportunity to make the bars uniquely yours! Whether you’re feeling adventurous or just want to use what you have on hand, these ideas can inspire you. And as you enjoy these healthy treats, don’t forget to try them alongside a rich delight like Cheesecake Stuffed Baked Apples for a balanced dessert experience!
What to Serve with No-Bake Chocolate Peanut Butter Oat Bars
Nothing complements these delightful bars quite like a few extra delicious options that enhance their rich flavors.
-
Crispy Oven Baked Sweet Potato Fries: These fries add a savory touch to your snack routine. Their crispy texture contrasts beautifully with the chewy bars, creating a satisfying combination.
-
Fresh Fruit Salad: A medley of bright seasonal fruits awakens the palate. The refreshing flavors and natural sweetness balance the decadence of the bars.
-
Creamy Yogurt Dip: A dollop of vanilla yogurt offers a cool, creamy element. Pairing it with the bars enhances their textures and adds a tangy contrast that is simply irresistible.
-
Nutty Granola: This crunchy topping can easily elevate your bars. Sprinkling it on top adds a delightful nutty flavor and additional chewiness, making every bite an adventure.
-
Iced Herbal Tea: The refreshing sip of herbal tea pairs perfectly with your sweet snack, cleansing your palate with every delicious mouthful. The mild flavors in tea won’t overpower the chocolatey goodness.
-
Dark Chocolate-Covered Strawberries: For a truly decadent treat, enjoy these alongside the bars. The sweet-tart notes of the strawberries harmonize with the rich chocolate base, delivering a luxurious experience that satisfies all the senses.
Storage Tips for No-Bake Chocolate Peanut Butter Oat Bars
Fridge: Store your no-bake bars in an airtight container in the refrigerator for up to 1 week to maintain freshness and chewy texture.
Freezer: For longer storage, freeze the bars in a single layer, then transfer to a zip-top bag for up to 3 months. Thaw in the fridge before enjoying.
Cutting: When you’re ready to enjoy, cut the bars into squares while they are cold, ensuring neat edges and easy servings.
Reheating: There’s no need to reheat these bars. Enjoy them chilled for a refreshing and satisfying snack experience!
Expert Tips for No-Bake Chocolate Peanut Butter Oat Bars
- Mix Thoroughly: Ensure your peanut butter mixture is fully combined with the dry ingredients to prevent dry spots in your bars. This helps every bite remain delightful.
- Creamy Peanut Butter: For best mixing results, choose creamy peanut butter. It makes mixing easier and contributes to a smoother texture in your no-bake bars.
- Chilling Time: Don’t rush the refrigeration! If your bars aren’t firm after an hour, extend the cooling time for a perfectly chewy result.
- Cutting Technique: Use a sharp knife and cut the bars while they are cold for clean edges. This makes your presentation as beautiful as they are tasty.
- Storage Secrets: Keep your bars fresh by storing them in an airtight container in the fridge. They can last up to a week, perfect for meal prep!
Make Ahead Options
These No-Bake Chocolate Peanut Butter Oat Bars are perfect for meal prep, allowing you to enjoy a healthy snack without the last-minute rush. You can prepare the mixture up to 24 hours in advance by combining the dry ingredients and storing them in an airtight container. For the wet mixture, heat and combine the peanut butter and honey/maple syrup, then refrigerate it separately. When you’re ready to assemble, simply mix the two together and press the mixture into your baking dish. With these make-ahead steps, you’ll have tasty bars waiting for you whenever you need a quick energy boost during busy days!
No-Bake Chocolate Peanut Butter Oat Bars Recipe FAQs
What should I look for when selecting ripe ingredients?
Absolutely! When choosing bananas or any sweet fruits to mix into your no-bake bars, look for fruits that are slightly soft with dark speckles on the skin. This indicates optimal sweetness and ripeness. For nut butter, I recommend selecting natural types without added sugars or oils for a healthier option.
How should I store the No-Bake Chocolate Peanut Butter Oat Bars?
Store your no-bake bars in an airtight container in the refrigerator for up to 1 week. This keeps them fresh and chewy. Be sure to separate the layers with parchment paper to prevent sticking if you are stacking them.
Can I freeze No-Bake Chocolate Peanut Butter Oat Bars?
Yes! To freeze, cut the bars into squares and place them in a single layer on a baking sheet. Once frozen solid—about 1-2 hours—transfer them to a zip-top bag or airtight container. They can be frozen for up to 3 months! Just thaw them in the fridge before enjoying for a quick, healthy snack.
What if my bars are too crumbly or don’t hold together?
Not to worry! If your bars end up crumbly, it usually means the peanut butter mixture wasn’t combined thoroughly with the dry ingredients. To troubleshoot, try adding a bit more peanut butter or honey to the mixture and pressing it back into the dish before refrigerating. Ensure it’s nicely compacted!
Are there any dietary considerations I should keep in mind?
Very important! If you’re catering to allergies, you can use almond or sun butter as nut-free alternatives. Be cautious about gluten—choose gluten-free rolled oats if necessary. Also, make sure your sweeteners are suitable for any dietary restrictions you might have, like opting for maple syrup for a vegan-friendly treat.
How can I customize the flavor of my No-Bake Chocolate Peanut Butter Oat Bars?
The more the merrier when it comes to flavors! Try adding in some cinnamon or vanilla extract to enhance the taste. You can include a variety of mix-ins like chopped nuts, dried fruits, or even flavored protein powder for an extra nutrient boost. Get creative; the sky’s the limit with these bars!
Crispy Oven Baked Sweet Potato Fries That Wow Your Taste Buds
Ingredients
Equipment
Method
- In a large mixing bowl, combine 2 cups of rolled oats, ½ cup of unsweetened cocoa powder, and ½ cup of chocolate chips. Stir the dry ingredients thoroughly until evenly distributed.
- In a small saucepan over low heat, combine 1 cup of peanut butter and ½ cup of honey or maple syrup. Stir continuously for 2-3 minutes until smooth.
- Pour the warm peanut butter mixture over the dry oat mixture and stir until all the oats are coated and the mixture is thick.
- Line an 8x8-inch baking dish with parchment paper and transfer the mixture into the dish, pressing it down firmly into an even layer.
- Place the baking dish in the refrigerator and chill for at least 1 hour until firm.
- Once set, remove the bars from the dish using the parchment paper and cut into rectangular or square shapes.
Leave a Reply