
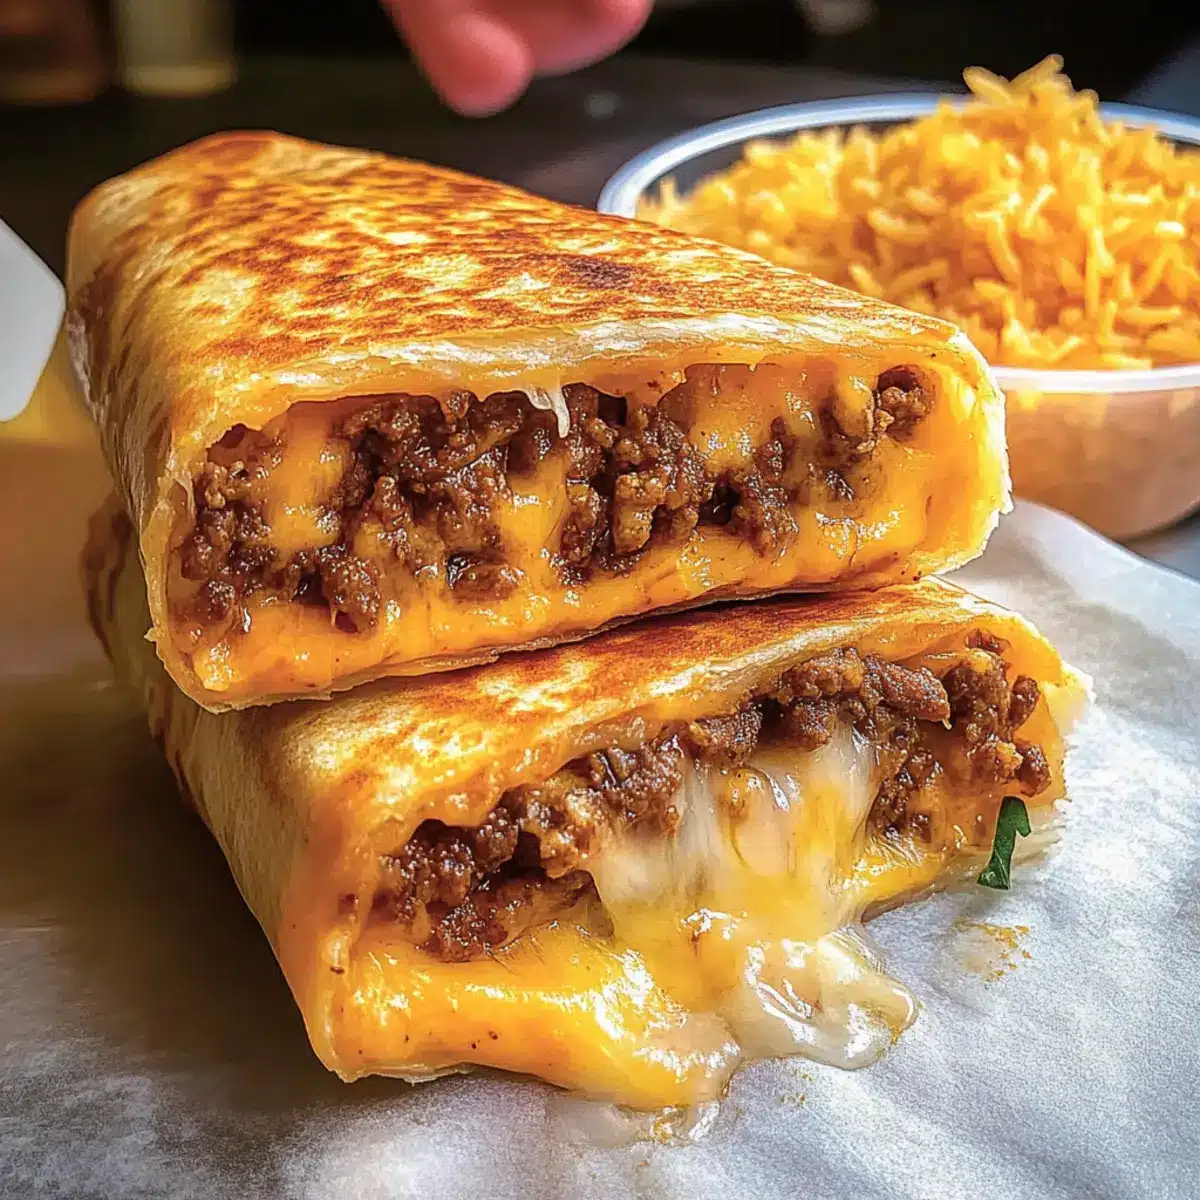
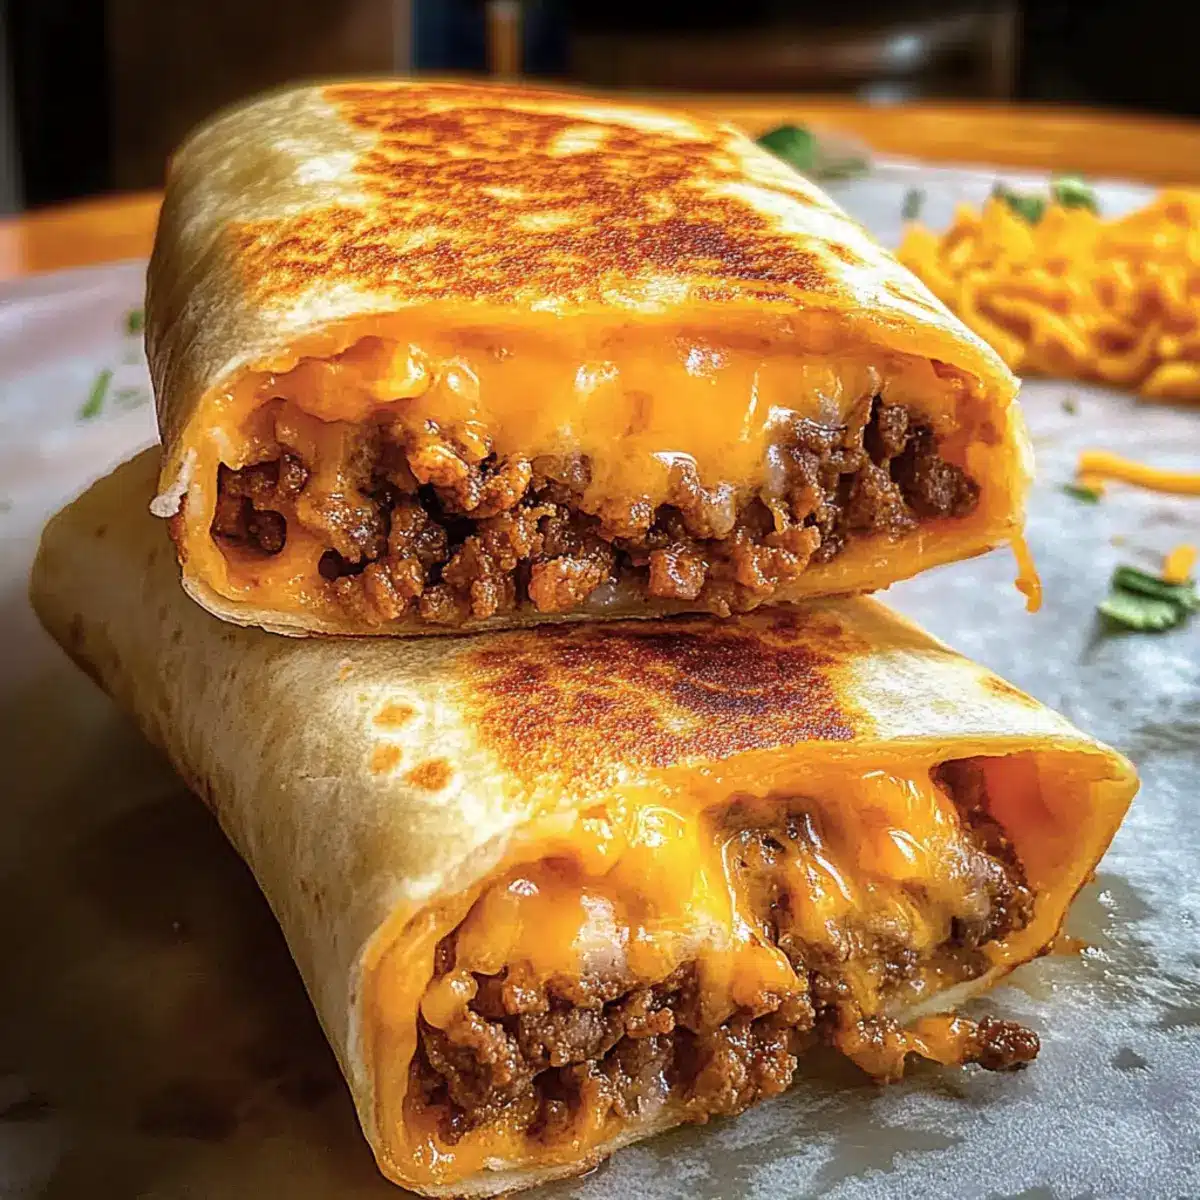
As I sliced into the warm, golden crust of my latest creation, the crispy sound echoed deliciously in the kitchen—this is the moment I live for! Today, I’m excited to share my take on the beloved Grilled Cheese Burrito, a cozy fusion of creamy cheese and spicy Tex-Mex flavors that will bring your fast-food cravings right to your countertop. With just a few ingredients, this customizable recipe is perfect for weeknight dinners or game-day gatherings, ensuring everyone can build their ideal burrito. Whether you stick with classic ground beef or opt for a vegetarian twist, the satisfaction of biting into that crunchy exterior is simply unbeatable. Curious how to master this comforting delight? Let’s roll!
Why is this Burrito a Game Changer?
Comforting flavors: Combining Tex-Mex spices and creamy cheese, this burrito is a comforting delight. Customizable ingredients: Whether you prefer ground beef, chicken, or a vegetarian option, you can adapt this recipe to suit your taste. Simple process: Easy to make, it’s perfect for weeknight dinners when you seek a speedy, satisfying meal. Perfect for sharing: Serve it at gatherings, and watch your guests devour these cheesy burritos with joy! Plus, if you’re in the mood for more cheesy goodness, check out my Grilled Cheese Burrito variation ideas for an exciting twist.
Grilled Cheese Burrito Ingredients
For the Beef Filling
• Ground Beef – The primary protein source; for a lighter option, substitute with ground turkey or a plant-based meat alternative.
• Taco Seasoning – Adds a burst of flavor; making your own allows for more control over spiciness.
• Water – It’s essential for mixing the taco seasoning with the beef; no substitutes needed here.
For the Burrito Assembly
• Nacho Cheese Sauce – Provides that creamy essence; feel free to use any cheese sauce or blend of cheeses you like.
• Cooked Rice – Acts as a satisfying filler; quinoa or cauliflower rice are excellent health-conscious alternatives.
• Tortillas – The cozy wrap; opt for flour tortillas for softness or corn tortillas for a gluten-free option.
• Chipotle Sauce – Infuses a spicy kick; swap with hot sauce or barbecue sauce if desired.
• Sour Cream – Adds a creamy layer; Greek yogurt can lighten it up without sacrificing flavor.
• Tortilla Strips – Offer that nice crunch; they can be omitted or substituted with crushed tortilla chips.
For Grilling
• Shredded Cheese – Essential for achieving a crispy exterior; experiment with different cheese types like pepper jack for an extra zing.
Let’s get cooking and enjoy this delicious Grilled Cheese Burrito together!
Step‑by‑Step Instructions for Grilled Cheese Burrito
Step 1: Cook the Beef
In a large skillet, heat over medium-high heat and add the ground beef. Cook for about 5-7 minutes, breaking the meat into small pieces with a spatula as it browns. The beef should be fully cooked and no longer pink. Once done, drain any excess fat to ensure a hearty, non-greasy flavor for your Grilled Cheese Burrito.
Step 2: Season the Beef
Lower the heat to medium and sprinkle the taco seasoning over the cooked beef, stirring well to coat. Pour in about 1/4 cup of water, mixing thoroughly, and let it simmer for 5 minutes. Cook until the mixture thickens and is fragrant, ensuring that every bite of your filling is bursting with Tex-Mex flavor. Remove from heat and set aside.
Step 3: Assemble the Burrito
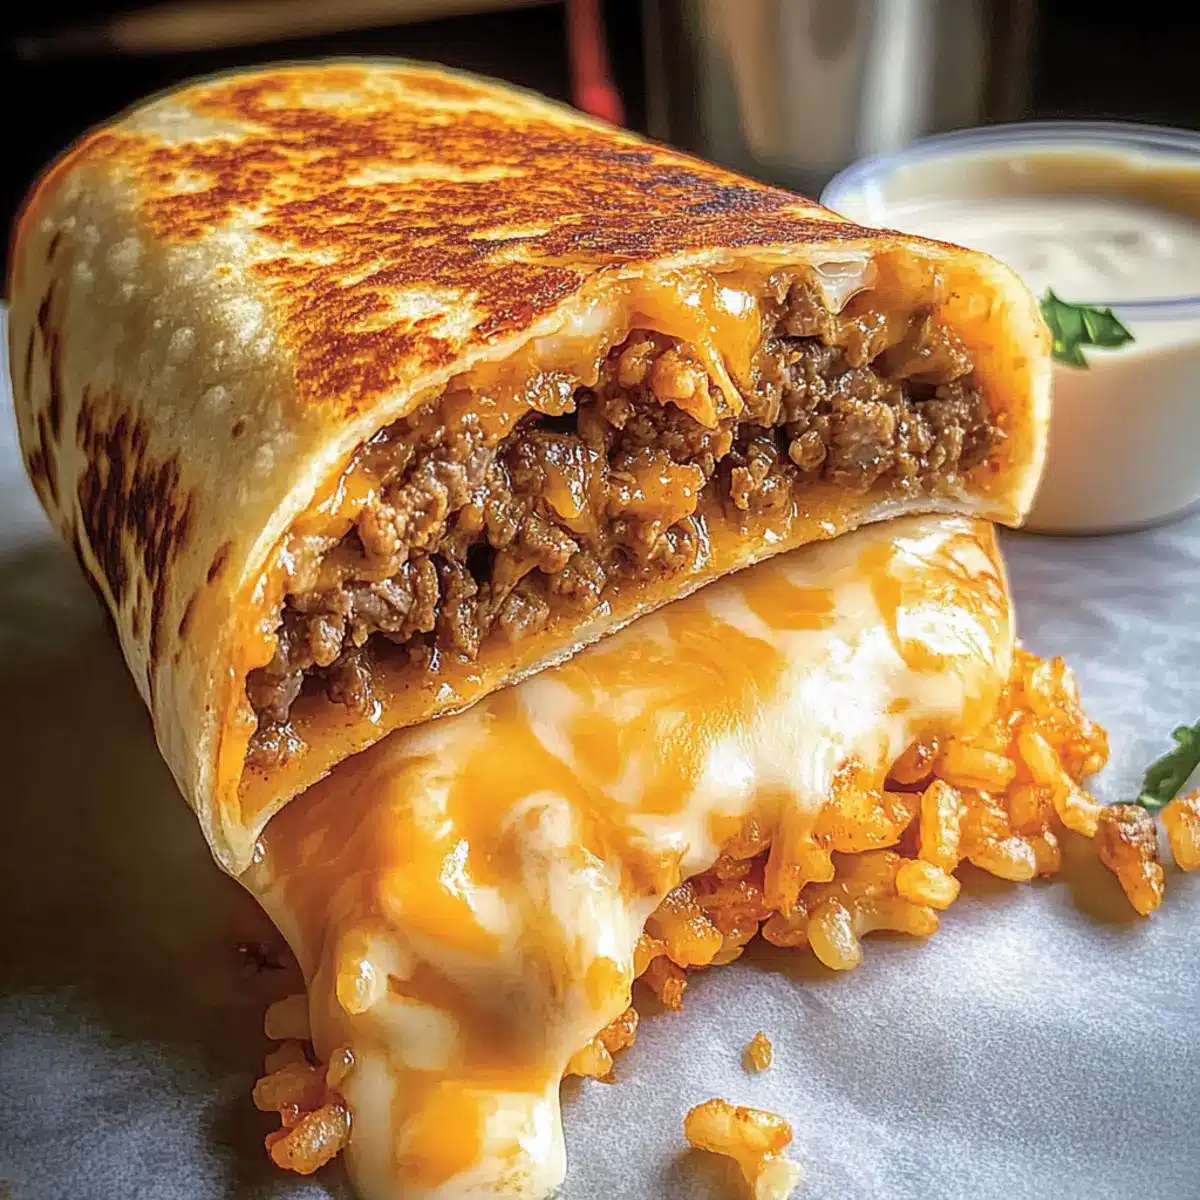
On a clean, flat surface, lay a tortilla down and spread a generous layer of nacho cheese sauce in the center. Layer on the seasoned beef mixture, followed by a scoop of cooked rice, and drizzle with chipotle sauce for that extra kick. Top with a dollop of sour cream and a handful of crunchy tortilla strips, preparing for a delicious Grilled Cheese Burrito feast.
Step 4: Wrap the Burrito
To wrap your burrito, fold the bottom edge of the tortilla up over the filling, tuck in the sides, and roll it tightly away from you. Securely rolling ensures that all the goodness stays inside while grilling. This step is crucial to enjoying every flavorful bite of your Grilled Cheese Burrito without any spills.
Step 5: Grill the Burrito
In a non-stick skillet, place it over medium heat and sprinkle shredded cheese evenly across the bottom. Once melted, place the burrito seam-side down in the skillet. Grill for about 2-3 minutes until the cheese is golden and crispy. Carefully flip the burrito, adding more cheese to the skillet, and grill the other side until it reaches a beautiful golden color.
Step 6: Serve the Burrito
Once the Grilled Cheese Burrito is perfectly crispy and golden on both sides, transfer it to a plate. Cut it in half to reveal the cheesy filling and serve it hot alongside your favorite sides like salsa or guacamole. Every mouthful is packed with deliciousness, making it an irresistible meal choice!

Expert Tips for Grilled Cheese Burrito
-
Meat Quality Matters: Choose lean ground beef to avoid excessive grease. Drain the fat thoroughly for a delicious, non-greasy Grilled Cheese Burrito.
-
Secure Your Roll: Make sure to roll your burrito tightly; this prevents any messy spills during grilling and ensures every bite is packed with flavor.
-
Cheese Choices: Experiment with different cheese varieties, like pepper jack for a spicy twist or sharp cheddar for a classic taste. Just ensure they melt well!
-
Flavor Boosters: Add veggies like bell peppers or onions for extra nutrition and flavor. They enhance both the texture and taste of your Grilled Cheese Burrito.
-
Grilling Technique: Use a non-stick skillet for easy flipping and to achieve that crispy exterior. For added crunch, sprinkle more cheese in the skillet while grilling the burrito!
Grilled Cheese Burrito Variations
Feel free to let your creativity shine as you customize this scrumptious recipe to suit your tastes!
- Vegetarian Delight: Replace ground beef with black beans or lentils for a hearty vegetarian option. This not only adds fiber but also introduces a delicious change in texture.
- Spicy Kick: Swap out the chipotle sauce for your favorite hot sauce to amp up the heat. This will give your burrito an exciting twist and cater to those who relish a fiery bite.
- Cheesy Bliss: Use a blend of cheeses like pepper jack for a spicy flavor profile or a classic mozzarella for a mild taste. The melting qualities of different cheeses can transform the burrito’s essence entirely.
- Quinoa Swap: Instead of rice, use cooked quinoa for a protein-packed filling. Quinoa not only adds nutritional value but also gives an interesting bite to each mouthful.
- Fresh Veggies: Add sautéed bell peppers or onions for extra nutrition and delightful crunch. These ingredients enhance the flavor and create a vibrant color contrast.
- Tortilla Upgrades: Use spinach or whole wheat tortillas for a healthier twist, or even try lettuce wraps for a low-carb option that still delivers on flavor.
- Ultimate Crunch: Substitute tortilla strips with crushed nacho chips for an extra crunch. These little bits elevate the texture and add a delightful salty kick.
- Flavor Fusion: Incorporate a dollop of creamy guacamole instead of sour cream for a rich, flavorful twist. This brings a refreshing element that pairs beautifully with the Tex-Mex flavors.
Don’t forget to check out my delightful Pimento Cheese Hash for a cheesy twist or try some fun with my Blueberry Grilled Cheese recipe for dessert! Remember, the possibilities are endless!
How to Store and Freeze Grilled Cheese Burrito
Fridge: Store leftover Grilled Cheese Burrito in an airtight container for up to 3 days. Reheat in a skillet to restore crispiness and flavor.
Freezer: For longer storage, wrap burritos tightly in plastic wrap and place in a freezer-safe bag. They can last up to 3 months.
Reheating: When ready to enjoy, thaw in the fridge overnight before reheating in a skillet for best results. Avoid microwave reheating to maintain texture.
Wrapping Tips: Ensure burritos are completely cooled before wrapping to prevent sogginess.
Make Ahead Options
These Crispy Grilled Cheese Burritos are perfect for meal prep enthusiasts! You can prepare the filling—cooked beef, taco seasoning, and rice—up to 3 days in advance, storing it in an airtight container in the fridge to maintain freshness. You can also wrap the burritos tightly and refrigerate them for up to 24 hours before grilling. When you’re ready to enjoy your homemade fast food, simply grill each burrito in a skillet until the cheese is golden and crispy; this ensures they taste just as delicious as when freshly made. This way, you’ll have a flavorful, comforting meal ready in no time, perfect for busy weeknights!
What to Serve with Crispy Grilled Cheese Burrito?
Elevate your dining experience with delightful sides and beverages that perfectly complement the irresistible flavors of your homemade creation.
-
Fresh Salsa: The bright, zesty flavors of fresh salsa enhance the cheesy filling, adding a refreshing contrast to every bite.
-
Guacamole: Creamy and rich, guacamole pairs beautifully by providing a silky texture that balances the crispy exterior of your burrito.
-
Mexican Street Corn: Sweet, buttery corn sprinkled with cheese and chili powder adds a fun texture and flavor twist that will excite your palate.
-
Crispy Tortilla Chips: Serve alongside some crunchy tortilla chips dipped in tangy cheese sauce for an extra level of snacking satisfaction.
-
Elote Salad: The creamy and slightly spicy flavors of this corn salad offer a delicious side that brings a touch of summer to your meal.
-
Spicy Pickled Jalapeños: Add a burst of heat with pickled jalapeños on the side, perfect for those who crave a spicy kick for their burrito.
-
Lemonade or Iced Tea: A refreshing lemonade or a glass of sweet iced tea provides a perfect thirst-quencher to balance the rich burrito experience.
-
Churros: For dessert, crispy churros dusted with cinnamon sugar provide a sweet ending that perfectly complements the savory satisfaction of the burrito.
Grilled Cheese Burrito Recipe FAQs
What type of tortillas should I use for the Grilled Cheese Burrito?
You can use flour tortillas for a soft and pliable wrap or opt for corn tortillas if you’re looking for a gluten-free option. Flour tortillas are usually easier to roll, while corn tortillas provide a distinct flavor.
How do I select the right ground beef for my burrito?
Absolutely! When selecting ground beef, go for lean cuts, such as 90% lean or higher, to avoid excess fat. Look for beef that has a bright red color and a fresh smell. If you choose to substitute, ground turkey or plant-based alternatives work wonderfully and still deliver great flavor.
How should I store leftover Grilled Cheese Burritos?
Simply place them in an airtight container in your fridge for up to 3 days. When you’re ready to enjoy, reheat them in a skillet over medium heat to regain that satisfying crispiness. This method ensures that they don’t turn soggy when reheated!
Can I freeze my Grilled Cheese Burritos?
Yes! To freeze, allow the burritos to cool completely before wrapping each one tightly in plastic wrap. Place them in a freezer-safe bag, removing as much air as possible. They can last in the freezer for up to 3 months. When you’re ready to eat, thaw them in the fridge overnight and reheat in a skillet for the best texture.
What if my burrito spills while grilling?
No worries! Ensure you’re rolling your burrito tightly and tucking in the sides. If spillage occurs, simply adjust your rolling technique next time. If the filling starts to leak, you can also add more melted cheese in the skillet as a “glue” to help hold everything together.
Is this recipe suitable for vegetarians?
Definitely! You can easily customize your Grilled Cheese Burrito by swapping out the ground beef for black beans, lentils, or any veggie mixture of your choice. Just make sure to keep the taco seasoning to introduce that iconic Tex-Mex flavor, and you’re good to go!
Crispy Grilled Cheese Burrito: Your New Comfort Food Obsession
Ingredients
Equipment
Method
- In a large skillet, heat over medium-high heat and add the ground beef. Cook for about 5-7 minutes, breaking it into small pieces. Drain excess fat.
- Lower heat to medium, sprinkle taco seasoning over the beef, stir well, add water, mix thoroughly, and let simmer for 5 minutes.
- On a flat surface, lay a tortilla down, spread nacho cheese sauce, layer seasoned beef, add cooked rice, drizzle chipotle sauce, top with sour cream and tortilla strips.
- Fold the bottom edge of the tortilla over the filling, tuck in the sides, and roll tightly.
- In a non-stick skillet, sprinkle shredded cheese and melt, place the burrito seam-side down, grill for 2-3 minutes, flip, and grill the other side.
- Transfer to a plate, cut in half, and serve hot with salsa or guacamole.
Leave a Reply