
As I stood at my kitchen counter, colorful candy melts glistening in the afternoon sun, I couldn’t help but feel a wave of nostalgia wash over me. The excitement of Easter egg hunts mixed with the joy of creating treats came rushing back. That’s the magic behind these No-Bake Easter Egg Oreo Balls—they’re not just delightful bites of chocolate and cream cheese; they’re memories waiting to be made! With a quick prep time and the ability to customize flavors and decorations, these treats are perfect for both the young and the young-at-heart. Plus, they make for a stunning centerpiece on any festive table. So grab your ingredients and get ready to dive into a fun-filled family activity that’s guaranteed to bring smiles all around. What’s your favorite way to make these festive treats uniquely yours?
Why Are These Oreo Balls a Must-Try?
Flavor Explosion: Each bite oozes with the rich, chocolaty delight of Oreo cookies, blended with creamy filling that brings an irresistible taste to your celebrations.
No-Bake Convenience: Say goodbye to complicated baking! This recipe requires minimal effort, making it perfect for those busy days when you crave something sweet without the fuss of an oven.
Customizable Fun: Get creative! You can switch up the Oreo flavors or toppings, ensuring that every batch can be a fun experiment that matches your festive theme or personal taste.
Family-Friendly Activity: Bring the kids into the kitchen! Shaping and decorating these Oreo balls creates cherished memories and a fun bonding experience for the whole family.
Crowd-Pleasing Treat: Wowing your guests is a breeze with these delightful, colorful treats on display; everyone will be reaching for more as they melt in their mouths! For more playful ideas, don’t miss out on making Jack Skellington Oreo or pair them with Crab Cake Egg for a real party platter!
Easter Egg Oreo Balls Ingredients
-
For the Filling
• Oreo Cookies – These provide the rich chocolate flavor; feel free to explore unique flavors for a twist!
• Cream Cheese (8 oz) – Softened for easy mixing, it creates the delightful, creamy base of the filling. -
For the Coating
• Candy Melts (16 oz) – Perfect for a sweet, colorful outer layer that enhances the festive look of your Easter Egg Oreo Balls. -
For Decoration
• Sprinkles/Edible Glitter – Optional but a fun way to dress up your treats, making them visually appealing for Easter celebrations!
Step‑by‑Step Instructions for Easter Egg Oreo Balls
Step 1: Crush Oreos
Begin by crushing your Oreo cookies to create a fine crumb mixture. You can use a food processor for a quick job, or alternatively, place the cookies in a resealable bag and crush them with a rolling pin. Aim for a texture similar to sand, which helps in forming the base for your Easter Egg Oreo Balls.
Step 2: Mix Filling
In a mixing bowl, combine the crushed Oreos with the softened cream cheese, blending until smooth and dough-like. Use a spatula or a hand mixer for thorough mixing, ensuring there are no lumps. This creamy filling will form the delightful center of your Easter Egg Oreo Balls, giving them a rich texture that pairs beautifully with the chocolate coating.
Step 3: Shape Eggs
Once your mixture is ready, scoop out portions and roll them into egg shapes using your hands. Aim for a consistent size, ensuring they fit in a standard bite. Place the formed eggs on a lined baking sheet, making sure to leave some space in between. To firm up the shape, transfer the tray to the freezer for 20 to 30 minutes until the balls are set.
Step 4: Melt Chocolate
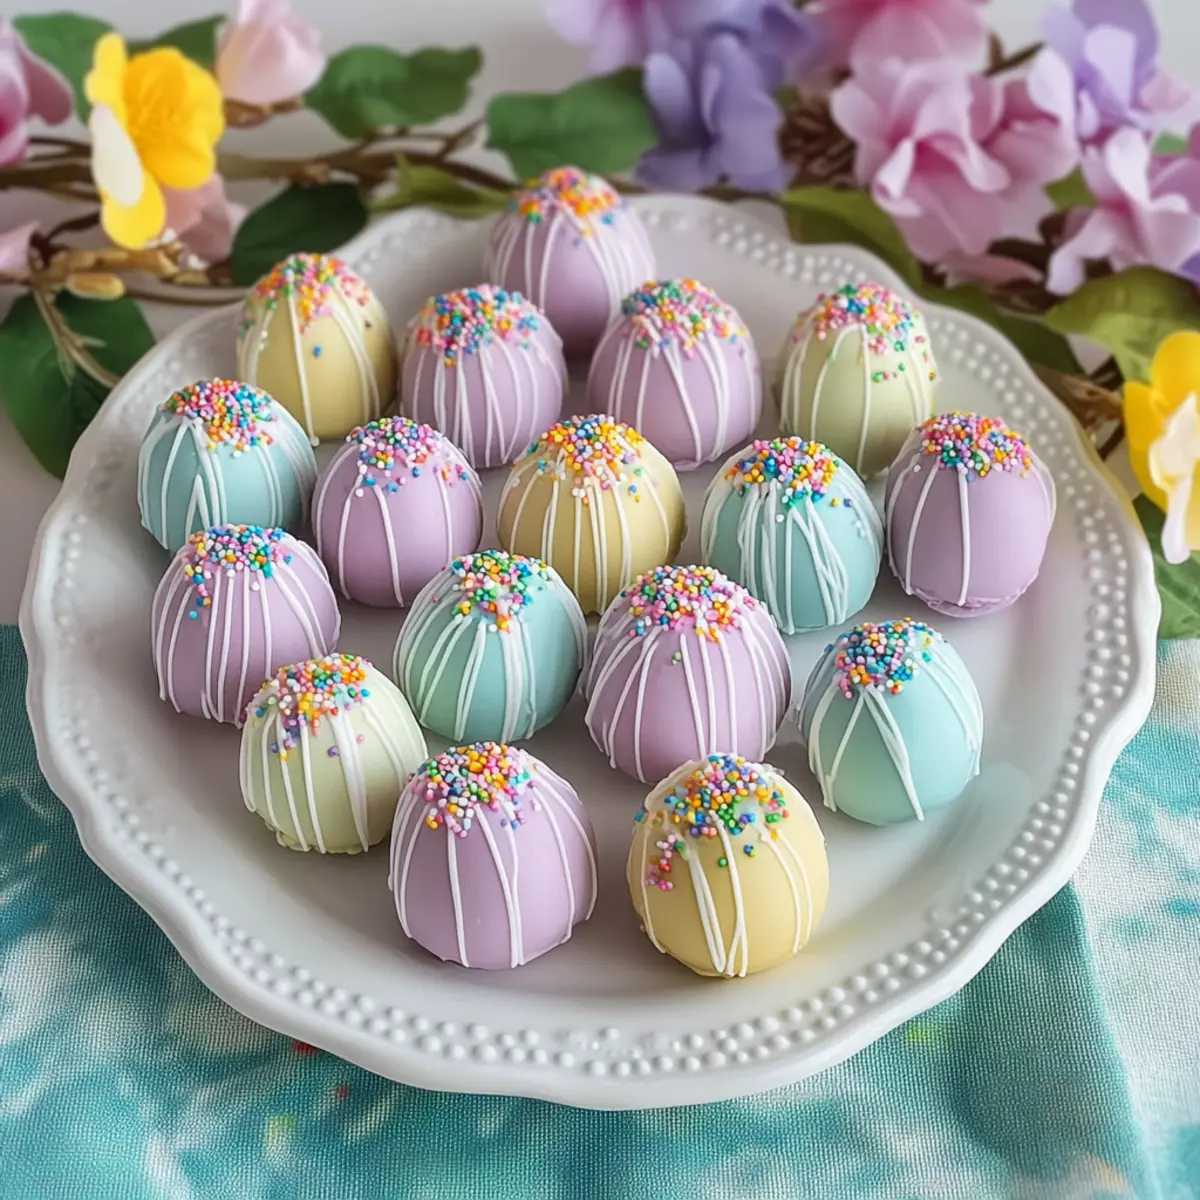
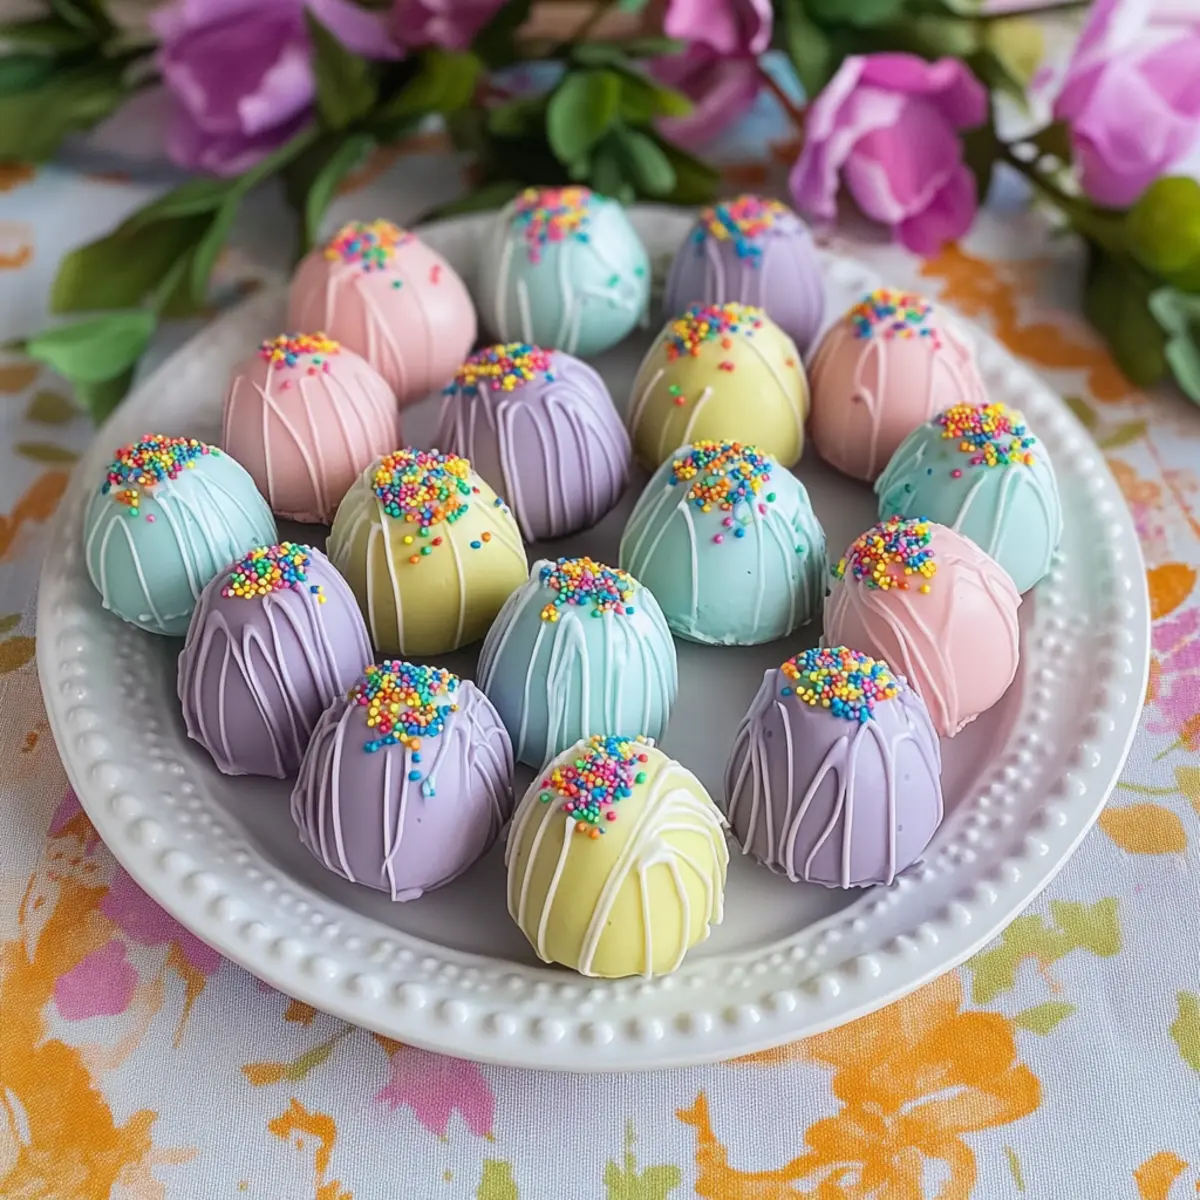
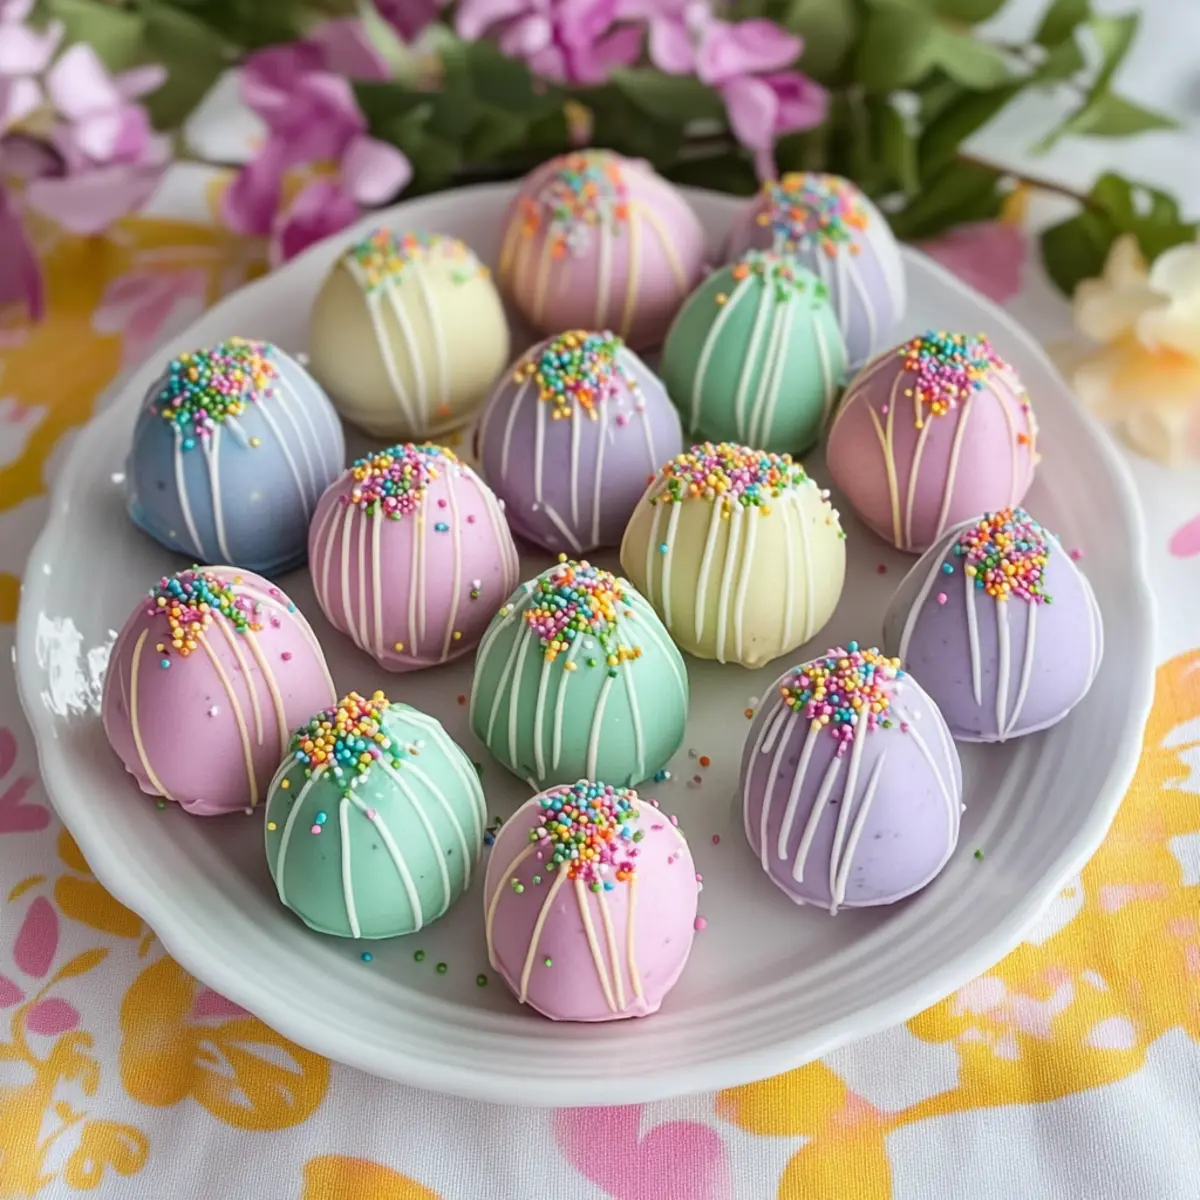
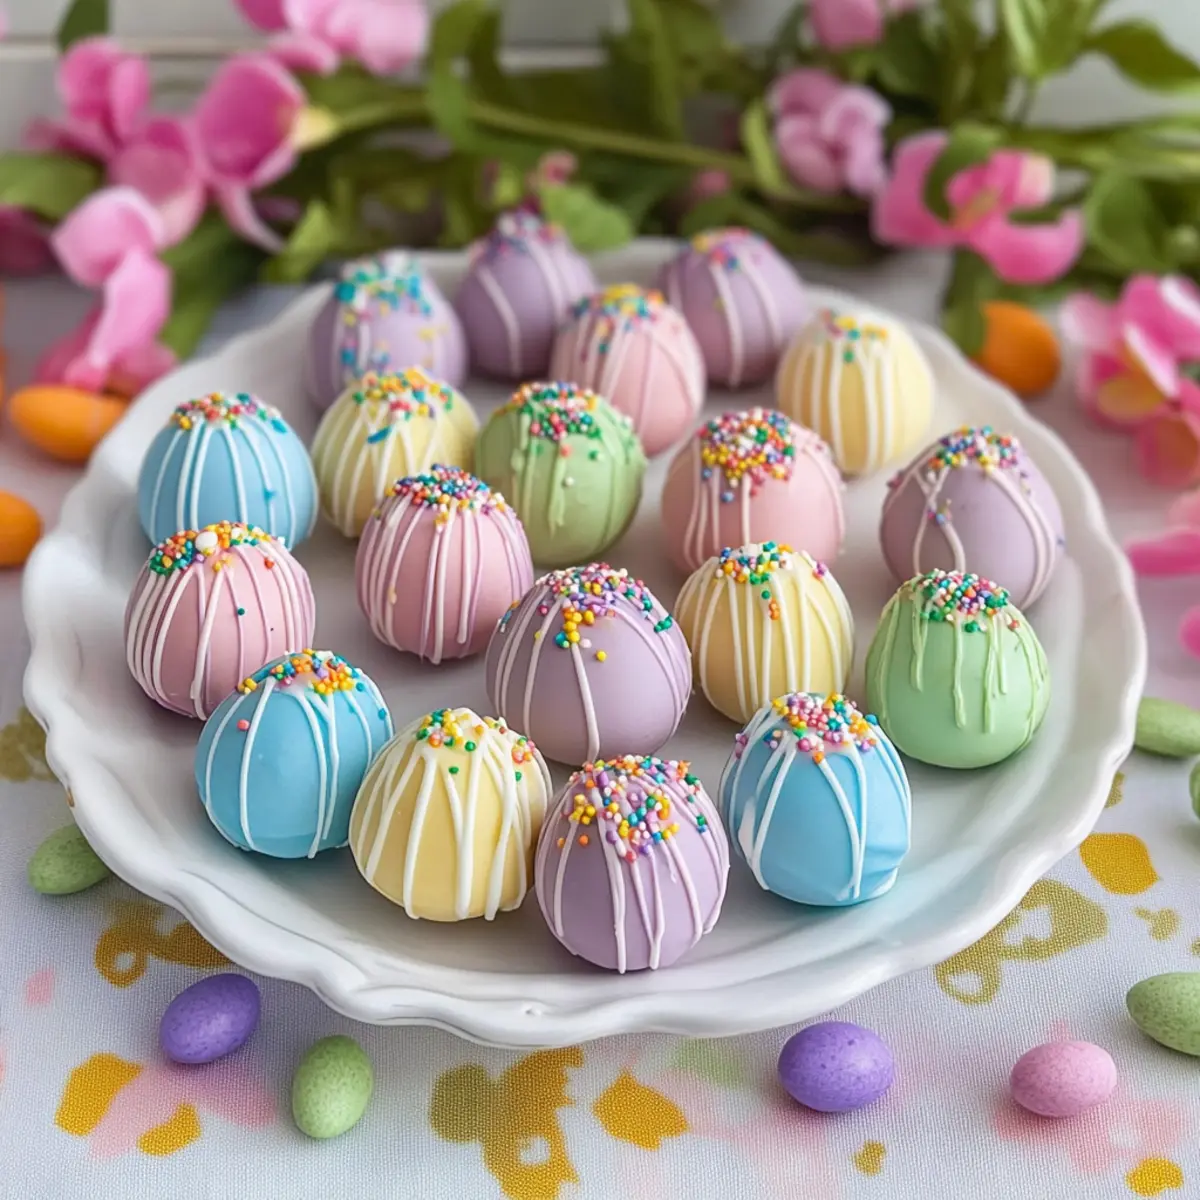
While your Oreo balls are chilling, melt the candy melts in separate bowls according to the package instructions. Use a microwave or a double boiler, stirring until completely smooth. Opt for pastel colors to add a festive touch to your Easter Egg Oreo Balls; the melted chocolate should have a glossy finish, indicating it’s ready for dipping.
Step 5: Dip and Decorate
Carefully dip each chilled Oreo ball into the melted chocolate, ensuring complete coverage. Using a fork or skewer can help minimize mess during this process. Once coated, let any excess chocolate drip off before placing the balls back onto the lined baking sheet. While still wet, get creative! Add sprinkles or drizzle extra chocolate on top for added flair.
Step 6: Set
Allow your beautifully decorated Easter Egg Oreo Balls to set at room temperature or place them in the refrigerator for quicker hardening. Depending on the thickness of your chocolate coating, this should take about 15 to 30 minutes. You’ll know they are ready when the chocolate is firm and has a glossy finish.
Step 7: Serve
Finally, once your Easter Egg Oreo Balls are fully hardened, arrange them neatly on a festive platter. These delightful treats are now ready to impress at your Easter celebration! Enjoy watching friends and family dive into these sweet, colorful bites that blend nostalgia and fun in every delicious mouthful.
Make Ahead Options
Preparing these Easter Egg Oreo Balls in advance can be a real lifesaver for busy cooks! You can shape the Oreo balls and refrigerate them for up to 3 days before coating. Simply follow the first three steps of the recipe, then place the formed eggs on a lined tray and cover them tightly with plastic wrap. When you’re ready to serve, melt the candy melts and dip each egg for that vibrant finish just before your gathering. This method not only saves you time but also ensures your treats are just as delicious and delightful when it’s time to indulge!
What to Serve with Easter Egg Oreo Balls?
Create an unforgettable festive experience with sides and drinks that perfectly complement your sweet treats!
-
Chocolate Dipped Strawberries: The sweetness and tartness of strawberries add a refreshing contrast to the rich Oreo balls, enhancing your dessert spread.
-
Mini Carrot Cake Cupcakes: These airy and spiced cupcakes bring a delightful nod to the season, harmonizing wonderfully with the cookies and cream flavor profile.
-
Vanilla Ice Cream: A scoop of creamy vanilla ice cream offers a cooling balance, turning your dessert moment into a classic indulgence.
-
Fruit Salad: Bright and colorful, a refreshing fruit salad provides a healthy, sweet option that beautifully contrasts the decadence of the Oreo balls, making every bite a joy.
-
Lemonade or Iced Tea: Serve chilled lemonade or sweet iced tea for a vibrant drink pairing that cuts through the richness, invigorating your palate.
-
Easter-themed Cheeseboard: Stack your favorite cheeses, meats, and crackers alongside the Oreo balls for a visually striking and delicious grazing option, perfect for gatherings.
-
Pistachio Macarons: These elegant, nutty treats not only look stunning but provide a crunchy texture and slightly salty flavor that pairs brilliantly with the creamy filling.
-
Chocolate Milkshake: Indulge in a nostalgic chocolate milkshake; its lusciousness complements the Oreo flavors while adding a delightful twist to your table.
Easter Egg Oreo Balls Variations
Feel free to get creative with these delightful treats to make them your own!
-
Flavored Oreos: Substitute regular Oreos with flavors like mint or peanut butter for a unique twist. Each flavor twist brings a fresh taste experience that’s sure to amaze!
-
Chocolate Coating: Use milk or dark chocolate instead of candy melts for a richer flavor. The luscious chocolate enveloping the treats creates a decadent bite.
-
Nutty Crunch: Add crushed nuts, like almonds or walnuts, to the filling for a delightful crunchy texture. This variation enhances each bite with an unexpected twist!
-
Dried Fruit Add-In: Mix in chopped dried fruits such as cranberries or cherries to the filling for a tangy contrast. This adds a touch of sweetness and a chewy surprise in every morsel.
-
Decorative Drizzles: For an artistic flair, drizzle contrasting chocolate colors over the set Oreo balls. This not only enhances presentation but gives a flavor contrast that’s delightful.
-
Spicy Kick: Incorporate a dash of cayenne pepper into the filling for a sweet and spicy surprise! It adds warmth and an exciting dimension to your treats.
-
Festive Sprinkles: Change up the sprinkles based on the occasion—use Halloween-themed sprinkles or Christmas colors for seasonal fun. They make every batch suited for any festive gathering!
-
Serve with a Twist: Pair these Oreo balls alongside Crab Cake Egg for a savory-sweet party platter or serve them next to Wine Braised Meatballs for an interesting flavor contrast.
Let your imagination run wild and enjoy the delicious variations of your Easter Egg Oreo Balls!
How to Store and Freeze Easter Egg Oreo Balls
Fridge: Store your Easter Egg Oreo Balls in an airtight container in the refrigerator for up to one week. This keeps them fresh and ready for snacking!
Freezer: For longer storage, freeze the Oreo balls in a single layer on a baking sheet before transferring to an airtight container. They can last up to three months in the freezer.
Thawing: When ready to enjoy, simply transfer the frozen Oreo balls to the fridge for several hours to thaw before serving, ensuring they maintain their delightful texture.
Reheating: There’s no need to reheat these treats; enjoy them chilled or at room temperature to savor the full flavor of the creamy filling and chocolate coating.
Expert Tips for Making Easter Egg Oreo Balls
-
Crush Well: Ensure Oreos are crushed into fine crumbs to avoid a grainy texture in your filling; this creates a smoother, creamier consistency.
-
Softened Cream Cheese: Allow cream cheese to sit at room temperature for easy blending; this step is crucial for achieving a well-mixed, dough-like filling for your Easter Egg Oreo Balls.
-
Chill Time: Don’t skip the chilling period! Freezing the shaped balls for 20-30 minutes is essential for firming them up and making them easier to dip in chocolate.
-
Dipping Hack: Use a fork or skewer for dipping to minimize mess. This method also allows for even coating and easier handling of the Oreo balls.
-
Creative Decorations: Embrace creativity with your decorations! Experiment with different sprinkles and colors to match your festive theme, making each batch of Easter Egg Oreo Balls uniquely yours.
Easter Egg Oreo Balls Recipe FAQs
How do I choose the right Oreos for my Easter Egg Oreo Balls?
Absolutely! You can use regular Oreos for a classic flavor or get creative with flavored Oreos such as mint or peanut butter for a unique twist. Look for Oreos that are fresh, without broken pieces, to ensure your filling maintains a smooth texture.
What’s the best way to store Easter Egg Oreo Balls?
Store your Easter Egg Oreo Balls in an airtight container in the refrigerator for up to one week. This preserves their freshness and delightful texture. If you want to keep them longer, they can be frozen for up to three months. Just ensure they are spaced out on a baking sheet before transferring them to a container to prevent sticking.
Can I freeze my Easter Egg Oreo Balls?
Yes! To freeze, place the formed Oreo balls in a single layer on a baking sheet after shaping them, then freeze until firm. Once solid, transfer the balls to an airtight container or a freezer bag. They will maintain their deliciousness for up to three months. When you’re ready to enjoy, thaw them in the fridge for a few hours.
What if my chocolate coating isn’t smooth?
Very understandable! If the melted candy melts aren’t smooth, it could be due to overheating or moisture. Make sure to melt the chocolate gradually in a microwave or double boiler, stirring regularly until smooth. If you encounter a grainy texture, try adding a teaspoon of vegetable oil to the melted chocolate for better consistency.
Are there any dietary considerations for making these treats?
Definitely! If you’re catering to specific dietary needs, consider using gluten-free Oreo flavors or dairy-free cream cheese as alternatives. Always ensure to check the packaging for allergens if you’re serving guests with allergies, such as dairy or gluten. These small adjustments can still let everyone enjoy these delightful Easter Egg Oreo Balls!
How can I make these Easter Egg Oreo Balls even more festive?
Get creative with decorations! Use different colored sprinkles or seasonal edible glitter to match your festive theme. You can also drizzle contrasting chocolate colors over the coated balls for a beautiful presentation. Don’t hesitate to involve kids in this part; it’s a fun way to add personal touches!
Easter Egg Oreo Balls: Easy No-Bake Treats for Everyone
Ingredients
Equipment
Method
- Begin by crushing your Oreo cookies to create a fine crumb mixture.
- In a mixing bowl, combine the crushed Oreos with the softened cream cheese, blending until smooth.
- Scoop out portions and roll them into egg shapes using your hands, then chill them to firm up.
- Melt the candy melts according to package instructions until smooth.
- Dip each chilled Oreo ball into the melted chocolate, allowing excess to drip off.
- Let the coated Oreo balls set at room temperature or refrigerate them to harden.
- Arrange the hardened Oreo balls on a platter and serve.
Leave a Reply