
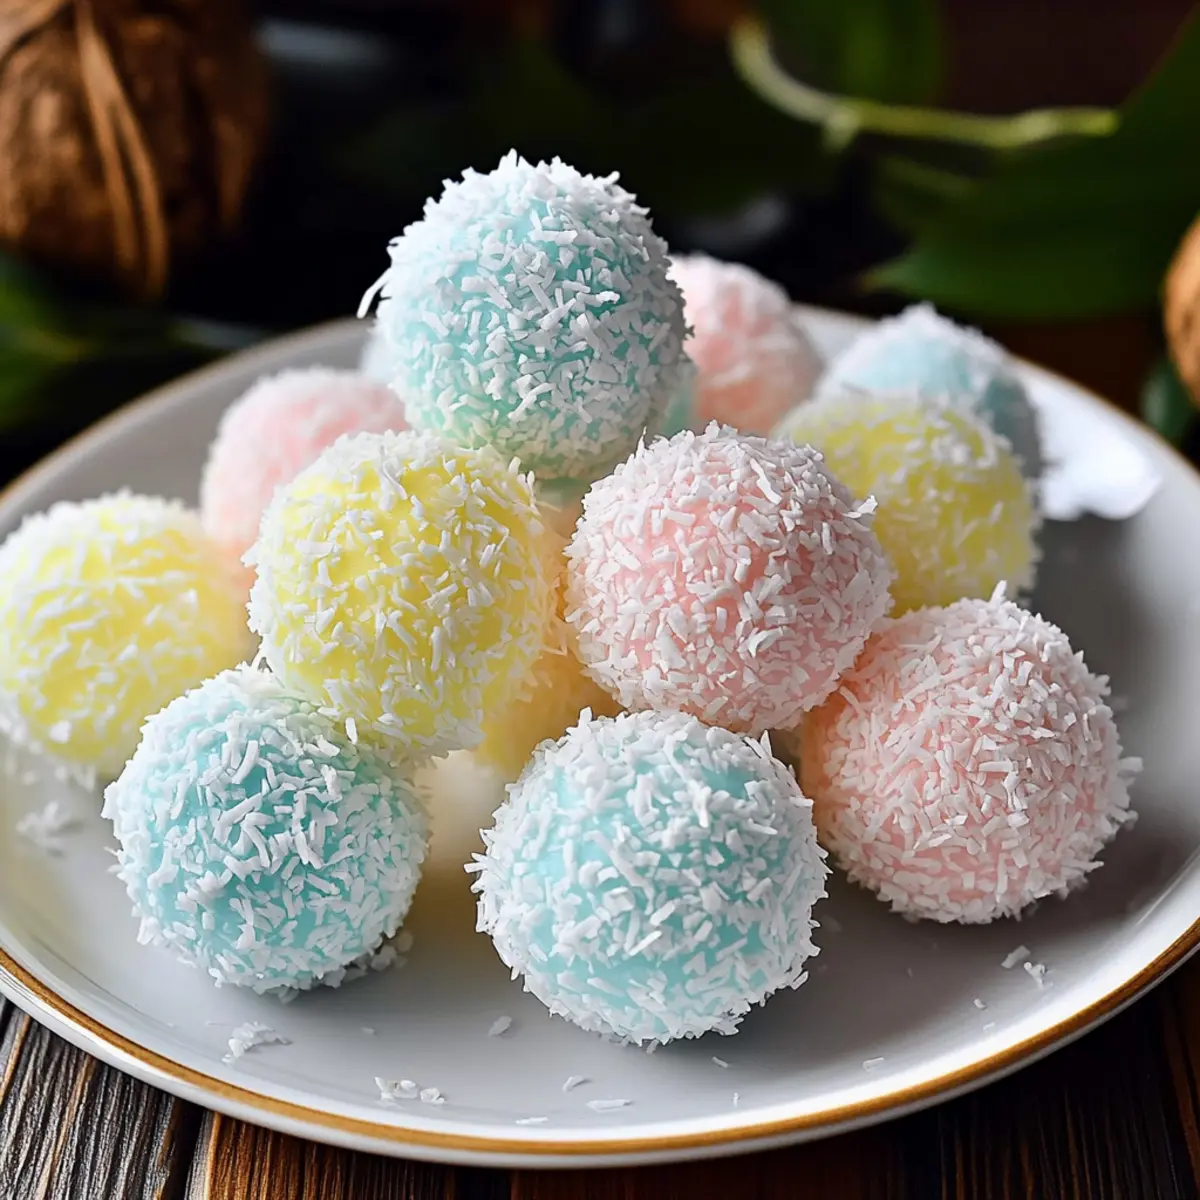
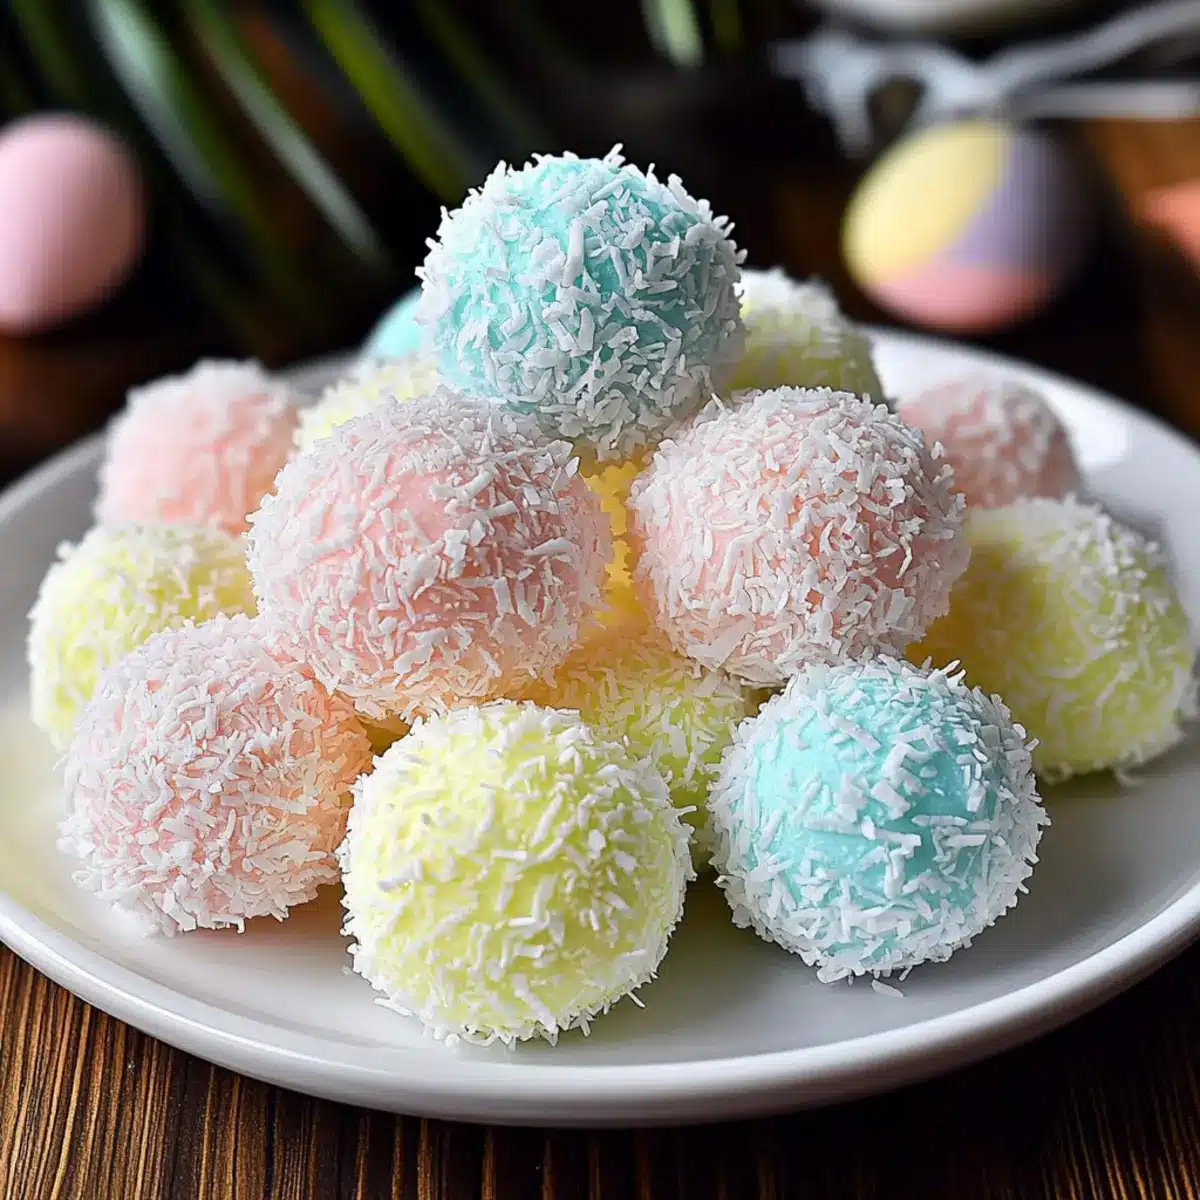
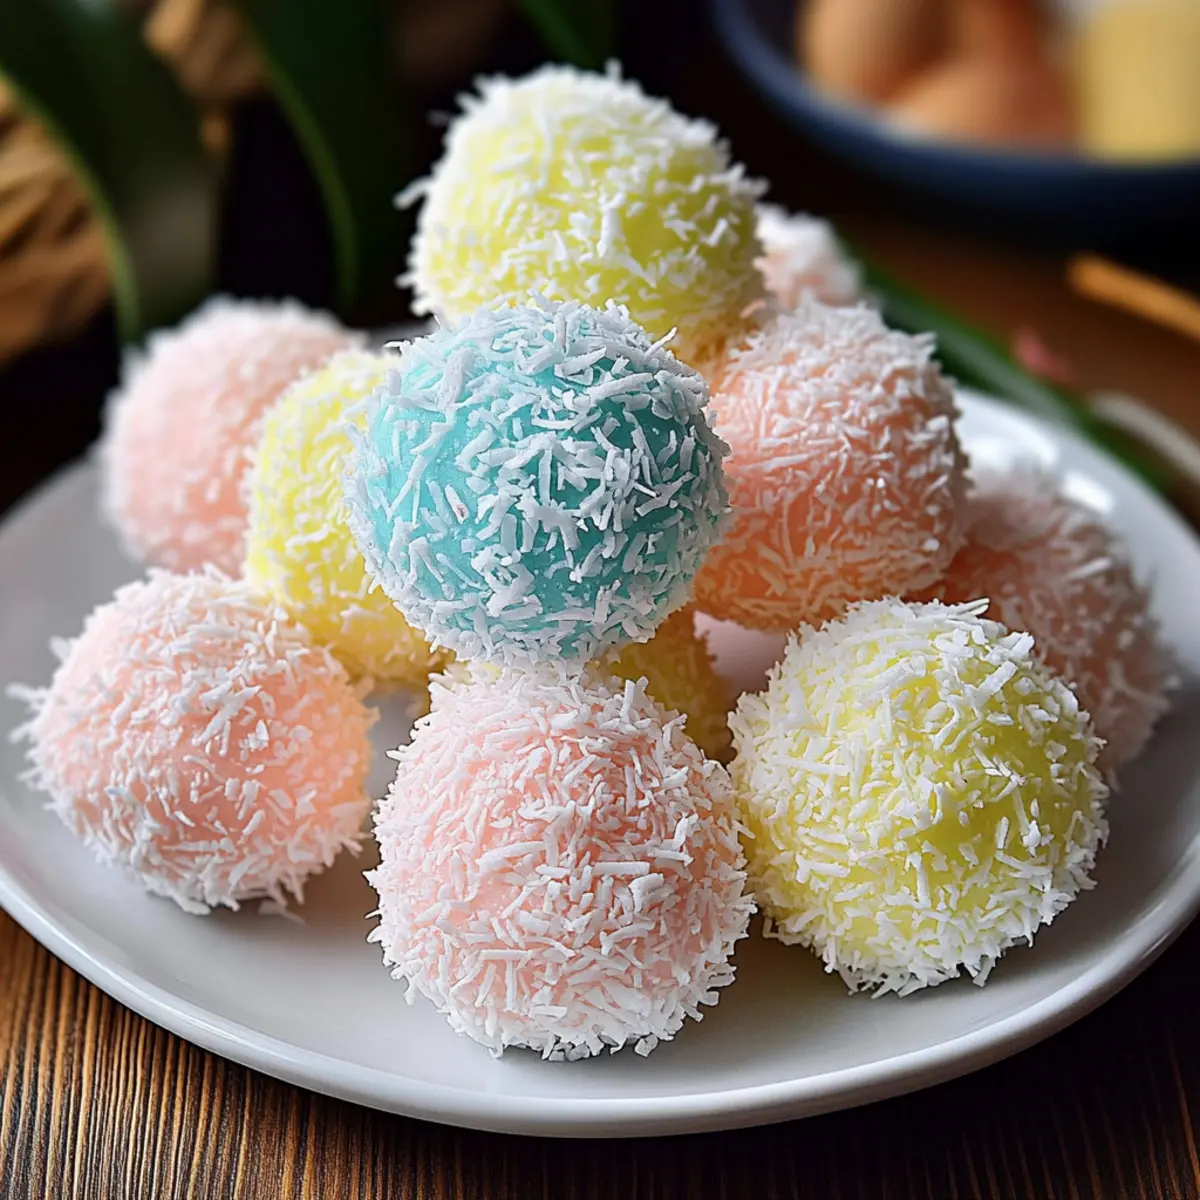
As I sifted through the colors of spring, I stumbled upon a delightful idea for our Easter celebrations. These Easter Bunny Coconut Tails are the perfect no-bake treat; they are not only quick to whip up but also tailor-made for little hands eager to help. With their soft, chewy texture and vibrant pastel coating, these delightful bites are sure to charm everyone at your holiday gathering. Whether you’re a seasoned home chef or just looking to escape the fast-food routine, these customizable and kid-friendly treats will bring joy to your kitchen and smiles all around the table. Plus, if you’re looking for a vegan option, I’ve got you covered! Are you ready to hop into this sweet adventure?
Why Make Easter Bunny Coconut Tails?
Quick and Easy: No baking required! Whip up these delightful treats in no time, making them perfect for busy families looking to brighten up their Easter celebrations.
Kid-Friendly Fun: Great for little hands! Your kids will love helping out by rolling and coating these yummy bites in colorful coconut—an enjoyable activity that fosters creativity.
Customizable Colors: Use your favorite shades! Feel free to experiment with different food colorings to create a stunning rainbow display, making them a standout at any gathering.
Vegan-Friendly Option: Accommodates dietary preferences! With simple swaps like dairy-free condensed milk and butter, everyone can enjoy these goodies without compromise.
Perfect for Any Occasion: Not just for Easter! These treats can easily be adapted for birthdays, holiday parties, or just a fun afternoon snack.
Enjoy making these Easter Bunny Coconut Tails and watch smiles bloom!
Easter Bunny Coconut Tails Ingredients
For the Coconut Mixture
- Medium Shredded Coconut (5 cups) – Provides the main texture and body of the tails; use unsweetened for a less sweet taste or sweetened if desired.
- Sweetened Condensed Milk (14 oz) – Acts as a binding agent for the mixture; can be swapped with a dairy-free alternative for a vegan version.
- Butter (2 tbsp, melted & cooled) – Adds richness and helps in binding; use plant-based butter for a dairy-free option.
- Vanilla Extract (1 tsp) – Enhances flavor; no substitutes needed, but imitation vanilla can be a budget-friendly option.
- Confectioner’s Sugar (¼ cup) – Sweetens and aids in binding; adjust based on desired sweetness.
For the Coating
- Fine Shredded Coconut (2 cups) – Used for coating the tails in vibrant colors; substitute with additional medium coconut if not available.
- Liquid Food Coloring – For tinting coconut for decorative appeal; gel food coloring can be used but may require dilution with water.
Get ready to create these delicious Easter Bunny Coconut Tails and bring a sprinkle of joy to your holiday celebrations!
Step‑by‑Step Instructions for Easter Bunny Coconut Tails
Step 1: Prepare the Coconut Mixture
In a large mixing bowl, combine 14 ounces of sweetened condensed milk, 2 tablespoons of melted and cooled butter, and 1 teaspoon of vanilla extract. Whisk these ingredients together until the mixture is smooth and well-blended. This will take about two minutes. Make sure there are no lumps before proceeding to the next step; this is the base of your Easter Bunny Coconut Tails.
Step 2: Add the Coconut and Sugar
Next, stir in 5 cups of medium shredded coconut and ¼ cup of confectioner’s sugar into the bowl with the wet ingredients. Mix thoroughly until the coconut is evenly coated and the sugar is fully incorporated, creating a sticky, cohesive mixture. Allow this mixture to chill in the refrigerator for 15 minutes, which will make it easier to shape into tails later.
Step 3: Color the Fine Shredded Coconut
While the mixture chills, place 2 cups of fine shredded coconut into separate bowls for coloring. Add 3-4 drops of liquid food coloring to each bowl, depending on the desired tint. Use your hands or a fork to mix it well until the coconut is evenly colored. This vibrant coconut will give your Easter Bunny Coconut Tails a festive, playful look—perfect for any gathering!
Step 4: Form the Coconut Tails
Once the coconut mixture has chilled, remove it from the refrigerator. Scoop out about 1½ teaspoons of the mixture and roll it gently between your palms to form little balls. Each ball should resemble a mini coconut tail. This process should take about 10-15 minutes. Be sure to work quickly so the mixture remains cool and manageable.
Step 5: Coat in Colored Coconut
Next, take each shaped coconut ball and roll it thoroughly in one of the colored coconut bowls, ensuring that the entire surface is covered. The coconut coating will not only add flavor but also make your Easter Bunny Coconut Tails visually stunning. This part is especially fun for the kids, as they can help customize their treats!
Step 6: Chill to Set
Place the coated coconut tails onto a parchment-lined baking sheet, ensuring they are spaced apart to avoid sticking. Refrigerate the tails for at least one hour until they have firmed up. This step is crucial for achieving the perfect texture! After chilling, your Easter Bunny Coconut Tails will be ready to delight everyone at your holiday gathering.
Step 7: Store or Serve
Keep the Easter Bunny Coconut Tails refrigerated until ready to serve. They can be stored in an airtight container and are best enjoyed chilled. If you’re preparing these treats in advance, they can last in the fridge for up to a week, or you can freeze them for up to three months. Enjoy this festive treat with your family and friends!

How to Store and Freeze Easter Bunny Coconut Tails
Fridge: Store the Easter Bunny Coconut Tails in an airtight container in the refrigerator for optimal freshness; they will last up to 1 week.
Freezer: These delightful treats can be frozen for up to 3 months! Ensure they are well-wrapped or placed in a sealed container to prevent freezer burn.
Reheating: If desired, let them sit at room temperature for a few minutes before serving for the best texture. They can also be enjoyed straight from the fridge.
Layering: To prevent sticking, layer the coconut tails with parchment paper when storing, ensuring they stay cute and intact until you’re ready to share!
Easter Bunny Coconut Tails Variations
Customize your delightful Easter Bunny Coconut Tails with any of these fun suggestions to create even more joyful treats!
-
Vegan-Friendly: Swap sweetened condensed milk with a coconut-based dairy-free alternative for a vegan twist. Every friend can enjoy these adorable bites!
-
Flavor Infusions: Add a teaspoon of almond or coconut extract to the mixture for an exciting flavor boost. The tropical notes will make these tails even more irresistible!
-
Nutty Crunch: Fold in ½ cup of finely chopped nuts, like almonds or pistachios, into the coconut mixture for added texture. This little crunch makes each bite even more delightful!
-
Chocolate Drizzle: Melt some dairy-free chocolate and drizzle it over the finished coconut tails before serving. A splash of chocolate elevates the festive flair tremendously!
-
Spicy Kick: For a unique twist, mix a pinch of cayenne pepper into the coconut coating for a surprising heat. Pair this with sweet for a delicious contrast—don’t be afraid to surprise your taste buds!
-
Seasonal Swaps: Use different colors for different occasions. Orange and black for Halloween treats, or red and green for Christmas. The versatility turns these joyful tails into year-round treats!
-
Coconut Flakes Variation: Experiment with toasted coconut flakes for an extra layer of flavor and crunch. The golden-tipped flakes add a beautiful touch—perfect for impressing guests!
-
Curious Bunny Shapes: Instead of traditional tail shapes, mold them into bunny faces or egg shapes using cookie cutters. Creativity brings even more joy to this making experience!
Get ready to create your own amazing Easter Bunny Coconut Tails that will surely make everyone hop with excitement!
Expert Tips for Easter Bunny Coconut Tails
-
Chill for Better Shape: A quick chill in the fridge before shaping the mixture makes it easier to handle and helps the tails maintain their form while rolling.
-
Mix Thoroughly: Ensure the coconut and sugar are completely blended with the wet ingredients for a uniform taste and texture, avoiding dry pockets in your Easter Bunny Coconut Tails.
-
Coloring Caution: When adding food coloring, start with a few drops and mix gradually to avoid overwhelming the coconut; it’s easier to deepen the color than to lighten it!
-
Storage Tips: Layer coconut tails with parchment paper when storing to prevent sticking, ensuring your treats stay fresh and intact until serving time.
-
Make Ahead: Consider preparing these treats a day in advance. They hold up well in the fridge and can even be frozen, making them a convenient option for busy Easter planners!
Make Ahead Options
These delightful Easter Bunny Coconut Tails are perfect for meal prep, allowing you to save valuable time during the hectic holiday season! You can prepare the coconut mixture and scoop it into balls up to 24 hours in advance; simply store them in an airtight container in the refrigerator. To maintain their freshness, it’s best to coat the balls in colored coconut just before serving. If you want to prep even further ahead, you can freeze the shaped tails for up to three months; just be sure to place parchment paper between layers to prevent sticking. When you’re ready to enjoy, simply thaw and coat them in the tinted coconut for a festive, delicious treat that’s just as delightful as when they were freshly made!
What to Serve with Easter Bunny Coconut Tails?
These delightful treats bring a burst of sweetness to your gathering, and pairing them with the right dishes can elevate your celebration to new heights!
-
Fresh Fruit Salad: A refreshing mix of seasonal fruits adds a light, zesty balance to the rich sweetness of the coconut tails. The bright colors will complement your festive theme beautifully!
-
Mini Carrot Cupcakes: These tiny delights echo the spirit of Easter and offer a touch of nostalgia. Their moist texture pairs perfectly with the chewy coconut tails, making a wonderful dessert duo.
-
Chocolate Dipped Strawberries: Juicy strawberries enrobed in chocolate create a luxurious contrast to the chewy texture of the tails, dazzling the palate. The sweetness of the fruit harmonizes beautifully with the desserts!
-
Creamy Vanilla Ice Cream: A scoop of this classic treat provides a cooling relief against the sweetness of the Easter Bunny Coconut Tails. It creates a delightful experience, especially if you sprinkle some colored coconut on top!
-
Lavender Lemonade: This refreshing drink with floral notes adds a sophisticated touch to your celebration. Its tartness beautifully mingles with the sweetness of the tails, making it a perfect match.
-
Nutty Biscotti: The crunchy texture of biscotti introduces a delightful contrast to the soft and chewy coconut tails, providing a delightful end to any meal. Enjoy them with a cup of tea or coffee for a comforting touch.
-
Coconut Milkshake: Coconuts unite! This creamy and dreamy shake echoes the flavors of your Easter Bunny Coconut Tails while offering a cool treat that kids and adults alike will enjoy.
-
Spring Vegetable Platter: Crisp, fresh veggies with a zesty dip can offer a savory counterpoint to the sweet treats. This light addition encourages a balanced spread at your festive table!
-
Carrot Sticks with Hummus: A playful nod to the Easter Bunny theme, this crunchy and nutritious option pairs well with the treats while encouraging kids to enjoy their veggies too!
-
Chocolate Milk: Simple yet effective and loved by all ages! This nostalgic drink complements the sweet nature of your Easter Bunny Coconut Tails in a heartwarming way.
Easter Bunny Coconut Tails Recipe FAQs
What type of coconut should I use for this recipe?
Absolutely! For the Easter Bunny Coconut Tails, medium shredded coconut is essential as it provides the main texture. You can choose between unsweetened for a less sweet flavor or sweetened if you prefer a sweeter treat. If you can’t find fine shredded coconut for coating, you can substitute it with more medium shredded coconut—the texture will slightly differ but will still work beautifully!
How should I store leftover Easter Bunny Coconut Tails?
Very! To maintain their freshness, store the Easter Bunny Coconut Tails in an airtight container in the refrigerator. They will keep well for up to 1 week. Just remember to layer them with parchment paper to prevent sticking—this little tip will ensure your treats stay intact and delicious until you’re ready to enjoy them!
Can I freeze Easter Bunny Coconut Tails?
Yes! You can freeze these delightful treats for up to 3 months. Just make sure they are well-wrapped in plastic wrap or stored in a sealed container. When you’re ready to indulge, simply let them sit at room temperature for a few minutes for the best texture. Enjoy them as a cool, refreshing snack!
What if my coconut tails won’t hold their shape?
It’s essential! If your coconut mixture feels too loose and hard to shape, chill it for an additional 10-15 minutes before rolling. The colder the mixture, the easier it is to form and roll into perfect tails. Be sure to mix the ingredients thoroughly to eliminate any dry pockets as well, which can cause issues during shaping.
Are Easter Bunny Coconut Tails safe for pets or those with allergies?
Very! These treats contain common ingredients like coconut and condensed milk. While they are safe for kids, if you’re considering sharing with pets, it’s best to avoid giving them human treats. Additionally, if anyone has allergies to dairy or gluten, you can easily make the recipe vegan by substituting condensed milk with a dairy-free version and using plant-based butter.
Can I customize the colors of the coconut?
Of course! Feel free to be as creative as you want! Add different food coloring combinations to achieve fun vibrant shades for your coconut coating. Just be cautious and start with a few drops; you can always add more until you reach your desired color. Getting the kids involved in this step makes it fun and engaging!
Enjoy making these Easter Bunny Coconut Tails—sweet fun awaits!
Easter Bunny Coconut Tails: Fun No-Bake Treats for Kids
Ingredients
Equipment
Method
- In a large mixing bowl, combine 14 ounces of sweetened condensed milk, 2 tablespoons of melted and cooled butter, and 1 teaspoon of vanilla extract. Whisk until smooth.
- Stir in 5 cups of medium shredded coconut and ¼ cup of confectioner’s sugar. Mix thoroughly, then chill in the refrigerator for 15 minutes.
- Color 2 cups of fine shredded coconut with 3-4 drops of liquid food coloring in separate bowls.
- Scoop about 1½ teaspoons of chilled mixture, roll it into balls resembling mini coconut tails.
- Roll each coconut ball in colored coconut until covered.
- Place the coated tails on a parchment-lined baking sheet and refrigerate for at least one hour.
- Store in an airtight container in the fridge until ready to serve.
Leave a Reply