
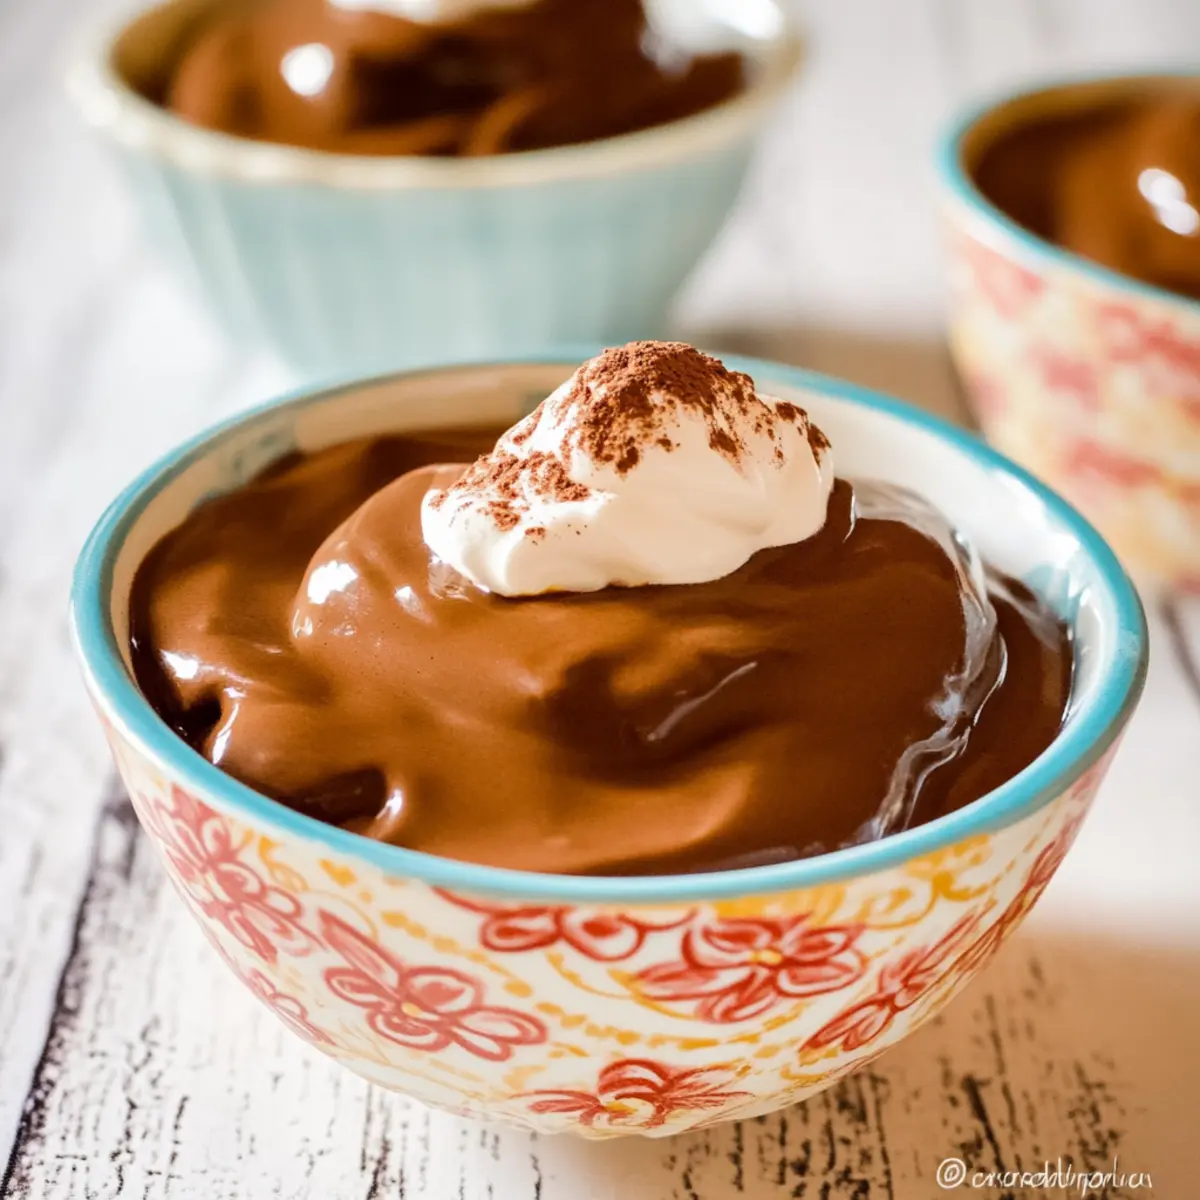
As the sun sets and the world slows down, a familiar craving creeps in—something sweet, yet comforting. That’s when I turn to my go-to recipe for creamy dairy-free chocolate pudding. This indulgent treat not only satisfies a sweet tooth but is also a delight for anyone navigating dietary restrictions, being both gluten-free and egg-free. What I love about this recipe is its simplicity—crafted from pantry staples, it can be whipped up in no time, perfect for those evenings when you want a homemade dessert without the fuss. Plus, it’s a great crowd-pleaser that leaves everyone feeling cared for, especially those with allergies. Are you ready to discover the joy of making your own silky, dreamy pudding?
Why is Dairy-Free Chocolate Pudding a Must-Try?
Simplicity: The process is incredibly easy and requires just a few pantry staples, making it perfect for novice cooks.
Decadent Flavor: Rich cocoa and sweet vanilla create an indulgent balance that rivals any traditional pudding.
Diet-Friendly: This pudding is gluten-free, dairy-free, and egg-free, making it a fantastic option for those with dietary restrictions.
Versatile: Customize your treat by experimenting with different non-dairy milks or flavor extracts—your taste buds will thank you!
Crowd-Pleaser: Whether for a cozy family dinner or a gathering with friends, this pudding is sure to impress everyone, regardless of dietary needs.
Quick Satisfaction: With a total prep and chill time that fits even the busiest evenings, you’ll have a delightful dessert ready without the hassle. Enjoy it as is or try serving it with a dollop of dairy-free whipped cream or fresh berries for an extra touch!
Dairy-Free Chocolate Pudding Ingredients
Perfect for a quick dessert!
For the Pudding Base
- Sugar – Creates sweetness and balances the bitterness of cocoa; can be replaced with stevia or other sweeteners, but results may vary.
- Cornstarch – Acts as a thickener, giving the pudding its creamy texture; rice flour can be used as an alternative thickener.
- Cocoa Powder – Provides the rich chocolate flavor; use unsweetened cocoa powder for best results—no direct substitutes suggested.
- Salt – Enhances flavor; feel free to use sea salt or kosher salt, but avoid table salt for the best taste.
- Almond Milk – Serves as the base liquid, contributing to the pudding’s creaminess without dairy; oat milk can work as an alternative for a different flavor.
- Vanilla Extract – Adds aromatic flavor; for a unique twist, consider using almond extract instead.
Remember, this pudding is a delicious and easy way to enjoy a dairy-free dessert that everyone can savor!
Step‑by‑Step Instructions for Dairy-Free Chocolate Pudding
Step 1: Mix Dry Ingredients
In a medium saucepan, combine sugar, cornstarch, cocoa powder, and salt. Whisk them together until no lumps remain. This step is essential for a smooth texture in your dairy-free chocolate pudding, so take a moment to get it right before moving on.
Step 2: Add Almond Milk
Place the saucepan over medium heat and gradually pour in almond milk. Whisk continuously to incorporate the dry ingredients with the liquid. You’ll notice the mixture starting to combine as it heats up, creating a rich chocolate base that will soon thicken beautifully.
Step 3: Cook the Mixture
Continue to whisk the mixture over medium heat for about 9 minutes. As it heats, it will begin to thicken. After the initial 9 minutes, stir constantly for an additional 2 minutes. The pudding should achieve a velvety consistency that signals it’s almost ready to come off the heat.
Step 4: Add Vanilla and Cool
Once your pudding has thickened to perfection, remove the saucepan from heat. Stir in the vanilla extract thoroughly, infusing the pudding with irresistible flavor. To prevent a skin from forming, quickly pour the pudding into heat-safe bowls and cover each with plastic wrap before letting them cool slightly.
Step 5: Chill & Serve
Refrigerate your dairy-free chocolate pudding for 1-2 hours to allow it to set and develop its rich texture. You can also enjoy it warm if you’re in a hurry! When ready to serve, top with dairy-free whipped cream or fresh berries for a delightful finishing touch that elevates your indulgent treat.
Expert Tips for Dairy-Free Chocolate Pudding
• Whisk Consistently: Keeping a steady whisk during heating helps prevent lumps and ensures a smooth dairy-free chocolate pudding.
• Mind the Heat: Use medium heat to control the cooking process. Too high and your pudding might scorch, too low and it won’t thicken properly.
• Cover Promptly: To avoid a skin forming on the pudding as it cools, cover with plastic wrap right after pouring into bowls. This simple step makes a big difference!
• Taste Test: Before chilling, taste your pudding! Adjust sweetness according to your preference—it’s all about enjoying what you create.
• Storage Reminder: If you have leftovers, store them covered in the fridge for up to 3 days. Give it a good stir before serving again for a delightful treat!
How to Store and Freeze Dairy-Free Chocolate Pudding
Fridge: Store fully cooled pudding in airtight containers for up to 3 days to maintain its creamy texture and flavors.
Room Temperature: Avoid leaving the pudding at room temperature for more than 2 hours to prevent spoilage and ensure it stays fresh.
Freezer: While not recommended for optimal texture, you can freeze leftover dairy-free chocolate pudding in freezer-safe containers for up to 3 months. Thaw in the fridge and stir well.
Reheating: For a warm treat, gently reheat on the stovetop over low heat, stirring constantly, until warmed through. Enjoy the luxurious taste of your dairy-free chocolate pudding!
What to Serve with Dairy-Free Chocolate Pudding
Indulging in a bowl of silky dairy-free chocolate pudding is just the beginning of a delightful dessert experience!
-
Fresh Berries: The tartness of strawberries or raspberries adds a refreshing contrast to the rich pudding, elevating each bite. Try a mix of colors for an eye-catching dessert plate.
-
Coconut Whipped Cream: Light and fluffy, this dairy-free topping enhances the pudding’s decadence while adding a tropical flair that makes every spoonful feel luxurious.
-
Shortbread Cookies: These crisp, buttery delights provide a perfect crunch, balancing the smoothness of the pudding for a delightful texture contrast. Dip them right into the pudding for an extra treat!
-
Chopped Nuts: Toasted almonds or walnuts introduce a delightful crunch and nutty flavor that complements the creamy chocolate. Toss them on top just before serving for added texture.
-
Mint Leaves: Fresh mint not only adds a pop of color but also a refreshing taste that brightens the chocolate. A simple garnish transforms this dessert into an elegant presentation.
-
Coffee or Herbal Tea: Pairing your pudding with a warm cup of coffee or soothing herbal tea enhances the dessert experience, allowing the rich chocolate flavor to shine even more.
Dairy-Free Chocolate Pudding Variations
Customize this delightful pudding to suit your tastes and dietary needs! Each twist promises to deliver the same creamy satisfaction in different ways.
-
Nut-Free: Substitute almond milk with oat milk or coconut milk for a delicious nut-free alternative. Your pudding remains rich and creamy, perfect for those with nut allergies.
-
Sweetener Swap: Replace sugar with maple syrup or agave for a different sweetness experience. Just remember to adjust the cornstarch slightly as needed to maintain thickness!
-
Flavored Extracts: Swap out vanilla extract for peppermint or orange extract to create a seasonal spin. These fresh flavors will elevate your pudding and bring a smile to everyone’s face.
-
Extra Creaminess: For a silkier texture, blend in a bit of canned coconut cream after cooking. This will add indulgent richness that makes every bite heavenly.
-
Spice it Up: Add a pinch of cinnamon or cayenne pepper for a surprising warmth that complements the chocolate beautifully. It’s a simple twist that takes your dessert to the next level!
-
Berry Bliss: Top the chilled pudding with a mix of fresh berries for a pop of color and tartness. Berries not only enhance presentation but add a refreshing contrast that brightens the overall flavor.
-
Choco-Mint Delight: Fold in some crushed mint candies or stir in dairy-free chocolate chips for an extra chocolatey treat. The added texture and flavor makes this version a total indulgence.
-
Chia Seed Boost: Mix in some chia seeds for added nutrition and texture. They’ll add a slight crunch while contributing to the pudding’s thickness, making it even more satisfying!
Feel free to explore these variations! The beauty of homemade desserts is in the creativity, and you may just discover a new favorite version. If you’re looking for more inspiration, consider trying out my guide on how to make unsweetened almond milk or experiment with my delicious dairy-free whipped cream to go alongside your pudding!
Make Ahead Options
These Dairy-Free Chocolate Pudding cups are perfect for busy home cooks looking to save time during the week! You can prepare the pudding mixture up to 24 hours in advance by following all the steps up to pouring it into bowls. Just remember to cover each bowl tightly with plastic wrap to prevent a skin from forming and to keep it fresh. When you’re ready to serve, simply refrigerate the pudding for about 1-2 hours to allow it to set, or enjoy it warm if you can’t resist the temptation! This way, you’ll have a creamy, indulgent dessert ready to delight your family or guests with minimal effort.
Dairy-Free Chocolate Pudding Recipe FAQs
How do I select ripe ingredients for the pudding?
While this recipe mainly uses pantry staples, ensuring the freshness of your almond milk is essential. When selecting almond milk, look for containers that are well before their expiration date and free from any strange off smells. For added flavor, choose unsweetened varieties of almond milk to control the sweetness of your pudding.
How should I store leftover dairy-free chocolate pudding?
To keep your pudding fresh, store it in airtight containers in the refrigerator for up to 3 days. Ensure it’s fully cooled before sealing to prevent moisture buildup. If you notice any moisture accumulation inside the container, consider transferring it to a fresh one, as excess moisture can affect the pudding’s creamy texture.
Can I freeze dairy-free chocolate pudding, and how?
Absolutely! You can freeze your dairy-free chocolate pudding for up to 3 months. Use freezer-safe containers, but remember to leave some space at the top, as the pudding may expand. To thaw, transfer it to the refrigerator overnight, then stir well before serving. While freezing can slightly alter the texture, it remains a delicious treat for later!
What can I do if my pudding turns out too thin?
If your pudding is too thin, you can thicken it by returning it to the stove. Heat it gently over medium-low heat while whisking. In a separate bowl, mix an additional tablespoon of cornstarch with a tablespoon of cold almond milk until smooth, then add this mixture to the heating pudding. Continue whisking until it thickens to your desired consistency.
Are there any allergies I should be aware of with this recipe?
This dairy-free chocolate pudding is naturally free from common allergens like dairy, eggs, and gluten, making it a safe choice for many. However, be cautious of specific nut allergies. If nut allergies are a concern, substitute almond milk with oat milk or other non-dairy alternatives that suit your needs. Always check labels to ensure all ingredients are safe for your dietary requirements.
Can I use sweetened almond milk instead of unsweetened?
While you can use sweetened almond milk, it may affect the final sweetness of your dairy-free chocolate pudding. I recommend adjusting the amount of sugar you add based on your preference. If using sweetened milk, you might want to decrease the added sugar—taste during the cooking process to get it just right!
Decadent Dairy-Free Chocolate Pudding Made Easy
Ingredients
Equipment
Method
- In a medium saucepan, combine sugar, cornstarch, cocoa powder, and salt. Whisk them together until no lumps remain.
- Place the saucepan over medium heat and gradually pour in almond milk. Whisk continuously to incorporate the dry ingredients with the liquid.
- Continue to whisk the mixture over medium heat for about 9 minutes. After the initial 9 minutes, stir constantly for an additional 2 minutes.
- Once your pudding has thickened, remove the saucepan from heat. Stir in the vanilla extract thoroughly.
- Refrigerate your dairy-free chocolate pudding for 1-2 hours to allow it to set.
Leave a Reply