
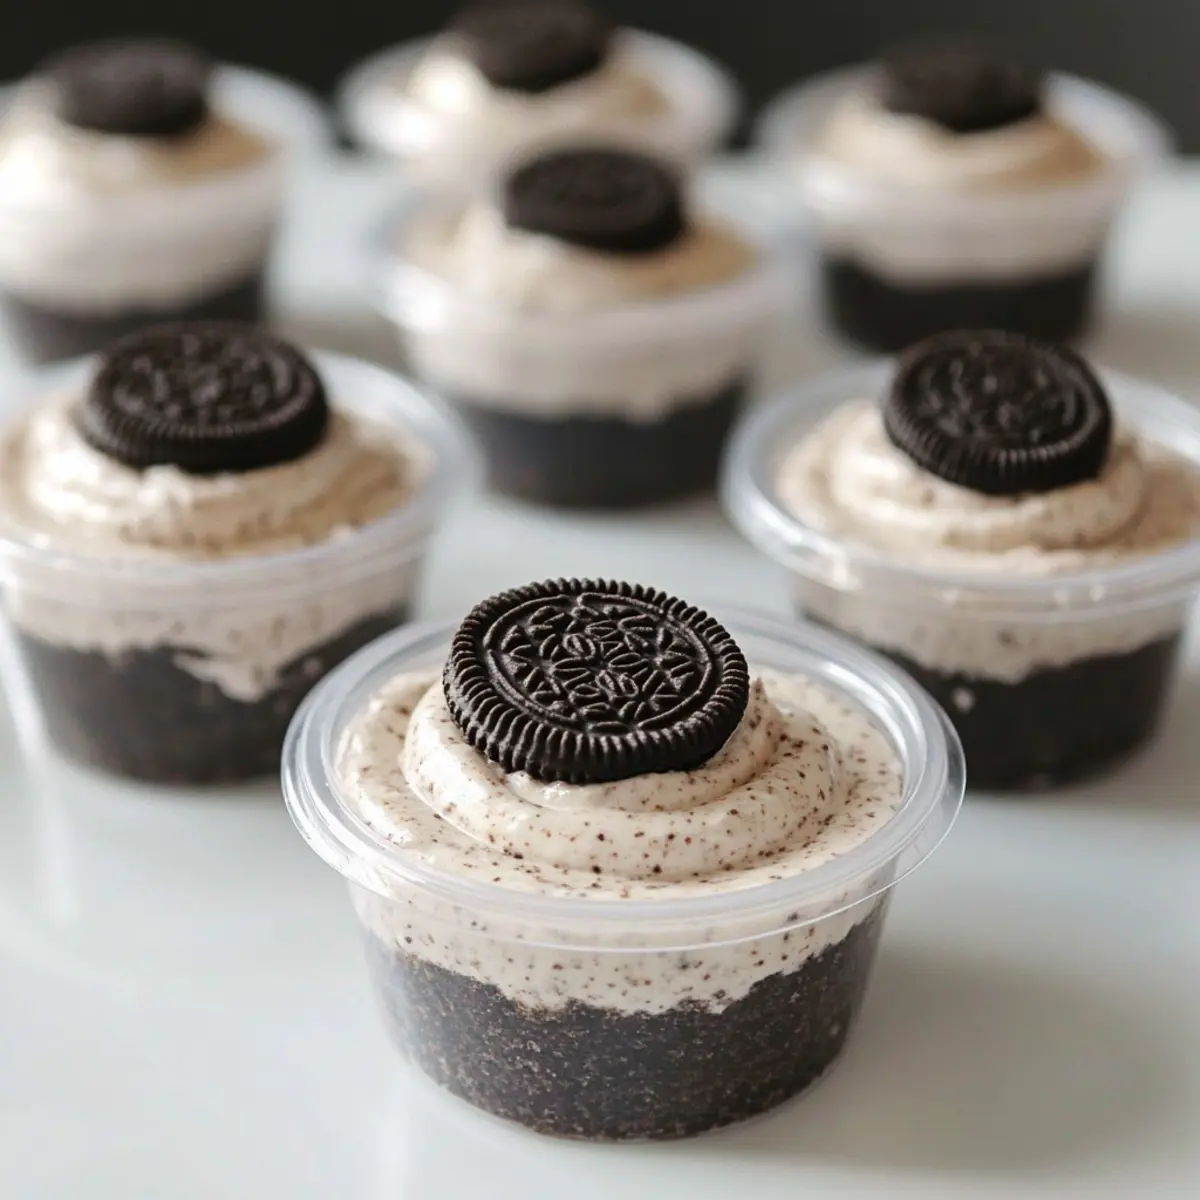
As I stood in my kitchen, the sweet aroma of chocolate wafted through the air, instantly transporting me back to childhood memories of cookies and cream ice cream on hot summer days. These delightful Cookies and Cream Dessert Cups capture that nostalgic essence perfectly, featuring a rich Oreo crust layered with a creamy, dreamy filling. What I love most about this no-bake dessert is how easy it is to prepare—it’s just a matter of mixing, layering, and chilling! Plus, their portable nature makes them an absolute hit at parties, allowing your guests to indulge without the mess. If you’re ready to impress, stick around; you won’t want to miss my secret tips for a stunning presentation!
Why are these dessert cups so delightful?
Simplicity: These delightful Cookies and Cream Dessert Cups require minimal effort, making them an ideal choice for busy home cooks.
Incredible Flavor: The combination of rich Oreo crust and creamy filling delivers a decadent taste that will have your guests coming back for seconds.
No-Bake Wonder: Forget the oven! This no-bake recipe saves you time and energy, perfect for hot days or last-minute gatherings.
Portable Treat: Their cup format makes these desserts easy to serve and enjoy, whether you’re hosting a party or heading to a potluck.
Customizable: Feel free to get creative! Want a twist? Experiment with different flavors, like adding a layer of chocolate ganache or swapping for vanilla wafers.
You’ll love presenting these at your next gathering, similar to how I enjoy serving my Buffalo Chicken Mac for a crowd-pleasing meal. Get ready to wow everyone with their stunning look and irresistible taste!
Cookies and Cream Dessert Cups Ingredients
For the Crust
• Crushed Chocolate Sandwich Cookies – Provides the base crust; using Oreos gives the authentic flavor.
• Butter – Binds the crust together with richness; margarine can be used for a dairy-free option.
For the Filling
• Cream Cheese – Adds creaminess and structure to the filling; Neufchâtel cheese works for a lighter version.
• Granulated Sugar – Sweetens the filling; opt for a sugar alternative for a lower-calorie treat.
• Vanilla Extract – Enhances the flavor of the filling; consider vanilla bean paste for a more intense taste.
• Heavy Cream – Whipped for lightness and volume; whipped coconut cream is perfect for a vegan choice.
• Crushed Chocolate Sandwich Cookies (for filling) – Adds texture and flavor; mini chocolate chips can elevate the crunch.
For the Garnish
• Mini Chocolate Sandwich Cookies – Ideal for topping each dessert cup; feel free to use other mini cookies or chocolates for a variation.
Now that you have all the ingredients lined up, it’s time to explore how to bring these luscious Cookies and Cream Dessert Cups to life! 🥄✨
Step‑by‑Step Instructions for Cookies and Cream Dessert Cups
Step 1: Prepare the Oreo Crust
In a mixing bowl, combine crushed chocolate sandwich cookies with melted butter until evenly mixed. The texture should resemble wet sand, allowing it to hold together. Using a ¼ cup measuring cup, portion the mixture into 28 2-ounce plastic cups. Press the crust mixture firmly into the bottom of each cup with your fingers or the bottom of a small glass.
Step 2: Make the Cream Filling
In a large mixing bowl, beat the softened cream cheese and granulated sugar together with an electric mixer on medium speed until the mixture is smooth and creamy—approximately 2-3 minutes. Scrape down the sides of the bowl to ensure everything is well combined. The filling should be light and fluffy before moving on to the next step.
Step 3: Whip the Heavy Cream
In a separate bowl, pour in the heavy cream and add vanilla extract. Using clean beaters, whip the cream on high speed until medium peaks form, usually about 3-5 minutes. As you whip, watch for the cream to double in volume and maintain a slight peak without being overly stiff. This lightness is key for achieving that airy texture in your Cookies and Cream Dessert Cups.
Step 4: Combine the Mixtures
Gently fold the whipped heavy cream into the cream cheese mixture using a spatula. Start by incorporating about a third of the whipped cream to lighten the mixture, then gradually fold in the remaining cream until fully combined. Be careful not to deflate the whipped cream, as the volume is crucial for the dessert’s fluffy filling.
Step 5: Add Cookie Crunch
Once combined, gently fold in additional crushed chocolate sandwich cookies into the filling mixture for an extra crunch and flavor boost. This addition creates a delightful contrast in texture within your Cookies and Cream Dessert Cups. Ensure the cookies are evenly distributed throughout the filling, making each dessert cup a treat to savor.
Step 6: Fill the Dessert Cups
Using a piping bag or a spoon, carefully fill each cup with the creamy filling until they are about three-quarters full. Ensure the filling is smooth and evenly distributed. The layers should be visible, showcasing the beautiful creamy filling against the dark crust. This step is crucial for achieving that stunning presentation.
Step 7: Garnish with Mini Cookies
To elevate your Cookies and Cream Dessert Cups, top each cup with a mini chocolate sandwich cookie or a sprinkle of extra crushed cookies. This will not only look appetizing but also enhance the flavor profile. The contrasting textures add an appealing touch to these elegant treats.
Step 8: Chill Before Serving
Seal each cup with a lid or plastic wrap, then refrigerate them for 2-3 hours or until the filling is set. This chilling time allows the flavors to meld together beautifully and the filling to firm up, making them easier to serve. For the best experience, serve these delightful Cookies and Cream Dessert Cups chilled.
What to Serve with Cookies and Cream Dessert Cups?
Enhance your gathering with delightful pairings that complement the rich, creamy goodness of these dessert cups.
- Fresh Fruit Skewers: A refreshing mix of strawberries and blueberries brightens the palate between rich bites, providing a textural contrast that’s pleasing.
- Chocolate Dipped Strawberries: These sweet, fruity treats echo the chocolate notes in your dessert cups while offering a beautiful presentation.
- Whipped Cream Topping: A dollop of homemade whipped cream adds extra sweetness and lightness, amplifying the creamy delight of the dessert.
- Decadent Coffee: Pairing these cups with a rich espresso or latte creates a satisfying balance between sweet and bitter flavors, perfect for any occasion.
- Ice Cream Floats: Create some fun by serving root beer or cream soda floats alongside your dessert cups; the fizzy drinks add a playful twist to the meal.
- Nutty Cookies: A side of crunchy nut cookies introduces an additional element of texture that contrasts beautifully with the soft filling.
- Mini Cheesecakes: For an indulgent touch, mini cheesecakes act as a decadent counterpart and invite guests to experience a variety of creamy sweets.
- Chocolate Milk: A childhood favorite, this sweet beverage complements the flavors of the dessert cups while inviting nostalgia and comfort.
- Caramel Sauce Drizzle: Offer a side of warm caramel sauce for drizzling; it adds a luscious, sweet element that elevates each bite even further.
- Sparkling Water: For a refreshing cleanse between bites, provide sparkling water with lemon or lime; its effervescence keeps the palate feeling light and ready for more.
Cookies and Cream Dessert Cups Variations
Feel free to personalize these delightful dessert cups with some fun twists that will awaken your inner chef!
-
Vanilla Wafer Swap: Substitute chocolate sandwich cookies with vanilla wafers and fold in crushed berries for a fresh flair. This adds a delightful fruity burst that contrasts against the creamy filling.
-
Minty Fresh: Incorporate mint extract into the filling for a refreshing peppermint version. It’ll transform these cups into a holiday favorite, bringing back memories of peppermint bark.
-
Crunchy Caramel Layer: Drizzle a layer of caramel sauce over the Oreo crust before adding the filling for a tasty twist. The rich caramel complements the chocolate beautifully, creating a decadent dessert.
-
Dairy-Free Delight: Use coconut cream instead of heavy cream and cashew cream cheese for a luscious vegan version. These swaps will retain that wonderful creaminess while accommodating dietary needs.
-
Nutty Addition: Mix in finely chopped nuts, like pecans or walnuts, for an irresistible crunch. The added texture will surprise and delight your guests, making each bite more satisfying.
-
Chocolate Ganache Topper: Pour a rich chocolate ganache over the filling before chilling for a gourmet touch. This gives a luxurious shine and enhances the dessert’s overall chocolate flavor.
-
Mini Chocolate Chips: Incorporate mini chocolate chips into the filling for added texture and surprise bites of chocolate. They’ll melt in your mouth, elevating the creamy experience.
-
Flavor Infusion: Use flavored whipped cream like almond or hazelnut for a unique twist. These subtle changes can transform the entire dessert experience, making it truly special.
Explore these variations and make your Cookies and Cream Dessert Cups a new family favorite, just like I do with my Cheesy Sour Cream when hosting gatherings! Enjoy the process of creating something deliciously memorable!
Expert Tips for Cookies and Cream Dessert Cups
- Room Temperature Cream Cheese: Allow cream cheese to come to room temperature before mixing for a smoother and well-blended filling.
- Whipping Wisely: Keep an eye on the heavy cream while whipping; stop when medium peaks form to retain a light, airy texture and avoid graininess.
- Serving Suggestion: For a more stunning presentation, serve these Cookies and Cream Dessert Cups in clear glass cups to showcase the layers and textures!
- Keep Fresh: Store leftover dessert cups in the refrigerator to maintain freshness; they’re best enjoyed within 2-3 days.
- Variations Are Fun: Don’t hesitate to get creative! Incorporate flavored extracts or swap chocolate cookies for vanilla wafers to customize your dessert.
Storage Tips for Cookies and Cream Dessert Cups
-
Fridge: Store your Cookies and Cream Dessert Cups in an airtight container or tightly covered with plastic wrap in the refrigerator. They will stay fresh for up to 2-3 days.
-
Make-Ahead: These delicious dessert cups can be prepared a day in advance, saving you time on the day of your event. Just wait to add the cookie garnish until right before serving for optimal texture.
-
Freezer: If you want to keep them longer, these dessert cups can be frozen for up to 2 months. Just be sure to wrap them well to prevent freezer burn and separate layers with parchment paper.
-
Reheating: There’s no need to reheat these dessert cups; simply remove them from the fridge or freezer and serve cold for the best taste and texture experience!
Make Ahead Options
These delightful Cookies and Cream Dessert Cups are perfect for meal prep, allowing you to enjoy a delicious dessert without the last-minute rush! You can prepare the crust and filling up to 24 hours in advance. Simply mix the crushed cookies with butter and press into cups, then make the creamy filling and refrigerate it separately. When you’re ready to serve, fill the cups with the chilled filling and top with mini chocolate sandwich cookies just before serving to maintain that appealing texture. This way, you’ll ensure these decadent treats are as fresh and delightful as ever, freeing up precious time for your busy weeknights!
Cookies and Cream Dessert Cups Recipe FAQs
What type of chocolate sandwich cookies should I use?
Absolutely! Using classic Oreos gives you that authentic flavor. However, feel free to experiment with other chocolate sandwich cookies based on your taste preferences, or even try gluten-free versions if needed.
How long can I store the dessert cups, and what’s the best method?
You can store your Cookies and Cream Dessert Cups in an airtight container or covered tightly with plastic wrap in the refrigerator for up to 2-3 days. If you’re preparing them for an event, make them a day in advance for maximum convenience!
Can I freeze Cookies and Cream Dessert Cups?
Yes! These dessert cups can be frozen for up to 2 months. To do this, wrap each dessert cup tightly in plastic wrap or aluminum foil, and place them in a freezer-safe container. Make sure to separate layers with parchment paper to prevent sticking. When you’re ready to enjoy, just thaw them in the fridge overnight before serving.
What do I do if my whipped cream becomes grainy?
If you accidentally over-whip the heavy cream, it might turn grainy and lose that lovely light texture. If this happens, gently fold in a bit of fresh cream to help lighten it back up, or start again with a new batch. Remember, whip until medium peaks form, and stop there for the best results!
Are these dessert cups suitable for people with allergies?
Always a great question! These Cookies and Cream Dessert Cups do contain dairy (cream cheese and heavy cream) and can be modified for dietary restrictions. For lactose-intolerant or dairy-free options, use dairy-free cream cheese and whipped coconut cream. Always double-check the ingredient labels for potential allergens.
Can I customize the recipe further?
Absolutely! There are endless possibilities for customization. For a festive twist, you might add a sprinkle of crushed peppermint candy or use different flavored extract like hazelnut or almond. Swap in different cookie brands or add fresh fruit layers for a delightful surprise in each cup!
Irresistible Cookies and Cream Dessert Cups You’ll Adore
Ingredients
Equipment
Method
- In a mixing bowl, combine crushed chocolate sandwich cookies with melted butter until evenly mixed. Press firmly into the bottom of 28 2-ounce cups.
- Beat softened cream cheese and granulated sugar until smooth and creamy, about 2-3 minutes. Scrape down the sides.
- Whip heavy cream and vanilla extract on high speed until medium peaks form, about 3-5 minutes.
- Gently fold the whipped cream into the cream cheese mixture until fully combined.
- Fold in additional crushed cookies for extra crunch.
- Using a piping bag or spoon, fill each cup with the creamy filling until three-quarters full.
- Garnish each dessert with mini cookies or extra crushed cookies.
- Seal and refrigerate for 2-3 hours until filling is set.
Leave a Reply