
As I stood in my cozy kitchen, the warm aroma of baked sweet potatoes wafting through the air instantly transported me to my favorite food truck in the city, where crispy oven-baked sweet potato fries were always on my mind. This recipe marries simplicity with deliciousness, proving that homemade can outshine fast food any day. Not only are these fries a healthier alternative over their fried counterparts, but they also offer an irresistible crunch that satisfies those cravings without any guilt. You’ll find them strikingly easy to prepare; in no time, you’ll have a batch ready for dipping or snacking. Curious about how to get that perfect crisp while keeping the interiors tender? Let’s dive into this delightful recipe!
Why Are These Cookies Truly Irresistible?
Easy to Make: This chocolate chip cookie recipe is straightforward, perfect for both novice bakers and experienced chefs alike.
Endless Variations: Whether you need a gluten-free indulgence or a low-sugar treat, this recipe covers all bases, inviting everyone to join in the fun!
Decadent Flavor: With melted chocolate chips and a rich buttery texture, each bite bursts with delightful sweetness that will satisfy any dessert lover.
Perfect for Sharing: Great for family gatherings or late-night cravings, these cookies will be the star of any snack table, just like the irresistible Cheesecake Stuffed Baked Apples.
Customizable: Feel free to swap in your favorite chips or add nuts, making the recipe truly your own. That’s the beauty, just like the Meatball Mashed Potato Bake!
Get ready to impress friends and family with these warm, chewy delights that are sure to have everyone asking for the recipe!
Chocolate Chip Cookie Ingredients
• Essential elements for chewy goodness.
For the Batter
- All-Purpose Flour – Provides structure; swap with a gluten-free blend for those dietary needs.
- Granulated Sugar – Adds sweetness and aids in browning; for low-sugar options, consider reducing or using a sugar substitute.
- Brown Sugar – Imparts moisture and that desired chewy texture; coconut sugar makes a lovely substitution if you’re looking for a healthier alternative.
- Unsalted Butter – Enhances richness and flavor; melted butter creates a gloriously gooey texture. Use vegan butter for a dairy-free spin.
- Eggs – Essential for binding; substitute with flax eggs (1 tbsp flaxseed meal + 2.5 tbsp water = 1 egg) for a vegan delight.
- Vanilla Extract – Elevates flavor; choose pure vanilla for the best taste, steering clear of imitation varieties.
- Baking Soda – Acts as a leavening agent; make sure it’s fresh for optimal rise.
- Salt – Balances flavors; sea salt will enhance the overall taste magnificently.
- Chocolate Chips – The star of the show; dark chocolate chips offer depth, or go for sugar-free chocolate for a healthier bite.
Enjoy creating your own batch of delightful chocolate chip cookies that will have your friends and family reaching for more!
Step‑by‑Step Instructions for Classic Chocolate Chip Cookies – Gluten-Free and Low-Sugar Variations
Step 1: Preheat the Oven
Begin by preheating your oven to 350°F (175°C). This is essential for achieving that perfect, golden-brown exterior on your classic chocolate chip cookies. While the oven warms up, gather your ingredients and prepare your baking sheets by lining them with parchment paper to prevent sticking.
Step 2: Mix Dry Ingredients
In a medium bowl, whisk together 2 cups of all-purpose flour, 1 teaspoon of baking soda, and ½ teaspoon of salt. It’s crucial to ensure these dry ingredients are well combined for even distribution throughout your batter. Set this mixture aside, as it will be added to the wet ingredients later in our chocolate chip cookie adventure.
Step 3: Cream the Butters and Sugars
In a large mixing bowl, cream together ¾ cup of melted unsalted butter, ½ cup of granulated sugar, and ¾ cup of brown sugar using a hand mixer or a sturdy spatula. Beat until the mixture is smooth and creamy, which should take about 2-3 minutes. This step helps to incorporate air and achieve the desired texture for your cookies.
Step 4: Add Eggs and Vanilla
Next, crack in 1 large egg and pour in 1 teaspoon of pure vanilla extract into the butter-sugar mixture. Mix well until everything is fully incorporated, ensuring a rich flavor that will elevate your classic chocolate chip cookies. The mixture should appear smooth and glossy, just like you want them to taste.
Step 5: Combine Wet and Dry Ingredients
Gradually add the flour mixture to the wet ingredients, stirring gently with a spatula or wooden spoon until just combined. Be careful not to overmix; you want those chocolate chip cookies to remain soft and chewy in the center. The dough should be slightly sticky but easy to scoop.
Step 6: Fold in Chocolate Chips
Now, fold in 1 cup of chocolate chips, ensuring they are evenly distributed throughout the dough. This is where your classic chocolate chip cookies really shine, with pockets of gooey chocolate balanced perfectly with the sweet, buttery batter. The goal is to have chocolate chips throughout each delicious bite.
Step 7: Scoop the Dough
Using a cookie scoop or a spoon, drop rounded tablespoons of the dough onto your prepared baking sheets, spacing them about 2 inches apart. This allows the cookies enough room to spread while baking, creating that perfect shape and texture everyone loves. You should see a lovely mound of cookie dough ready to be baked.
Step 8: Bake the Cookies
Bake the cookies in your preheated oven for 10-12 minutes or until the edges are golden brown, and the centers look soft and slightly underbaked. This ensures they remain chewy as they cool. A lovely aroma will fill your kitchen, letting you know that delicious chocolate chip cookies are on their way!
Step 9: Cool and Enjoy
Once baked, remove the cookies from the oven and let them cool on the baking sheet for 5 minutes. Then, carefully transfer them to a wire rack to cool completely. This final cooling step allows the cookies to set while maintaining that irresistible chewiness, making them perfect for sharing—or enjoying all on your own!
Expert Tips for Classic Chocolate Chip Cookies
-
Don’t Overmix: Avoid tough cookies by mixing just until ingredients are combined. Overmixing activates gluten, leading to dense results.
-
Chill the Dough: For chewier cookies, chill the dough for at least 30 minutes. This helps maintain their shape and enhances flavor.
-
Use Fresh Ingredients: Always check expiration dates on baking soda and flour to ensure best results in your cookie texture.
-
Mind the Oven Time: Keep an eye on your cookies in the last couple minutes of baking. They should be golden at the edges and soft in the center for perfect classic chocolate chip cookies.
-
Explore Variations: Feel free to swap chocolate for nuts or dried fruit. This simple adjustment can refresh your classic chocolate chip cookie recipe and cater to different taste preferences!
-
Tweak Sweetness: If going low-sugar, taste the dough before baking. You might find you can reduce sugar even more without sacrificing flavor.
What to Serve with Classic Chocolate Chip Cookies
Indulging in warm chocolate chip cookies is a delightful experience, especially when paired with scrumptious sides that enhance their sweet, buttery goodness.
-
Cold Glass of Milk: A classic pairing, the creamy richness of milk perfectly complements the sweetness of the cookies while making each bite melt in your mouth.
-
Fresh Fruit Salad: The bright, juicy flavors of strawberries, blueberries, and kiwi add a refreshing contrast, balancing the richness of the cookies while offering a healthful touch.
-
Vanilla Ice Cream: A scoop of velvety vanilla ice cream provides the ultimate indulgence, allowing the warm cookie to melt the ice cream into a delightful blend of flavors and textures.
-
Chocolate Dipping Sauce: For the chocolate lovers, serving a warm chocolate dipping sauce can elevate your cookies into a decadent dessert experience, inviting everyone to dive right in.
-
Creamy Hot Chocolate: Cozy up with a comforting cup of hot chocolate, where the warmth and sweetness echo the flavors of the cookies, making this pairing a perfect winter treat.
-
Caramel Sauce Drizzle: A drizzle of homemade caramel creates a rich sweetness that enhances the cookies, adding an exciting flavor twist for those who enjoy a little extra indulgence.
Feel free to mix and match these pairings to create the ultimate dessert experience that will leave your family and friends craving more!
Variations & Substitutions for Chocolate Chip Cookies
Feel free to make these chocolate chip cookies your own with these delightful variations!
- Gluten-Free: Substitute all-purpose flour with a gluten-free flour blend for a deliciously chewy, gluten-free version.
- Low-Sugar: Use a sugar substitute, like erythritol or stevia, to cut back on sweetness without sacrificing flavor. This is a great option for those watching their sugar intake.
- Dairy-Free: Replace unsalted butter with vegan butter or coconut oil to create a dairy-free version everyone can enjoy. The texture remains just as lovely and buttery!
- Nutty Bliss: Add chopped walnuts or pecans for extra texture and a delicious crunch, enhancing the flavor profile while giving that classic cookie some nutty goodness.
- Oatmeal Twist: Incorporate oats (about 1 cup) into the dough for a heartier texture, transforming your classic chocolate chip cookies into a delightful oatmeal variation that’s just bursting with flavor.
- Chocolate Variety: Swap in white chocolate or peanut butter chips instead of semi-sweet chocolate for a fun twist, providing a different flavor experience that’s equally delightful.
- Spicy Kick: Add a pinch of cayenne pepper or cinnamon to the batter for a surprising hint of warmth that mingles beautifully with the sweet chocolate.
- Boozy Treat: For adults, consider a splash of bourbon or rum in the dough to enhance flavors—it adds a lovely depth that’s perfect for festive occasions.
With these variations, you can create endless versions that will keep the cookie jar exciting and your taste buds dancing!
Storage Tips for Chocolate Chip Cookies
Room Temperature: Store baked cookies in an airtight container at room temperature for up to 1 week. This keeps them soft and chewy, ready for snacking any time!
Fridge: If you prefer a firmer texture, store cookies in the fridge for up to 2 weeks. Let them warm up to room temperature before enjoying for the best flavor.
Freezer: For longer storage, freeze chocolate chip cookies by placing them in a freezer-safe bag up to 3 months. Lay parchment between layers to prevent sticking.
Reheating: To enjoy cookies warm, reheat in the microwave for 10-15 seconds or in a toaster oven until just warmed. This brings back that freshly baked taste!
Make Ahead Options
These classic chocolate chip cookies are perfect for busy home cooks who want to save time with meal prep! You can prepare the cookie dough up to 24 hours in advance by chilling it in the refrigerator, which helps enhance the flavors and maintain that chewy texture. Simply mix the dough according to the recipe, scoop it onto a baking sheet, and cover it tightly with plastic wrap. When you’re ready to bake, you can either cook the chilled dough directly or let it sit at room temperature for a few minutes before popping it in the oven for 10-12 minutes, achieving that delicious, warm cookie goodness just as if you baked them fresh!
Chocolate Chip Cookie Recipe FAQs
How do I choose ripe ingredients for my chocolate chip cookies?
Absolutely! The quality of your ingredients matters. For the best taste, your eggs should be fresh, and your butter should be soft but not melted. As for chocolate chips, opt for high-quality brands; the better the chocolate, the better the flavor!
What storage methods can I use for my cookies, and how long do they last?
Great question! Store your chocolate chip cookies in an airtight container at room temperature for up to 1 week. If you want them to last longer, place them in the fridge for up to 2 weeks. This keeps them from drying out while allowing flexibility for your snacking needs!
Can I freeze my chocolate chip cookie dough, and how should I do it?
Certainly! Freezing cookie dough is a fantastic way to have fresh cookies on demand. First, scoop the dough into balls and arrange them on a baking sheet lined with parchment paper. Freeze them for about 1-2 hours until solid. Then, transfer the frozen dough balls to a freezer-safe bag and store for up to 3 months. When you’re ready to bake, there’s no need to thaw—just pop them directly in the oven for a couple more minutes than usual!
What if my cookies turn out too flat or too hard?
Very common troubleshooting! If your cookies are too flat, it might be due to melted butter; ensure it’s just softened, not melted. Also, check your flour measurements—scooping straight from the bag can lead to too little flour in the mix. On the other hand, if they are hard, make sure you don’t overbake them. They should be golden at the edges but soft in the center when you pull them out of the oven.
Can I make these cookies suitable for allergies or special diets?
Absolutely! For a gluten-free version, just swap all-purpose flour with a gluten-free blend, making sure it includes xanthan gum for proper texture. If you’re aiming for a low-sugar option, you can substitute granulated sugar with stevia or monk fruit sweetener—just check the conversion on the packaging for the right amount to use. Also, for a vegan version, replace the eggs with flax eggs (1 tablespoon of flaxseed meal mixed with 2.5 tablespoons of water = 1 egg) and use vegan butter. Enjoy baking without worry!
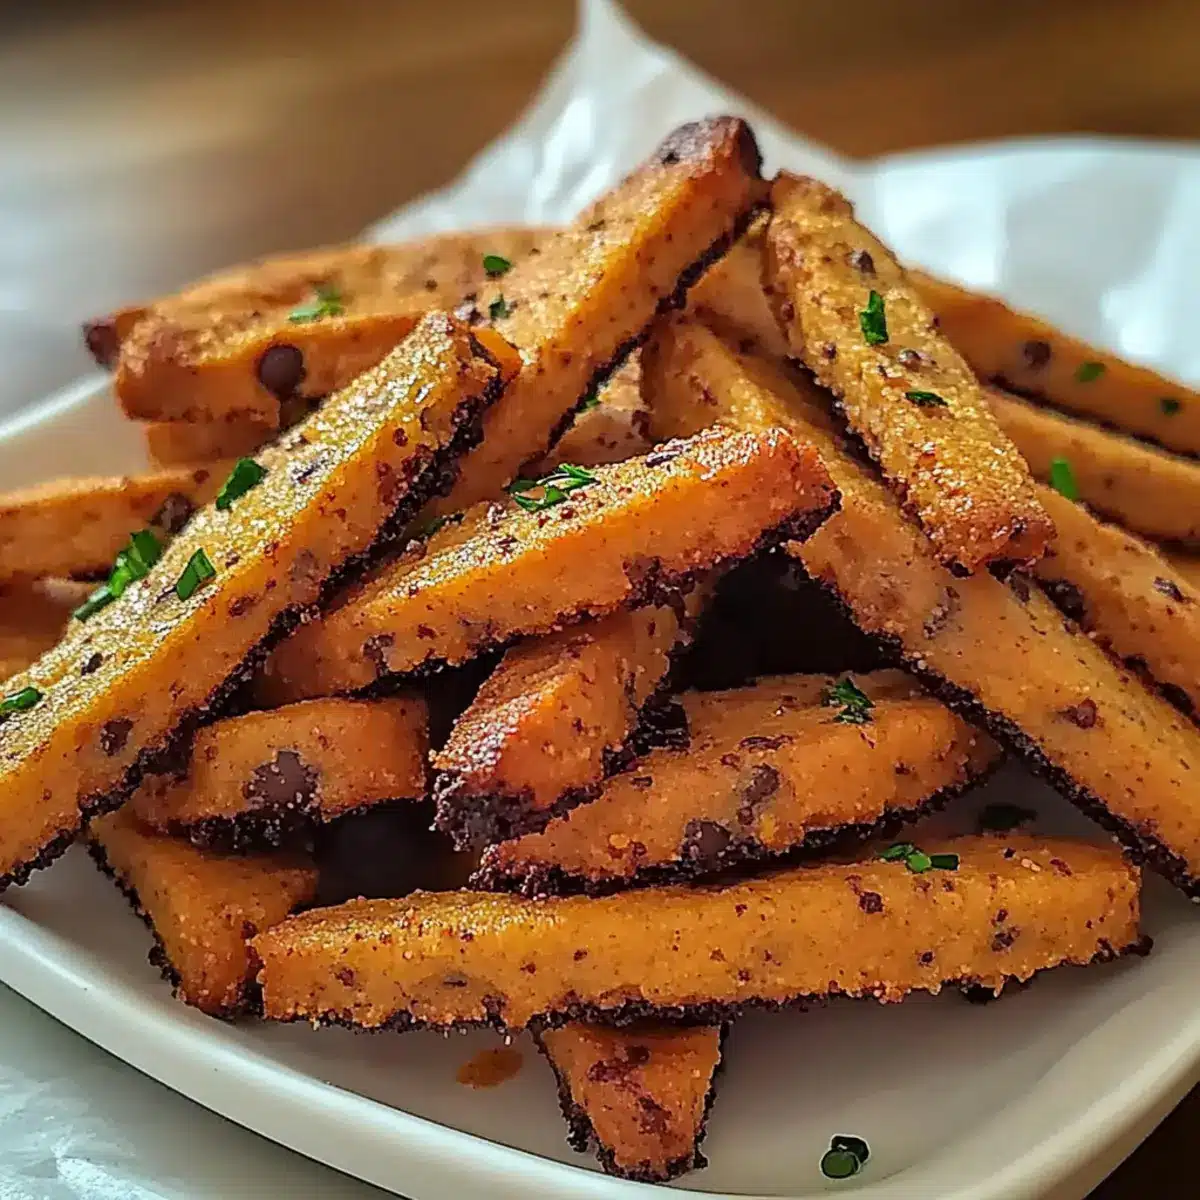
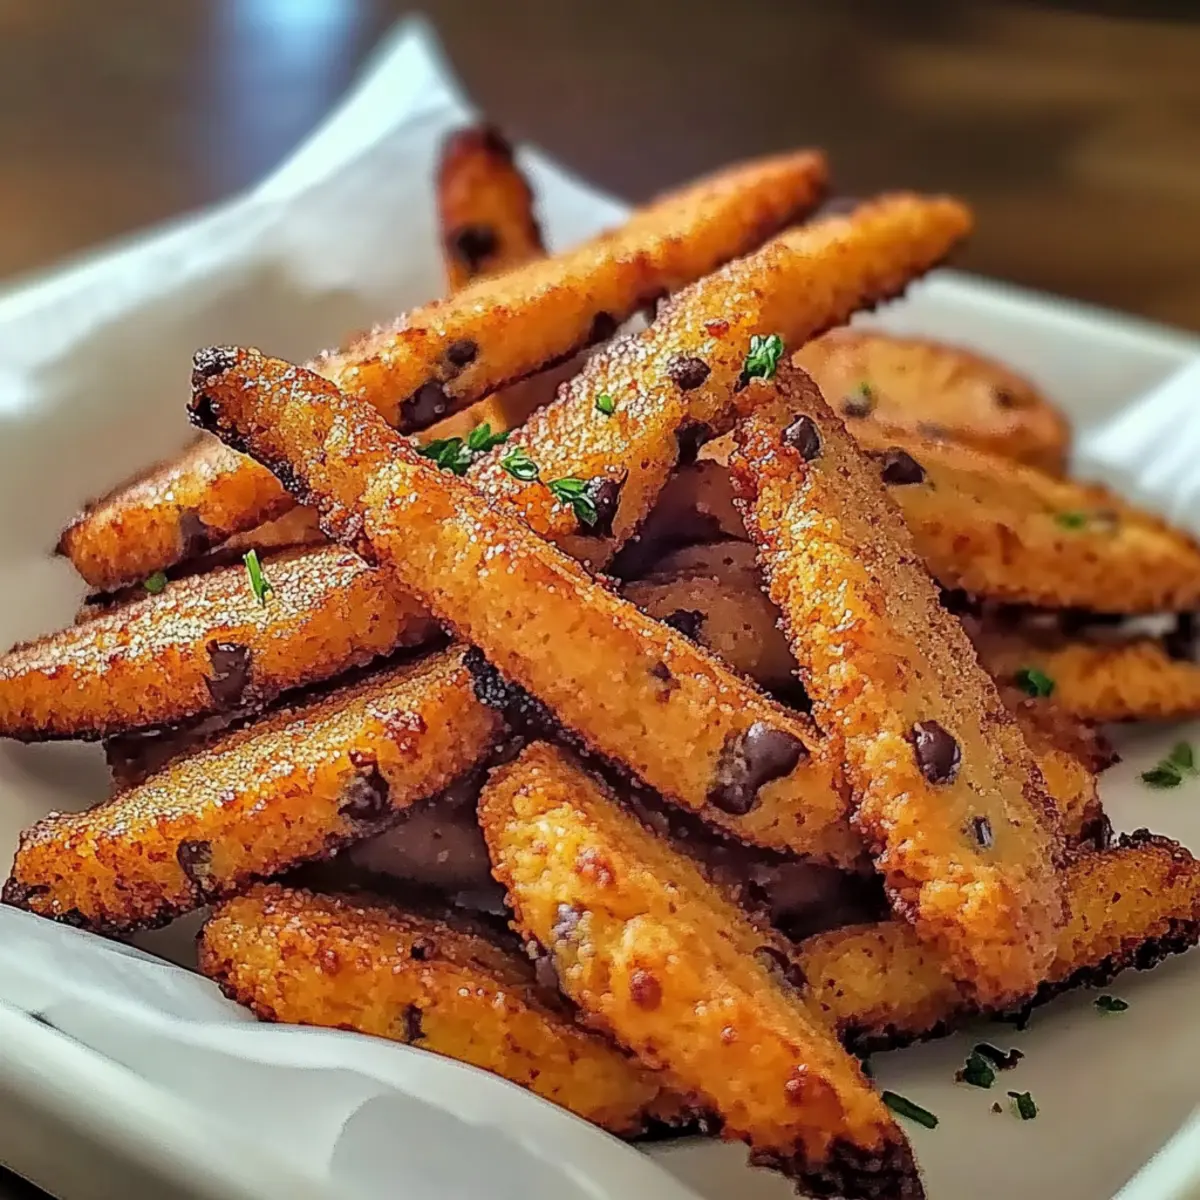
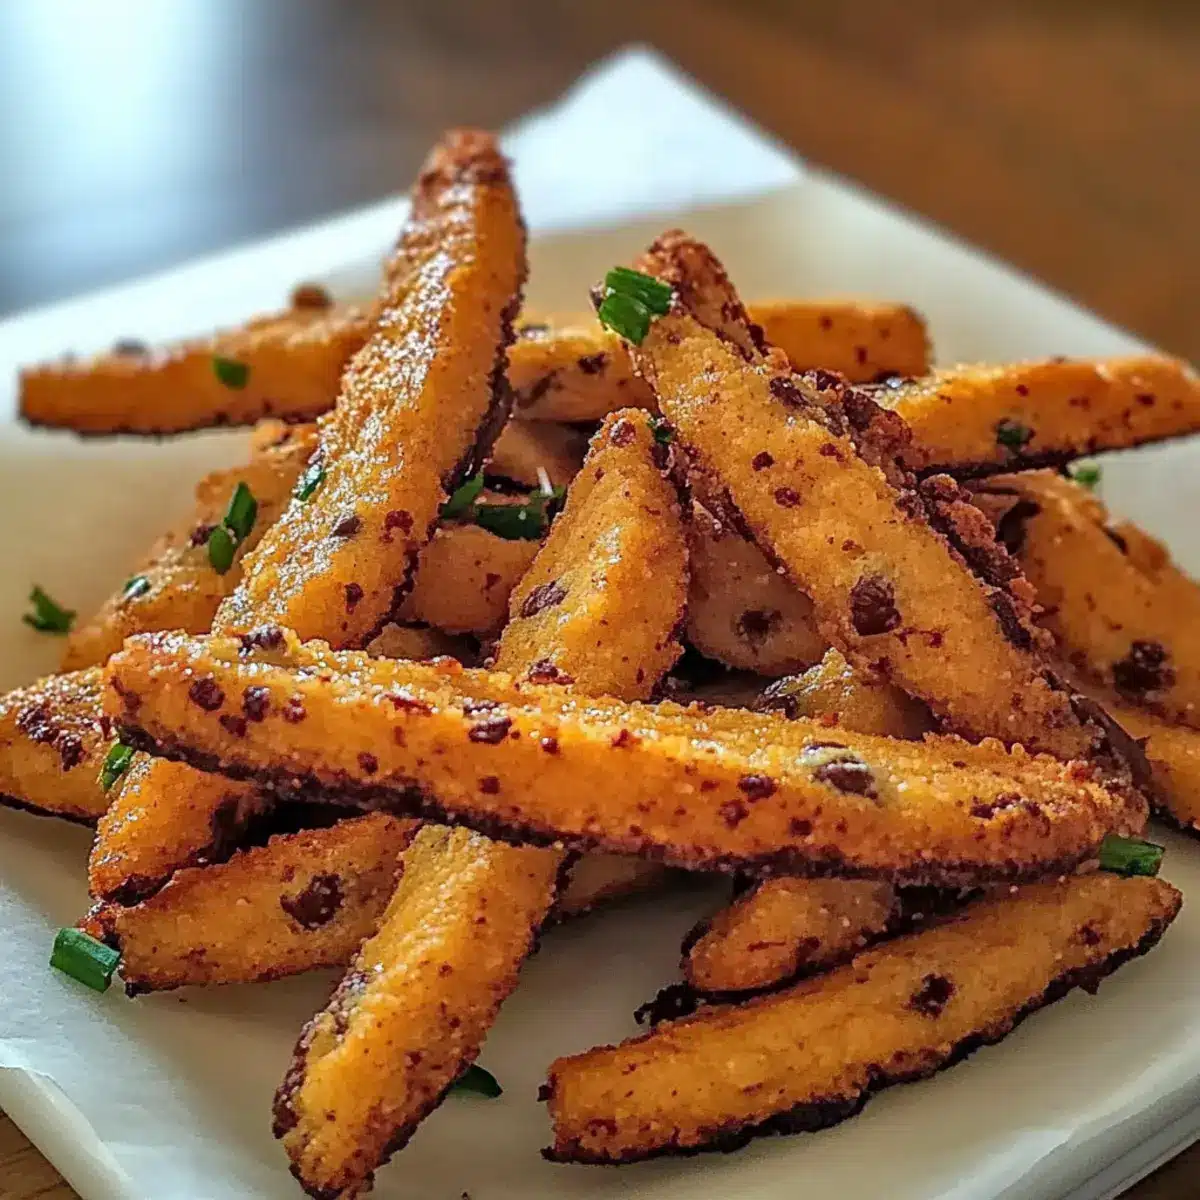
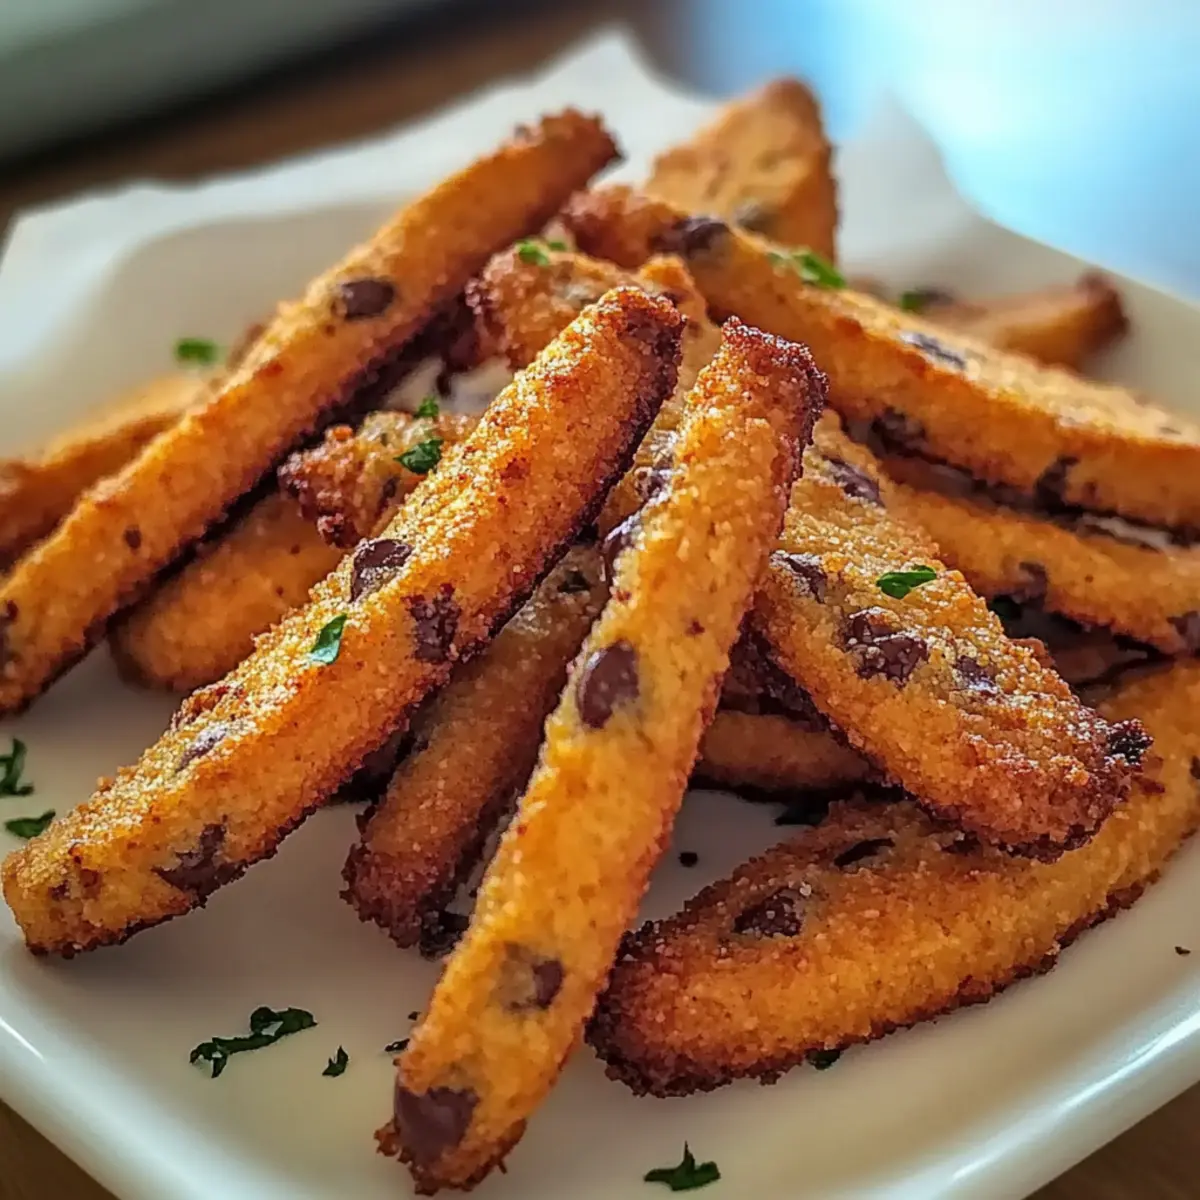
Crispy Oven Baked Sweet Potato Fries That Steal the Show
Ingredients
Equipment
Method
- Preheat the oven to 425°F (220°C) and line a baking sheet with parchment paper.
- In a large bowl, toss the sweet potato fries with olive oil, salt, paprika, and black pepper.
- Spread the fries in a single layer on the prepared baking sheet.
- Bake for 25-30 minutes, flipping halfway through, until crispy and golden.
- Allow to cool for a few minutes before serving.
Leave a Reply