
It was an ordinary Wednesday evening when I realized I was craving something cheesy yet guilt-free. Enter these Cheesy Zucchini Breadsticks, my latest culinary obsession! Perfectly nestled between indulgent flavor and healthy eating, these low-carb delights allow you to enjoy a crispy snack without throwing your diet off track. With their melty mozzarella and hearty texture, they serve as a fantastic pizza crust alternative or a delicious side dish. Plus, they come together in a snap—ideal for those busy weeknights or whenever friends drop by. Trust me, once you whip up a batch, they’ll quickly become your new go-to for satisfying cravings. Ready to take your snacking to the next level with this scrumptious recipe? Let’s get started!
Why Do You Need This Recipe?
Indulgent yet Guilt-Free: These Cheesy Zucchini Breadsticks deliver a savory experience without the carb overload, making them a perfect fit for your low-carb lifestyle. Versatile Delight: Use them as snack-sized bites, or get creative and transform them into a delightful pizza crust! Quick and Easy: Ready to eat in just 20 minutes, they’re a lifesaver for busy evenings or unexpected guests. Melt-in-Your-Mouth Goodness: The combination of mozzarella and parmesan captures the essence of cheesy perfection. Whether served plain, or with a sauce, you won’t be able to resist! For more cheesy goodness, check out our Spicy Southern Cheesy Chicken Spaghetti Casserole and One Pot Pasta.
Cheesy Zucchini Breadsticks Ingredients
• For the Batter
- Grated Zucchini – Adds moisture and bulk; use about 1 pound to yield 4 cups shredded, ensuring it’s dehydrated well to keep the breadsticks from becoming soggy.
- Mozzarella Cheese – Provides meltiness and flavor; substitute with another cheese if desired.
- Parmesan Cheese – Enhances savory flavor and helps with crust browning; can be substituted with another hard cheese for a different twist.
- Egg – Binds ingredients together, providing structure; consider using a chia egg for a vegan option.
- Garlic Parsley Salt – Adds flavor; can be replaced with garlic powder and fresh parsley for a customized seasoning.
• For the Topping
- Grated Cheese of Choice – Enhances flavor and texture; mix and match your favorite cheeses for an extra cheesy experience.
These Cheesy Zucchini Breadsticks are not just delicious, but they also stand out for being low-carb and gluten-free, making them a fantastic choice for those seeking healthier snacking options!
Step‑by‑Step Instructions for Cheesy Zucchini Breadsticks
Step 1: Preheat the Oven
Start by preheating your oven to 425°F (or adjust to 400°F for a softer version). This sets the foundation for achieving that golden crust on your Cheesy Zucchini Breadsticks. Make sure your oven is fully warmed up before placing the breadsticks inside to ensure even cooking.
Step 2: Prepare the Zucchini
While the oven heats, grab about 1 pound of zucchini and shred it using a box grater or food processor. Once shredded, place the zucchini in a clean cloth or several paper towels, squeezing out as much moisture as possible. This crucial step helps prevent sogginess in the finished breadsticks.
Step 3: Combine Ingredients
In a large mixing bowl, combine the dried grated zucchini, 1 cup of mozzarella cheese, ½ cup grated parmesan, 1 beaten egg, and 1 teaspoon of garlic parsley salt. Stir the mixture thoroughly until all ingredients are well incorporated, and the mixture has a cohesive texture ready for baking.
Step 4: Form the Zucchini Base
Line a baking dish with parchment paper to prevent sticking, then evenly spread the zucchini mixture into the dish. Aim for about ½-inch thickness to ensure even baking and nice crisp edges. Use a spatula to smooth it out, creating a uniform surface for your Cheesy Zucchini Breadsticks.
Step 5: Bake the Base
Place the baking dish in your preheated oven and bake for approximately 15 minutes. Keep an eye on the breadsticks; you’re looking for a slightly browned bottom and firmed-up texture, indicating they are perfectly cooked and ready for the next step.
Step 6: Add Toppings
After your zucchini base is baked, carefully remove the dish from the oven. Sprinkle your choice of grated cheese generously over the top, ensuring an even layer. Feel free to mix different cheeses for added flavor—this is where the cheesy goodness really shines!
Step 7: Final Bake
Return the cheesy-topped zucchini base to the oven for an additional 2-5 minutes. This quick bake will melt the cheese and create a bubbly, irresistible topping. Watch closely to catch it right when it’s melted and just begins to turn golden, maximizing flavor and texture.
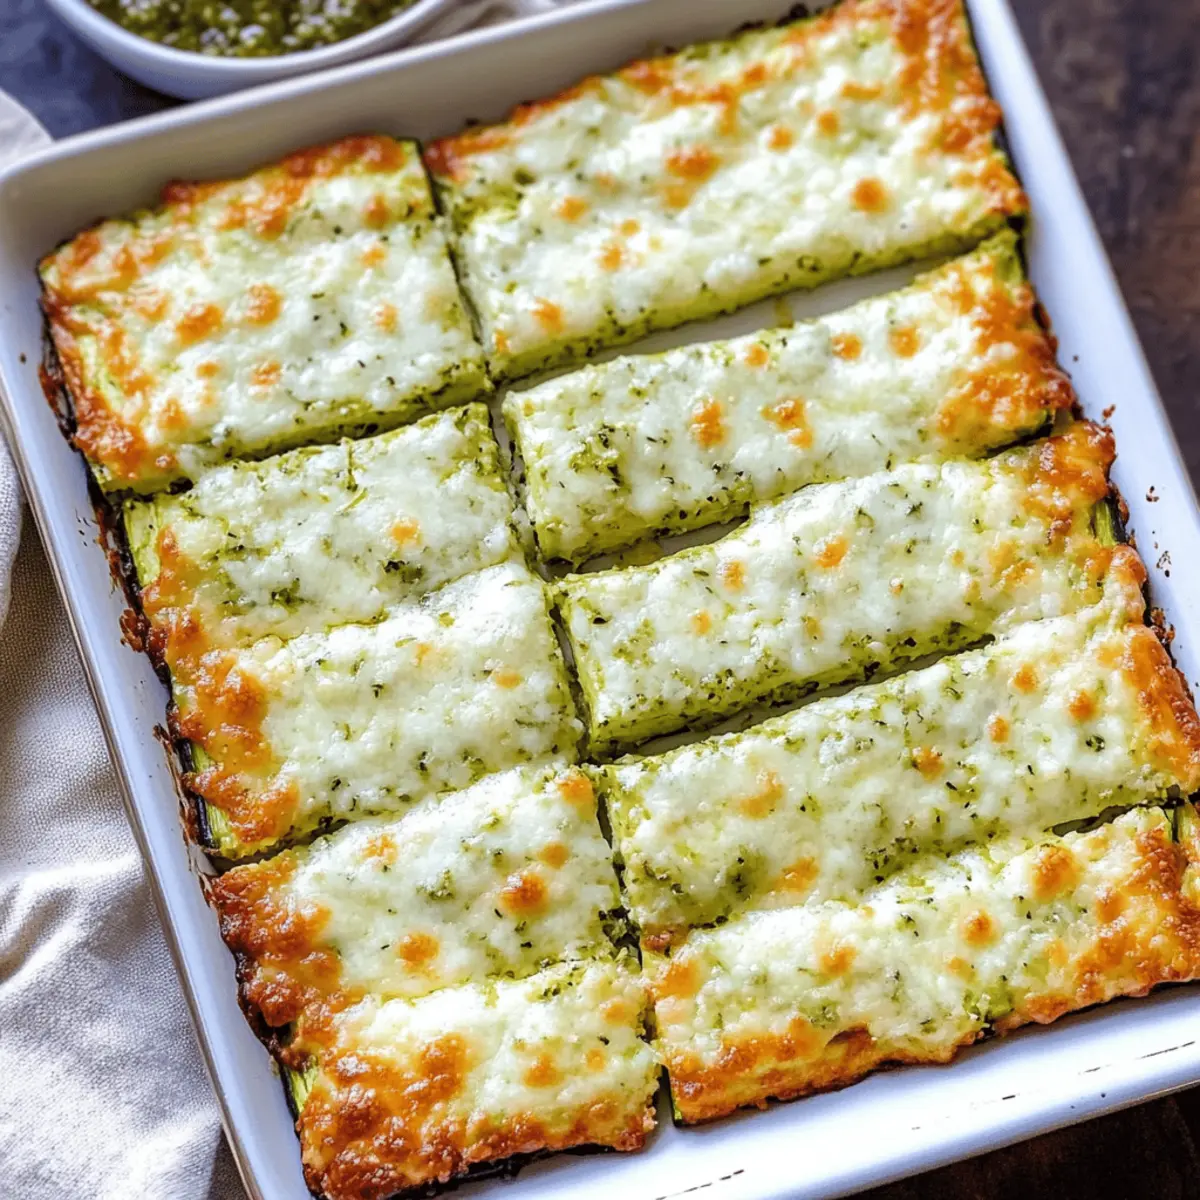
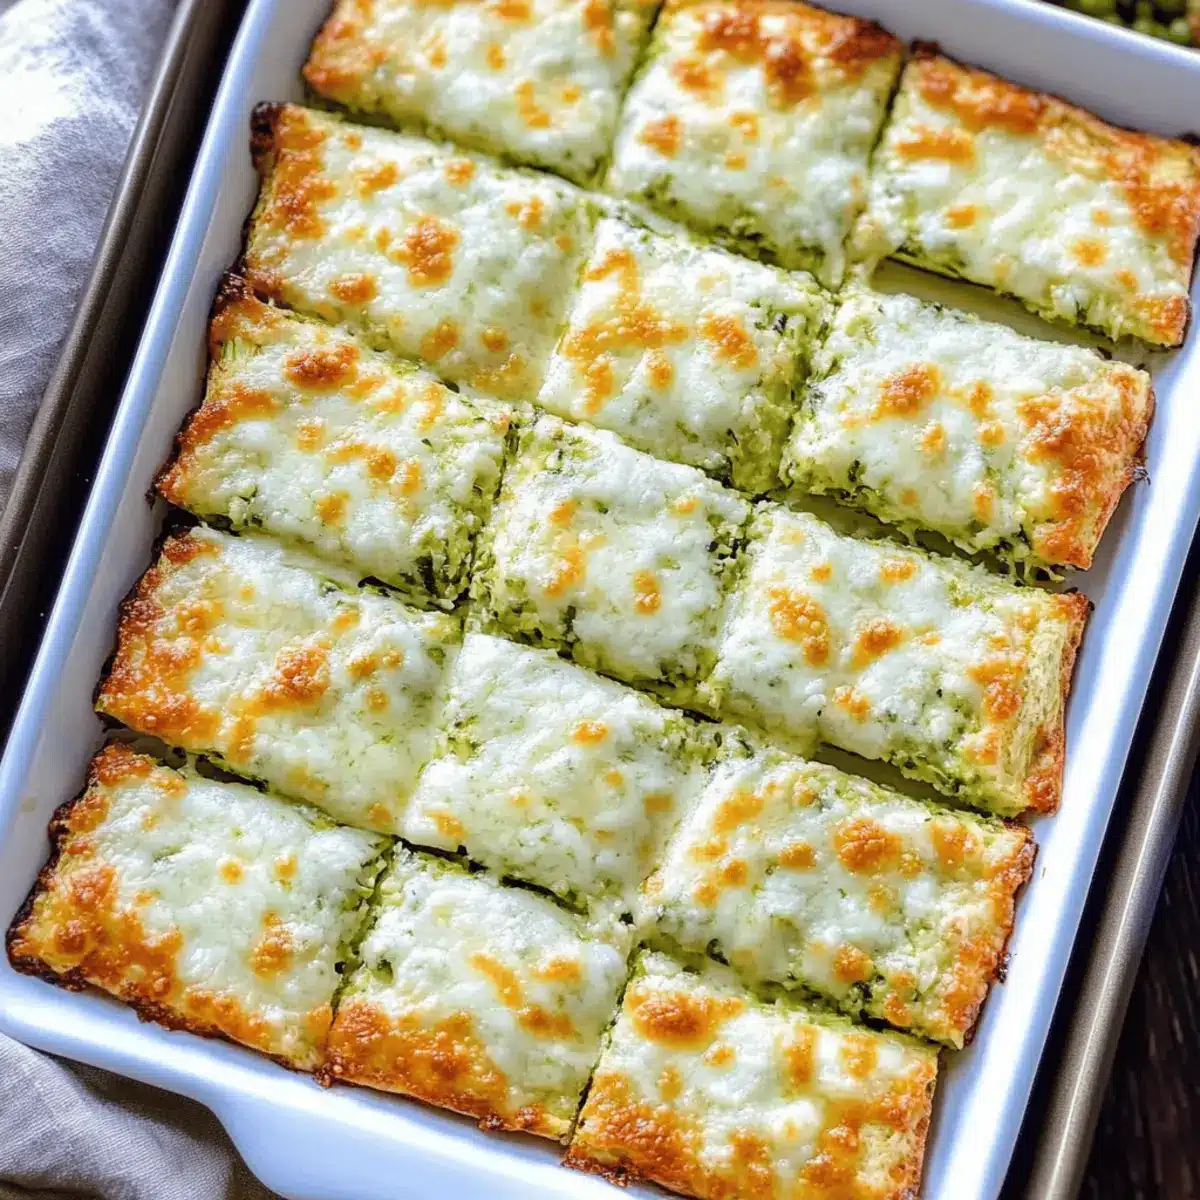
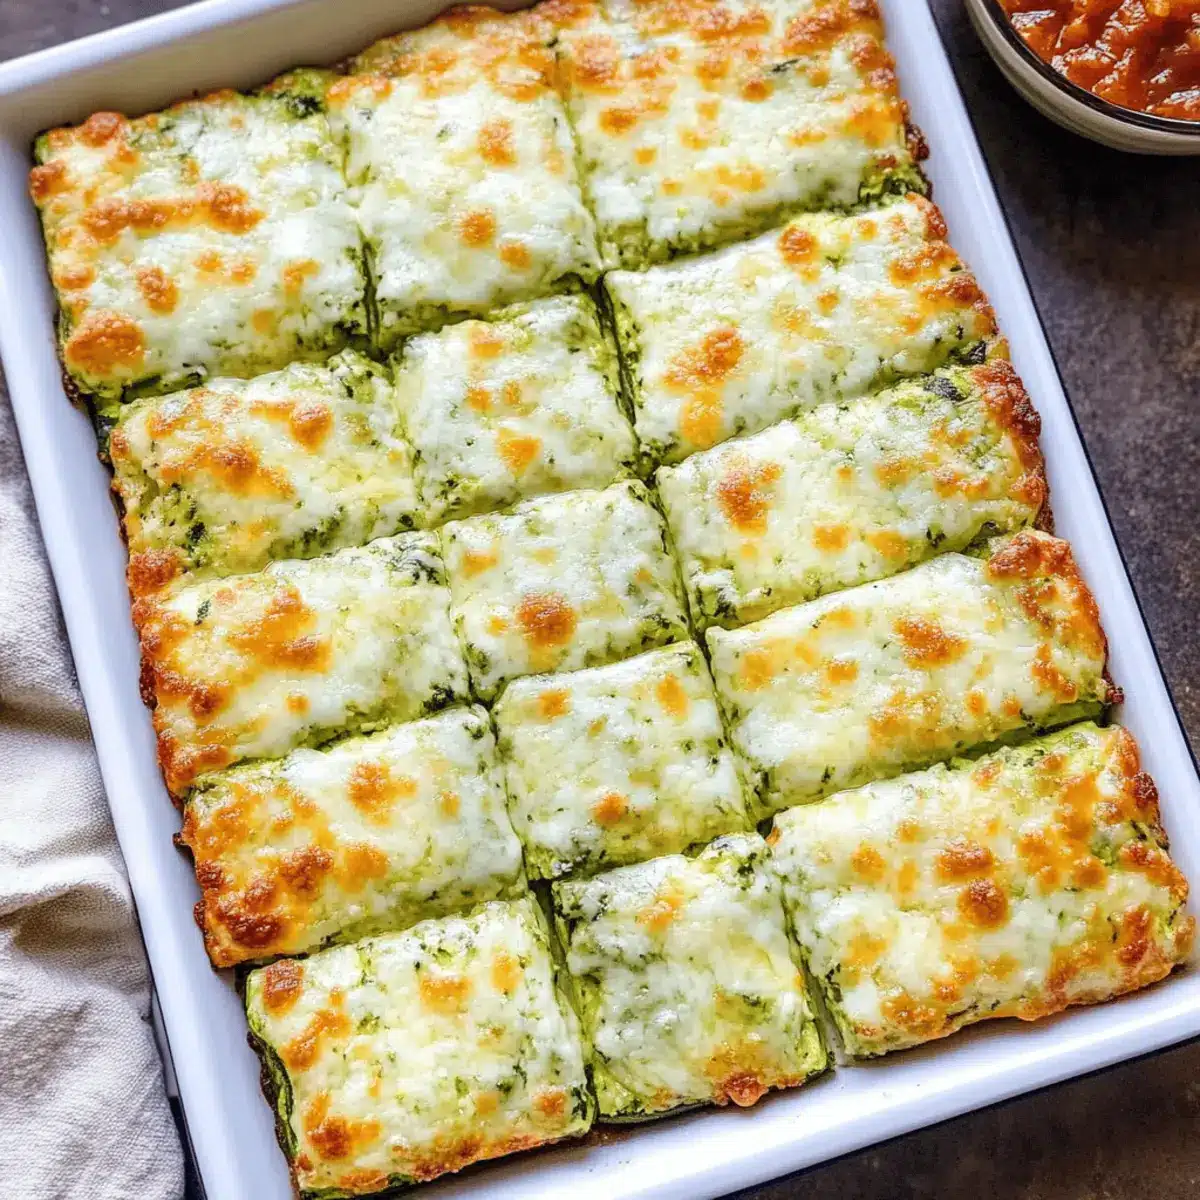
Step 8: Slice and Serve
Once melted and bubbling, take the dish out and let it cool for a minute. Use a sharp knife to slice your Cheesy Zucchini Breadsticks into strips. Serve warm, ideally with a dipping sauce such as marinara or ranch, and enjoy these delightful low-carb snacks fresh from your kitchen!
Make Ahead Options
These Cheesy Zucchini Breadsticks are perfect for busy home cooks looking to save time during the week! You can prepare the zucchini mixture up to 24 hours in advance; simply combine the dried grated zucchini, mozzarella, parmesan, egg, and garlic salt in a bowl, cover tightly, and refrigerate. When you’re ready to bake, evenly spread it in your lined baking dish and follow the baking instructions. For optimal quality, avoid adding the cheese topping until just before you bake; this ensures it melts beautifully without becoming soggy. Just think—delicious, guilt-free Cheesy Zucchini Breadsticks straight from your oven in a snap!
Cheesy Zucchini Breadsticks Variations
Feel free to get creative with these Cheesy Zucchini Breadsticks, tailoring them to your taste buds!
-
Dairy-Free: Substitute all cheese with vegan cheese alternatives, maintaining that gooey texture while keeping it dairy-free.
-
Herb-Infused: Add fresh herbs like basil or oregano to the zucchini mixture for an aromatic twist that elevates each bite.
-
Spicy Kick: Mix in sliced jalapeños or crushed red pepper flakes for a zesty flavor explosion that complements the cheese.
-
Mix and Match: Swap mozzarella for other melting cheeses like gouda or cheddar to create unique flavor profiles.
-
Veggie Boost: Incorporate shredded carrots or yellow squash into the zucchini mix for an extra dose of veggies and color!
-
Almond Flour Addition: For a crustier texture, add a tablespoon of almond flour to the batter; it helps hold everything together beautifully.
-
Pizza Lover’s Delight: Use the breadsticks as your pizza base, adding marinara and toppings of choice before returning to the oven.
-
Sweet Variation: For a dessert twist, mix in a touch of cinnamon and a sweetener, then bake until golden for a cheesy treat that’s a hit with everyone!
These variations keep it exciting in the kitchen, ensuring your Cheesy Zucchini Breadsticks never taste the same twice! If you’re looking for more cheesy inspiration, don’t forget to check out our delightful Cheesy Ranch Potatoes and Smoked Sausage recipes too!
Expert Tips for Cheesy Zucchini Breadsticks
• Moisture Matters: Ensure all moisture is thoroughly drained from the zucchini to prevent soggy breadsticks. Patting it dry with cloths works wonders!
• Crispy Perfection: Baking at a higher temperature ensures a crispier edge. Just watch closely and adjust time so they don’t over-brown.
• Texture Boost: For an improved texture, consider adding a spoonful of almond flour to the mixture. It enhances the chewiness of your Cheesy Zucchini Breadsticks.
• Flavor Variations: Don’t hesitate to mix up your seasonings! A pinch of Italian herbs or red pepper flakes can elevate the flavor and give a unique twist.
• Fresh is Best: Enjoy your Cheesy Zucchini Breadsticks fresh for the best experience. Freezing alters the texture, making them less enjoyable.
What to Serve with Cheesy Zucchini Breadsticks
Looking to create an unforgettable meal that perfectly complements these delicious, cheesy bites?
- Marinara Sauce: A classic pairing, this tangy sauce enhances the cheesy delight, providing a burst of flavor in every bite.
- Garlic Aioli: This creamy dip adds a sophisticated touch, and its garlicky richness balances the savory notes of the breadsticks beautifully.
- Italian Salad: With crisp greens, fresh tomatoes, and zesty dressing, this salad introduces a refreshing contrast to the warm breadsticks.
- Stuffed Mushrooms: These bite-sized treats echo the savory theme, packed with flavor and adding a delightful chewiness.
- Roasted Vegetables: Their caramelized edges and earthy flavors bring a wholesome component, filling your plate with color and nutrition.
- Creamy Spinach Dip: Pair with crispy tortilla chips or veggies for dipping, this indulgent option tantalizes the taste buds alongside the zucchini goodness.
- Sparkling Water with Lime: Refreshing and light, this drink cuts through the richness of the cheese, making every bite even more enjoyable.
- Chocolate Mousse: For dessert, this light, airy treat offers a sweet finish to your savory meal without overwhelming your palate.
Storage Tips for Cheesy Zucchini Breadsticks
Fridge: Store leftovers in an airtight container for up to 3 days. This keeps the Cheesy Zucchini Breadsticks fresh and ready for quick snacks.
Reheating: For the best results, reheat in the oven at 350°F for about 10 minutes. You can also use an air fryer for a quicker, crispy texture.
Freezer: Avoid freezing these breadsticks, as thawing can change their delightful texture. It’s best to enjoy them fresh right after baking!
Prepping Ahead: If you want to save time, prepare the zucchini mixture ahead of time and store it in the fridge for up to a day, then bake when ready to serve.
Cheesy Zucchini Breadsticks Recipe FAQs
How do I choose the right zucchini?
Absolutely! When selecting zucchini, pick ones that are firm, smooth, and vibrant in color. Look for sizes that are medium, about 6-8 inches long, as larger zucchinis can be seedy and watery. If you notice dark spots all over the skin or the zucchini feels soft, it’s best to skip those.
How should I store leftover Cheesy Zucchini Breadsticks?
You can store leftover Cheesy Zucchini Breadsticks in an airtight container in the refrigerator for up to 3 days. Just make sure they’re completely cooled before transferring to the container. This keeps them fresh for quick snacks or side dishes without losing their delightful flavor!
Can I freeze Cheesy Zucchini Breadsticks?
Avoid freezing these delicious breadsticks! Freezing alters the texture significantly upon thawing, resulting in a soggy finish. It’s best to enjoy them fresh after baking, but if you must prepare ahead, consider prepping the mixture and refrigerating it for up to 24 hours before baking.
What if my breadsticks turn out soggy?
Very! If you encounter soggy Cheesy Zucchini Breadsticks, it’s likely due to excess moisture in the zucchini. To avoid this, make sure to thoroughly drain your grated zucchini using paper towels or a clean cloth. Additionally, a sprinkle of almond flour can help absorb some moisture and improve the texture!
Are these breadsticks suitable for certain diets?
Yes! These Cheesy Zucchini Breadsticks are low-carb, gluten-free, and vegetarian, making them a fantastic option for those following keto or gluten-free diets. If you’re cooking for someone with egg allergies, you can substitute a chia egg (1 tablespoon chia seeds mixed with 2.5 tablespoons water) for binding in the recipe.
What cheese can I use for the topping?
The more the merrier! While mozzarella and parmesan are fantastic choices, feel free to mix and match according to your taste. For a spicy flair, try pepper jack, or for a salty punch, add feta. Just ensure to choose cheeses that melt well for the best topping experience!

Savory Cheesy Zucchini Breadsticks That You’ll Crave Daily
Ingredients
Equipment
Method
- Preheat your oven to 425°F (or adjust to 400°F for a softer version).
- Shred the zucchini and squeeze out as much moisture as possible.
- In a mixing bowl, combine the zucchini, mozzarella, parmesan, egg, and garlic parsley salt.
- Spread the mixture into a lined baking dish.
- Bake for approximately 15 minutes until slightly browned.
- Remove from oven and sprinkle grated cheese over the top.
- Return to the oven for an additional 2-5 minutes until cheese is melted.
- Slice and serve warm, optionally with a dipping sauce.
Leave a Reply