
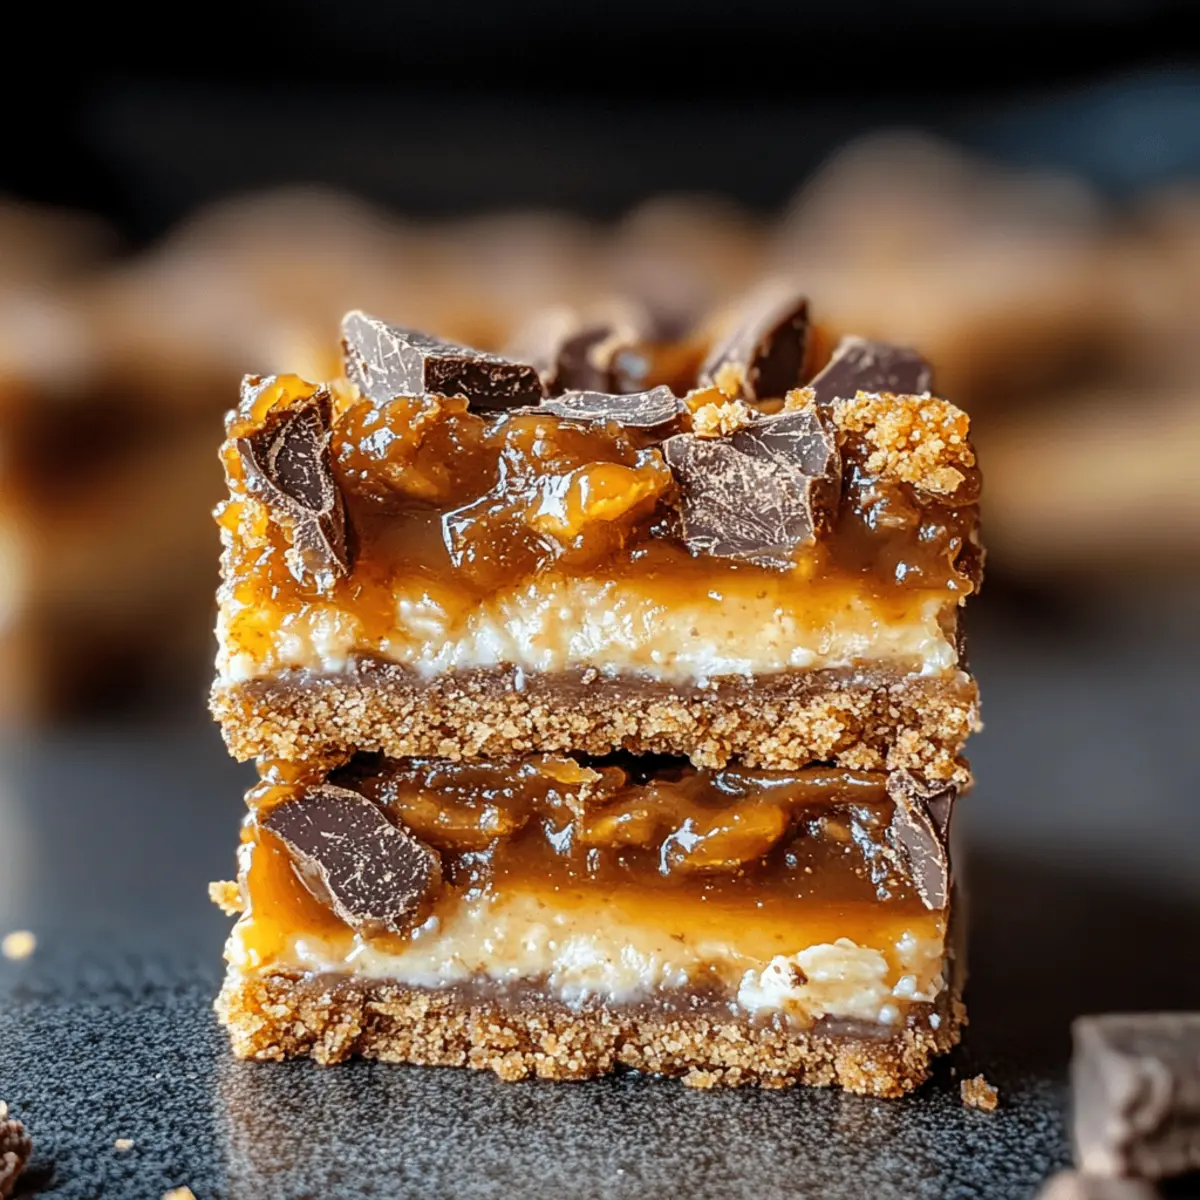
As I rummaged through my pantry, searching for a sweet tooth remedy, I stumbled upon a treasure trove of ingredients just waiting to come together—a bit of chocolate here, some marshmallows there. Enter my No-Bake Butterfinger Caramel Bars! This treat is not just easy to make; it’s designed to be the showstopper for any gathering. With layers of creamy caramel and crunchy Butterfinger pieces, these bars are the ultimate crowd-pleaser and can be whipped up without ever turning on the oven. The best part? You can customize them to suit your taste, whether you swap in your favorite candy bars or throw in some nuts for a delightful crunch. Ready to take your dessert game to the next level without the fuss? Let’s dive into this deliciously simple recipe together!
Why Are These Bars a Must-Try?
Irresistible Flavor: Each bite is a heavenly blend of creamy caramel and crunchy Butterfinger, creating a rich taste that chocolate lovers will adore.
No-Bake Convenience: Perfect for warm days, these bars involve no baking—just mix, chill, and enjoy!
Easy to Customize: Swap Butterfingers for your favorite candy or add nuts for a delightful crunch. The possibilities are endless!
Crowd-Pleaser: Whether for parties, picnics, or family gatherings, these bars are sure to impress your guests and satisfy their sweet cravings.
Quick Preparation: Assembly takes mere minutes, meaning you won’t be stuck in the kitchen for long. Perfect for spontaneous dessert cravings!
Looking for something else? Check out these delightful Blueberry Oatmeal Bars for another simple yet tasty treat!
Butterfinger Caramel Bars Ingredients
-
For the Base
• Graham Crackers – Provides a buttery, crumbly base; gluten-free options work perfectly too.
• Mini Marshmallows – Adds chewy texture and sweetness, enhancing the overall indulgence. -
For the Caramel Layer
• Caramel Bits – Supplies that gooey sweetness crucial for the bars; feel free to experiment with other caramel types.
• Milk – Helps melt the caramel for a smooth consistency; non-dairy milk is a great substitute. -
For the Topping
• Butterfinger Bites – Offers a delightful crunch and distinct flavor; try swapping for crushed Reese’s for a fun twist!
• Semi-Sweet Chocolate – Perfect for drizzling on top, enhancing both flavor and visual appeal; dark chocolate can add a richer taste.
Enjoy making these delightful Butterfinger Caramel Bars that everyone will love!
Step‑by‑Step Instructions for No-Bake Butterfinger Caramel Bars
Step 1: Prepare the Pan
Start by lining a 9×9 inch baking dish with aluminum foil, ensuring it hangs over the edges for easy removal later. Lightly spray the foil with cooking spray to prevent sticking. This step sets the stage for your No-Bake Butterfinger Caramel Bars, ensuring a hassle-free release once they’ve set.
Step 2: Layer the Base
Next, take graham crackers and arrange them snugly at the bottom of the prepared pan. Make sure to cover the entire surface without any gaps. This crumbly base forms the foundation of your bars, lending a buttery flavor and texture that pairs beautifully with the sweet layers to come.
Step 3: Add Marshmallows
Spread a generous layer of mini marshmallows evenly over the graham cracker base. Use your hands or a spatula to ensure they are distributed well. This will add a delightful chewy texture to your No-Bake Butterfinger Caramel Bars, elevating their overall mouthfeel and sweetness.
Step 4: Melt Caramel
In a microwave-safe bowl, combine the caramel bits and milk. Microwave on high for about 1-2 minutes, stirring every 30 seconds, until the mixture is completely melted and smooth. This gooey caramel layer will be the heart of your dessert, binding the marshmallows and graham crackers together beautifully.
Step 5: Pour and Spread Caramel
Drizzle the melted caramel mixture over the layer of marshmallows, using a spatula to spread it evenly. Make sure to cover all the marshmallows to create a cohesive layer. The warm, gooey caramel is what makes these No-Bake Butterfinger Caramel Bars so irresistible, adding a luscious richness.
Step 6: Butterfinger Layer
Sprinkle the chopped Butterfinger pieces generously over the caramel layer, pressing them down slightly to help them adhere. The crunchy texture of the Butterfinger will add a delightful contrast to the smooth caramel and soft marshmallows, creating a flavor explosion in every bite of your bars.
Step 7: Melt Chocolate
In a separate microwave-safe bowl, heat the semi-sweet chocolate in 30-second bursts, stirring in between until fully melted and smooth. This chocolate drizzle will not only enhance the flavor of your No-Bake Butterfinger Caramel Bars but also provide a gorgeous finish that makes them visually stunning.
Step 8: Chocolate Drizzle
Once the chocolate is melted, use a spoon or a piping bag to drizzle it artfully over the top layer of your bars. Feel free to go wild with the design! This final touch adds a luxurious chocolatey richness that complements the other layers perfectly and makes these bars look extra tempting.
Step 9: Chill
Place the baking dish in the refrigerator and chill for about 1 hour or until the bars are set and firm to the touch. Cooling is crucial for helping the layers meld together and for achieving that perfect texture in your No-Bake Butterfinger Caramel Bars, so be patient!
Step 10: Slice and Enjoy
Once set, use the foil overhang to lift the bars out of the pan. Place them on a cutting board and slice them into squares with a sharp knife. Enjoy your sweet creation with family and friends, and relish every delightful bite of your No-Bake Butterfinger Caramel Bars!
Make Ahead Options
These No-Bake Butterfinger Caramel Bars are perfect for busy cooks looking to save time! You can prepare the graham cracker base and layer of mini marshmallows up to 24 hours in advance. Simply follow steps 1 to 3, cover the pan tightly with plastic wrap, and refrigerate. The caramel and chocolate layers can be melted and drizzled after preparing the base, ensuring they maintain their delectable quality. For optimal flavor, mix the caramel and Butterfinger pieces, then refrigerate until you’re ready to serve. When it’s time to enjoy, simply finish assembling and chill until set before slicing into squares, bringing the charm of homemade dessert without the last-minute rush!
Butterfinger Caramel Bars Variations
Feel free to mix it up and create your very own version of these delicious treats!
- Dairy-Free: Substitute regular milk with almond or coconut milk to make the bars completely dairy-free without sacrificing flavor.
- Nutty Delight: Add a layer of crushed nuts, such as peanuts or almonds, for a crunchy twist that complements the caramel perfectly. A little extra texture goes a long way!
- Spicy Kick: Incorporate a pinch of cayenne pepper into the chocolate drizzle for an unexpected spicy twist that can heighten the flavors and add excitement.
- Flavored Marshmallows: Swap out regular mini marshmallows for chocolate or caramel-flavored ones to add another layer of deliciousness to your bars.
- Gourmet Chocolate: Use sea salt dark chocolate for drizzling to enhance the flavor richness and add a touch of sophistication to these bars.
- Fruit Fusion: Blend in some dried fruit, such as cranberries or raisins, to add a sweet, chewy dimension that will surprise your taste buds.
- Candy Bar Swap: Use any of your favorite candy bars like Snickers or Milky Way to create a unique flavor profile in every bite. It’s a sweet adventure!
- Oreo Crust: Instead of graham crackers, use crushed Oreos for a chocolatey base that perfectly harmonizes with the other flavors in these bars.
If you’re up for more delightful creations, why not check out these delectable Blueberry Oatmeal Bars for another treat that’s sure to impress? Enjoy your culinary journey!
Storage Tips for Butterfinger Caramel Bars
-
Room Temperature: These bars can be stored in a cool, dry place for up to 2-3 months, but make sure they are in an airtight container to maintain freshness.
-
Refrigerator: Wrapped tightly, Butterfinger Caramel Bars will last for 3-4 months in the fridge, keeping their delightful texture and flavor intact.
-
Freezer: For longer storage, you can freeze the bars individually for up to a year. Just remember to allow them to thaw at room temperature before indulging in those sweet layers again.
-
Reheating: If you prefer a warm treat, gently microwave a slice for 10-15 seconds, but be careful not to overheat—enjoy the gooey goodness fresh from the fridge!
What to Serve With No-Bake Butterfinger Caramel Bars
Get ready to create a delightful spread that perfectly complements the sweet richness of these delightful bars.
-
Vanilla Ice Cream: The creamy, cold treat provides a refreshing contrast to the gooey sweetness of the bars, making each bite indulgent.
-
Fresh Berries: A mix of strawberries and blueberries adds a burst of freshness, balancing the richness of the caramel and chocolate layers beautifully.
-
Salted Pretzels: The salty crunch harmonizes wonderfully with the sweet flavors, introducing an unexpected element that keeps your taste buds excited.
-
Chocolate Milkshake: This decadent drink enhances the chocolate notes in the bars while providing a rich, creamy experience that will please any chocolate lover.
-
Whipped Cream: A dollop of fluffy whipped cream adds a light texture, making the dessert feel even more indulgent without overwhelming the palate.
-
Coconut Macaroons: These chewy delights offer a different texture and flavor, bringing a touch of tropical flair that contrasts well with the bars’ sweetness.
Enjoy creating a full feast around your No-Bake Butterfinger Caramel Bars and let each dish enhance the next!
Expert Tips for Butterfinger Caramel Bars
-
Keep It Cool: Ensure your melted caramel and chocolate don’t overheat; constant checking is key to a perfect consistency.
-
Prep Ahead: Make your Butterfinger Caramel Bars a day in advance. Let them chill overnight for improved flavor and texture!
-
Room Temp Slice: For easier cutting, allow the bars to sit at room temperature for a few minutes before slicing them into squares.
-
Storage Savvy: Store leftovers in an airtight container to keep the bars fresh and prevent them from getting sticky.
-
Experiment Freely: Feel free to swap out Butterfinger for your favorite candy or nuts, making this recipe uniquely yours every time!
No-Bake Butterfinger Caramel Bars Recipe FAQs
What type of graham crackers should I use?
You can use regular graham crackers for a classic taste, or try gluten-free graham crackers if you’re avoiding gluten; both options provide a deliciously buttery base.
How should I store my Butterfinger Caramel Bars?
Store your bars in a cool, dry place in an airtight container for up to 2-3 months. If you prefer, keep them in the refrigerator, where they’ll last 3-4 months when tightly wrapped. They retain their flavor and texture beautifully this way!
Can I freeze the bars, and if so, how?
Absolutely! To freeze, wrap each bar individually in plastic wrap and then place them in a zip-top freezer bag or an airtight container. They can last for up to a year. When you’re ready to enjoy, simply allow them to thaw at room temperature for about 30 minutes before serving.
What if my caramel gets too thick while melting?
If your caramel becomes too thick, just add a splash more milk and return it to the microwave in 10-15 second bursts, stirring between, until you reach a smooth consistency. It’s essential to check frequently, ensuring it melts evenly without overheating!
Can I modify the recipe to accommodate allergies?
Certainly! If you have nut allergies, make sure to avoid any nuts in your mix. For dairy allergies, use non-dairy milk and select dairy-free chocolate for drizzling. Always check the ingredients in your candy bars to ensure they are suitable for everyone.
How do I know when the bars are properly chilled?
You’ll know the bars are ready when they feel firm to the touch, about an hour in the refrigerator. For the best texture, it’s crucial to let them set fully so all layers meld together beautifully!
Irresistible Butterfinger Caramel Bars That Everyone Loves
Ingredients
Equipment
Method
- Line a 9x9 inch baking dish with aluminum foil, ensuring it hangs over the edges. Spray with cooking spray.
- Arrange graham crackers snugly at the bottom of the prepared pan to cover the surface.
- Spread a layer of mini marshmallows evenly over the graham cracker base.
- Combine caramel bits and milk in a microwave-safe bowl. Microwave on high for 1-2 minutes, stirring every 30 seconds until smooth.
- Drizzle melted caramel over the layer of marshmallows and spread it evenly.
- Sprinkle chopped Butterfinger pieces over the caramel layer and press down slightly.
- Melt semi-sweet chocolate in a microwave-safe bowl in 30-second bursts, stirring in between.
- Drizzle melted chocolate artfully over the top layer of the bars.
- Chill the baking dish in the refrigerator for about 1 hour or until the bars are set.
- Lift the bars out using the foil overhang, place on a cutting board, and slice into squares.
Leave a Reply