
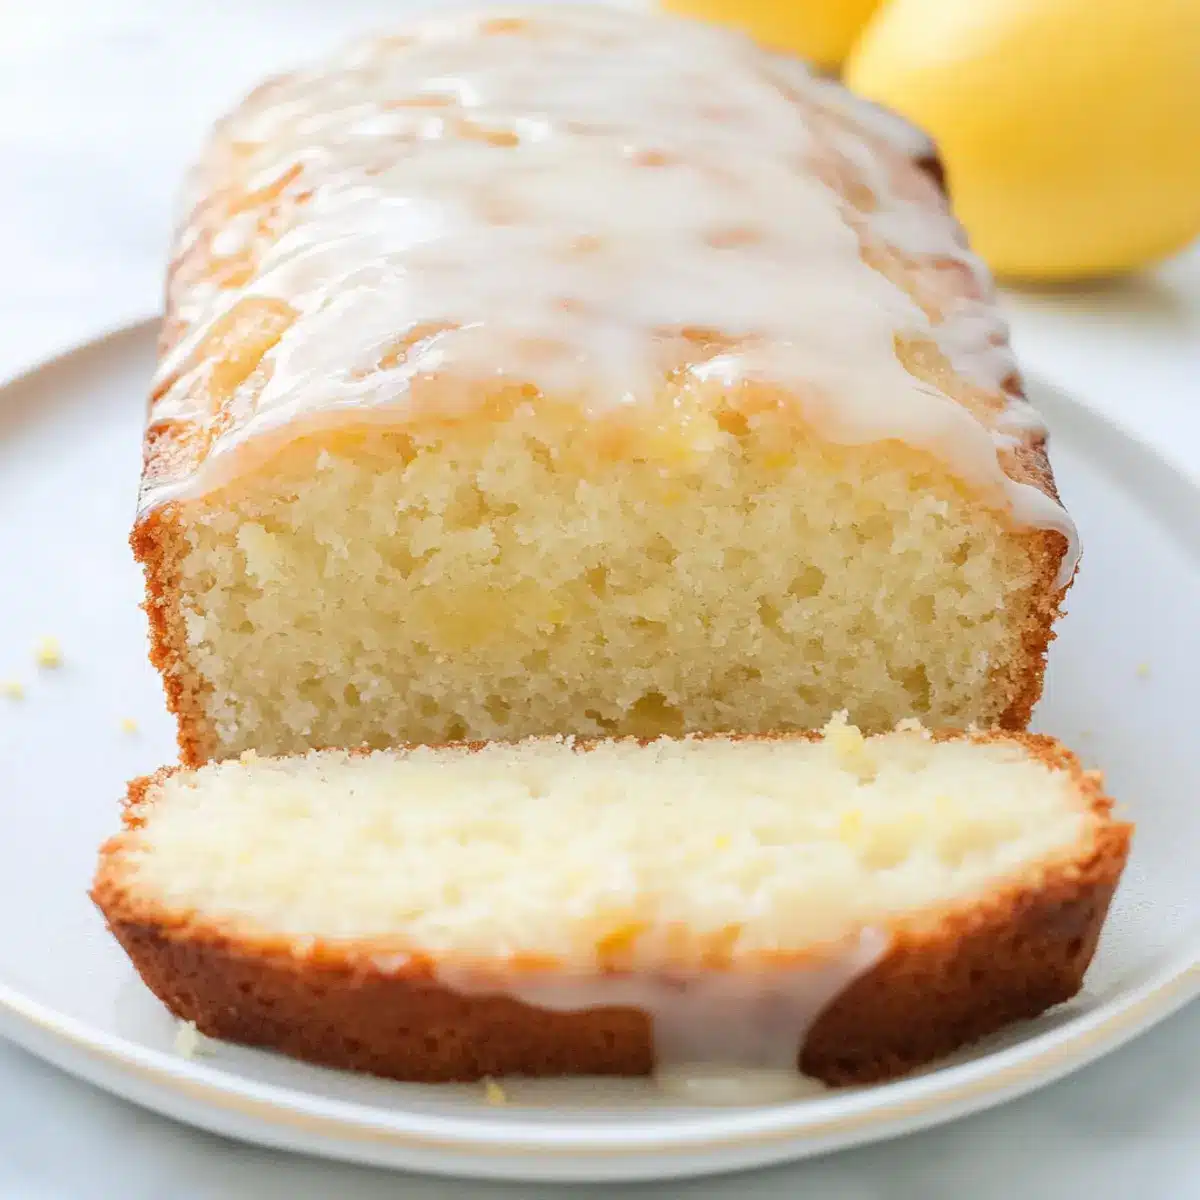
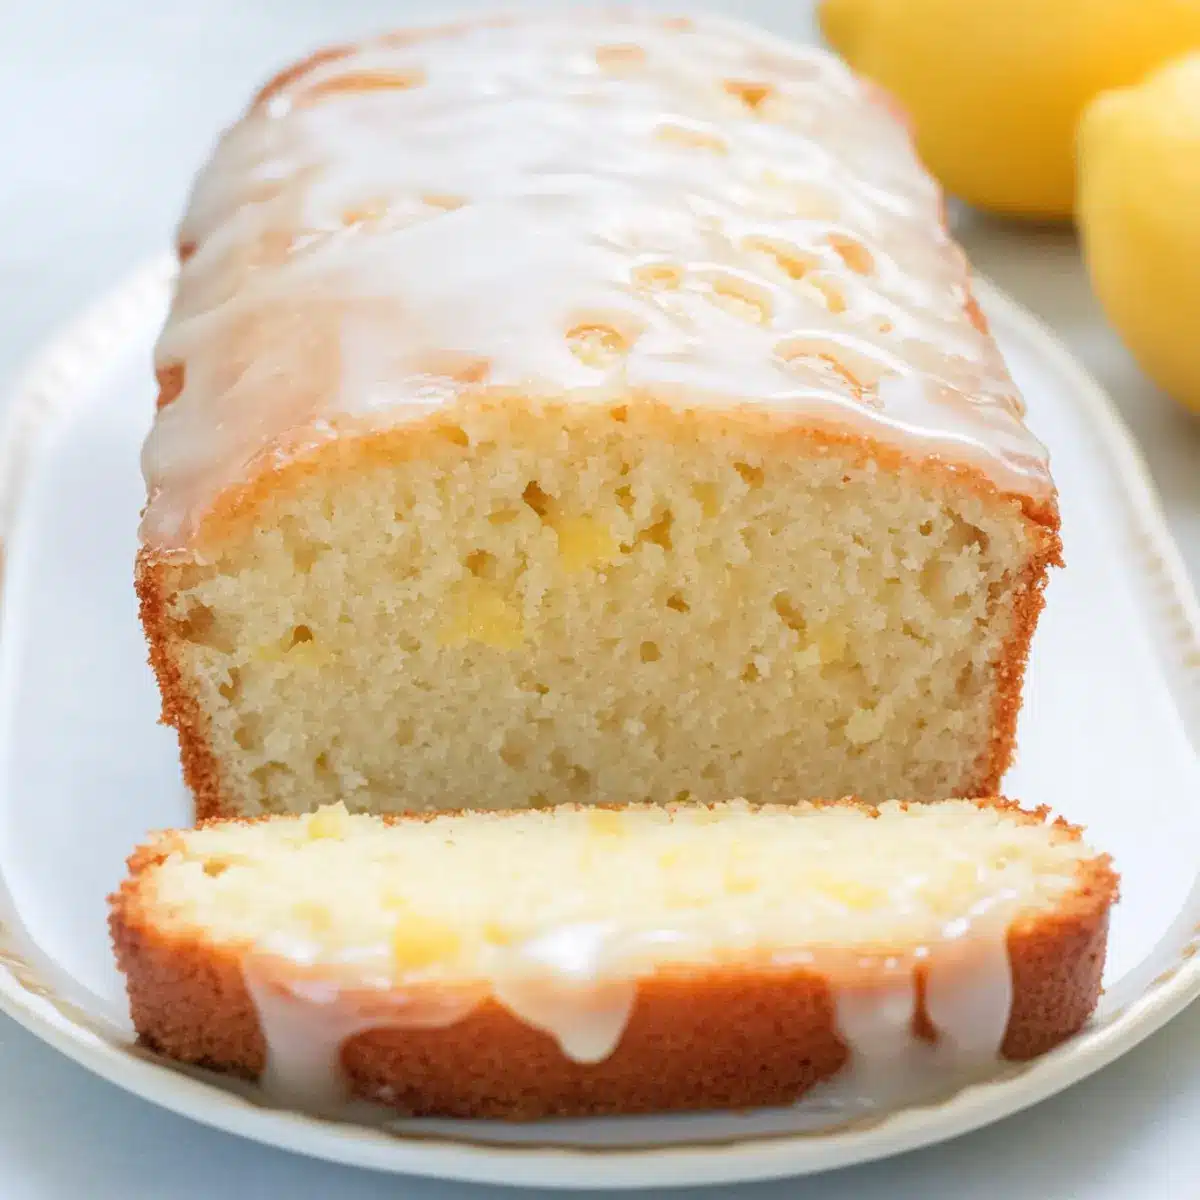
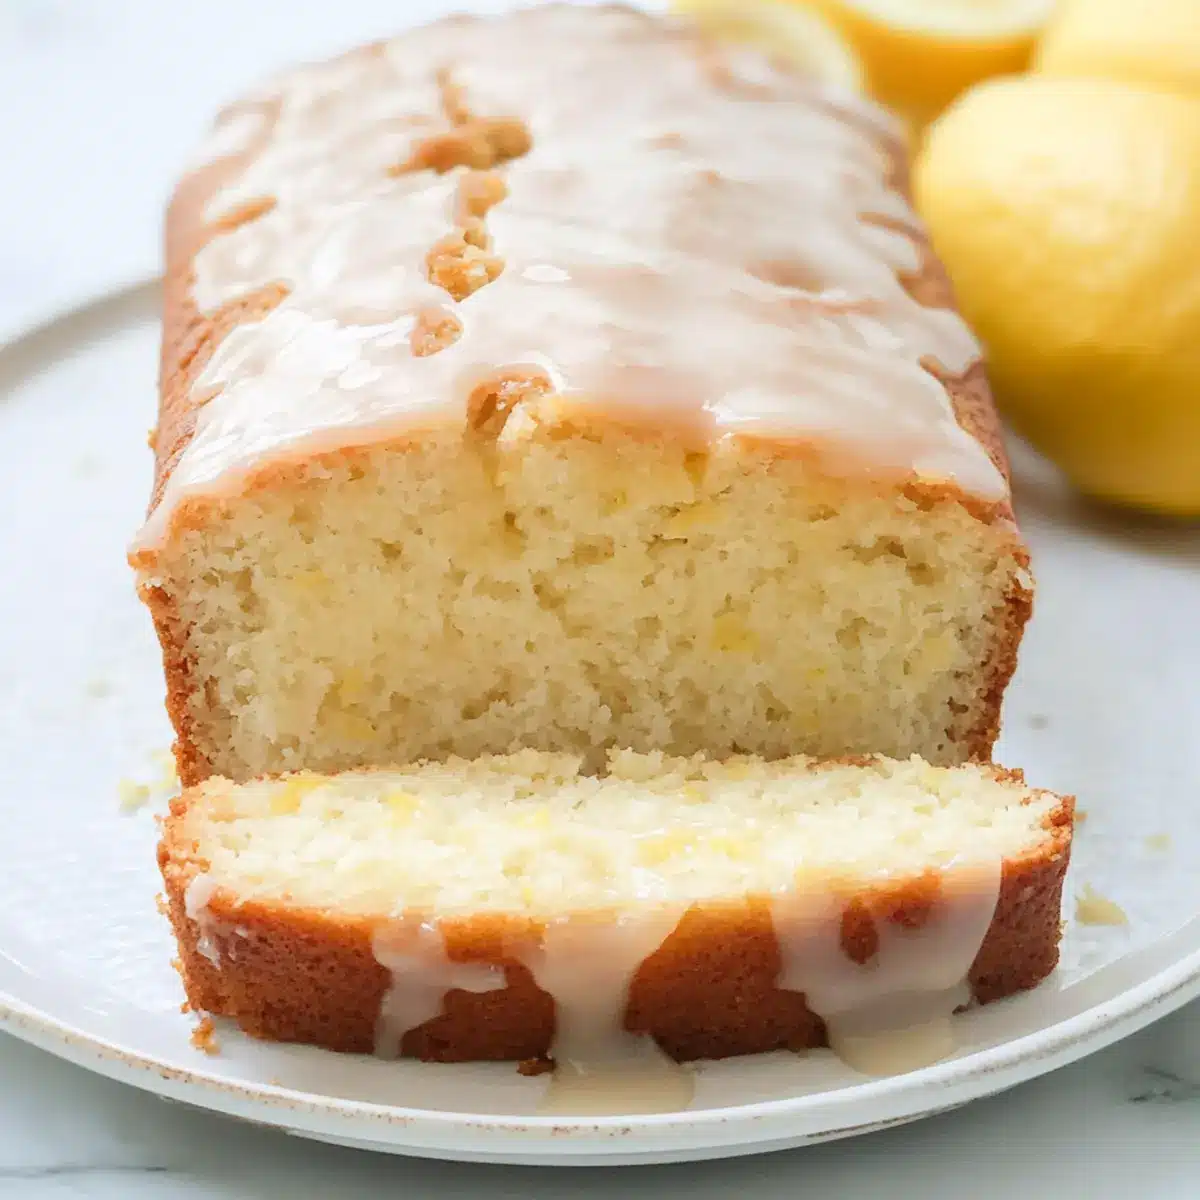
It’s one of those moments when a fleeting whiff of fresh lemons takes me back to sunny days spent with my grandmother in the kitchen. If you’re on the hunt for a delightful dessert that radiates cheer and is also gluten-free, my Gluten-Free Lemon Loaf with Lemon Glaze is just the ticket. Not only does it have a moist and tender crumb that makes it perfect for pairing with coffee, but it’s also entirely dairy-free, ensuring it’s a crowd-pleaser for everyone. This versatile treat is ideal for everything from holiday gatherings to cozy brunches, or simply when you’re longing for a taste of brightness in your day. And who can resist that sweet, tangy glaze that adds the perfect finishing touch? Are you ready to fill your kitchen with the uplifting scent of lemons? Let’s dive in!
Why is this lemon loaf irresistible?
Bright, Zesty Flavor: Each bite is bursting with fresh lemon juice and zest, elevating your taste buds to new heights.
Gluten-Free Goodness: Perfect for those avoiding gluten, this loaf showcases how delightful gluten-free baking can be.
Dairy-Free Delight: Crafted without dairy, it’s an inclusive dessert option that everyone can enjoy, promising no sacrifices on taste.
Simple to Make: With straightforward steps, this recipe is designed for both novice and experienced bakers alike.
Versatile Treat: Enjoy it as a sweet snack or serve it at brunch, where it’s sure to impress guests alongside a cup of tea or coffee.
Try pairing it with a side of Air Fryer Lemon Chicken for a complete meal experience!
Gluten-Free Lemon Loaf Ingredients
• Brighten your baking with these essentials!
For the Loaf
- Gluten-Free Flour – Provides structure; a 1:1 flour blend with xanthan gum can be an excellent substitute.
- Baking Powder – Ensures a perfect rise; always choose a gluten-free labeled version for safety.
- Baking Soda – Works with acidic ingredients for extra lift, making your loaf light and fluffy.
- Salt – Enhances flavor and balances sweetness, creating a delicious harmony in every slice.
- Avocado or Coconut Oil – Adds moisture and richness; oil helps keeps the loaf tender, unlike butter.
- Granulated Sugar – Sweetens the loaf beautifully; you might experiment with maple syrup for a different taste.
- Almond Milk – Serves as the liquid base; substitutes like cashew or oat milk are great for nut allergies.
- Lemon Juice and Zest – Infuses the loaf with vibrant flavor; using fresh ingredients guarantees brightness.
- Cornstarch – Acts as a thickener for the glaze; arrowroot or tapioca starch are suitable alternatives.
For the Lemon Glaze
- Powdered Sugar – Sweetens and thickens the glaze; for optimal sweetness, feel free to adjust to your liking.
- Lemon Juice – Adds a tangy brightness; fresh juice is always recommended for a brighter flavor.
Step‑by‑Step Instructions for Gluten-Free Lemon Loaf
Step 1: Preheat Your Oven
Begin by preheating your oven to 350°F (175°C). While the oven heats up, prepare a loaf pan by greasing it with a little oil or cooking spray to ensure your gluten-free lemon loaf releases easily after baking. This step sets the stage for a perfectly baked loaf.
Step 2: Mix Dry Ingredients
In a sturdy mixing bowl, combine your gluten-free flour, baking powder, baking soda, and salt. Whisk these dry ingredients together until they are well blended, which typically takes about a minute. This step helps to aerate your flour, ensuring an even rise while baking, so aim for a smooth, lump-free mixture.
Step 3: Combine Wet Ingredients
In a separate bowl, whisk together the avocado or coconut oil, granulated sugar, almond milk, fresh lemon juice, and lemon zest. Mix these ingredients until the sugar starts to dissolve, creating a smooth and creamy texture. This combo of wet ingredients will bring moisture and flavor to your gluten-free lemon loaf.
Step 4: Blend Wet and Dry Mixtures
Gradually add the dry ingredients to the wet mixture, stirring gently with a spatula or wooden spoon until just combined. Be careful not to overmix; a few lumps are perfectly fine. This step ensures your batter remains tender and light, which is essential for achieving that delightful crumb.
Step 5: Transfer to Pan
Pour the gluten-free lemon loaf batter into your prepared loaf pan. Use a spatula to spread the batter evenly and smooth out the top. This creates a beautiful loaf shape. Make sure to tap the pan gently on the counter to release any air bubbles trapped within the batter.
Step 6: Bake the Loaf
Place the loaf pan in your preheated oven and bake for about 60 minutes. Your loaf is done when it turns a lovely golden brown color, and a toothpick inserted into the center comes out clean. The tantalizing aroma of lemons will permeate your kitchen, let it beckon you as the baking time comes to a close.
Step 7: Cool and Glaze
Once baked, remove the gluten-free lemon loaf from the oven and let it sit in the pan for about 10 minutes before transferring it to a wire rack to cool completely. While the loaf cools, prepare the glaze by combining powdered sugar and fresh lemon juice until it reaches your desired consistency, ready to enhance that bright lemon flavor.
How to Store and Freeze Gluten-Free Lemon Loaf
Airtight Container: Store your gluten-free lemon loaf in an airtight container at room temperature for up to 3 days to maintain its moist texture.
Refrigerator Storage: If you plan on keeping it longer, refrigerate the loaf for up to 5–7 days. Just make sure to wrap it well to prevent it from drying out.
Freezing: For longer storage, freeze individual slices in plastic wrap, then place them in a freezer-safe bag. Enjoy the loaf for up to 3 months; simply thaw at room temperature.
Reheating: To retain moisture, reheat slices in the microwave for about 10-15 seconds, or toast them lightly for a warm lemony treat.
What to Serve with Gluten-Free Lemon Loaf with Lemon Glaze
Delightfully light and tangy, this lemon loaf is a wonderful centerpiece for an inviting meal or snack time.
- Creamy Mashed Potatoes: The smooth texture of mashed potatoes balances the zesty notes of the lemon loaf, making for a comforting contrast.
- Fresh Garden Salad: A crisp, refreshing salad complements the moistness of the loaf while enhancing its citrus notes; consider a citrus vinaigrette for harmony.
- Steamed Asparagus: Bright green and tender, these spears provide a subtle earthiness that pairs beautifully with the lemon flavor.
- Roasted Chicken: A savory, herb-marinated roasted chicken offers a satisfying balance to the sweetness of the lemon loaf, creating a delightful dinner duo.
- Blackberry Compote: Drizzling a homemade blackberry compote over each slice of lemon loaf adds a layer of sweetness and a pop of color that’s both visually and deliciously appealing.
- Iced Tea: A glass of cold, unsweetened iced tea serves as a refreshing drink alongside the loaf, allowing its bright flavors to shine through.
- Lemon Sorbet: Finish off a meal with a light and refreshing citrus sorbet that echoes the lemony sweetness of the loaf, providing a cool, sweet treat.
Make Ahead Options
These delightful Gluten-Free Lemon Loaf slices are perfect for meal prep enthusiasts! You can prepare the batter up to 24 hours in advance by mixing the wet and dry ingredients separately and refrigerating them; this helps preserve the freshness and quality of the flavors. The loaf can also be baked and stored at room temperature for up to 3 days or refrigerated for a longer shelf life. To maintain its moist texture, wrap the loaf tightly in plastic wrap or store it in an airtight container. When you’re ready to enjoy, simply glaze the loaf just before serving for that fresh, sweet finish—cornerstones of a scrumptious, hassle-free dessert!
Tips for the Best Gluten-Free Lemon Loaf
- Use Fresh Ingredients: Fresh lemons yield the best flavor. Always opt for freshly squeezed lemon juice and zest for that zesty brightness in your gluten-free lemon loaf.
- Measure Accurately: Packing your gluten-free flour can lead to a dense loaf. Use a spoon to gently fluff the flour before spooning it into your measuring cup.
- Don’t Overmix: Mixing the batter too much can result in a tough crumb. Stir gently until just combined for a light, airy loaf.
- Cool Before Glazing: Allow the loaf to cool completely before adding the glaze to prevent it from melting away. This ensures a beautiful finish and keeps the glaze intact.
- Experiment with Sweetness: If you’re substituting different sugars, keep an eye on the loaf’s texture and flavor, as these can vary significantly and impact your gluten-free lemon loaf.
Gluten-Free Lemon Loaf Variations
Feel free to get creative with your Gluten-Free Lemon Loaf! Each variation will add a unique twist that awakens the senses.
-
Lemon-Blueberry Burst: Add fresh or frozen blueberries to the batter for a delightful lemon-blueberry combo that lightens up every bite.
-
Tropical Citrus: Swap lemon juice and zest with orange for a bright, sweet citrus profile that makes every slice feel like a sunny getaway. The sweetness of oranges makes this a lovely variation.
-
Extra Moisture: For a richer loaf, substitute half of the coconut or avocado oil with unsweetened applesauce. This will add moisture while keeping the flavor vibrant.
-
Coconut Flakes: Stir in unsweetened shredded coconut to the batter for a chewy texture and a bit of tropical flair. The added coconut enhances the loaf’s moistness; it complements the lemon wonderfully.
-
Zesty Spice: Incorporate a pinch of cardamom or ginger powder for a warm spice twist that plays beautifully with the tangy lemon. A sprinkle adds depth and intrigue to each bite.
-
Gluten-Free Almond Flour Swap: For a denser crumb, replace part of the gluten-free flour with almond flour, creating a nutty flavor that brings richness to your loaf.
-
Sweetener Swap: Experiment with coconut sugar or honey instead of granulated sugar for a unique sweetness. Remember, honey could require adjusting the liquid ratios!
These twists not only personalize your loaf but keep it exciting for any occasion. And if you love citrus delights, you might also enjoy pairing this gluten-free loaf with a delightful Lemon Butter Lobster Risotto. Happy baking!
Gluten-Free Lemon Loaf with Lemon Glaze Recipe FAQs
How do I choose ripe lemons for this lemon loaf?
Absolutely! Look for lemons that are firm to the touch and have a bright yellow color. Avoid any that have dark spots or feel soft, as these could be past their prime. Fresh, juicy lemons will provide the best flavor for your gluten-free lemon loaf.
How should I store my gluten-free lemon loaf?
For best results, keep your lemon loaf in an airtight container at room temperature for up to 3 days. If you need to store it longer, pop it in the fridge for about 5–7 days. Just make sure to seal it well to preserve its moisture!
Can I freeze gluten-free lemon loaf?
Very! To freeze, slice the gluten-free lemon loaf into individual portions and wrap each slice tightly in plastic wrap. Place the wrapped slices in a freezer-safe bag and you can enjoy them for up to 3 months. When you’re ready for a taste, simply thaw at room temperature or microwave for about 10-15 seconds.
What can I do if my loaf turned out dense?
If your gluten-free lemon loaf is too dense, it might be due to overmixing the batter or using an incorrect flour blend. For a lighter loaf, mix the wet and dry ingredients until just combined — a few lumps are perfectly fine! Additionally, make sure your gluten-free flour blend contains xanthan gum, as this aids in the structure of the loaf.
Are there any allergens I should be aware of?
Absolutely! This gluten-free lemon loaf is dairy-free, which makes it suitable for most people with dairy allergies. However, do check if you or your guests have nut allergies since almond milk is used. You can easily substitute with oat or coconut milk to accommodate any dietary restrictions.

Lemon-Infused Gluten-Free Lemon Loaf for Bright Mornings
Ingredients
Equipment
Method
- Preheat your oven to 350°F (175°C). Grease the loaf pan with oil or cooking spray.
- In a mixing bowl, whisk together gluten-free flour, baking powder, baking soda, and salt.
- In another bowl, whisk together oil, sugar, almond milk, lemon juice, and zest.
- Gradually add dry ingredients to wet mixture, stirring gently until combined.
- Pour the batter into the prepared loaf pan and smooth the top.
- Bake for about 60 minutes until golden brown and a toothpick inserted comes out clean.
- Cool in the pan for 10 minutes before transferring to a wire rack. Prepare the glaze while cooling.
Leave a Reply