
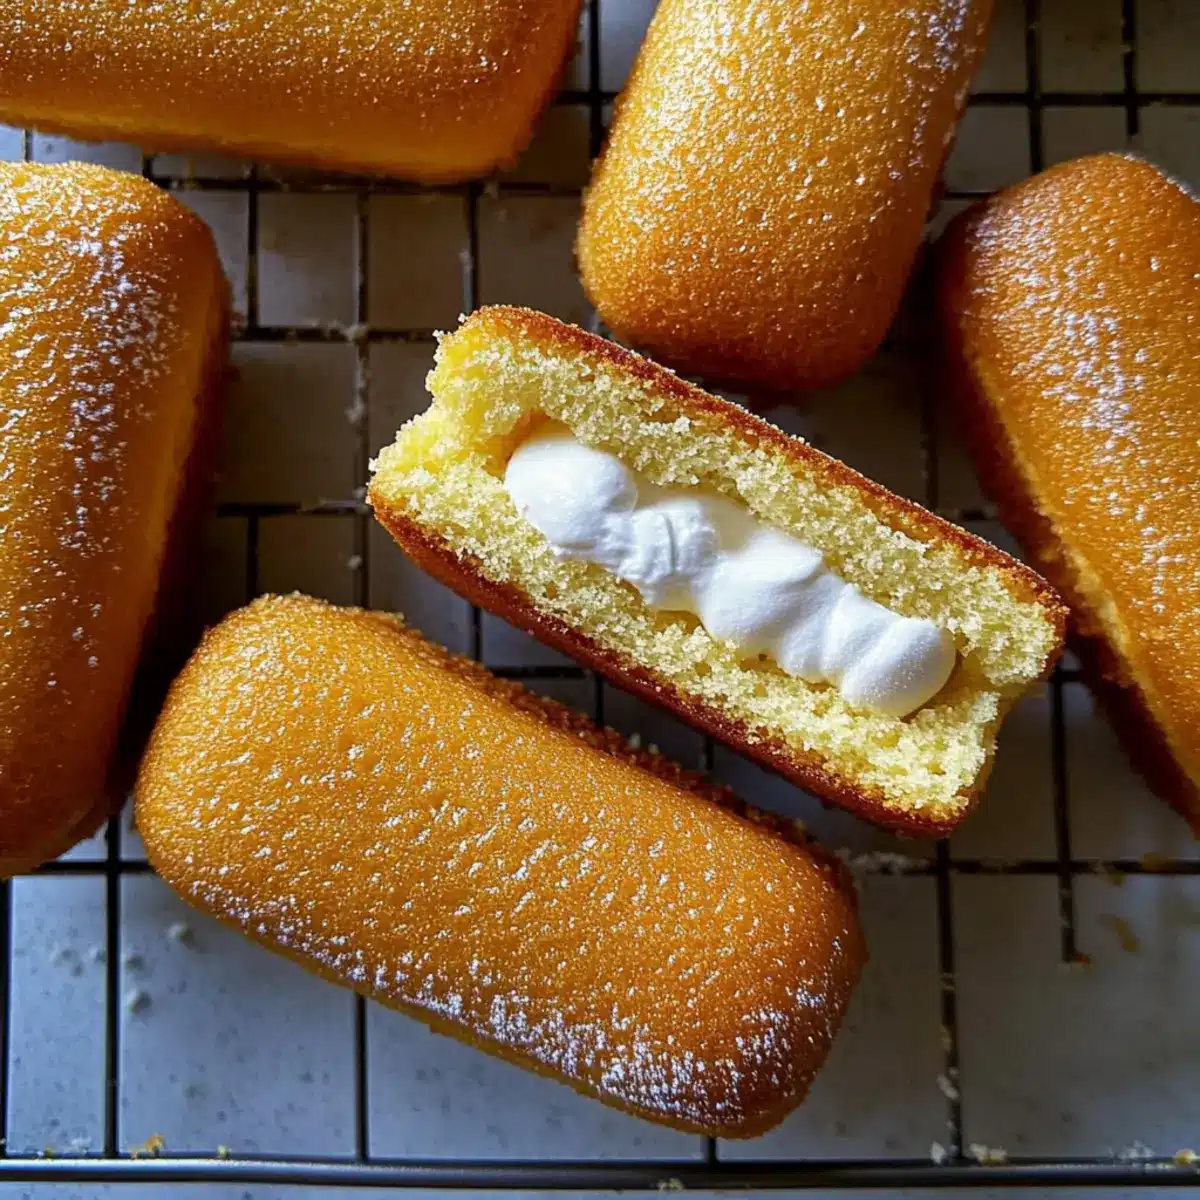
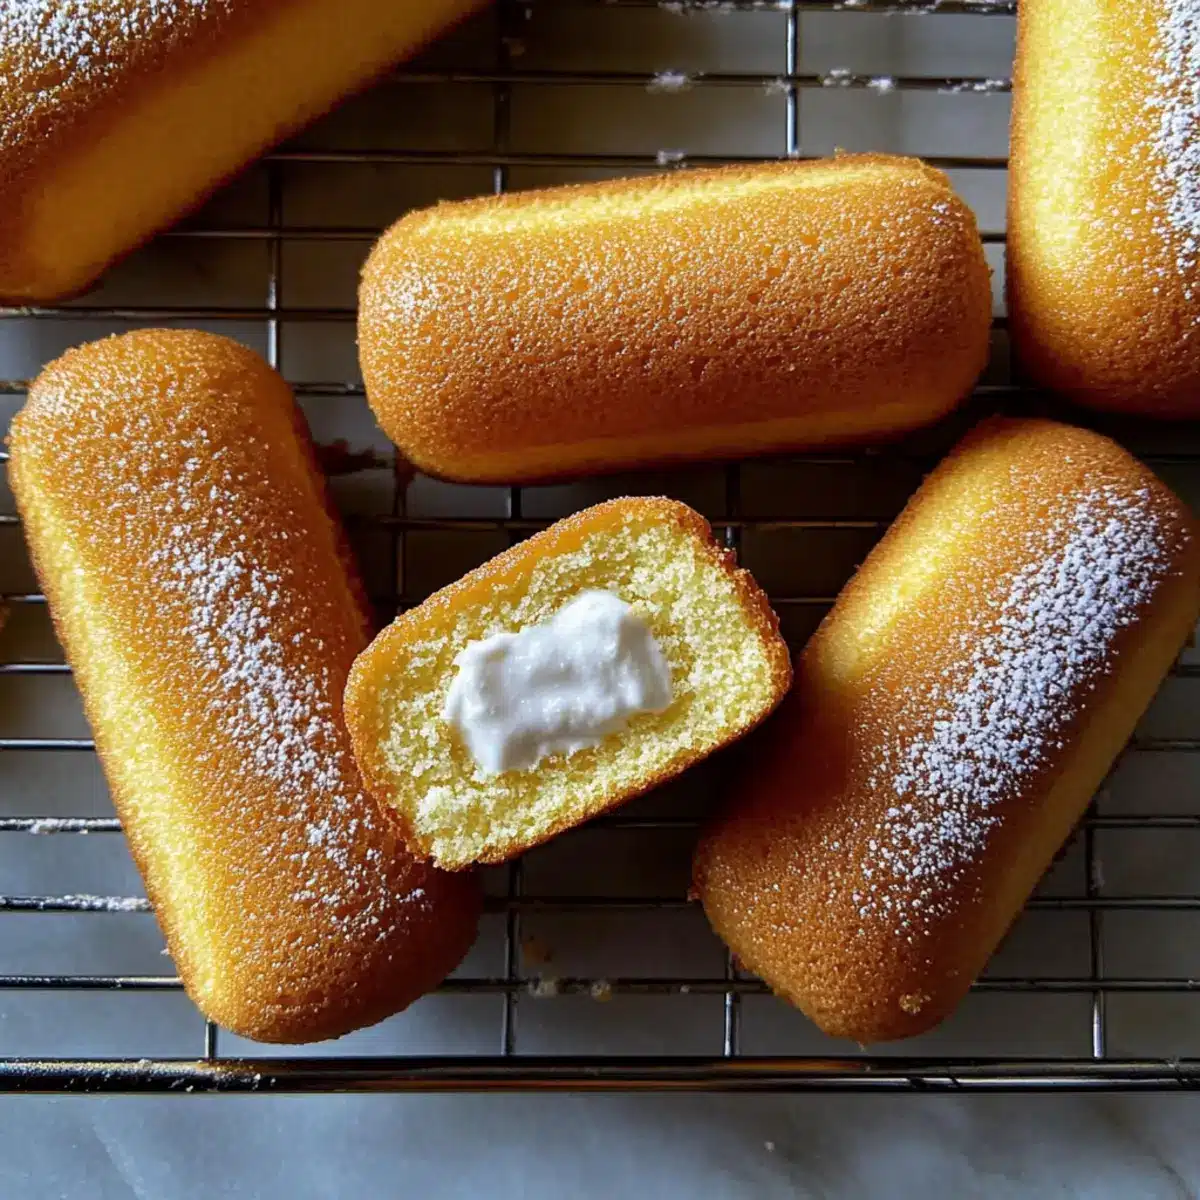
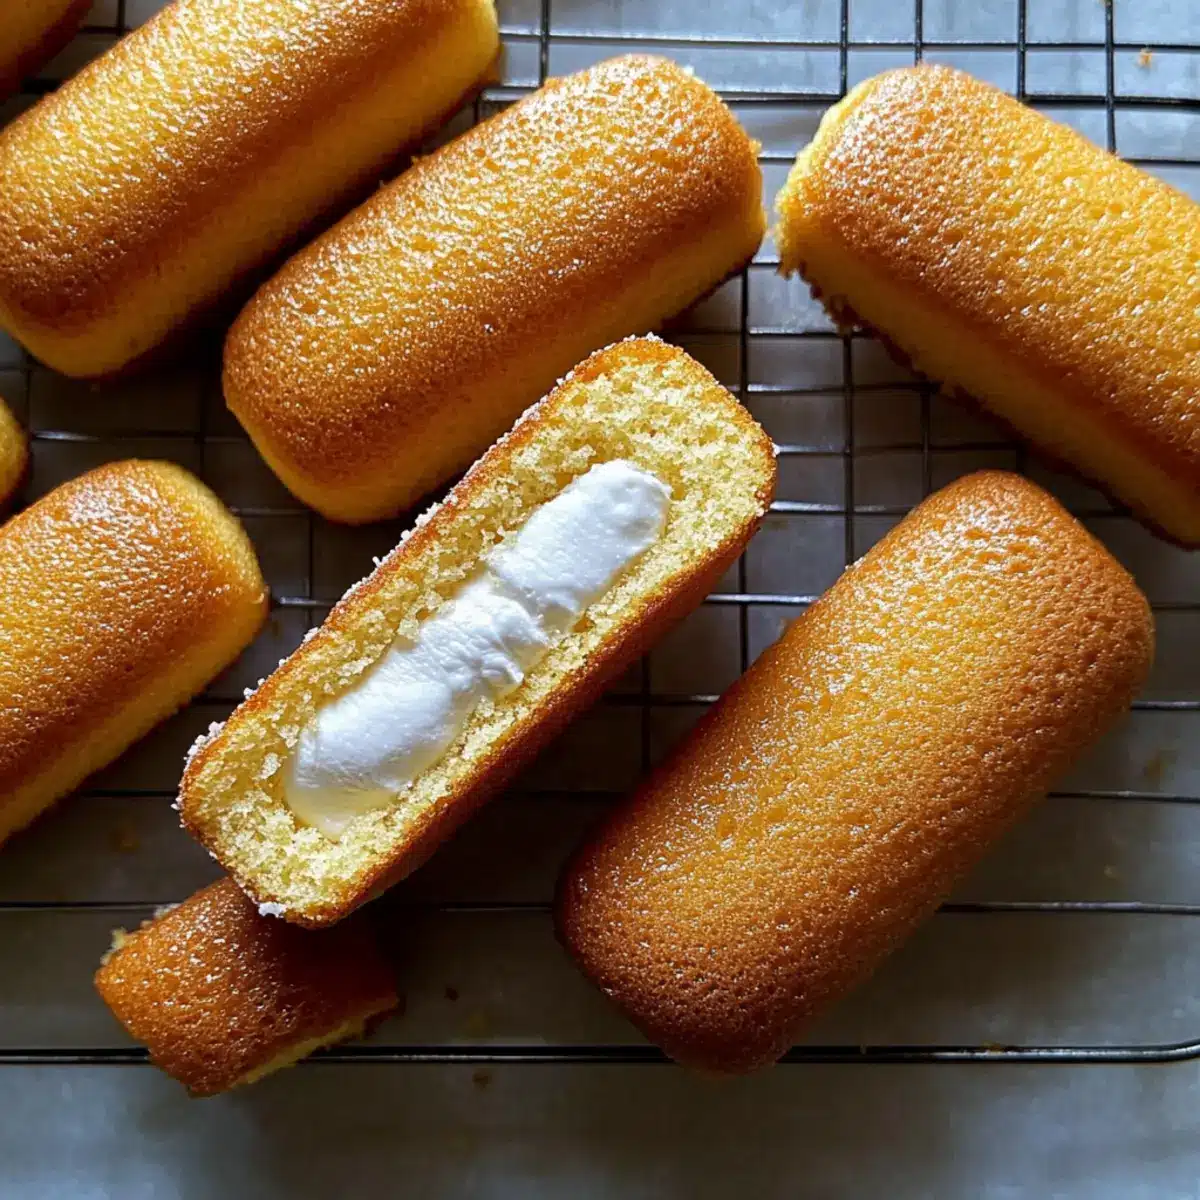
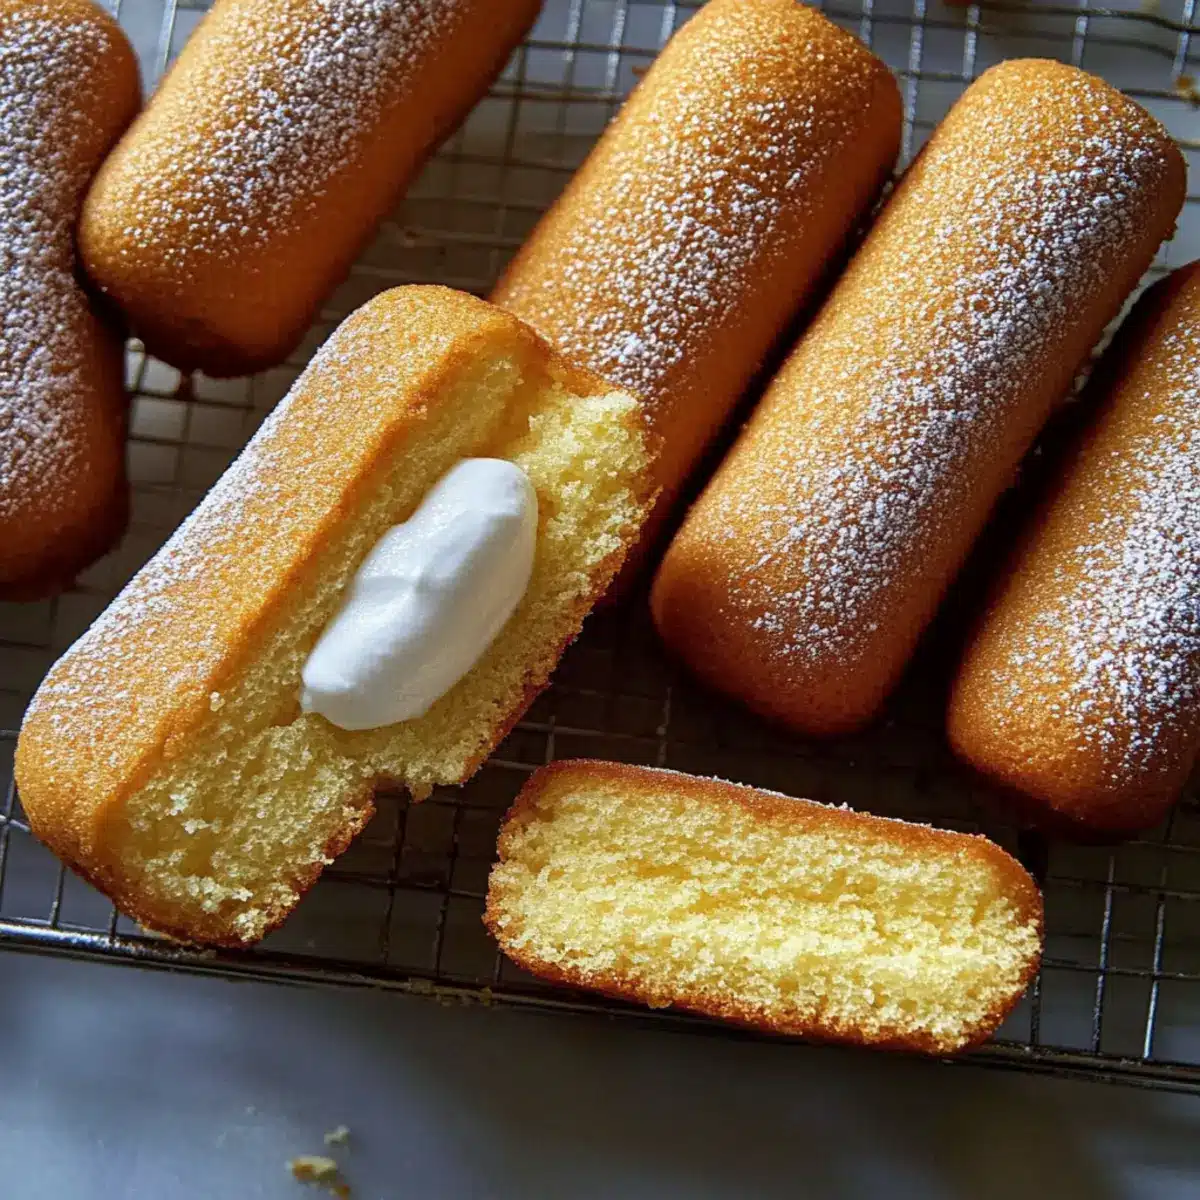
The first bite of a homemade Twinkie is like a warm hug from childhood, instantly transporting you back to simpler times and sweet memories. As I whisk together fluffy eggs and creamy butter, I can almost hear the laughter of family gathered around the kitchen table, enjoying these cloud-like delights. Crafting my own Homemade Twinkies has turned into an irresistible ritual that brings joy and nostalgia, and they’re much better than the store-bought ones! With just a handful of wholesome ingredients, you can whip up these airy treats in no time, making them a perfect addition to any gathering or a delightful pick-me-up after a long day. Plus, the customizable filling options mean you can get creative and tailor them to your taste. So, are you ready to dive into the blissful world of homemade desserts?
Why Choose Homemade Twinkies?
Nostalgic memories come flooding back with each bite, recreating the joy of childhood in your kitchen. Customizable flavors let you unleash your creativity—add chocolate chips, zesty citrus, or even your favorite extracts for a unique twist. Wholesome ingredients mean you can ditch the preservatives and artificial additives, making these treats a healthier choice. Easy to make, our simple recipe ensures that you won’t need a bakery degree to impress your family and friends. Whether it’s a weekend treat or a crowd-pleasing addition to your next party, Homemade Twinkies will surely delight everyone. For another easy and nostalgic treat, check out my Crack Burgers Homemade recipe!
Homemade Twinkies Ingredients
For the Cake
• All-Purpose Flour – Provides structure to the cakes; substitute with gluten-free flour for a gluten-free option.
• Baking Powder – Helps the cake rise; ensure it’s fresh for the best results.
• Salt – Enhances flavor; omit if needed for low-sodium diets.
• Large Eggs – Vital for the cake’s lightness and texture; use room temperature eggs for maximum volume.
• Granulated Sugar – Sweetens while aiding in the cake’s structure; coconut sugar can be a less refined substitute.
• Vanilla Extract – Adds flavor; use pure vanilla for the best taste.
• Milk – Contributes moisture and richness; dairy-free milk can be substituted.
• Unsalted Butter – Adds flavor and moistness; margarine can be used for dairy-free options.
For the Filling
• Marshmallow Creme – Provides sweetness and texture for the filling; homemade or store-bought options work well.
• Powdered Sugar – Sweetens and thickens the filling; can be substituted with a sugar alternative.
• Heavy Cream – Helps achieve the desired consistency of the filling; for a lighter option, use a non-dairy cream.
Step‑by‑Step Instructions for Homemade Twinkies
Step 1: Preheat and Prepare
Preheat your oven to 350°F (175°C) and grease a Twinkie or mini loaf pan with non-stick spray or butter. This essential step ensures your homemade Twinkies will release easily after baking. While the oven heats up, gather your ingredients and have them ready for a smooth baking experience.
Step 2: Combine Dry Ingredients
In a medium bowl, sift together the all-purpose flour, baking powder, and salt, ensuring there are no lumps. This crucial blend adds structure to your cake and helps it rise beautifully. Set this mixture aside so you can focus on the wet ingredients in the next step.
Step 3: Whip Eggs and Sugar
In a large mixing bowl, beat the large eggs and granulated sugar together until the mixture becomes thick and pale, about 6-8 minutes. You want it to have a velvety texture that captures air, which is essential for achieving the lightness of your homemade Twinkies. A stand mixer makes this task easier but whisking by hand can work too!
Step 4: Fold in Vanilla and Dry Ingredients
Gently fold in the vanilla extract, followed by your dry ingredient mixture in batches. Carefully incorporate the ingredients to maintain the airy texture you created in the previous step. Finally, mix in the combined milk and melted unsalted butter until just combined, ensuring everything is integrated without over-mixing.
Step 5: Fill and Bake
Using a spoon or piping bag, fill the molds about 3/4 full with the batter. Bake in the preheated oven for 12-15 minutes or until the tops are golden and a toothpick inserted into the center comes out clean. Keep an eye on them, as you want a light golden color that indicates moist, fluffy homemade Twinkies.
Step 6: Cool the Cakes
Once baked, remove the Twinkie pan from the oven and allow the cakes to cool in the pan for about 5 minutes. Then, gently transfer them to a wire rack to cool completely. Allowing them to cool is crucial to preventing the marshmallow filling from melting when you prepare to fill them.
Step 7: Prepare the Filling
In a mixing bowl, beat the softened unsalted butter until it’s light and fluffy. Gradually mix in the marshmallow creme, powdered sugar, and heavy cream. Continue beating until your filling is smooth and creamy. This decadent filling is what will make your homemade Twinkies truly shine, so ensure it’s well combined.
Step 8: Fill Each Cake
Using a piping bag or a squeeze bottle, carefully fill each cooled Twinkie from the bottom with the marshmallow filling. Make sure to fill them generously, as this classic filling is key to replicating that beloved taste. You’ve now crafted your own homemade Twinkies, ready to enjoy!
What to Serve with Homemade Twinkies?
Nothing says comfort like a delightful spread to accompany your homemade treats, enhancing every bite with flavors and textures.
-
Creamy Vanilla Ice Cream: Adding a scoop of creamy vanilla ice cream creates a delightful contrast, melting smoothly against the soft sponge of your twinkies. The classic pairing is both nostalgic and delicious.
-
Fresh Berries: A side of juicy strawberries or tart raspberries adds a burst of freshness. Their natural sweetness balances the richness of the marshmallow filling, making each bite even more enjoyable.
-
Chocolate Ganache: Drizzling warm chocolate ganache over your homemade Twinkies will amplify their appeal and satisfy any chocolate craving. The luscious, rich flavor creates an indulgent experience.
-
Whipped Cream: Light and fluffy whipped cream complements the airy texture of your twinkies beautifully. Consider swirling in a bit of vanilla or a dash of cocoa powder for an extra flavor boost.
-
Coffee or Espresso: A hot cup of coffee or a shot of espresso serves as a perfect beverage choice. The rich, robust flavors cut through the sweetness of the twinkies and create a balanced dessert experience.
-
Caramel Sauce: Pouring some warm caramel sauce on top introduces a sweet and buttery element that elevates both taste and presentation. It adds a touch of elegance, perfect for gatherings or special occasions.
-
Lemon Zest: Brighten up your homemade Twinkies by garnishing them with freshly grated lemon zest. The citrusy aroma adds a refreshing note, enhancing the overall flavor without overpowering the sweetness.
-
Nutty Sprinkles: Toasted nuts, such as almonds or hazelnuts, lend a delightful crunch. They provide a contrasting texture that enhances the overall enjoyment of this nostalgic dessert.
Expert Tips for Homemade Twinkies
-
Room Temperature Eggs: Ensure your large eggs are at room temperature before whipping to achieve optimal volume and lightness in your batter.
-
Gentle Mixing: Avoid over-mixing when incorporating dry ingredients into the wet mix. A gentle fold retains airiness, preventing dense cakes in your homemade Twinkies.
-
Cool Completely: Always let the cakes cool fully before filling them with marshmallow creme. Filling warm cakes may cause the filling to melt and leak.
-
Right Pan Matters: While a Twinkie pan is ideal for shaping, mini loaf pans or other molds can work effectively. Just remember to adjust baking times if needed.
-
Flavor Variations: Experiment with various filling flavors, using chocolate chips or flavored extracts, to customize your homemade Twinkies for different occasions.
Homemade Twinkies: Fun Twists!
Feel free to put your own spin on these delightful treats by incorporating different flavors and ingredients!
-
Chocolate Filling: Replace traditional marshmallow creme with chocolate ganache for a decadent twist that chocolate lovers will adore. Creamy and rich, this filling complements the sponge beautifully.
-
Fruit-Flavored: Add zest from oranges or lemons to the filling or use fruit puree to create a citrusy version of your twinkies. This refreshing twist can brighten any occasion!
-
Nutty Crunch: Stir in finely chopped nuts, like almonds or pecans, into the filling for an added crunch. This adds a delightful texture that contrasts perfectly with the fluffy cake.
-
Spiced Delight: Incorporate ground cinnamon or nutmeg into the batter for a warming spice that enhances the flavor profile and makes each bite comforting and delightful.
-
Vanilla Bean: Instead of vanilla extract, try using actual vanilla bean paste for intensified flavor. The flecks of vanilla bean elevate the aesthetics and the taste!
-
Layered Treats: Make a deconstructed Twinkie by layering cake pieces with filling, fresh berries, and a drizzle of chocolate syrup. It’s a beautiful presentation for parties!
-
Mini Versions: Bake your batter in mini muffin tins for bite-sized twinkies. They’re perfect for snacking or serving at gatherings, and they allow guests to enjoy a taste without indulgence!
-
Nostalgic Combo: Pair your homemade Twinkies with a scoop of vanilla ice cream for a nostalgic dessert reminiscent of childhood sundae outings. It’s an unbeatable combo!
With these fun options, you can enjoy a unique twist on your homemade twinkies, whether you’re aiming for something fruity, decadent, or creatively fun. For more delightful recipes, don’t forget to explore my Jalapeno Peach Chicken for a unique flavor explosion!
Make Ahead Options
These homemade Twinkies are an excellent choice for meal prep, allowing you to savor nostalgia without the last-minute rush! You can prepare the cake batter up to 24 hours in advance. Simply mix the dry ingredients and wet ingredients separately, then refrigerate until you’re ready to bake. Bake the Twinkies and let them cool completely, then prepare the filling and store it in an airtight container in the refrigerator for up to 3 days. To maintain the soft texture, keep the filled Twinkies in an airtight container until you’re ready to serve. When it’s time to indulge, just take them out, and you’ll have freshly filled homemade Twinkies that taste just as delightful as when they were made!
How to Store and Freeze Homemade Twinkies
-
Room Temperature: Homemade Twinkies can be stored at room temperature for up to 2 days in an airtight container to maintain their softness and flavor.
-
Fridge: For longer freshness, keep your Twinkies in the refrigerator, where they will last for up to 4-5 days. Ensure they’re in an airtight container to prevent them from drying out.
-
Freezer: If you want to store them for an extended period, wrap each Twinkie individually in plastic wrap and place them in a freezer-safe bag. They can be frozen for up to 3 months.
-
Reheating: To enjoy frozen Homemade Twinkies, thaw them in the refrigerator overnight. For a little warmth, pop them in the microwave for about 10-15 seconds before serving.
Homemade Twinkies Recipe FAQs
What is the best way to select ripe ingredients for my Homemade Twinkies?
Absolutely! Fresh ingredients lead to the best flavors and textures. For eggs, choose ones that are free from cracks and have a clean shell. When selecting butter, look for unsalted varieties, ensuring it’s fresh and stored correctly. For milk, check the expiration date and that the packaging is intact. Using room temperature eggs will yield a fluffier cake, so take them out ahead of time!
How should I store Homemade Twinkies for optimal freshness?
Very! Store your Homemade Twinkies in an airtight container at room temperature for up to 2 days to keep them soft. If you want them to last a bit longer, place them in the refrigerator, where they can stay fresh for up to 4-5 days. Just make sure to keep them sealed to avoid drying out!
Can I freeze my Homemade Twinkies?
Absolutely! Freezing is a great way to enjoy your Homemade Twinkies later. Wrap each Twinkie individually in plastic wrap, then place them in a freezer-safe bag to keep them protected from freezer burn. They can be stored in the freezer for up to 3 months. When you’re ready to enjoy them, simply thaw them in the fridge overnight. For a warm treat, microwave them for 10-15 seconds!
What should I do if my Twinkies collapse or are too dense?
If your Homemade Twinkies collapse or are dense, there are a few things to troubleshoot. Ensure your baking powder is fresh and has not expired, as this is crucial for rising. Also, make sure you’re not over-mixing the batter; gently folding in the ingredients is key to keeping the airiness. Lastly, check that your oven temperature is accurate, as baking too hot can cause them to rise too quickly and deflate.
Are there any dietary considerations for Homemade Twinkies?
Yes! If you’re making Homemade Twinkies for people with dietary restrictions, there are several adjustments you can make. To cater to gluten-free diets, substitute all-purpose flour with a gluten-free flour blend. For those with dairy allergies, you can use dairy-free milk, margarine, and non-dairy cream for the filling. It’s always a good idea to check ingredient labels for any potential allergens, especially with store-bought marshmallow creme.
Homemade Twinkies: Bake Your Nostalgia from Scratch
Ingredients
Equipment
Method
- Preheat your oven to 350°F (175°C) and grease a Twinkie or mini loaf pan.
- In a medium bowl, sift together the all-purpose flour, baking powder, and salt.
- In a large mixing bowl, beat the large eggs and granulated sugar together until thick and pale.
- Fold in the vanilla extract, followed by the dry ingredients and then mix in the milk and butter.
- Fill the molds about 3/4 full and bake for 12-15 minutes until golden.
- Remove from the oven and cool in the pan for about 5 minutes, then transfer to a wire rack.
- Beat the softened unsalted butter until fluffy and mix in the marshmallow creme, powdered sugar, and heavy cream.
- Fill each cooled Twinkie from the bottom with the marshmallow filling.
Leave a Reply