
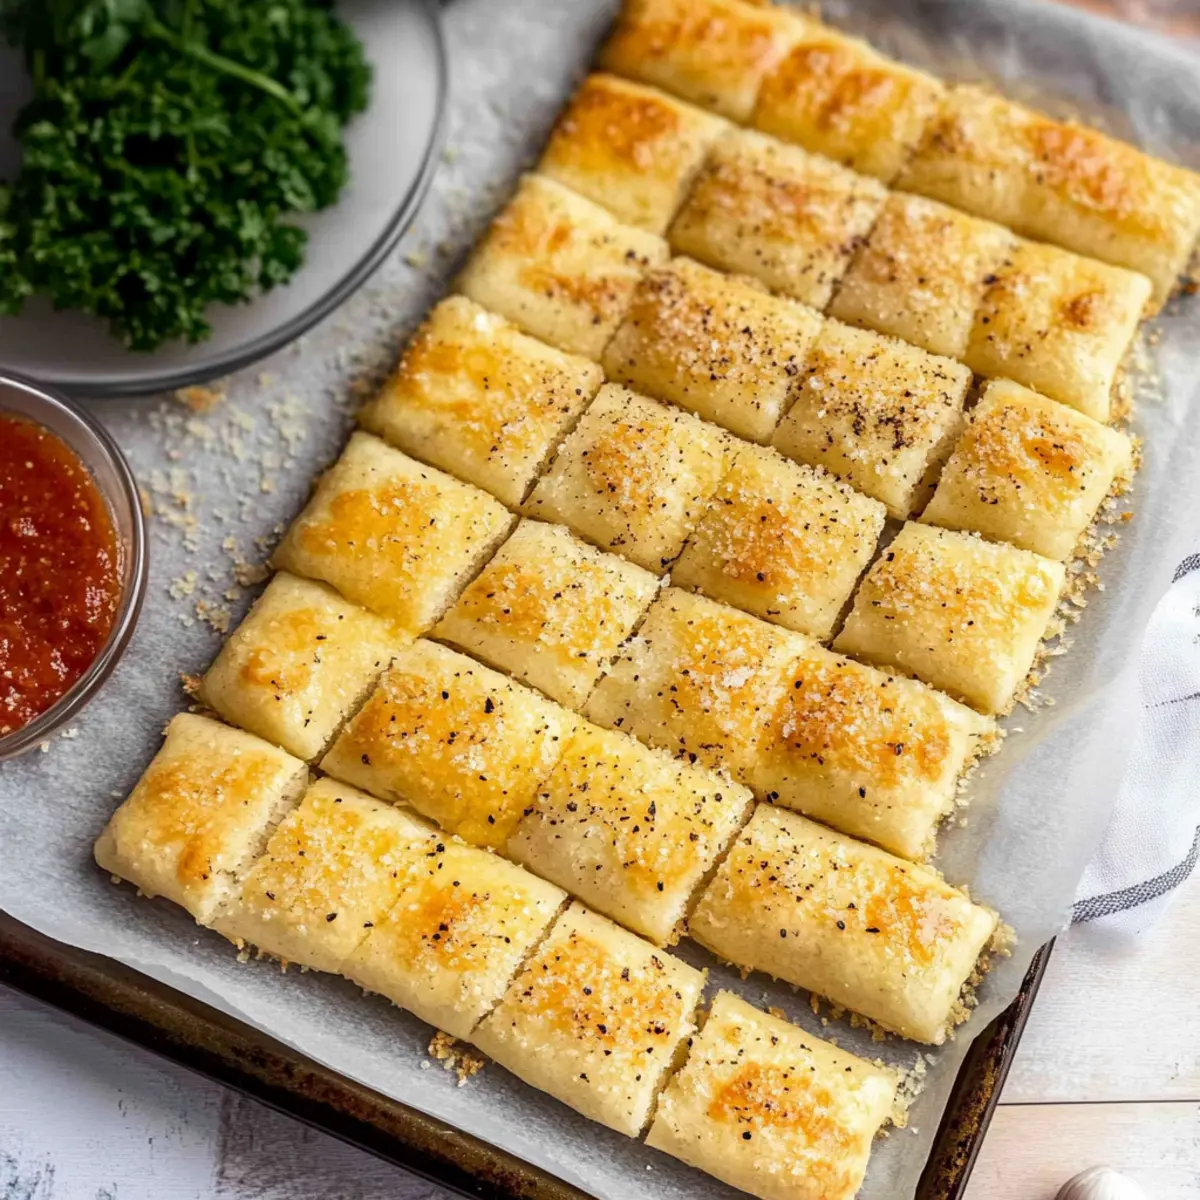
The irresistible aroma of freshly baked breadsticks dancing through the kitchen is like a warm hug for the soul. Today, I’m excited to share my recipe for Quick & Easy Garlic Sheet Pan Breadsticks, which are not only incredibly easy to make but also an absolute crowd-pleaser. With just a handful of basic ingredients, these tender, chewy delights transform any meal into a memorable experience. Whether you pair them with pasta, soups, or enjoy them on their own with a touch of marinara, they’re sure to bring smiles to the dinner table. Plus, these breadsticks are freezer-friendly, making them perfect for make-ahead meals. Who doesn’t love having a delicious snack ready to go? Let’s dust off that mixing bowl and dive into the dough—your taste buds are in for a treat!
Why Are These Breadsticks So Irresistible?
Simplicity at its finest: With just a handful of basic ingredients, these breadsticks come together easily, making them a perfect project for novice cooks and seasoned chefs alike.
Flavor-packed goodness: Infused with garlic and topped with savory cheese, each bite delivers a burst of flavor that’ll make you crave more.
Crowd-pleasing delight: Serve them at family dinners or casual get-togethers—everyone will love them! Pair with marinara sauce for dipping, or enjoy them alongside a hearty soup, like Japanese Katsu Bowls.
Freezer-friendly convenience: Prepare a batch ahead of time, freeze them, and bake fresh breadsticks whenever hunger strikes!
Versatile possibilities: You can easily customize these Sheet Pan Breadsticks by substituting different cheeses or adding spices to suit your taste. The options are endless!
Sheet Pan Breadsticks Ingredients
• Unlock the secrets behind these heavenly breadsticks!
For the Dough
- Warm Water – Activates the yeast; use water at 105°-115°F for optimal yeast activity.
- Granulated Sugar – Feeds the yeast for a better rise, ensuring fluffy breadsticks.
- Salt – Enhances flavor and controls yeast growth, balancing the taste perfectly.
- Yeast – Essential for leavening the dough; it creates that light, airy texture you desire.
- All-Purpose Flour – Provides structure; substitute with bread flour for a chewier outcome.
- Melted Butter – Adds richness and flavor; can be replaced with olive oil for a lighter touch.
For the Topping
- Parmesan Cheese – Adds savory flavor with a slight crunch on top; feel free to swap with mozzarella for extra gooeyness!
- Garlic Salt – Imparts that delightful garlicky taste; consider fresh minced garlic for a bolder flavor.
- Italian Seasoning – Offers an aromatic touch; adjust to your preference for a personalized blend.
Dive into these ingredients and bring flavor-packed Sheet Pan Breadsticks to your table!
Step‑by‑Step Instructions for Quick & Easy Garlic Sheet Pan Breadsticks
Step 1: Activate the Yeast
In a small bowl, mix together warm water (105°-115°F), sugar, and salt. Stir in the yeast and allow it to rest for 5-10 minutes, until it becomes bubbly and frothy. This step is crucial for ensuring your Quick & Easy Garlic Sheet Pan Breadsticks rise beautifully.
Step 2: Mix the Dough
In a large mixing bowl, combine the activated yeast mixture with flour gradually, using a dough hook on your stand mixer. Mix until the dough forms a loose ball; it should be slightly sticky but still manageable. This dough will be the base for your flavorful breadsticks!
Step 3: Proof the Dough
Cover the dough with a clean kitchen cloth and place it in a warm area. Let it rise for 30-45 minutes, or until it has doubled in size. The dough should feel fluffy and airy, ready to create those delightful Quick & Easy Garlic Sheet Pan Breadsticks.
Step 4: Prepare the Baking Sheet
As the dough is rising, preheat your oven to 350°F (175°C). Grease a large sheet pan with melted butter, ensuring that it’s well coated. This will help achieve that slightly crispy exterior we all love on our breadsticks.
Step 5: Spread the Dough
Once the dough has risen, gently punch it down to release air. Transfer it to the prepared pan and press it outwards from the center to cover the entire sheet. Aim for an even layer, while enjoying the aromatic scent of dough that’s about to become your delicious breadsticks.
Step 6: Add the Toppings
Drizzle the remaining melted butter over the stretched dough, evenly coating the surface. Next, sprinkle Parmesan cheese, garlic salt, and Italian seasoning generously over the top. These toppings will infuse the breadsticks with mouthwatering flavors that will tantalize everyone’s taste buds.
Step 7: Final Proof
Allow the prepared dough to rise a second time for about 15-20 minutes. This will give your Quick & Easy Garlic Sheet Pan Breadsticks an extra lift, making them soft and chewy once baked. Keep an eye on the dough as it puffs up!
Step 8: Cut & Bake
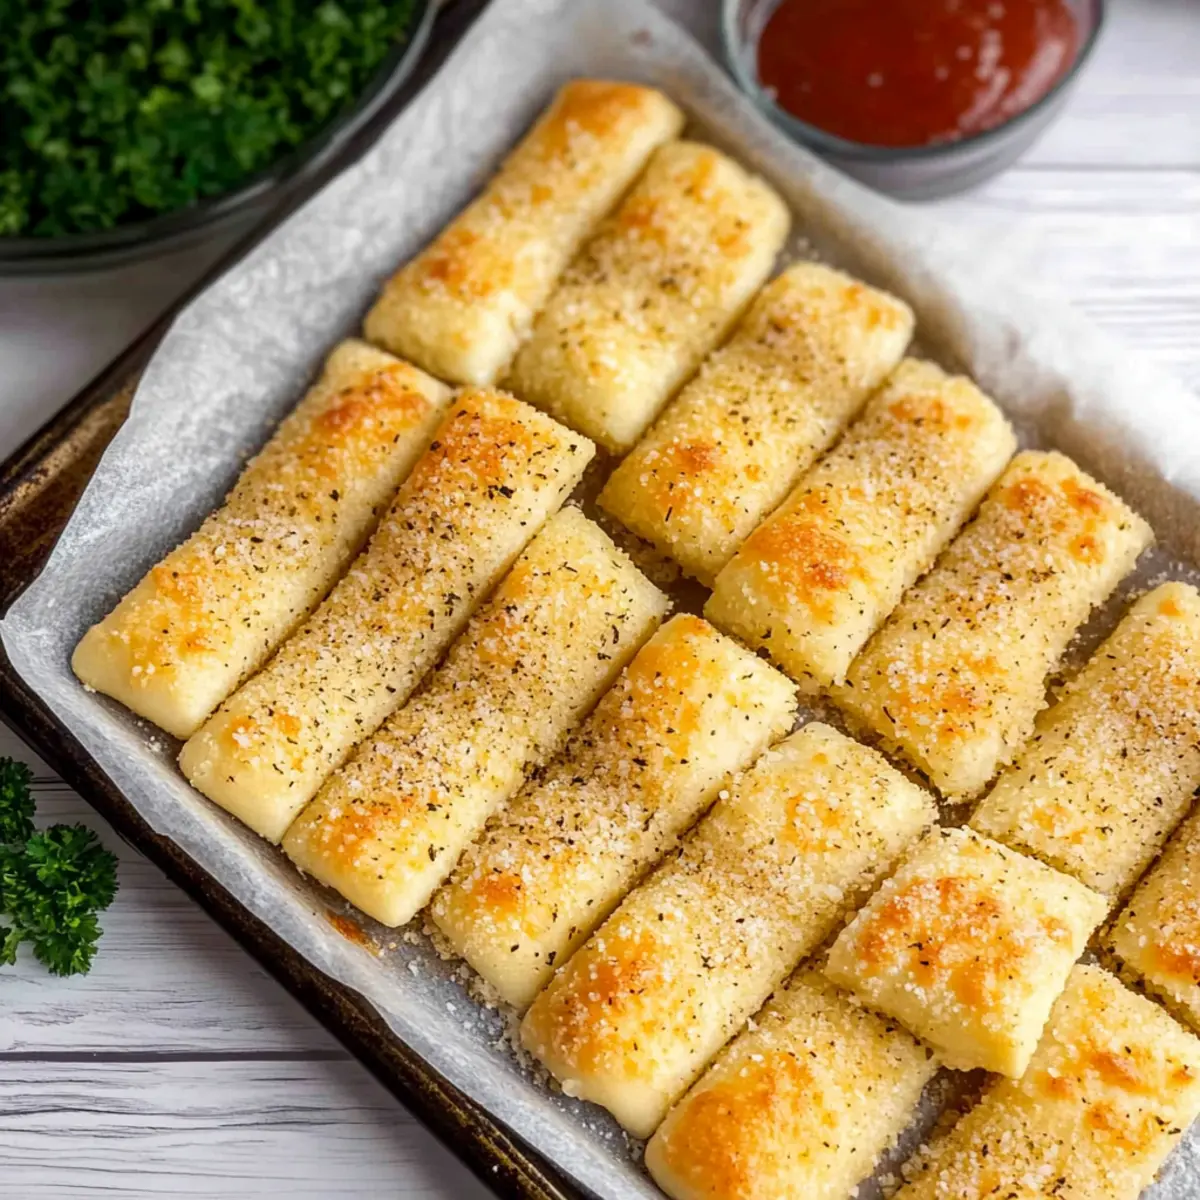
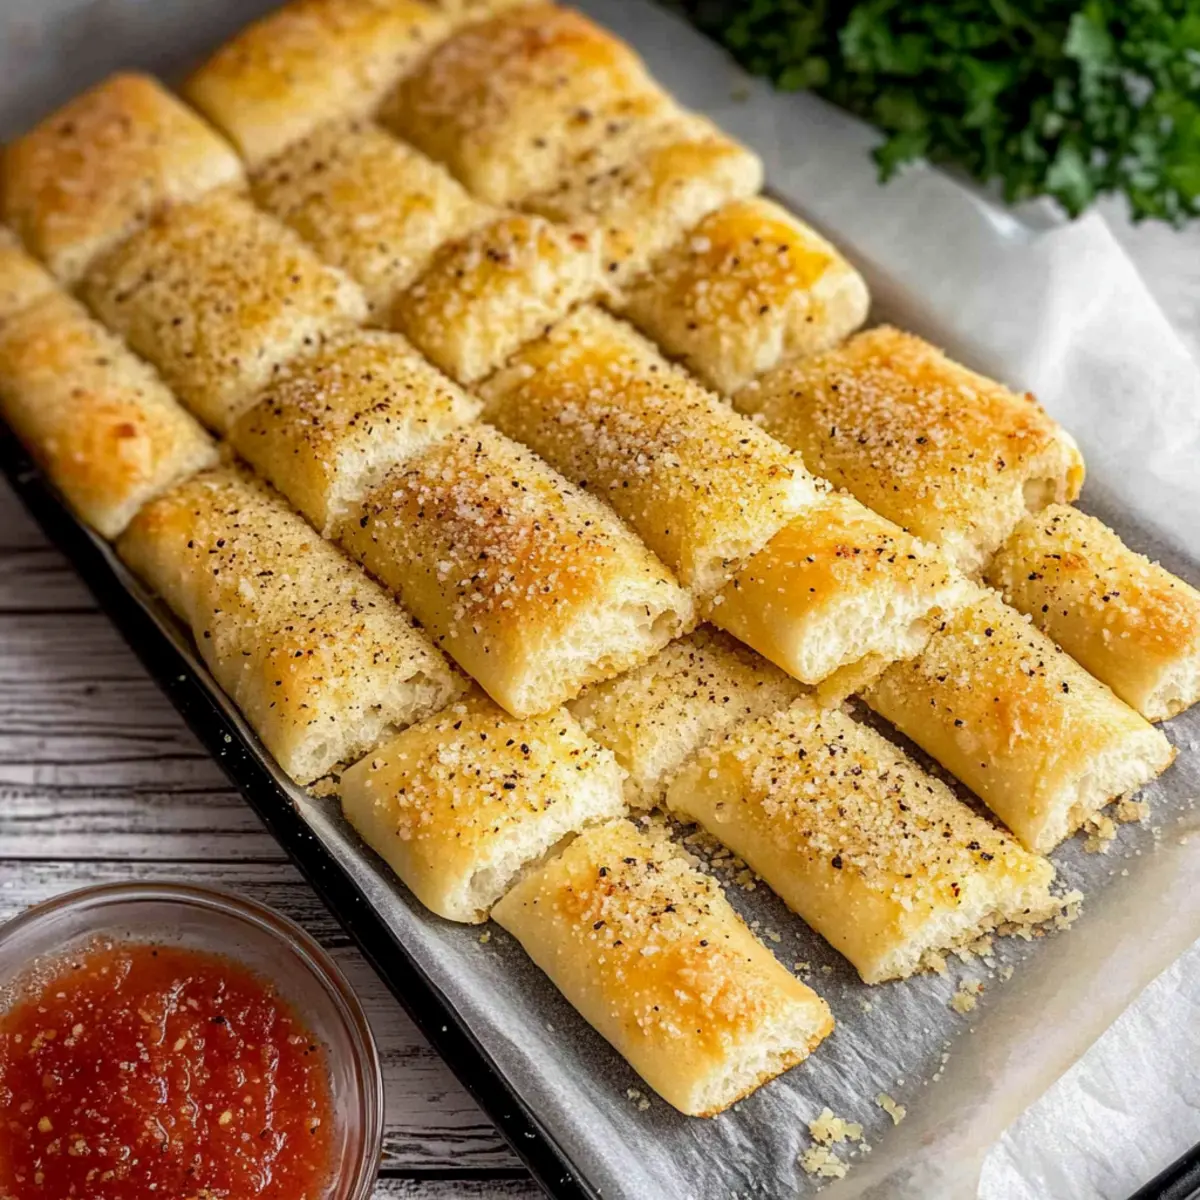
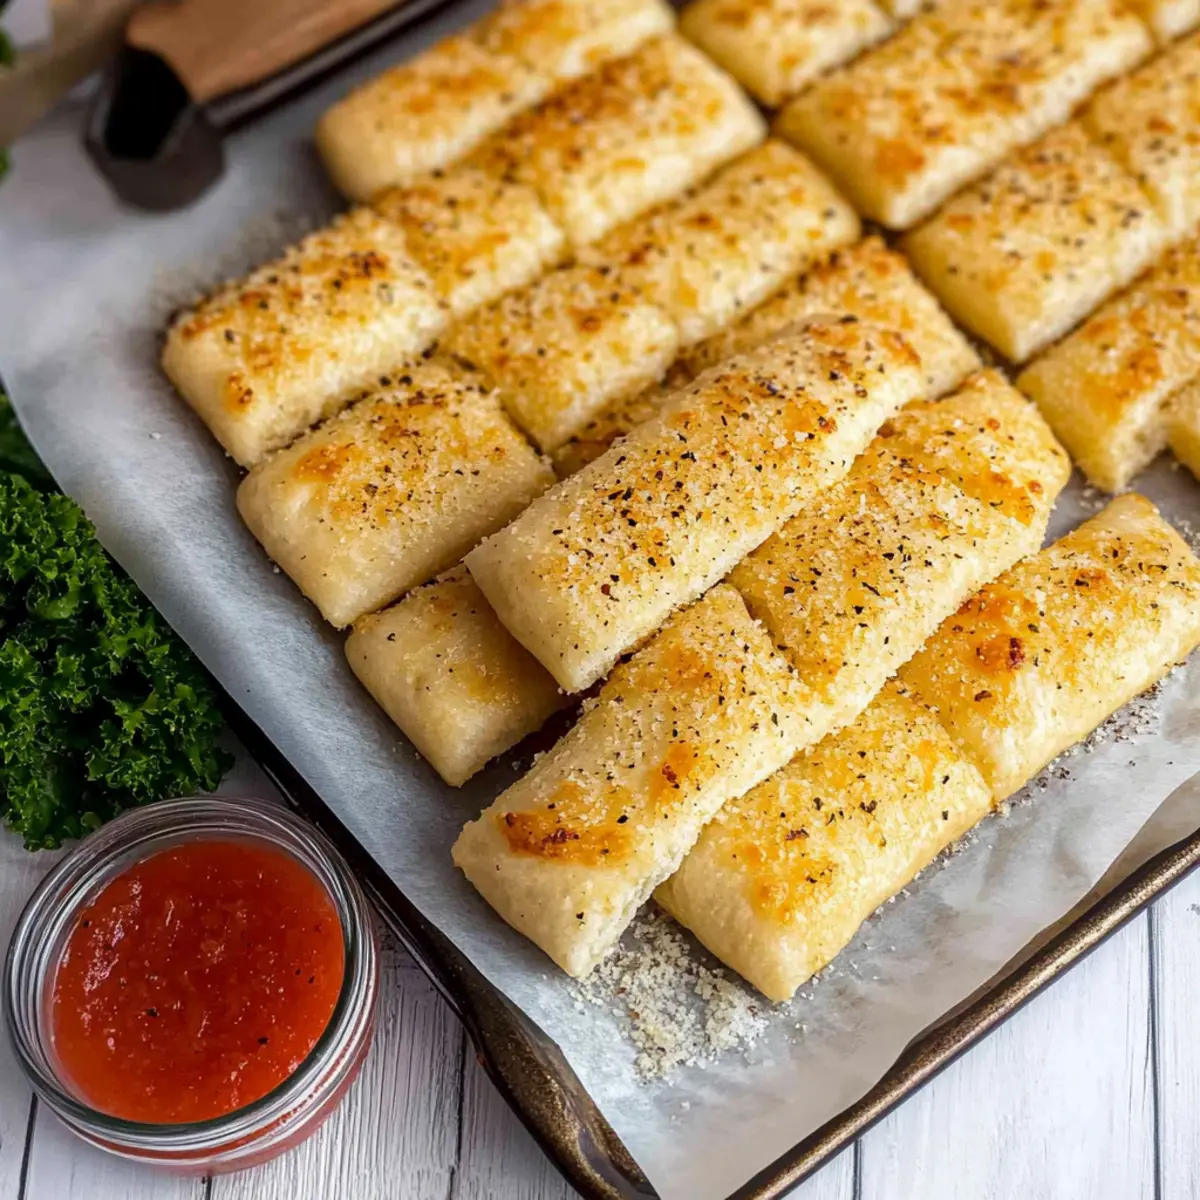
Once the dough has risen, use a pizza cutter to divide it into equal rows, creating individual breadsticks. Place the baking sheet in the preheated oven and bake for 18-20 minutes, or until the breadsticks turn golden brown and the edges are slightly crispy.
Step 9: Cool & Serve
After baking, remove the Sheet Pan Breadsticks from the oven and let them cool slightly on the pan for a few minutes. Serve them warm, perhaps with marinara sauce, to elevate your meal experience.
How to Store and Freeze Sheet Pan Breadsticks
Room Temperature: Keep any leftover breadsticks in an airtight container for up to 1 week. This helps maintain their soft texture and flavor.
Freezer: For long-term storage, freeze the breadsticks in a single layer on a baking sheet, then transfer them to a freezer bag or airtight container for up to 3 months.
Reheating: To enjoy your frozen Sheet Pan Breadsticks, preheat the oven to 350°F (175°C) and bake directly from frozen for about 10-15 minutes until heated through.
Thawing Tips: If you prefer thawing, let them sit at room temperature for an hour or overnight in the fridge before reheating in the oven for best results.
Expert Tips for Perfect Sheet Pan Breadsticks
- Yeast Activation: Make sure your warm water is between 105°-115°F; using water that’s too hot can kill the yeast, leading to flat breadsticks.
- Dough Consistency: Aim for a slightly sticky yet manageable dough; if it’s too dry, the breadsticks won’t be as chewy.
- Baking Time: Watch for that golden-brown color! Overbaking can cause them to dry out, so set a timer and keep an eye on them.
- Flavor Boost: Experiment with fresh herbs or different cheeses like mozzarella to customize your Sheet Pan Breadsticks.
- Storage Tips: Store leftovers in an airtight container at room temperature for a week, or freeze for up to three months to enjoy them later!
Sheet Pan Breadsticks Variations
Feel free to play around with these easy and delicious twists on the classic breadsticks to suit your taste!
- Cheesy Delight: Swap out Parmesan for double the mozzarella for a gooey, melty experience that cheese lovers will adore.
- Herb Infusion: Incorporate a blend of chopped fresh herbs like rosemary or thyme into the dough for an aromatic twist.
- Spicy Kick: Add red pepper flakes to the dough or sprinkle them on top before baking for a delightful heat that pairs beautifully with marinara.
- Garlic Lover’s Dream: Replace garlic salt with minced fresh garlic for a more robust flavor and aromatic experience.
- Whole Wheat: Substitute part of the all-purpose flour with whole wheat flour for a nuttier taste and extra nutrition without sacrificing too much texture.
- Mediterranean Flair: Mix in feta cheese and kalamata olives into the dough for a unique Mediterranean twist that’s bursting with flavor.
- Sweetness: Drizzle honey on top before serving to contrast the savory flavors with a hint of sweetness—perfect for those who like a sweet-savory combo.
- Brushed with Pesto: Slather the dough with pesto before adding toppings for an herbaceous flavor explosion that’s sure to impress.
Whatever variation you choose, these Sheet Pan Breadsticks are sure to be a hit at your table! You might also like to pair them with a delightful side like Cheesy Ranch Potatoes and Smoked Sausage for a fun meal experience!
Make Ahead Options
These Quick & Easy Garlic Sheet Pan Breadsticks are perfect for meal prep enthusiasts! You can prepare the dough up to 24 hours in advance by following the first three steps: activating the yeast, mixing the dough, and letting it rise. After the initial rise, cover the dough with plastic wrap and refrigerate to maintain its quality. When you’re ready to bake, simply let the dough come to room temperature for about 30 minutes before spreading it on the sheet pan, adding the toppings, and performing the final proof. This way, you get delicious, fresh breadsticks with minimal effort, making those busy weeknights a little easier!
What to Serve with Quick & Easy Sheet Pan Breadsticks
The harmonious blend of soft, chewy breadsticks and vibrant flavors can elevate any meal into a delightful experience.
- Marinara Sauce: Perfect for dipping, this classic Italian sauce enhances the flavor of breadsticks with its rich tomato goodness.
- Creamy Tomato Soup: The luscious texture of soup pairs beautifully, creating a warm and inviting meal perfect for any day of the week.
- Garlic Parmesan Pasta: For a hearty feast, this pasta complements the breadsticks, echoing their garlic flavor in a satisfying embrace.
- Caesar Salad: Crisp romaine and tangy dressing create a refreshing contrast to the softness of the breadsticks for a balanced meal.
- Chicken Alfredo: A creamy, comforting dish that pairs well with the garlic undertones of the breadsticks for an indulgent dinner.
- Roasted Vegetables: The crunchy, caramelized elements of veggies provide a delightful texture and a fresh taste that highlights the breadsticks’ flavor.
- Grilled Cheese Sandwich: A fun and nostalgic combo, rich, melted cheese brings joy and comfort alongside those warm, fluffy breadsticks.
- Herb-Infused Olive Oil: Drizzle this olive oil mixture over warm breadsticks for a simple yet elegant touch that highlights their delightful flavor.
- Sparkling Lemonade: The bright, citrusy drink refreshes the palate, making it a delightful addition to any meal featuring Sheet Pan Breadsticks.
Sheet Pan Breadsticks Recipe FAQs
What type of water should I use for the dough?
Absolutely! You want to use warm water at a temperature between 105°-115°F. This temperature range is ideal for activating the yeast, ensuring that your Sheet Pan Breadsticks rise beautifully. If the water is too hot, it can kill the yeast, resulting in flat breadsticks.
How should I store leftover breadsticks?
Very straightforward! Store any leftover Sheet Pan Breadsticks in an airtight container at room temperature for up to one week. This will help maintain their soft texture and keep them fresh for your next meal. If you anticipate having them for longer, consider freezing them for later enjoyment!
Can I freeze the breadsticks? If so, how?
Yes, you can! To freeze your Sheet Pan Breadsticks, place them in a single layer on a baking sheet and freeze until solid. Then, transfer them to a freezer bag or an airtight container. They can be stored for up to three months. When you’re ready to enjoy them, simply bake them straight from frozen at 350°F (175°C) for about 10-15 minutes until heated through.
What can I do if my dough isn’t rising?
Don’t worry, it happens! If your dough isn’t rising, the likely culprit is the yeast. Check the water temperature; it should be warm, not hot. Also, ensure your yeast is fresh. If your mixture didn’t bubble after 5-10 minutes, it might mean the yeast didn’t activate properly. Don’t despair—start over with fresh yeast and the right water temperature, and you’ll be on your way to those delicious breadsticks!
Can I adjust the ingredients for dietary reasons?
Of course! If you’re concerned about dairy, you can replace the melted butter with olive oil for a lighter option. For those sensitive to gluten, consider using a gluten-free all-purpose flour mix. Just remember, the texture and flavor might differ slightly, but your Sheet Pan Breadsticks can still be delightful!
How long can I keep the breadsticks in the freezer?
You can store your frozen Sheet Pan Breadsticks for up to three months. After that, they may start to lose their quality and flavor. However, they’re perfect for quick meals or snacks, so make sure to keep an eye on your freezer inventory!
Perfectly Chewy Sheet Pan Breadsticks for Easy Family Dinners
Ingredients
Equipment
Method
- In a small bowl, mix warm water, sugar, and salt. Stir in the yeast and let it rest for 5-10 minutes until bubbly.
- In a large mixing bowl, combine the activated yeast mixture with flour gradually. Mix until a loose, slightly sticky dough forms.
- Cover the dough with a cloth and let it rise in a warm area for 30-45 minutes until doubled in size.
- Preheat your oven to 350°F (175°C) and grease a large sheet pan with melted butter.
- Once risen, punch down the dough and transfer it to the prepared pan, pressing it outwards evenly.
- Drizzle remaining melted butter over the dough, then sprinkle with Parmesan cheese, garlic salt, and Italian seasoning.
- Allow the dough to rise for another 15-20 minutes.
- Use a pizza cutter to cut the dough into individual breadsticks. Bake in the oven for 18-20 minutes until golden brown.
- Let cool slightly before serving with marinara sauce.
Leave a Reply