
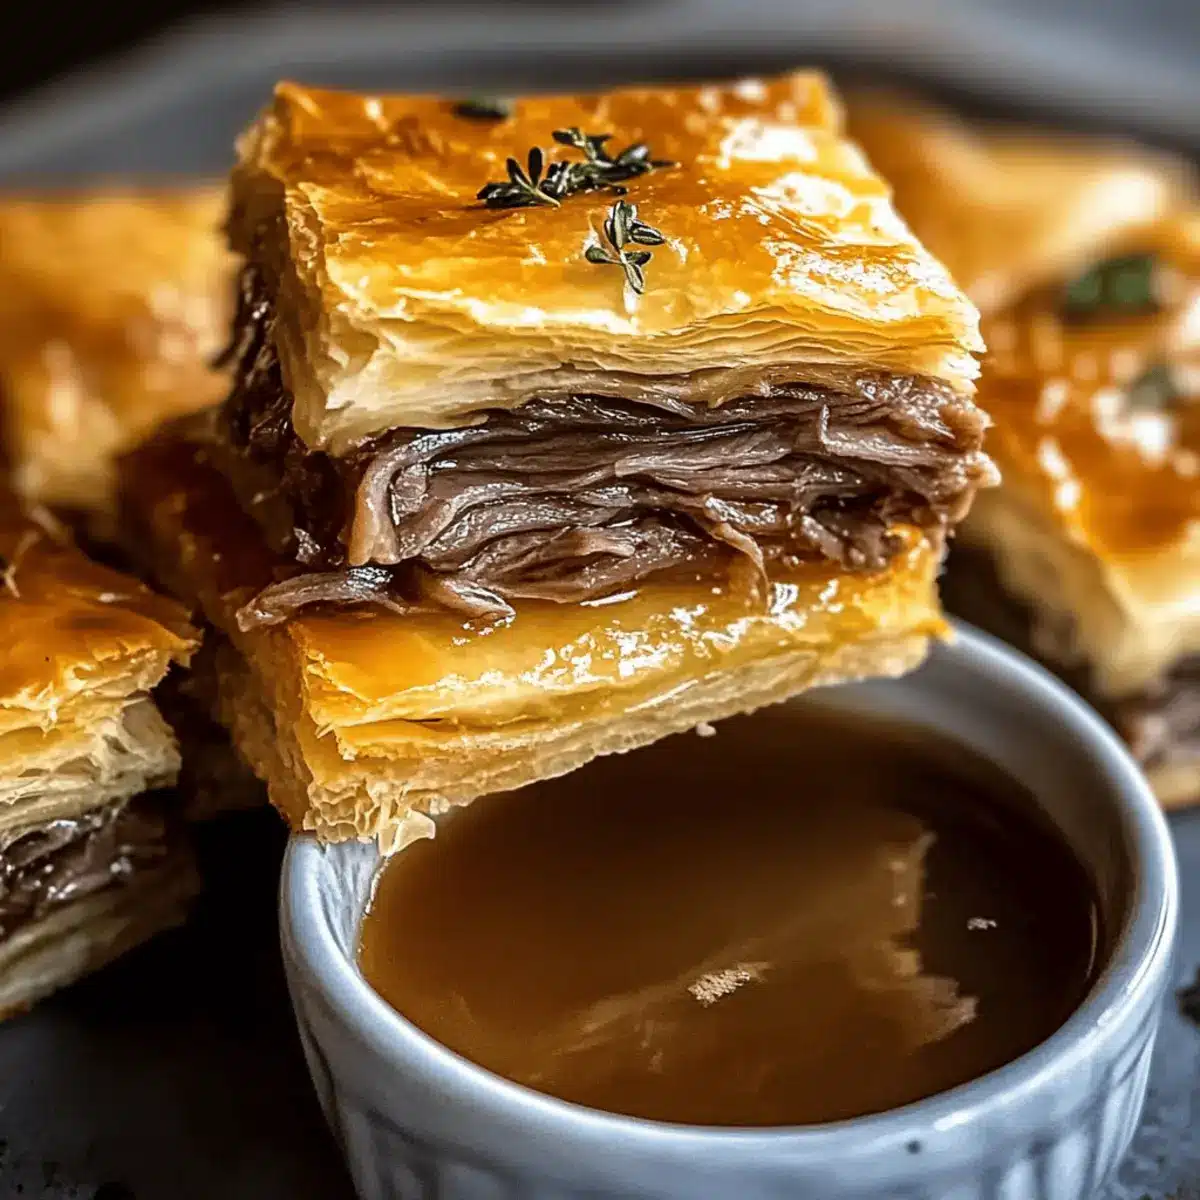
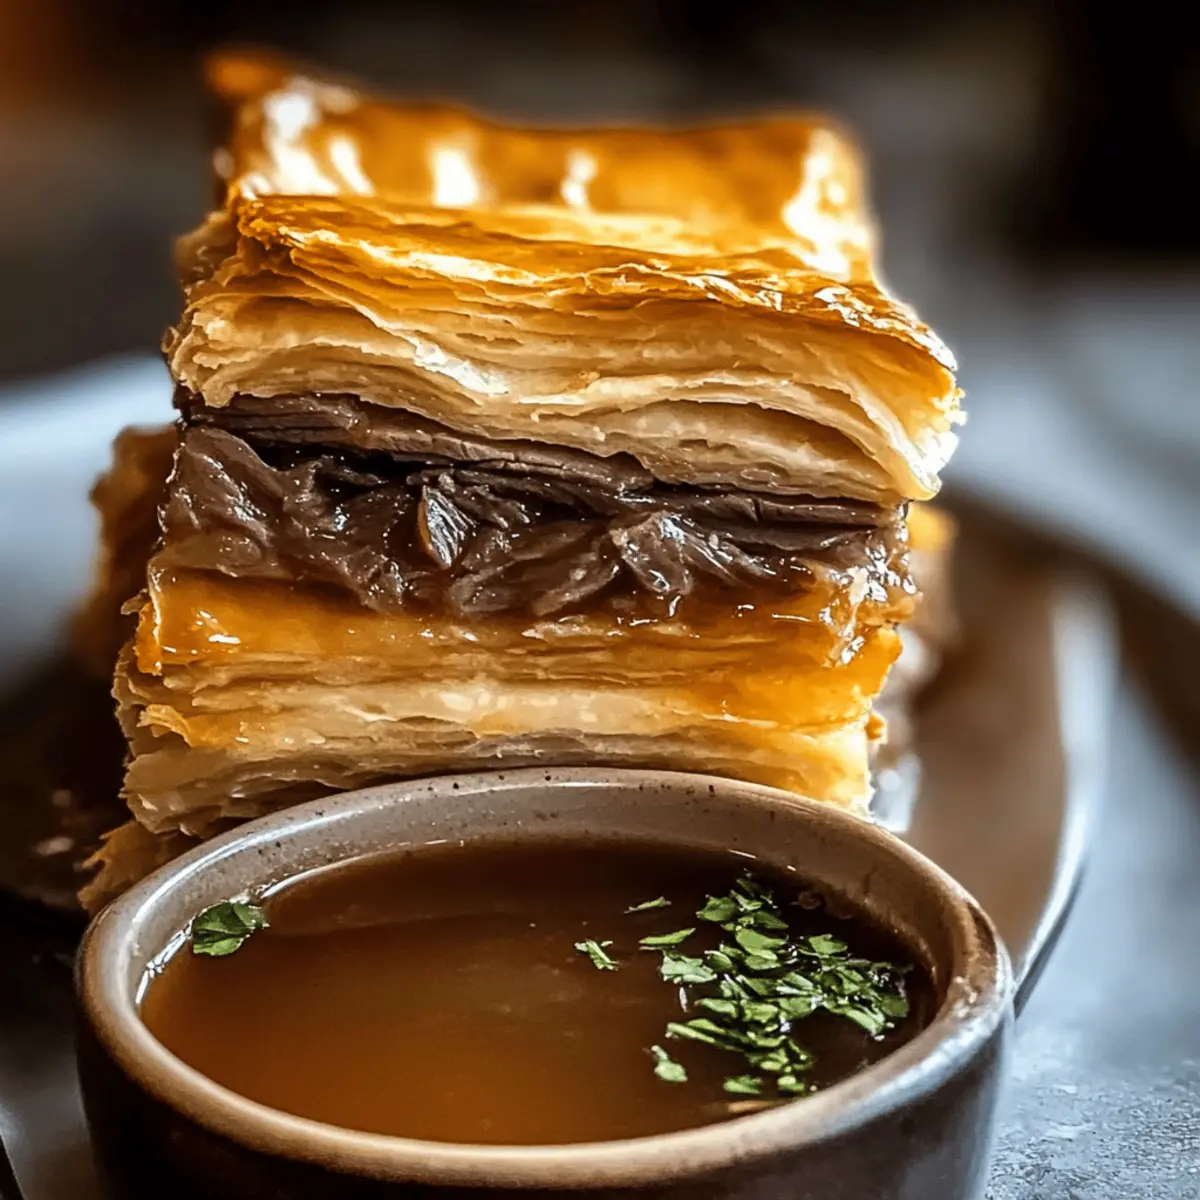
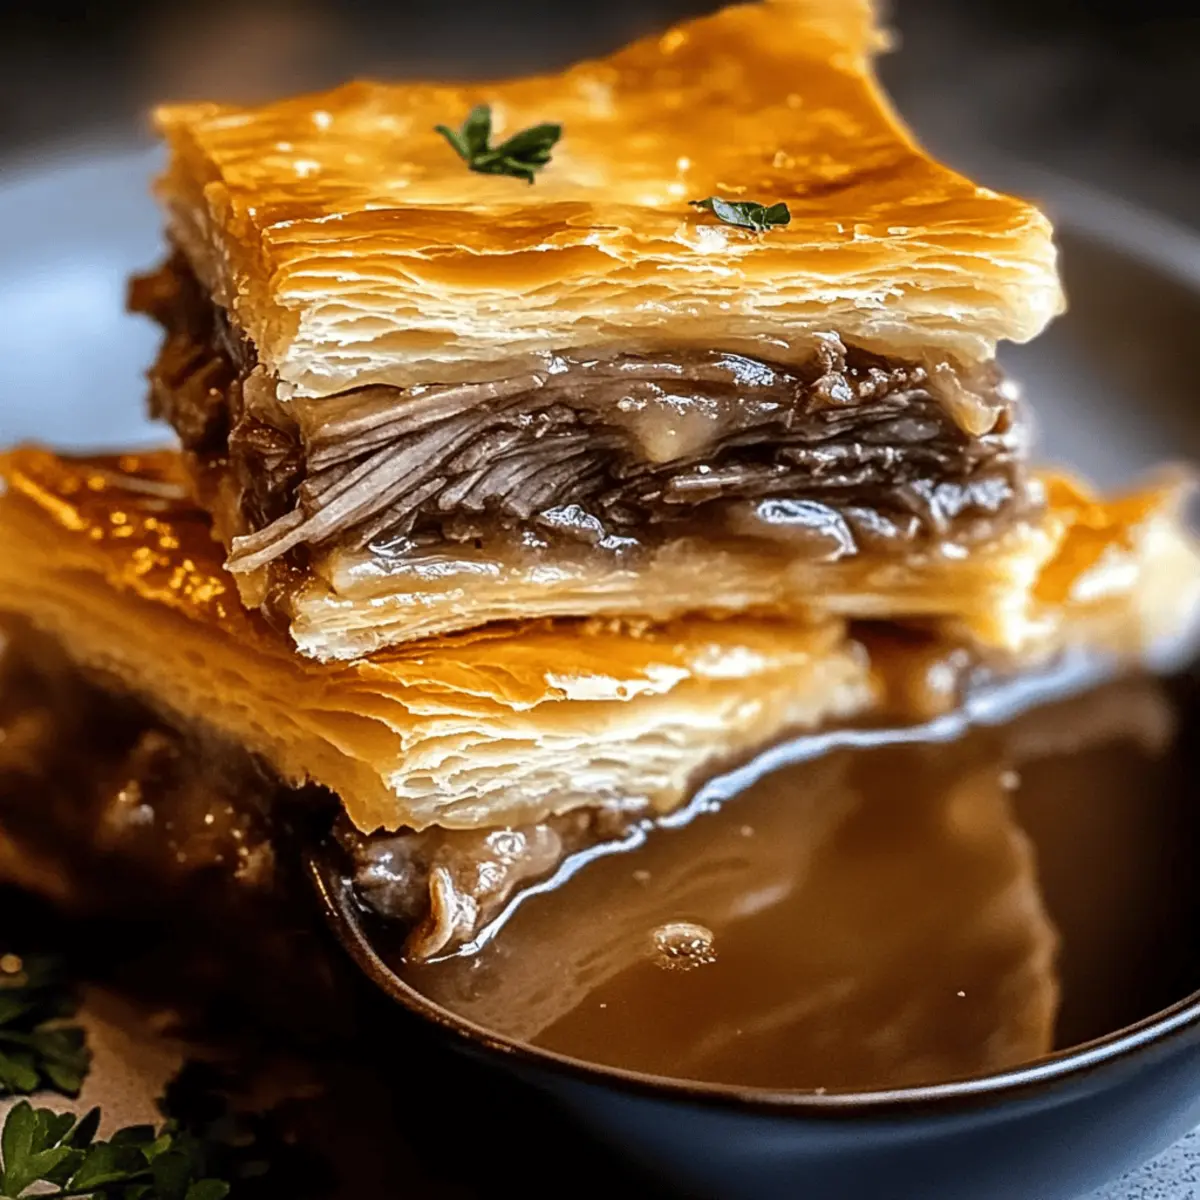
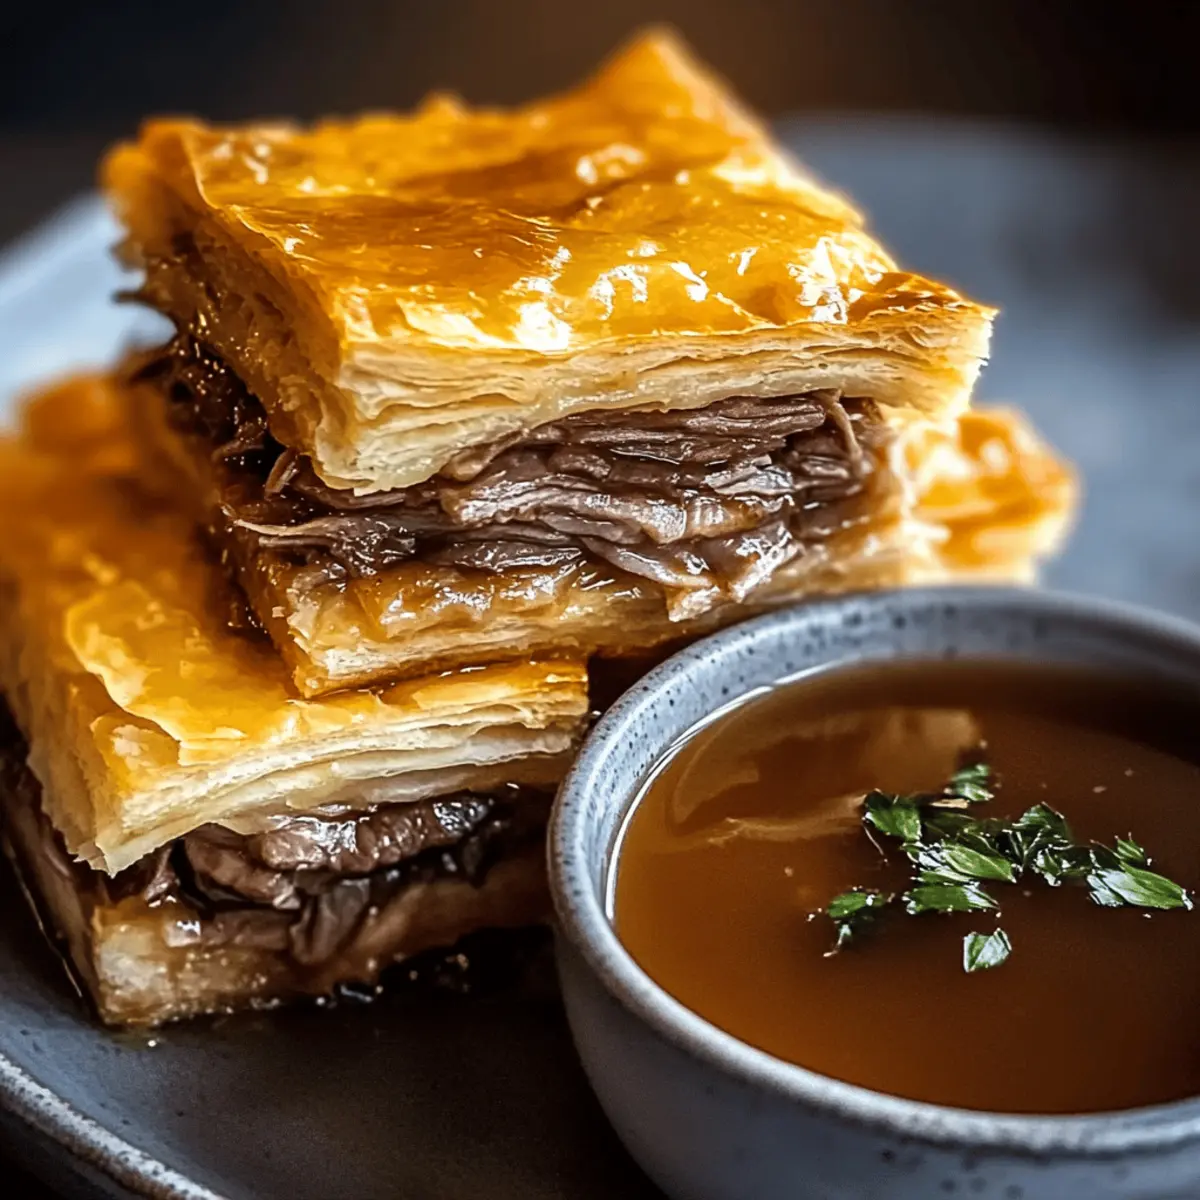
“Do you ever wish you could take the comforting flavors of your favorite French Dip sandwich and turn them into something effortlessly shareable?” Well, today’s your lucky day! These Easy French Dip Squares transform everything you love about that classic meal into a delicious dish that’s perfect for potlucks, family gatherings, or just a cozy night in. Imagine layers of buttery crescent roll dough enveloping tender deli roast beef and melted Swiss cheese, all paired with a warm beef broth for dipping. The best part? Not only are these squares a quick and easy solution for any occasion, but they also encourage customization—swap in your favorite cheese or add some spice! Ready to impress your guests (and yourself) with this delightful comfort food twist? Let’s dive into the recipe!
Why are French Dip Squares so irresistible?
Easy Preparation: This recipe is quick and uncomplicated, perfect for busy weeknights or unexpected guests.
Customizable Ingredients: Add your favorite cheeses or meats for a dish that suits everyone’s tastes.
Mouthwatering Dipping Sauce: The warm beef broth elevates every bite, making it feel special and comforting.
Shareable Delight: Cut these squares into bite-sized pieces—ideal for parties, family gatherings, or simply a cozy night in.
Kid-Friendly Fun: With a gooey, cheesy center, these are bound to be a hit with kids and adults alike! Try pairing them with a delicious Slow Cooker Dip on the side for even more flavor!
French Dip Squares Ingredients
• These ingredients come together to create a delightful dish!
For the Base
- Refrigerated Crescent Rolls – Provides a buttery, flaky crust that’s easy to work with and bakes quickly.
For the Filling
- Deli Roast Beef – Acts as the main protein source, offering a tender, savory bite; ensure it’s thinly sliced for even layering.
- Swiss Cheese – Melts beautifully and complements the beef; its mild, nutty flavor balances wonderfully—feel free to substitute with cheddar or provolone!
For Flavor Enhancements
- Dry Onion Soup Mix – Adds depth and savory flavor, enhancing the overall taste profile of the dish.
- Melted Butter – Infuses richness; combine it with other ingredients for a flavorful drizzle.
- Worcestershire Sauce – Brings a tangy, umami kick that elevates the dish.
- Garlic Powder – Enhances flavors with mild garlicky notes for an extra layer of taste.
For Dipping
- Beef Broth (for dipping) – Essential for replicating the authentic French Dip experience, enhancing moisture and flavor in every bite.
Enjoy crafting your delicious French Dip Squares!
Step‑by‑Step Instructions for French Dip Squares
Step 1: Preheat and Prepare the Dish
Begin by preheating your oven to 375°F (190°C). While the oven heats, take a 9×13 inch baking dish and coat it lightly with non-stick spray to ensure easy release once your French Dip Squares are baked. This preparation will create the perfect foundation for your savory filling.
Step 2: Assemble the Base Layer
Unroll one can of refrigerated crescent rolls and press the dough evenly into the bottom of the prepared baking dish. Make sure to seal any seams to create a cohesive base layer, ensuring that your delicious filling stays enclosed. The crescent rolls should spread slightly up the sides of the dish for a nice, snug fit.
Step 3: Layer the Fillings
Next, evenly layer the deli-sliced roast beef over the crescent roll base, spreading it out so every bite is flavorful. Top the roast beef with slices of Swiss cheese, allowing the cheese to cover the beef completely. This delightful combination will melt together beautifully during baking, creating the perfect filling for your French Dip Squares.
Step 4: Mix and Drizzle the Flavor Enhancements
In a mixing bowl, combine the dry onion soup mix, melted butter, Worcestershire sauce, and garlic powder. Stir well until all ingredients are thoroughly mixed. Drizzle this savory mixture over the cheese layer, ensuring each section is covered. This will infuse the dish with depth and flavor, making every bite irresistible.
Step 5: Add the Top Layer of Dough
Open the second can of crescent rolls and carefully cover the entire filling with the dough, pressing the seams together to seal in all the flavors. Take the time to ensure there are no gaps or holes, as this will help keep the filling perfectly contained as the French Dip Squares bake to a golden perfection.
Step 6: Bake to Golden Perfection
Place the assembled dish in the preheated oven and bake for 15-20 minutes. Keep an eye on your French Dip Squares; they’re done when the top is bubbly and golden brown. The aroma that fills your kitchen will indicate that deliciousness is on its way!
Step 7: Prepare the Dipping Sauce
While your French Dip Squares cool slightly, heat the beef broth in a saucepan over medium heat for dipping. You can enhance the broth with a splash of Worcestershire sauce for added flavor, making it the perfect accompaniment when enjoying your squares.
Step 8: Cut and Serve
Once the French Dip Squares have cooled for about 5-10 minutes, cut them into squares for serving. Arrange them on a platter alongside the warmed beef broth. This presentation not only looks appetizing but also invites your family and friends to indulge in the delightful dipping experience!
What to Serve with Easy French Dip Squares
These delicious squares are perfect for creating a satisfying meal that caters to everyone’s cravings.
- Crispy French Fries: The crunch of perfectly fried potatoes complements the softness of the squares and provides a delightful contrast in texture.
- Simple Green Salad: Fresh greens tossed in a light vinaigrette brighten the plate and cut through the richness of the cheese and beef.
- Creamy Coleslaw: The cool, creamy slaw adds a refreshing crunch that balances the savory flavors of the dish, making every bite enjoyable.
- Baked Potato Wedges: Seasoned potato wedges bring a hearty, rustic touch that pairs deliciously with the savory filling of the French Dip Squares.
- Garlic Bread: Toasty, buttery garlic bread is the perfect side for soaking up any leftover dipping sauce and adds an extra layer of indulgence.
- Beer or Cider: A cold, crisp lager or sweet apple cider complements the savory notes of your French Dip Squares and adds a fun twist to your meal.
- Warm Spinach Dip: Serve a warm, cheesy spinach dip with crackers or bread on the side for an irresistible appetizer experience.
- Chocolate Chip Cookies: End your meal on a sweet note! A warm, gooey chocolate chip cookie is the perfect finish after savoring those savory squares.
How to Store and Freeze French Dip Squares
Fridge: Store leftover French Dip Squares in an airtight container in the refrigerator for up to 3 days. This keeps them fresh and ready for quick enjoyment!
Freezer: For longer storage, freeze the squares by wrapping them tightly in plastic wrap and then aluminum foil. They can be stored in the freezer for up to 2 months.
Reheating: When ready to enjoy, reheat from frozen in a 350°F (175°C) oven for about 25-30 minutes, or until heated through. You can also microwave individual squares for 1-2 minutes, though oven reheating results in a crispier texture.
Make-Ahead Tip: Prepare the dish up to the point of baking, store in the fridge for up to 24 hours, and bake when ready to serve!
Make Ahead Options
These French Dip Squares are a game-changer for meal prep enthusiasts! You can prepare the dish up to the point of baking 24 hours in advance. Simply assemble the layers of crescent rolls, roast beef, and cheese, then cover the baking dish tightly with plastic wrap and refrigerate. To maintain the quality and prevent sogginess, ensure that the layers are well-sealed, and bake straight from the fridge when you’re ready to enjoy them—just add an extra few minutes to the baking time if necessary. Alternatively, you can bake them ahead of time, let them cool, and then refrigerate for up to 3 days. Reheat in the oven before serving for that delightful, fresh-out-of-the-oven taste!
Expert Tips for French Dip Squares
-
Use Non-Stick Spray: This ensures the crescent rolls don’t stick to the baking dish, making for easy removal and serving.
-
Seal the Edges: Pinch the seams of the crescent rolls together carefully to prevent any filling from leaking out during baking.
-
Cool Before Cutting: Allow the French Dip Squares to cool for 5-10 minutes before slicing to achieve clean, neat squares without squishing the filling.
-
Rotate for Even Baking: Consider rotating the baking dish halfway through to ensure an even golden brown crust on all sides.
-
Monitor Browning: If the top begins to brown too quickly, loosely cover it with aluminum foil to prevent burning while the inside cooks through.
French Dip Squares: Endless Possibilities
Feel free to personalize these delicious squares and make them truly yours!
- Turkey Swap: Use turkey instead of roast beef for a lighter option that still packs flavor.
- Cheese Choice: Experiment with cheddar or provolone for different taste experiences; both melt beautifully!
- Veggie Boost: Add sautéed mushrooms or diced caramelized onions to enhance the savory profile. Their sweetness brings a comforting depth to the dish!
- Spicy Twist: Mix in horseradish or Dijon mustard for an exciting kick that elevates the overall taste. Your guests will be pleasantly surprised!
- Buffalo Flavor: Toss in some shredded chicken tossed in buffalo sauce for a spicy twist. A perfect match if you love heat!
- Mixed Meats: Try a combination of roast beef, turkey, and even ham for a hearty medley that’s fun to share.
- Herb Infusion: Add fresh herbs like thyme or rosemary for a fragrant touch that brightens every bite.
- Vegetarian Option: Swap out the meat for a hearty lentil mix; seasoned chickpeas or sautéed veggies white also work wonderfully!
If you’re looking for a delightful dip to accompany these squares, consider trying a Slow Cooker Dip for an encore of flavors; it pairs perfectly with the savory delights of French Dip Squares!
French Dip Squares Recipe FAQs
How do I choose the right deli roast beef for my French Dip Squares?
Absolutely! When selecting deli roast beef, look for high-quality cuts that are thinly sliced. If possible, opt for a leaner option to keep the flavors balanced. You can also ask the deli staff for “rare” or “medium rare” slices for a more tender piece—these will melt beautifully when baked!
What’s the best way to store leftover French Dip Squares?
Very! Store any leftovers in an airtight container in the refrigerator for up to 3 days. Make sure they’re completely cooled before sealing, as this helps maintain their texture. If stored properly, they’ll stay delicious and ready for a snack any time!
Can I freeze French Dip Squares for later?
Definitely! To freeze, wrap the cooled French Dip Squares tightly in plastic wrap, then in aluminum foil, or place them in a freezer-safe container. They’ll keep well for up to 2 months. When you’re ready to enjoy, reheat them from frozen at 350°F (175°C) for about 25-30 minutes, or microwave individual squares for quicker delight!
What can I do if my crescent rolls leak while baking?
Oh no! If you notice leaks, it might be due to not sealing the edges properly. In the future, ensure that you pinch the seams of the crescent rolls together well before baking. If some filling escapes, don’t worry too much—just keep an eye on the baking and enjoy those deliciously crispy edges!
Are there any dietary considerations I should be aware of?
Very good question! If you’re accommodating dietary restrictions, consider using gluten-free crescent rolls or turkey as a leaner substitute for roast beef. For lactose-sensitive individuals, using a dairy-free cheese can work wonders too! Always check labels if you’re unsure, and feel free to customize to suit your family’s needs.
How long can I keep the uncooked French Dip Squares in the fridge before baking?
Absolutely! You can prepare the French Dip Squares up to the point of baking and store them in the refrigerator for around 24 hours. Just make sure they’re covered well to prevent them from drying out or absorbing any smells from the fridge. When you’re ready, just pop them in the oven!
Savory French Dip Squares: Your New Favorite Comfort Food
Ingredients
Equipment
Method
- Preheat your oven to 375°F (190°C) and coat a 9x13 inch baking dish with non-stick spray.
- Unroll the crescent rolls and press dough evenly into the bottom of the dish, sealing seams.
- Layer the deli roast beef over the base, then top with Swiss cheese slices.
- In a bowl, mix onion soup mix, melted butter, Worcestershire sauce, and garlic powder. Drizzle over the cheese.
- Cover filling with a second can of crescent rolls, sealing all edges.
- Bake for 15-20 minutes until the top is bubbly and golden brown.
- While cooling, heat beef broth on medium for dipping.
- Cut into squares and serve with warm beef broth on the side.
Leave a Reply