
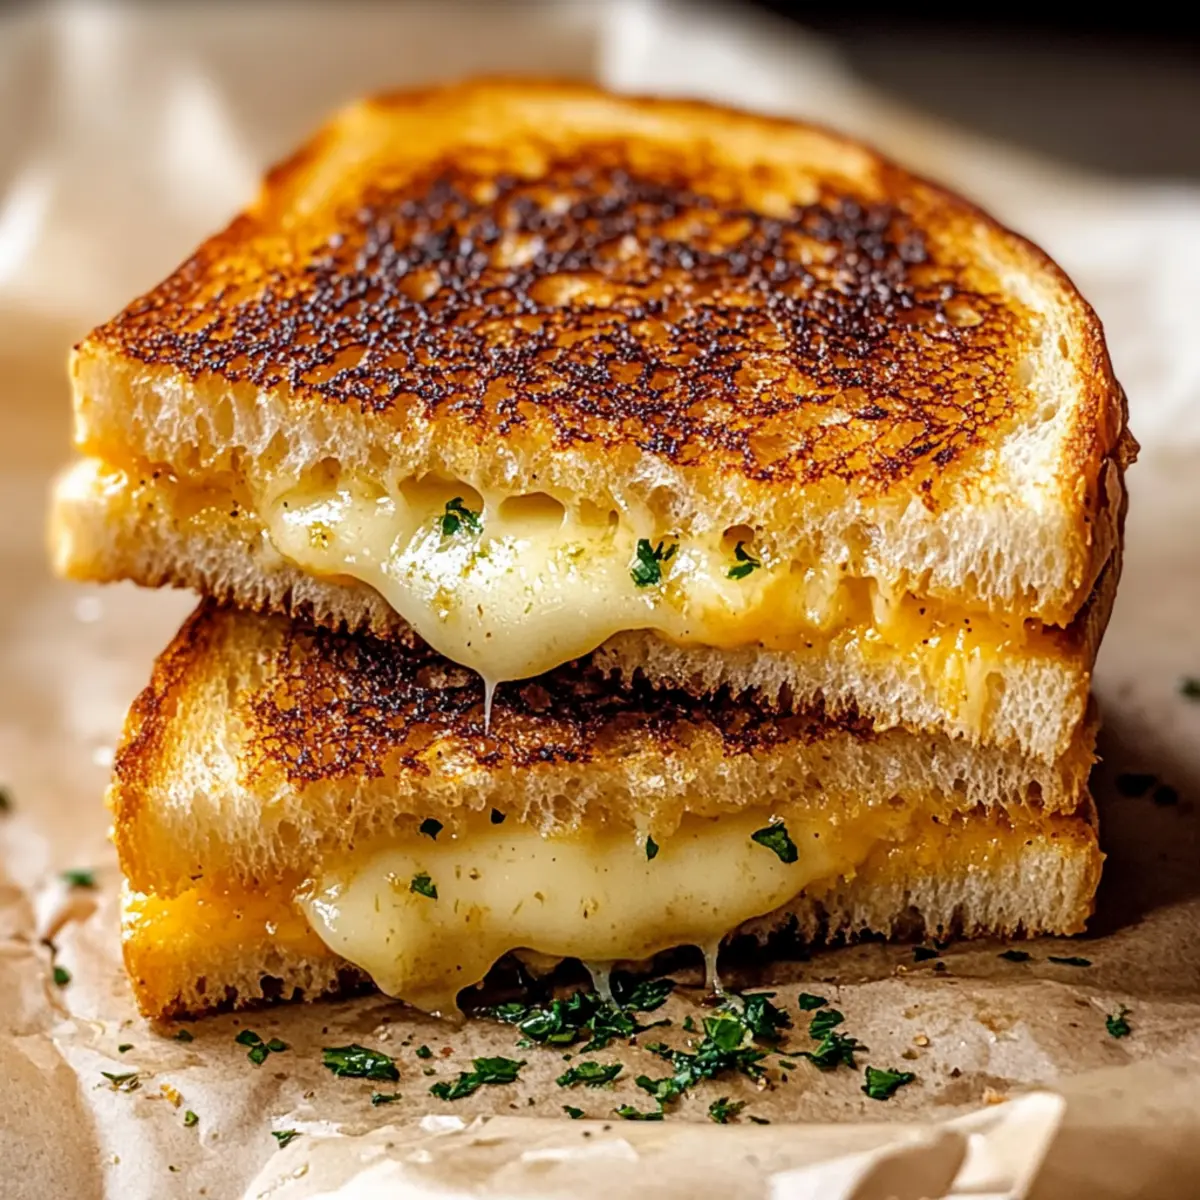
As the buttery aroma swirls through the kitchen, I can’t help but feel a wave of nostalgia wash over me. There’s something so comforting about the Garlic Butter Grilled Cheese, a dish that transforms a simple childhood favorite into a gourmet delight. This ultimate comfort sandwich pairs the crispy, golden crunch of garlic bread with the melty, gooey cheese we all know and love, making it perfect for a quick weeknight meal or a cozy weekend treat. With minimal prep time and endless variations on cheese and bread, this recipe is not only a crowd-pleaser but also a fantastic way to elevate a classic dish. So, who’s ready to get their taste buds tingling and dive into a world of cheesy goodness?
Why is This Recipe a Must-Try?
Simplicity at its best: This Garlic Butter Grilled Cheese requires just a few ingredients and minimal prep—perfect for home cooks of any skill level.
Irresistible flavor: The garlicky richness paired with gooey cheese creates a mouthwatering sandwich that transforms ordinary bread into a gourmet experience.
Versatile options: Feel free to experiment with different cheeses like sharp cheddar or pepper jack, and even substitute the bread to suit your taste.
Crowd-pleaser: Whether it’s a weeknight dinner or a weekend brunch, this sandwich is sure to impress everyone at the table.
Quick and easy: In just 20 minutes, you can whip up this delicious dish to satisfy your cravings without the need for fast food.
Pair it with a side of creamy tomato soup for a classic combination, and don’t forget to check out my Grilled Cheese Burrito for a fun twist!
Garlic Butter Grilled Cheese Ingredients
-
For the Garlic Butter Spread
-
Butter – Use softened unsalted butter for the best flavor and easy spreading.
-
Olive Oil – Helps achieve an even crisp without burning; can use any mild oil if preferred.
-
Garlic – Freshly minced garlic offers the deepest flavor; garlic powder works as an acceptable substitute.
-
Parsley – Add freshness; dried parsley can be used if fresh isn’t available.
-
Parmesan Cheese – Enhances the richness of the butter spread; feel free to substitute with any hard cheese you like.
-
Salt – Just a pinch to enhance all the flavors in the spread.
-
For the Sandwich
-
Bread – Opt for thick-cut white, sourdough, or Italian bread to hold the fillings well.
-
Cheese – Mozzarella gives that classic stretchy pull; try mixing it with cheddar or provolone for added flavor.
This Garlic Butter Grilled Cheese is not just a meal; it’s a warm hug on a plate. Enjoy every melty, crispy bite!
Step‑by‑Step Instructions for Garlic Butter Grilled Cheese
Step 1: Prepare the Garlic Butter Spread
In a small bowl, blend together 4 tablespoons of softened unsalted butter, 1 tablespoon of olive oil, 2 minced garlic cloves, 1 tablespoon of chopped fresh parsley, 2 tablespoons of grated Parmesan cheese, and a pinch of salt. Mix until smooth and creamy, ensuring all ingredients are well incorporated. This aromatic garlic butter will enrich your Garlic Butter Grilled Cheese.
Step 2: Assemble the Sandwich
Take two slices of thick-cut bread like sourdough or Italian, and evenly spread the garlic butter on one side of each slice. Ensure that the edges are well coated to enhance crispiness during grilling. Position the bread so that the garlic buttered sides face outwards, ready to hold the delicious fillings within.
Step 3: Heat the Skillet
Place a non-stick skillet over medium heat and let it preheat for about 2 minutes. This step is crucial for achieving that golden-brown crust on your Garlic Butter Grilled Cheese. As the skillet warms, prepare your chosen cheese—ideally, a mix of mozzarella and cheddar for that perfect melt.
Step 4: Toast the First Side
Once the skillet is hot, carefully place the first slice of bread butter-side down into the skillet. Immediately layer a generous amount of cheese on top. For the ultimate indulgence, add another slice of cheese if desired. This creates a gooey center that complements the crispy exterior.
Step 5: Add the Second Slice
Next, place the second slice of bread on top, butter-side up. This will be your top layer. Gently press down on the sandwich with a spatula to encourage even melting and to create a secure structure as it cooks. Allow it to toast for about 3-4 minutes until the bottom is golden brown.
Step 6: Flip and Finish Cooking
Carefully flip the sandwich using a spatula, ensuring it remains intact. Toast the other side for an additional 3-4 minutes, pressing lightly to ensure the cheese melts thoroughly. Keep an eye on the heat; adjust it if necessary to avoid burning the butter while achieving a crispy, golden finish.
Step 7: Slice and Serve
Once both sides are beautifully golden and the cheese is melted, remove the Garlic Butter Grilled Cheese from the skillet. Let it sit for a minute before slicing it in half. This resting period allows the gooey interior to stabilize. Serve immediately to enjoy the delightful contrast of crispy crust and melty cheese.
Garlic Butter Grilled Cheese Variations
Feel free to explore creative twists on your Garlic Butter Grilled Cheese that will awaken your taste buds with every bite!
- Cheese Swap: Substitute mozzarella with sharp cheddar for a tangy kick that enhances flavor.
- Spicy Kick: Add sliced jalapeños or pepper jack cheese for a fiery twist that will elevate your sandwich’s heat level.
- Herbed Delight: Try mixing in fresh herbs like basil or thyme into your garlic butter spread for an aromatic flavor boost. Fresh herbs bring a delightful freshness to every bite.
- Bacon Addition: Layer crispy bacon slices inside the sandwich for extra richness and a savory crunch that complements the gooey cheese perfectly.
- Sweet Contrast: Spread a thin layer of fig jam or honey on the inside of the sandwich before adding cheese. The sweet flavor harmonizes beautifully with the savory elements.
- Whole Grain Bread: For a healthier option, use whole grain or sourdough bread, which adds a lovely nutty flavor and improves texture. You’ll enjoy the heartiness of this choice, making every bite even more satisfying!
- Gluten-Free Option: Switch to gluten-free bread to cater to dietary needs while still enjoying the cheesy goodness of this classic sandwich.
- Air Fryer Shortcut: If you want a quick and healthier version, air fry your sandwich for an even crunch without using much oil.
Pair your Garlic Butter Grilled Cheese with my Blueberry Grilled Cheese for a bold flavor experience, and don’t forget to try it alongside a comforting bowl of creamy tomato soup!
Make Ahead Options
These Garlic Butter Grilled Cheese sandwiches are perfect for meal prep enthusiasts! You can make the garlic butter spread up to one week in advance; simply blend 4 tablespoons of softened butter with 1 tablespoon of olive oil, minced garlic, parsley, Parmesan, and a pinch of salt, then refrigerate it in an airtight container. Additionally, you can assemble the sandwiches (but without grilling) up to 24 hours ahead—just remember to keep the garlic butter spread properly coated on the bread to prevent sogginess. When you’re ready to enjoy your Garlic Butter Grilled Cheese, simply grill them as directed until golden and gooey, providing comfort food with minimal effort on busy nights!
Expert Tips for Garlic Butter Grilled Cheese
-
Perfectly Preheated Skillet: Ensure your skillet is truly hot before adding the sandwich for that desirable crispy texture and golden crust.
-
Customize Your Cheese: Experiment with a variety of cheeses like sharp cheddar or pepper jack to find your perfect flavor combination for the Garlic Butter Grilled Cheese.
-
Mind the Heat: If you notice the butter browning too quickly, reduce the heat to prevent burning while ensuring even cooking throughout the sandwich.
-
Garlic Boost: For an extra kick, sprinkle a dash of garlic powder directly into the skillet while cooking for enhanced garlic flavor that permeates each bite.
-
Resting Time Matters: Let the sandwich sit for a minute after cooking before slicing; this helps prevent the cheese from oozing out too quickly and lets it set.
What to Serve with Garlic Butter Grilled Cheese
The warmth of garlic and melted cheese creates the perfect atmosphere for a delightful meal—let’s elevate the occasion!
-
Creamy Tomato Soup: A classic companion that adds vibrant flavors and a smooth texture, allowing you to dip and savor every bite.
-
Side Salad with Vinaigrette: Crisp greens drizzled with a tangy dressing provide a fresh contrast to the rich grilled cheese, enhancing the overall experience.
-
Roasted Vegetables: Seasonal roasted veggies add earthy flavors and a sense of cozy comfort, rounding out your meal beautifully.
-
Pickles or Pickled Vegetables: The tart crunch of pickles cuts through the richness of the sandwich, offering an invigorating burst of taste that keeps every bite exciting.
-
Sweet Potato Fries: Crispy and sweet, these fries add a delightful crunch and balance out the savory elements of the grilled cheese.
-
Balsamic Glazed Brussels Sprouts: Roasting these little gems with balsamic brings out their natural sweetness and earthiness, creating a delightful pairing.
-
Old-Fashioned Lemonade: A refreshing beverage that complements the richness of the sandwich, quenching your thirst with its light, zesty flavor.
-
Chocolate Chip Cookies: End on a sweet note with warm cookies, their gooey goodness echoing the indulgence of your hearty sandwich.
Each pairing adds a unique dimension, making your Garlic Butter Grilled Cheese a memorable meal!
How to Store and Freeze Garlic Butter Grilled Cheese
Fridge: Store any leftover Garlic Butter Grilled Cheese in an airtight container for up to 2 days. This helps maintain flavor and prevents sogginess.
Freezer: If you want to prolong the life of your grilled cheese, wrap each sandwich securely in plastic wrap or foil and freeze for up to 1 month. This ensures freshness is preserved.
Reheating: For the best results, reheat from frozen in a skillet over medium heat or an air fryer to restore the crispy texture—about 5-7 minutes, flipping halfway through.
Make-Ahead Tips: Prep the garlic butter ahead of time and keep it in the fridge for up to a week; this allows for quick assembly and grilling whenever cravings strike.
Garlic Butter Grilled Cheese Recipe FAQs
What type of bread is best for Garlic Butter Grilled Cheese?
Thick-cut white, sourdough, or Italian bread is ideal for this recipe. These types hold up well to grilling and provide the perfect base for achieving a golden, crispy texture. Make sure to choose slices that are sturdy enough to contain the melty cheese without getting soggy.
How long can I store leftover Garlic Butter Grilled Cheese?
You can store leftover sandwiches in an airtight container in the refrigerator for up to 2 days. This helps preserve the flavors and keeps them from becoming overly soggy. When reheating, it’s best to warm them in a skillet on low heat to maintain that crispiness.
Can I freeze Garlic Butter Grilled Cheese?
Absolutely! To freeze, wrap each sandwich securely in plastic wrap or foil, then place them in a resealable freezer bag. They can be frozen for up to 1 month. When ready to enjoy, reheat directly from the freezer in a skillet or air fryer at medium heat for 5-7 minutes, flipping halfway through to ensure even cooking.
What should I do if my Garlic Butter Grilled Cheese isn’t getting crispy?
If your sandwich isn’t crisping up as desired, make sure your skillet is preheated adequately before placing the sandwich inside. Additionally, using softened butter mixed with a touch of olive oil helps in achieving an even golden crust. If the butter browns too quickly, reduce the heat to allow for slower cooking, ensuring a crispy exterior without burning.
Can I use different types of cheese in my Garlic Butter Grilled Cheese?
Yes, the more the merrier! Feel free to get creative with cheese combinations. Sharp cheddar, gouda, pepper jack, or provolone each bring unique flavors to the sandwich. Mixing cheeses can enhance the taste and give you that perfect gooey cheesiness that makes this dish so comforting. You might even discover your new favorite variation!
Garlic Butter Grilled Cheese That Will Melt Your Heart
Ingredients
Equipment
Method
- In a small bowl, blend together 4 tablespoons of softened unsalted butter, 1 tablespoon of olive oil, 2 minced garlic cloves, 1 tablespoon of chopped fresh parsley, 2 tablespoons of grated Parmesan cheese, and a pinch of salt. Mix until smooth and creamy.
- Take two slices of thick-cut bread like sourdough or Italian, and evenly spread the garlic butter on one side of each slice.
- Place a non-stick skillet over medium heat and let it preheat for about 2 minutes.
- Once the skillet is hot, carefully place the first slice of bread butter-side down into the skillet. Layer a generous amount of cheese on top.
- Next, place the second slice of bread on top, butter-side up, and gently press down with a spatula to encourage even melting.
- Carefully flip the sandwich using a spatula and toast the other side for an additional 3-4 minutes.
- Once both sides are golden and the cheese is melted, remove the sandwich from the skillet. Let it sit for a minute before slicing in half.
Leave a Reply