
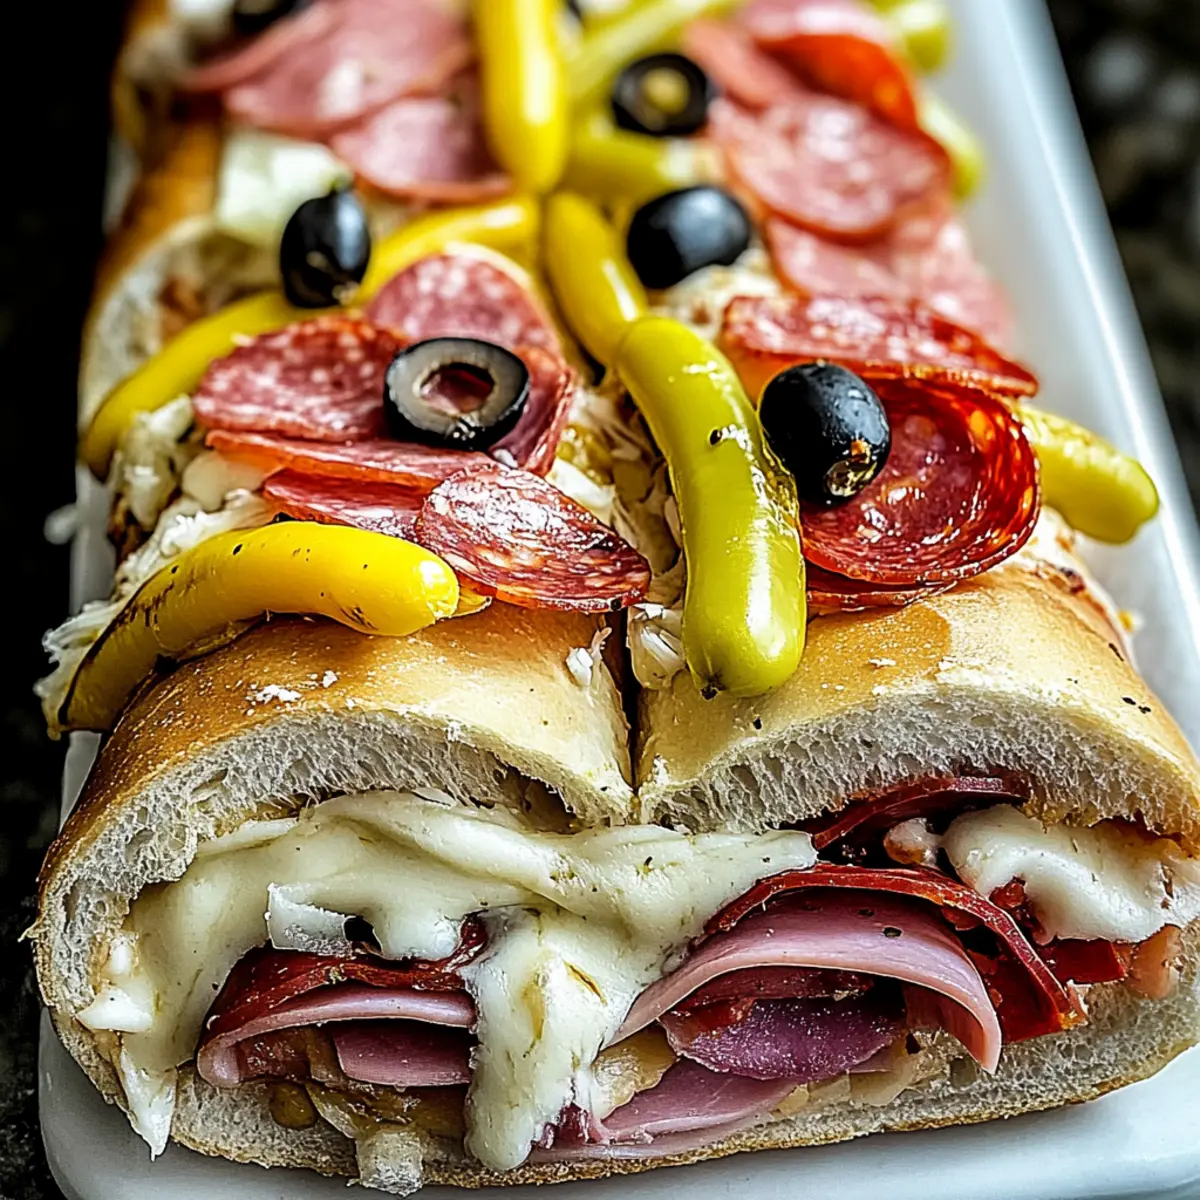
As I pulled open the oven door, the rich aroma of melted cheese and savory meats transported me straight to an Italian deli—my mouth watering in anticipation. These Baked Italian Sub Sandwiches are the ultimate comfort food, showcasing layers of zesty salami, ham, and pepperoni, all snuggled in a golden, buttery sub roll. What makes this recipe truly special is how it combines ease and impressive flavor, making it perfect for a quick family dinner or a delightful appetizer for gatherings. With just 35 minutes from start to finish, you can bring the taste of Italy right to your kitchen. Are you ready to create a satisfying meal that’s sure to impress?
Why You’ll Adore These Italian Subs
Ease of Preparation: This recipe transforms dinner into an effortless experience, requiring only 35 minutes from start to finish.
Bold, Authentic Flavors: With layers of zesty meats and gooey cheeses enveloped in buttery sub rolls, every bite is bursting with Italian goodness.
Customizable Options: Whether you’re a meat lover or prefer a vegetarian twist, you can easily swap ingredients for a meal that suits everyone.
Crowd-Pleasing Appeal: Perfect for family dinners or gatherings, these sandwiches are sure to satisfy hungry guests and leave them begging for more.
Serve with Style: Pair with crunchy chips or a fresh salad for a complete meal that looks and tastes gourmet. Try these with a side of delicious Baked Feta Pasta for an irresistible feast.
Get ready to wow your taste buds!
Baked Italian Sub Sandwich Ingredients
For the Rolls
• Sub Rolls – The soft yet sturdy base that holds all your delicious fillings. You can swap for whole wheat or gluten-free rolls if desired.
For the Meats
• Salami – Offers a robust flavor and a delightful chew. Combine with other deli meats for a satisfying texture.
• Ham – Adds a mild, sweet taste that balances the zesty meats.
• Pepperoni – Provides a classic and spicy kick; great for the authentic Italian sub vibe.
For the Cheeses
• Provolone Cheese – Creamy and slightly tangy, it’s essential for that gooey goodness. Mozzarella or cheddar are great substitutes if you prefer.
• Mozzarella Cheese – The star of the show for that melty, gooey texture; any melting cheese will work here.
For the Veggies
• Banana Peppers – These give a mild tang and a pleasant crunch; swap for jalapeños for extra heat!
• Black Olives – Adds a touch of saltiness and bitterness; green olives can also be used for variation.
• Red Onion – Brings crunch and a bit of sharpness; feel free to replace with green onions or shallots for a mellower flavor.
For the Seasoning
• Italian Dressing – Infuses a zesty flavor while keeping the subs moist; homemade dressings work wonders too!
• Italian Seasoning – A blend of aromatic herbs that elevate the overall flavor. Substitute with dried oregano or basil if needed.
For the Butter Mixture
• Butter – Adds richness and helps achieve that crispy, golden top; swap for olive oil for a lighter touch.
• Garlic – Provides a fragrant depth; garlic powder works in a pinch if fresh isn’t available.
Each ingredient plays a vital role in crafting these mouth-watering Baked Italian Sub Sandwiches, ensuring they’ve got the flavor and texture to leave your taste buds dancing!
Step‑by‑Step Instructions for Baked Italian Sub Sandwiches
Step 1: Preheat Your Oven
Begin by preheating your oven to 350°F (175°C). This initial step is crucial as it ensures even cooking and perfect melting of the cheeses in the Baked Italian Sub Sandwiches. While the oven heats, gather your ingredients and line a baking sheet with parchment paper to prevent sticking and make cleanup a breeze.
Step 2: Prepare the Sub Rolls
Carefully slice each sub roll in half and lay them cut-side up on the prepared baking sheet. This creates a sturdy base for your filling while allowing the rolls to toast slightly in the oven. Ensure they are evenly spaced on the baking sheet to allow for optimal heat circulation during baking.
Step 3: Layer the Cheeses
Start your sandwich assembly by placing two slices of provolone cheese on each sub roll half. This creamy, tangy layer not only enhances the flavor of the Baked Italian Sub Sandwiches but also acts as a moisture barrier to prevent sogginess from the meats and veggies to follow.
Step 4: Add the Meats
Next, layer in your chosen meats: two slices each of salami, ham, and pepperoni on top of the provolone. Ensure an even distribution to guarantee that every bite is packed with savory goodness. This combination of zesty deli meats is what makes these subs irresistibly delicious.
Step 5: Sprinkle on the Veggies
Distribute banana peppers, black olives, and red onion evenly over the meat layers. These fresh ingredients add a vibrant crunch and tanginess to your Baked Italian Sub Sandwiches, balancing the richness of the meats and cheeses. Feel free to adjust the quantities to your preference for a personalized touch.
Step 6: Drizzle with Italian Dressing
Evenly drizzle Italian dressing over each sub. This step infuses every layer with zesty flavor while providing moisture, which is essential for the overall taste of the Baked Italian Sub Sandwiches. Use as much or as little dressing as you like for your desired taste.
Step 7: Add the Shredded Mozzarella
Sprinkle shredded mozzarella cheese generously on top of each sub. This layer is key for achieving that gooey texture that everyone loves. Make sure to cover the toppings well with cheese to ensure a delicious, melty finish once baked.
Step 8: Mix the Garlic Butter
In a separate bowl, mix together melted butter, minced garlic, and Italian seasoning until well combined. This aromatic garlic butter will enhance the overall flavor and help achieve a beautifully golden crust on top of your sandwiches, elevating the Baked Italian Sub experience.
Step 9: Brush the Rolls
Gently brush the garlic butter mixture over the top of the sub rolls, ensuring they are coated well. This step not only adds a rich flavor but also promotes browning and crispiness, making your subs irresistible. Don’t be shy with the butter—this is where the magic happens!
Step 10: Top with Provolone
Place one additional slice of provolone cheese on top of each sub roll. This final layer of cheese will melt beautifully and create a delicious topping that holds all the ingredients together as the Baked Italian Sub Sandwiches cook.
Step 11: Press and Bake
Carefully press down the tops onto the bottoms of the subs to secure all the fillings. Place the baking sheet in the preheated oven and bake for 12-15 minutes or until the cheese is melted and the tops are golden brown. Keep an eye on them to achieve that perfect level of crispy without burning.
Step 12: Cool and Slice
Once baked to perfection, remove the Baked Italian Sub Sandwiches from the oven and let them cool for a few minutes. This brief resting period allows the cheese to set slightly, making it easier to slice. Cut each sandwich in half, revealing the delicious layers inside.
Step 13: Serve Warm
Serve your Baked Italian Sub Sandwiches warm for optimal gooeyness and flavor. Pair them with crunchy chips or a fresh salad to complete your meal. These delectable sandwiches are perfect for family dinners, game days, or any occasion that calls for comfort food!

Expert Tips for Baked Italian Sub Sandwiches
-
Oven Prep: Ensure that your oven is fully preheated before baking. This guarantees even cooking and perfect melting of cheeses in your Baked Italian Sub Sandwiches.
-
Cheese Barrier: To avoid sogginess, place cheese directly on the bread before adding meats and veggies. This creates a protective barrier that keeps everything crunchy.
-
Customizable Ingredients: Feel free to mix and match the meats and cheeses according to your taste preferences. Experiment with different options for a unique twist on your Baked Italian Sub Sandwiches.
-
Garlic Butter Brushing: For an extra crispy top, generously brush more garlic butter on the rolls before baking. This flavorful addition takes your sandwiches to the next level.
-
Serving Suggestions: Serve your subs warm for the best gooey texture, and consider adding a side of chips or a fresh salad for a complete meal.
Storage Tips for Baked Italian Sub Sandwiches
-
Fridge: Store leftovers in an airtight container for up to 3 days. This helps maintain the freshness of the Baked Italian Sub Sandwiches and prevents them from drying out.
-
Freezer: These sandwiches can be frozen for up to 2 months. Wrap each sandwich tightly in plastic wrap, then place in a freezer bag to protect against freezer burn.
-
Reheating: To reheat, thaw in the fridge overnight if frozen, then place in a preheated oven at 350°F (175°C) for about 10-15 minutes until warmed through and the cheese is gooey again.
-
Make-ahead Tip: Assemble the Baked Italian Sub Sandwiches up to the baking stage, cover, and refrigerate. Bake them just before serving for a fresh and delightful meal!
Baked Italian Sub Sandwiches Variations
Feel free to personalize your Baked Italian Sub Sandwiches with these tasty substitutions and twists that add flavor and fun!
- Dairy-Free: Use cashew cheese or a vegan mozzarella alternative to make these sandwiches lactose-free while keeping them delicious.
- Spicy Kick: Swap out provolone for pepper jack cheese for an extra layer of heat that will leave your taste buds tingling.
- Lean and Mean: Replace salami and pepperoni with turkey or grilled chicken for a leaner option that still packs a savory punch.
- Veggie Delight: Include roasted vegetables like zucchini, bell peppers, and mushrooms instead of meats for a scrumptious vegetarian twist.
- Herb Infusion: Try adding fresh basil or spinach for a vibrant pop of color and freshness that enhances the overall flavor profile.
- Crunchy Toppings: Top with crispy fried onions or some crushed potato chips for added texture and a delightful crunch with each bite.
- Different Dressings: Experiment with dressings, such as balsamic vinaigrette or ranch, to switch up the flavor dynamics and keep meal times exciting.
- Mid-Week Magic: Prepare the sandwich filling and freeze it in advance; then create fresh sandwiches whenever the craving strikes!
These variations not only enhance the traditional baked Italian sub experience but also offer exciting options to suit every palate. If you’re looking for a side to accompany your subs, pair them with some Italian Herb Cheese for a truly delightful dining experience!
Make Ahead Options
These Baked Italian Sub Sandwiches are perfect for meal prep, allowing you to enjoy a homemade treat without the last-minute rush! You can assemble the subs up to 24 hours in advance and refrigerate them, ensuring all those flavors meld beautifully. Simply prepare the sub rolls with cheese, meats, and veggies, then drizzle with Italian dressing and cover with shredded mozzarella. Brush the garlic butter mixture on top before wrapping them tightly in plastic wrap to maintain freshness. When you’re ready to serve, just pop them in the oven for 12-15 minutes until they’re golden and gooey. This way, you’ll enjoy a mouthwatering meal with minimal effort, making your busy weeknights a bit simpler!
What to Serve with Baked Italian Sub Sandwiches
Enhancing your meal with delightful accompaniments makes these inviting subs even more satisfying.
-
Crispy Chips: The crunch of potato chips adds a satisfying contrast, providing that perfect salty crunch to balance the savory subs.
-
Fresh Green Salad: A bright, crisp salad tossed with a light vinaigrette complements the richness of the subs and keeps your meal refreshing. The colors will pop on your plate, making it irresistible!
-
Garlic Breadsticks: Soft, buttery breadsticks infused with garlic make a perfect side to soak up any extra Italian dressing. They add that extra touch of deliciousness to your meal.
-
Antipasto Platter: A selection of olives, cheeses, meats, and marinated vegetables brings an extra Italian flair to your table, setting the stage for memorable flavors.
-
Homemade Pasta Salad: A chilled pasta salad with olives, cherry tomatoes, and Italian herbs creates an effortless yet flavorful pairing that elevates your meal.
-
Soda or Lemonade: The fizzy sweetness of a soda or the refreshing zest of lemonade harmonizes wonderfully with the bold flavors of Italian sandwiches.
Pairing cleverly can take your Baked Italian Sub Sandwiches from a simple meal to a delightful experience. Enjoy these combinations for an impressive feast!
Baked Italian Sub Sandwiches Recipe FAQs
How do I select the best sub rolls for my sandwiches?
Absolutely! Look for sub rolls that are soft yet sturdy enough to hold all your delicious fillings without falling apart. Freshness is key; aim for rolls with a slight crusty exterior and soft inside. If you’re gluten-sensitive, consider using whole wheat or gluten-free rolls, which still provide great texture and flavor.
What is the best way to store leftover Baked Italian Sub Sandwiches?
For the best results, store your leftovers in an airtight container in the fridge for up to 3 days. This helps maintain the subs’ freshness and prevents drying. When you’re ready to enjoy them again, just reheat in a preheated oven for about 10-15 minutes at 350°F (175°C) until warmed through.
Can I freeze Baked Italian Sub Sandwiches?
Yes, you can freeze these sandwiches! Wrap each one tightly in plastic wrap, then place them in a freezer bag for protection against freezer burn. They can be frozen for up to 2 months. When ready to eat, thaw in the refrigerator overnight, then reheat in the oven to maintain that wonderful gooey texture.
What should I do if my sandwiches turn out soggy?
Soggy subs can be disappointing! To prevent this, place a layer of cheese directly on the bread before adding meats and veggies; this forms a barrier against moisture. Also, ensure you’re not overloading the subs with wet ingredients like dressings. If sogginess does occur, briefly reheating the sandwiches in the oven can help crisp them up again.
Are there any dietary considerations I should keep in mind?
Very! If you’re preparing these sandwiches for guest with dietary restrictions, you can easily customize the ingredients. Use turkey or a leaner meat option instead of traditional deli meats for a healthier take. For a vegetarian version, consider grilled vegetables, and make sure to check any cheese or dressing for potential allergens.
Can I prepare these sandwiches ahead of time?
Absolutely! You can assemble the Baked Italian Sub Sandwiches right up to the baking stage. Cover them tightly and refrigerate for a couple of hours or even overnight if needed. When you’re ready to bake, just pop them in the oven, making this a great option for stress-free entertaining!

Baked Italian Sub Sandwiches That Will Wow Your Taste Buds
Ingredients
Equipment
Method
- Preheat your oven to 350°F (175°C).
- Carefully slice each sub roll in half and lay them cut-side up on a baking sheet lined with parchment paper.
- Place two slices of provolone cheese on each sub roll half.
- Layer in salami, ham, and pepperoni on top of the provolone.
- Distribute banana peppers, black olives, and red onion evenly over the meat layers.
- Drizzle Italian dressing over each sub.
- Sprinkle shredded mozzarella cheese generously on top of each sub.
- Mix melted butter, minced garlic, and Italian seasoning in a bowl.
- Brush the garlic butter mixture over the top of the rolls.
- Place one slice of provolone cheese on top of each sub roll.
- Press down the tops onto the bottoms of the subs and bake for 12-15 minutes.
- Let cool for a few minutes before slicing in half.
- Serve the sandwiches warm with sides like chips or salad.
Leave a Reply