
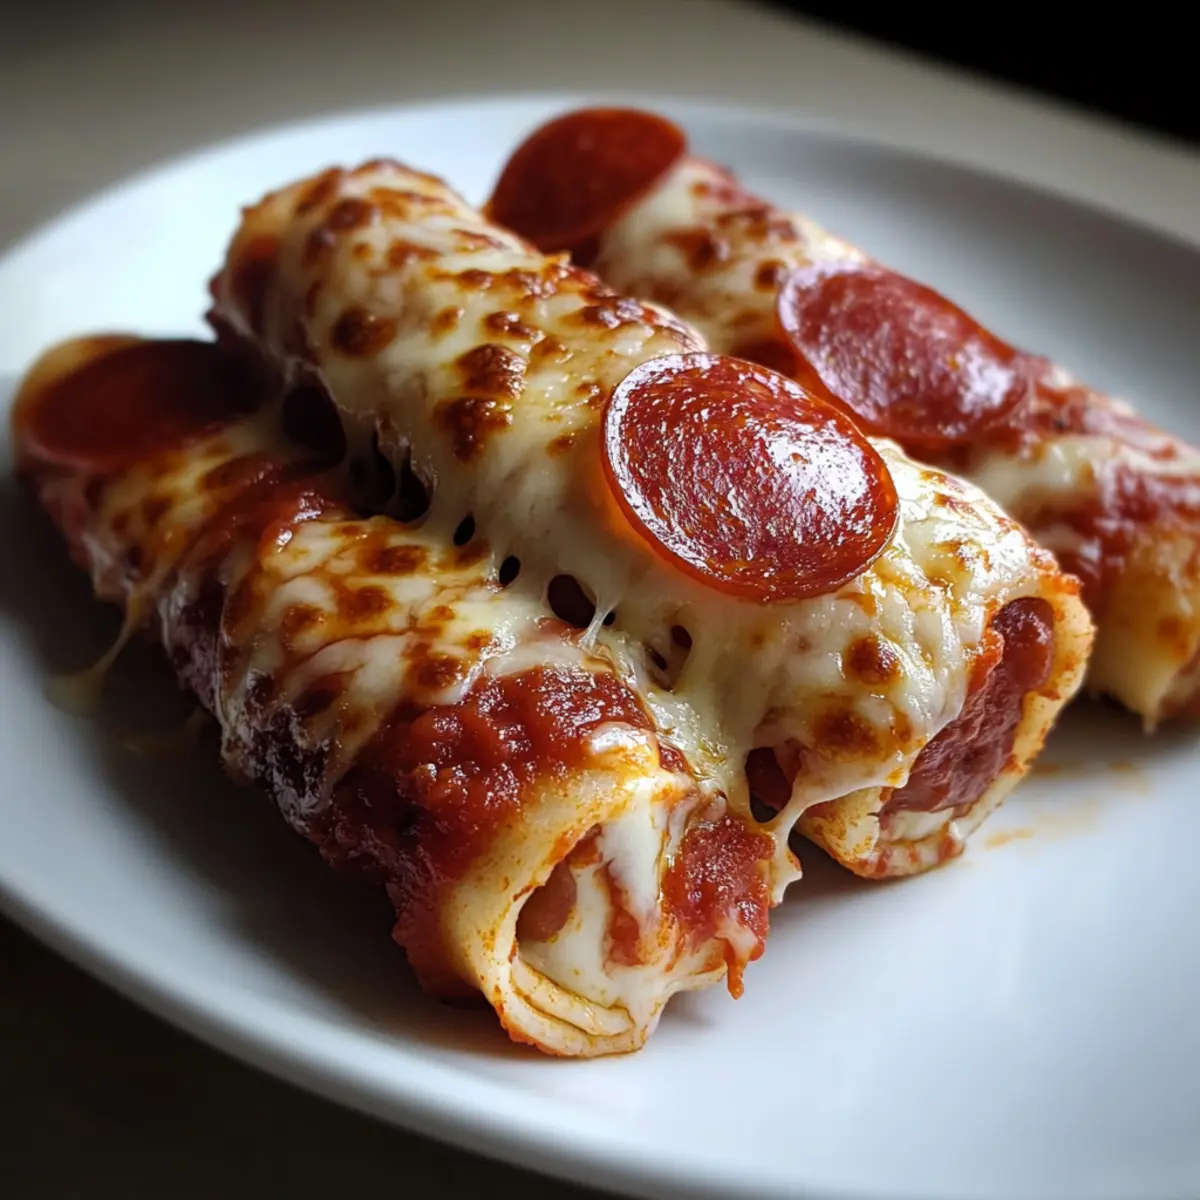
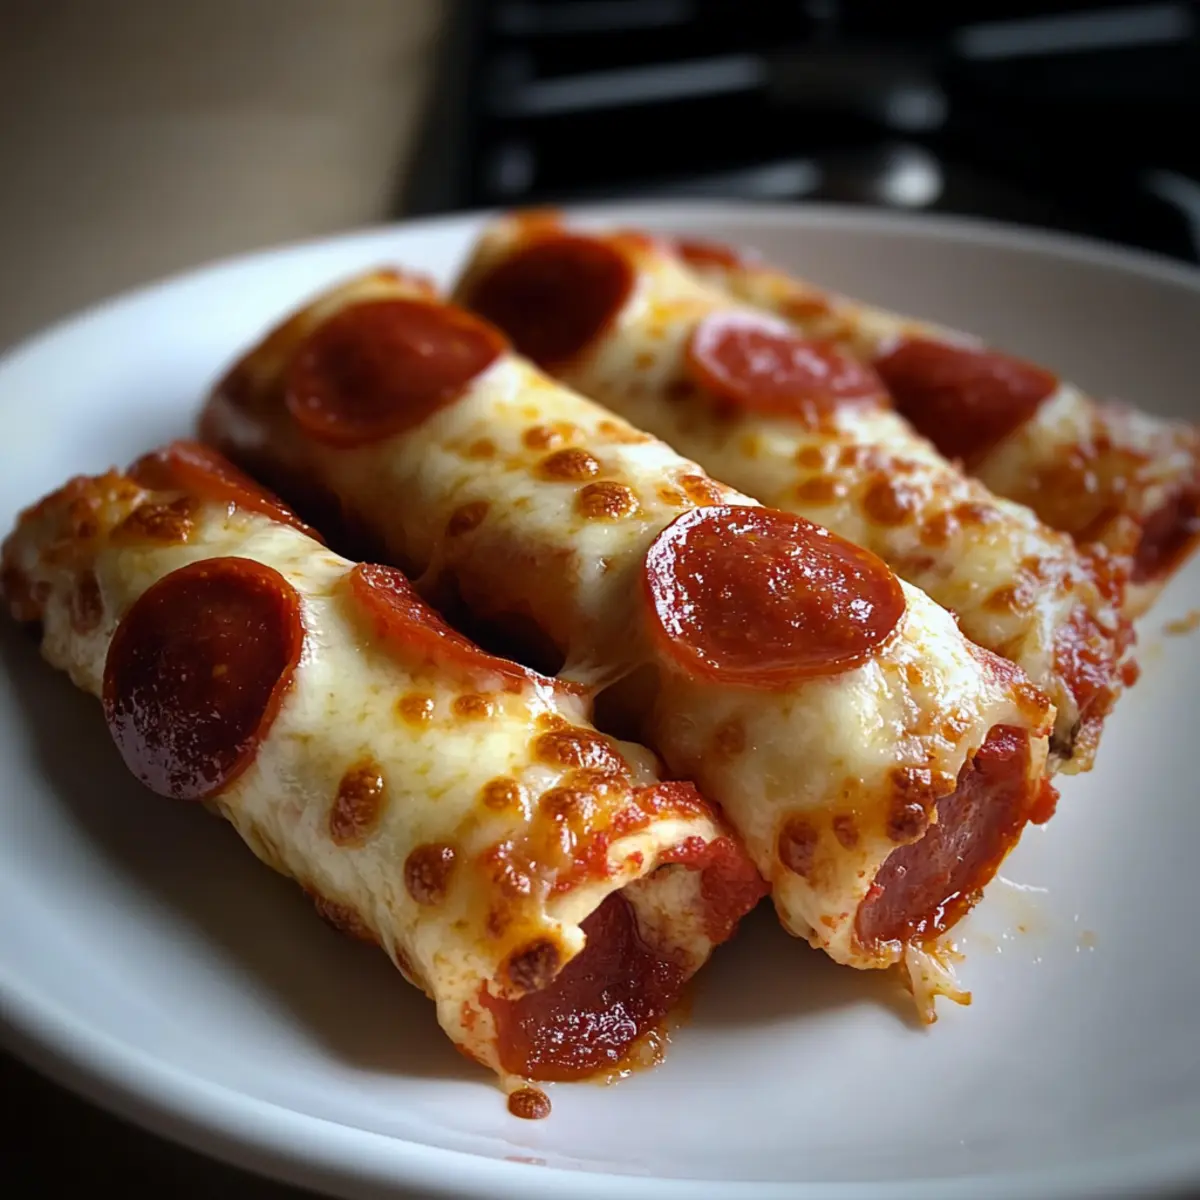
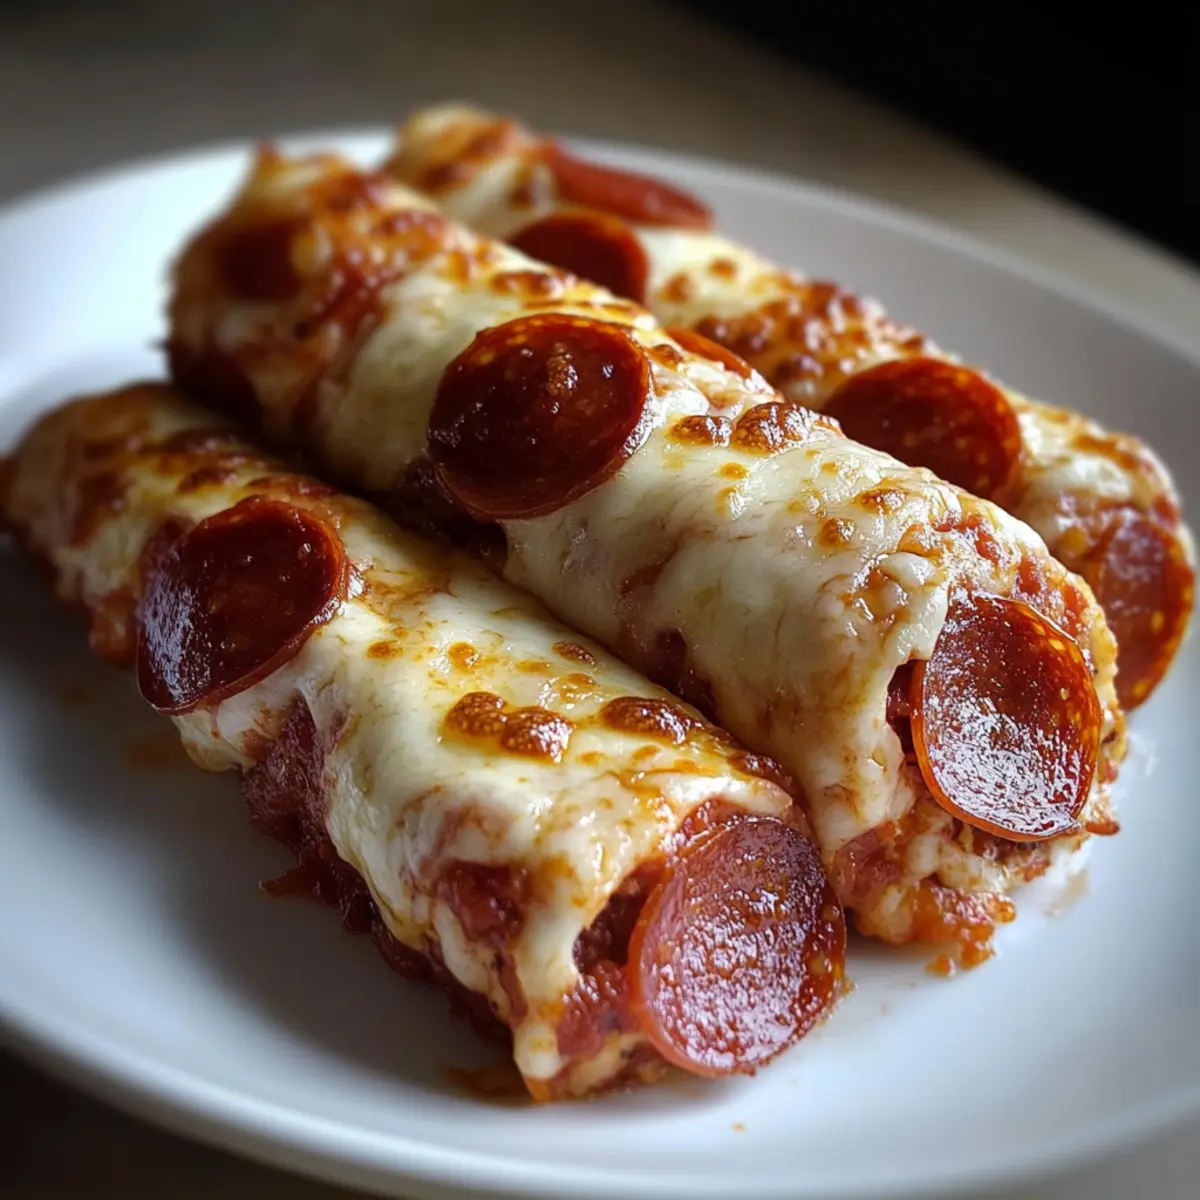
As the oven hums with the promise of a delicious transformation, my kitchen fills with the tantalizing scent of melting cheese and zesty marinara. Today, I’m sharing my new favorite snack: Cheesy Pepperoni Pizza Roll-Ups. These quick, low-carb delights are a game-changer for anyone looking to savor some comfort food without straying from their keto goals. Ready in under 20 minutes, they are the perfect finger food for movie nights or casual get-togethers, bringing fun and flavor to the table. With that gooey mozzarella and savory pepperoni wrapped in a crispy tortilla, each bite feels like a mini pizza party. So, why not treat yourself to these crispy, cheesy treats tonight? What toppings will you customize yours with?

What Makes These Pizza Roll-Ups Irresistible?
Quick and Easy: In under 20 minutes, you can whip up a delicious snack that fits directly into your busy lifestyle.
Low-Carb Delight: These roll-ups satisfy your pizza cravings without the carbs, making them perfect for keto enthusiasts.
Customizable Flavors: Mix and match with your favorite toppings—perhaps add some sliced bell peppers or a dash of spicy red pepper flakes.
Crispy Texture: The golden-brown tortilla gives you that satisfying crunch while encasing gooey, melty mozzarella and pepperoni.
Crowd-Pleasing Snack: Whether it’s movie night or a casual gathering, these cheesy roll-ups are sure to be a hit, much like my Smothered Cheesy Sour recipe!
Cheesy Pepperoni Pizza Roll-Ups Ingredients
For the Roll-Ups
• Low-Carb Tortillas – Offers the perfect wrap for these pizza roll-ups, keeping them low in carbs.
• Marinara Sauce – A tangy layer that adds moisture and flavor; stick to about 2 tablespoons to prevent sogginess.
• Shredded Mozzarella Cheese – This gooey cheese is essential for that melty, stretchy goodness; freshly shredded cheese melts best.
• Pepperoni Slices – Adds a burst of flavor and protein; try swapping for spicy pepperoni or adding veggies for variety.
• Olive Oil – Brushed on the outside for a crispy finish; melted butter can also be used as a flavorful alternative.
Optional Add-Ons
• Sliced Bell Peppers – A crunchy veggie option that enhances flavor and nutrition; just be sure to pat them dry.
• Crushed Red Pepper Flakes – For those who like a little heat, sprinkle these on before rolling for an extra kick.
• Fresh Basil – Add a refreshing touch of basil before rolling for unique aromatic flavor.
Step‑by‑Step Instructions for Cheesy Pepperoni Pizza Roll Ups
Step 1: Preheat the Oven
Start by preheating your oven to 375°F (190°C). This ensures that your cheesy pepperoni pizza roll-ups bake evenly and achieve that golden, crispy texture. While the oven heats up, gather your ingredients and prepare your baking sheet by lining it with parchment paper for easy cleanup.
Step 2: Prepare the Tortillas
Lay your low-carb tortillas flat on a clean surface or cutting board. Spread approximately 2 tablespoons of marinara sauce evenly across each tortilla, leaving a half-inch border around the edges. This not only adds flavor but also helps prevent sogginess, making your pepperoni pizza roll-ups wonderfully crispy.
Step 3: Add Cheese and Pepperoni
Next, sprinkle a generous amount of shredded mozzarella cheese over the sauce, covering it evenly. Then, arrange pepperoni slices neatly on top of the cheese. You can opt for spicy pepperoni or add in some sliced bell peppers for a veggie twist. Make sure every bite is packed with flavor!
Step 4: Roll Up the Tortillas
Carefully roll the tortillas tightly from one end to the other, ensuring the filling is well enclosed. Once rolled, brush the outside of each roll with olive oil for that extra crispiness. This step is crucial for achieving a delightful golden-brown finish on your cheesy pepperoni pizza roll-ups.
Step 5: Bake the Roll-Ups
Place the roll-ups seam-side down on your prepared baking sheet. Bake them in the preheated oven for 10-12 minutes, or until they turn a beautiful golden color and the cheese is bubbly. Keep an eye on them during the baking process to achieve perfect crispy edges.
Step 6: Slice and Serve
Once your cheesy pepperoni pizza roll-ups are out of the oven, let them cool for a minute or two. This allows the filling to set slightly, making slicing easier. Use a sharp knife to cut them into bite-sized pieces, then serve warm with extra marinara sauce on the side for dipping. Enjoy your savory snack!
What to Serve with Cheesy Pepperoni Pizza Roll-Ups
Looking to create a delightful meal around these crispy, cheesy bites? Here are some perfect pairings to enhance your dining experience.
-
Garlic Breadsticks: Their crispy, buttery flavor complements the cheesy goodness, making every bite a comforting treat. Serve them warm, and watch them disappear!
-
Caesar Salad: The crisp Romaine and tangy dressing provide a refreshing contrast to the pizza roll-ups’ richness. It’s the perfect side to keep things balanced and light.
-
Tzatziki Dip: This cool, flavorful yogurt-based dip adds a refreshing note to your cheesy roll-ups. A scoop of tzatziki will elevate your snacking experience!
-
Roasted Vegetables: A medley of colorful roasted veggies brings fresh flavors, adding a vibrant, healthy element to your meal. It’s a great way to sneak in some nutrition!
-
Spicy Buffalo Wings: For a delightful flavor boost, pair with some spicy buffalo wings. The heat and crunch are a match made in snack heaven!
-
Iced Tea or Lemonade: Refreshing drinks like iced tea or homemade lemonade perfectly complement the savory snacks. Their sweetness contrasts beautifully with the cheesy flavors.
How to Store and Freeze Cheesy Pepperoni Pizza Roll-Ups
Fridge: Store leftovers in an airtight container for up to 3 days. This keeps your cheesy pepperoni pizza roll-ups fresh and ready for a quick snack.
Freezer: For longer storage, wrap individual roll-ups tightly in plastic wrap and store in a freezer bag for up to 2 months. This allows you to enjoy them anytime!
Reheating: To restore crispness, reheat in the oven at 350°F for about 5-7 minutes. Avoid microwaving, as it can make the roll-ups chewy rather than crispy.
Thawing: If frozen, thaw overnight in the fridge before reheating for best results. Enjoy the delightful cheesy goodness just like when they were freshly baked!
Make Ahead Options
These Cheesy Pepperoni Pizza Roll-Ups are a fantastic choice for meal prep enthusiasts! You can assemble the roll-ups up to 24 hours in advance by preparing all the ingredients, rolling them up, and storing them in an airtight container in the refrigerator. To maintain their crispiness, ensure you brush them with olive oil before wrapping. When it’s time to enjoy, simply pop them in the oven for about 10-12 minutes, or until golden brown and bubbly. This way, you can savor delicious homemade snacks with minimal effort, making them perfect for busy weeknights or impromptu gatherings!
Cheesy Pepperoni Pizza Roll-Ups Variations
Feel free to explore these tantalizing twists to make your roll-ups even more delightful and unique!
-
Veggie Boost: Add sliced bell peppers or black olives for a colorful veggie twist. Just be sure to pat them dry to avoid sogginess!
-
Spicy Kick: Include crushed red pepper flakes for a delightful heat that adds excitement in every bite.
-
Herb Infusion: Consider incorporating fresh basil or oregano before rolling. The aroma of fresh herbs takes these roll-ups to a new level!
-
Cheese Variety: Swap mozzarella for pepper jack or cheddar cheese to create a new flavor profile that’s both bold and comforting.
-
Sauce Swap: Instead of marinara, try using pesto or a cheesy Alfredo sauce for a creamy, rich alternative; perfect for a different pizza experience.
-
Sweet & Savory: For a fun twist, add a layer of sliced jalapeños and serve with a drizzle of honey or BBQ sauce for a sweet-savory contrast.
-
Meat Lovers: Add extra protein by including crumbled sausage or cooked bacon along with your pepperoni for a delicious meaty addition.
Feel inspired? These variations ensure that every time you make your cheesy pepperoni pizza roll-ups, it’s a new culinary adventure! And while you’re at it, pair them with a side of Cheesy Ranch Potatoes for a decadent spread. Enjoy creating!
Expert Tips for Cheesy Pepperoni Pizza Roll-Ups
-
Preheat Perfectly: Always preheat the oven to ensure even cooking and that delightful crispiness on your roll-ups.
-
Sauce Control: Use only about 2 tablespoons of marinara sauce to prevent sogginess, keeping your cheesy pepperoni pizza roll-ups crispy and delightful.
-
Quality Cheese: Opt for freshly shredded mozzarella, as it melts beautifully, creating that gooey texture we all love in pizza roll-ups.
-
Rolling Technique: Roll tortillas tightly to enclose the filling; loose rolls can lead to spillage and loss of that cheesy goodness during baking.
-
Crispy Finish: For extra crispiness, consider baking on a wire rack to allow air circulation around the roll-ups.
-
Storage Tips: Store leftovers in an airtight container in the fridge for up to 3 days; reheat in the oven for that fresh-out-of-the-oven crunch!
Cheesy Pepperoni Pizza Roll-Ups Recipe FAQs
How do I choose the right low-carb tortillas?
Absolutely! When selecting low-carb tortillas, look for those with high fiber content and minimal added sugars. Brands that use almond flour or coconut flour are great for keeping carbs low while offering a tasty texture. It’s essential to ensure they are fresh and without any dark spots to maintain that soft wrap.
What is the best way to store leftovers?
To store your cheesy pepperoni pizza roll-ups, place them in an airtight container in the fridge for up to 3 days. This helps keep them fresh and ready for a quick snack. I recommend reheating them in the oven at 350°F for about 5 minutes to restore their crispiness, rather than using the microwave, which can make them chewy.
Can I freeze the roll-ups?
Absolutely! For freezing, wrap each roll-up tightly in plastic wrap, ensuring there are no air pockets, then place them in a freezer-safe bag. They will keep well for up to 2 months. When you’re ready to enjoy, simply thaw them overnight in the fridge and reheat in the oven at 350°F for about 5-7 minutes until they’re warmed through and crispy again.
What should I do if my roll-ups are soggy?
Very common! To avoid sogginess, make sure to use around 2 tablespoons of marinara sauce and pat your pepperoni dry before adding. If they turn out soggy, you can try baking them a bit longer or reheating them in a hot oven to restore that lovely crunch.
Are these roll-ups suitable for pets or have allergy considerations?
While the cheesy pepperoni pizza roll-ups are delicious for humans, they aren’t suitable for pets, particularly because of the cheese and spices like pepperoni. If you’re concerned about allergies, be cautious of the cheese ingredients and the type of tortillas you select, especially if gluten is a concern. Always read labels to ensure they meet dietary needs.
Can I make these roll-ups dairy-free?
Yes, you certainly can! For a dairy-free version, substitute mozzarella with a dairy-free cheese alternative; many brands are now creating great melting plant-based cheeses. Be vigilant with the rest of the ingredients to ensure they conform to your dietary preferences; the low-carb tortillas should still align with your needs.
Irresistible Cheesy Pepperoni Pizza Roll Ups in Minutes
Ingredients
Equipment
Method
- Preheat your oven to 375°F (190°C) and prepare a baking sheet lined with parchment paper.
- Lay the low-carb tortillas flat, spreading 2 tablespoons of marinara sauce evenly across each, leaving a half-inch border.
- Sprinkle shredded mozzarella cheese over the sauce and add pepperoni slices on top.
- Roll the tortillas tightly from one end to the other, brushing the outside with olive oil.
- Bake seam-side down on the prepared baking sheet for 10-12 minutes until golden and bubbly.
- Let cool slightly, slice into bite-sized pieces, and serve warm with extra marinara sauce for dipping.
Leave a Reply