
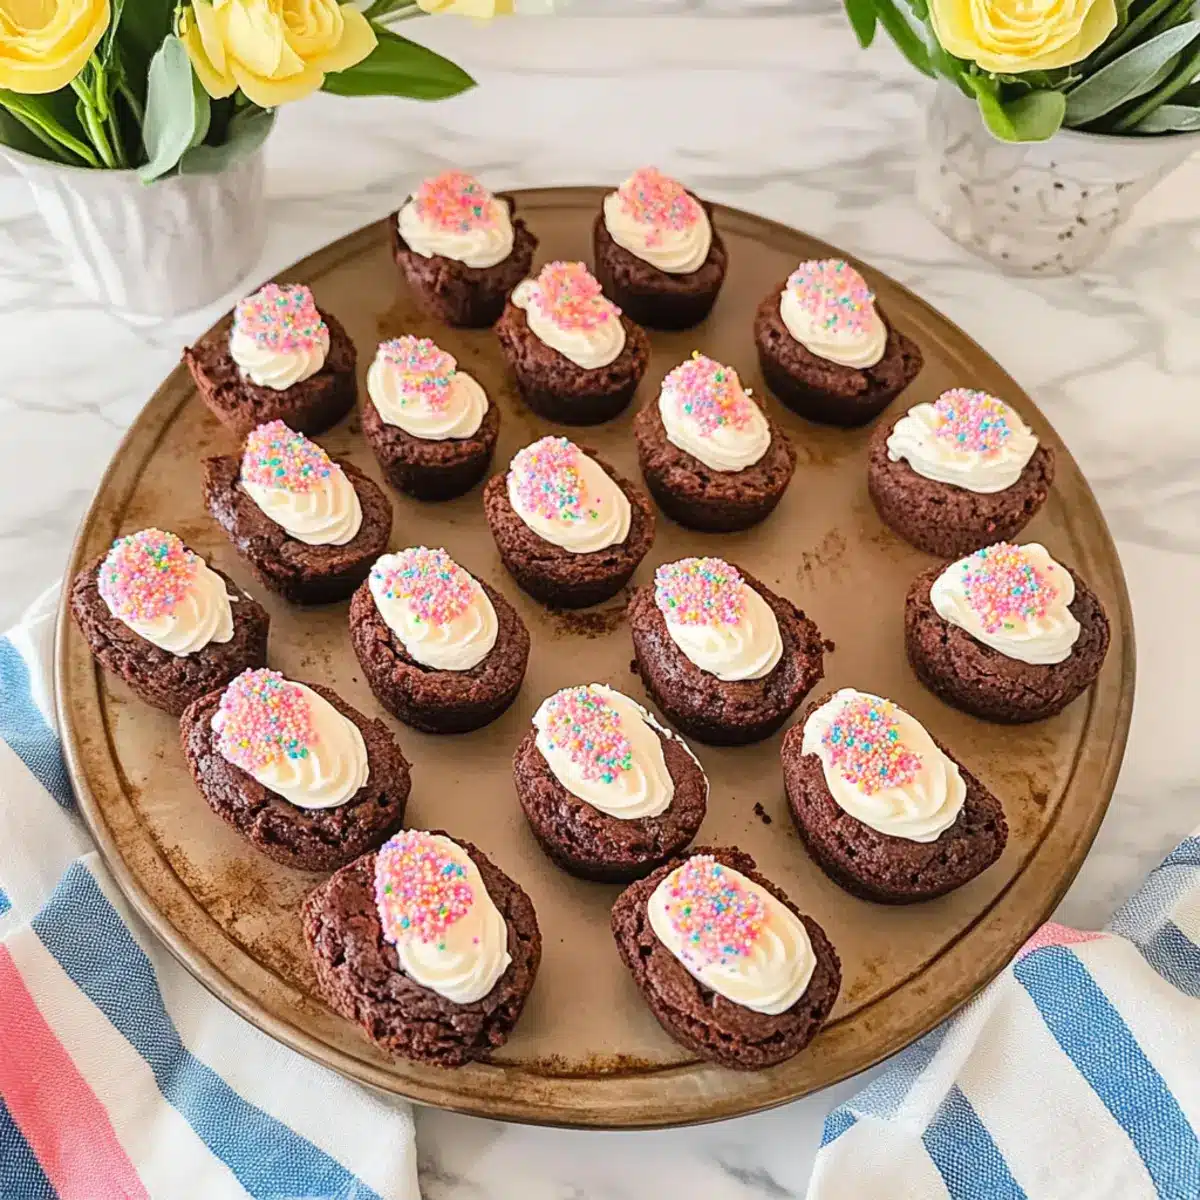
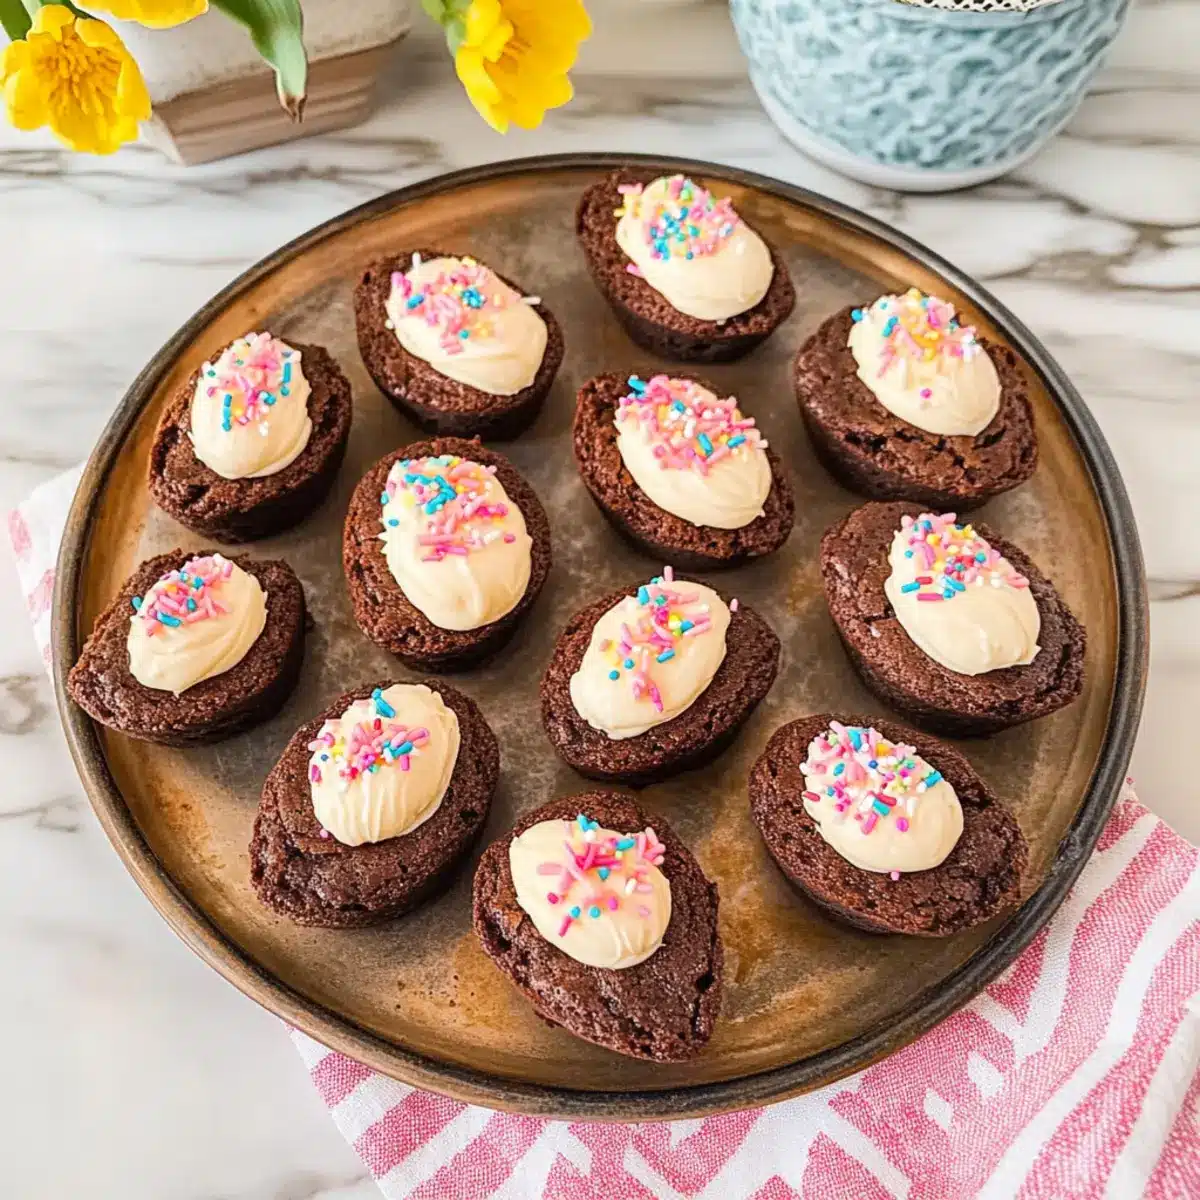
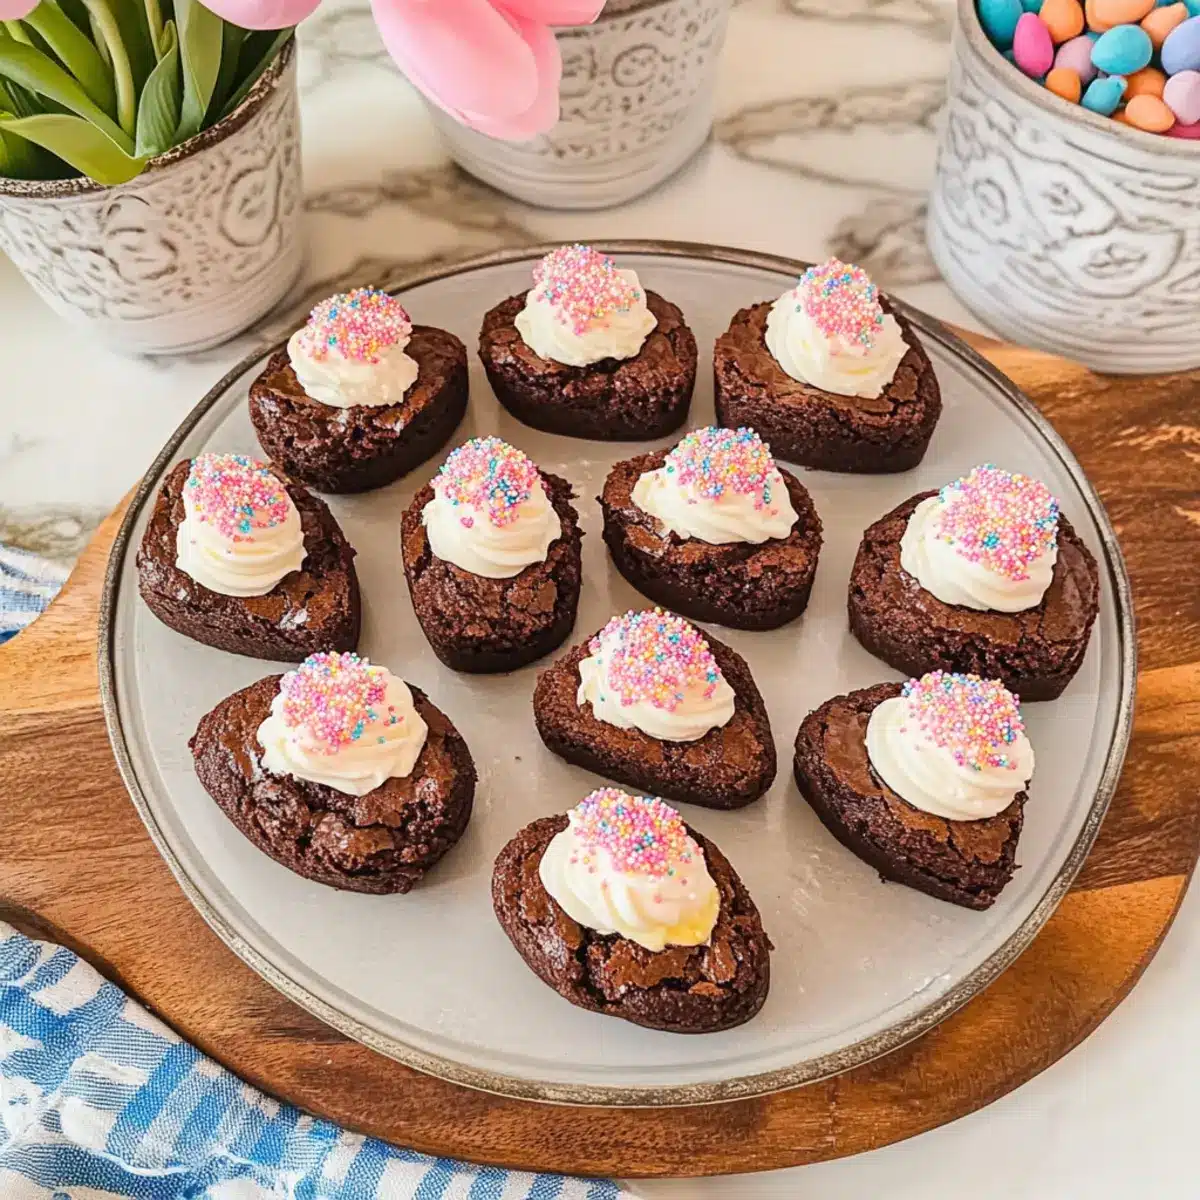
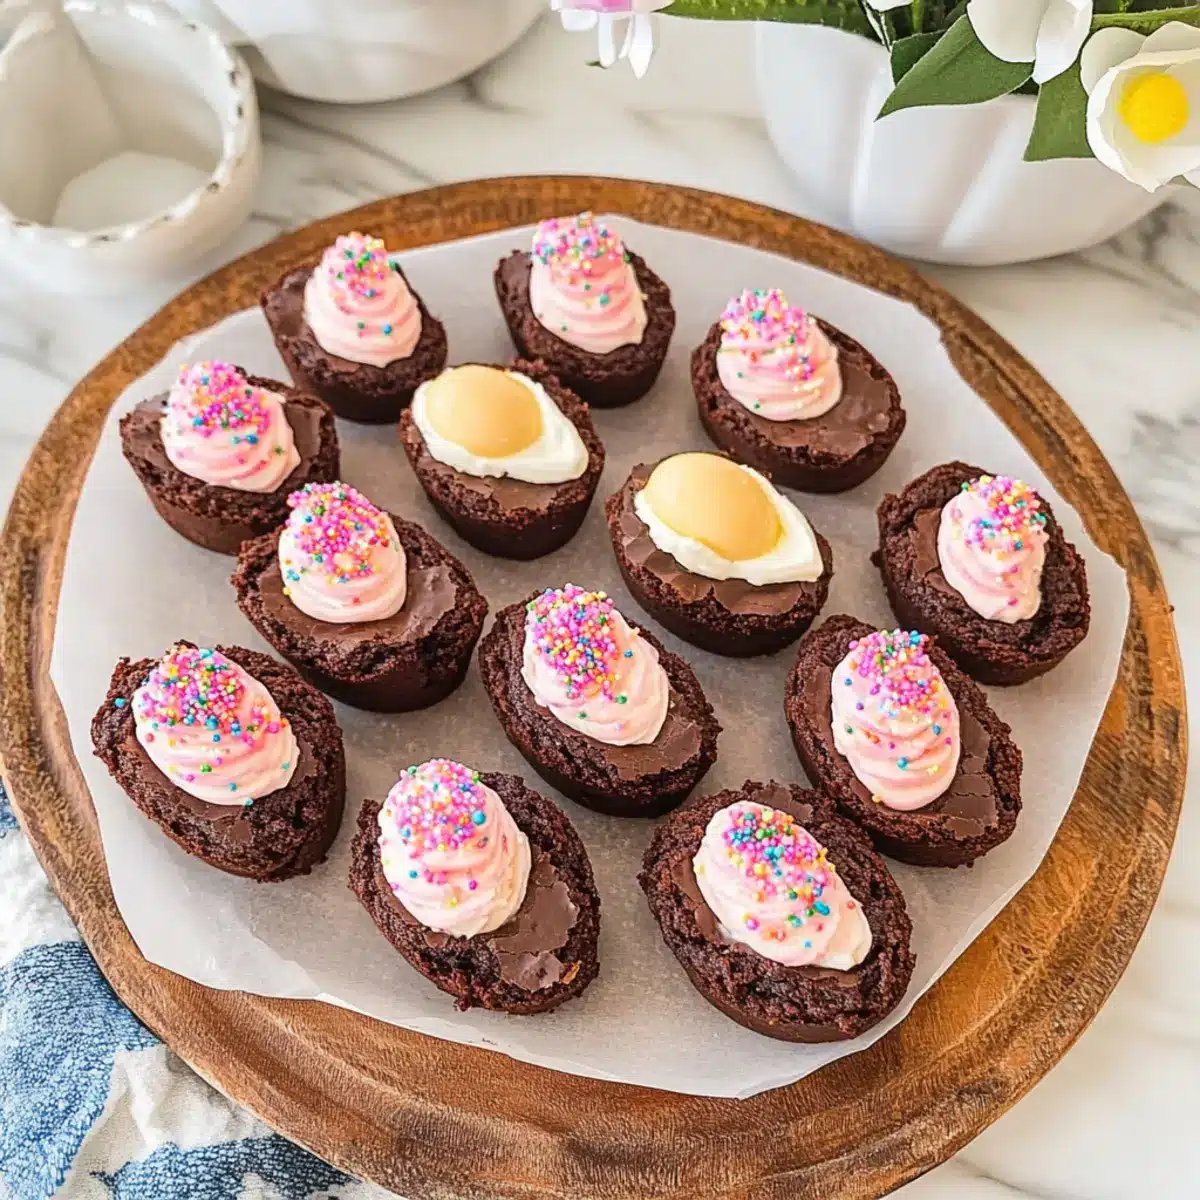
Spring has a way of bringing out our playful side, and what better way to celebrate than with a batch of Easter Deviled Brownies? These delightful treats combine fudgy chocolate goodness with a whimsical twist that’s bound to impress your family and friends. Whether you’re hosting an Easter gathering or simply looking to brighten a rainy day, this kid-friendly dessert is both easy to make and visually captivating. With minimal prep time thanks to a trusty boxed brownie mix, you’ll whip up these festive confections in no time. Plus, their whimsical deviled egg appearance makes them a true standout on any dessert table. Ready to take your spring baking to the next level? Let’s dive into this fun and delicious recipe!
Why Are Easter Deviled Brownies So Special?
Playful Presentation: With their clever design mimicking deviled eggs, these brownies elevate your dessert table, sparking conversation and delight!
Kid-Friendly Fun: Perfect for little hands to help with, ensuring a fun baking experience the whole family can enjoy together.
Quick & Easy: Minimal prep is required thanks to boxed brownie mix, making it a go-to recipe for busy schedules.
Decadent Flavor: The combination of rich brownie and creamy frosting creates a lush indulgence that will have everyone coming back for seconds!
Versatile Appeal: Whether you’re celebrating Easter or just want to add a special treat to a weekday, these brownies fit the bill. Not to mention, they’re a fabulous way to use up that extra frosting from your vanilla frosting recipe.
Easter Deviled Brownies Ingredients
For the Brownies
• Fudgy Brownie Mix – This boxed mix yields the rich chocolate base that makes these brownies irresistible.
• Eggs – Essential for binding the mixture; use as directed on the box for best results.
• Oil – Adds moisture to the brownies; vegetable oil works perfectly, but melted butter can add richness.
• Water – Required for mixing; stick to the quantity recommended on the package.
For the Frosting
• Vanilla Frosting – This sweet, creamy frosting mimics the yolk of a deviled egg; cream cheese frosting can be used for a tangy kick.
For Decoration
• Festive Sprinkles – Choose colorful sprinkles to bring your brownies to life, just like paprika decorates deviled eggs; pastel or Easter-themed works best.
Remember, these Easter Deviled Brownies are not just a dessert; they’re a conversation starter that combines delightful taste with fun presentation!
Step‑by‑Step Instructions for Easter Deviled Brownies
Step 1: Preheat and Prepare
Begin by preheating your oven according to the brownie mix instructions, typically around 350°F (175°C). While the oven warms, gather your baking materials including an egg-shaped silicone mold and nonstick spray. This step sets the perfect stage for your delicious Easter Deviled Brownies.
Step 2: Mix the Brownie Batter
In a large mixing bowl, combine your fudgy brownie mix with the required eggs, oil, and water as specified on the package. Whisk until smooth, ensuring there are no lumps. This should take about 2-3 minutes. Once mixed, your brownie batter should have a rich, glossy appearance, ready to be transformed into delightful Easter treats.
Step 3: Prepare the Silicone Mold
Lightly spray the egg-shaped silicone mold with nonstick spray to ensure easy removal. This step is crucial for achieving the perfect shape for your Easter Deviled Brownies. Place the mold on a baking sheet to catch any spills when filling it later, providing you with easier handling and a cleaner workspace.
Step 4: Fill the Mold
Carefully fill each cavity of the silicone mold about three-quarters full with the prepared brownie batter. Avoid overfilling, as this can lead to messy and uneven baked brownies. Ensure an even distribution, which allows all your brownies to bake uniformly, maintaining the fun egg shape you desire.
Step 5: Bake the Brownies
Place the filled silicone mold in the preheated oven and bake according to the package instructions, usually around 25-30 minutes. Check for doneness a few minutes early by inserting a toothpick; it should come out with a few moist crumbs. This step guarantees perfectly fudgy brownies that serve as the base for your festive dessert.
Step 6: Create the Indentations
Once baked, remove the brownies from the oven and, while still warm, gently press the back of a tablespoon into the center of each egg cavity to create a small indentation. This step is essential for mimicking the look of deviled eggs while the brownies are warm, allowing for clean indentations that hold the frosting perfectly.
Step 7: Cool the Brownies
Allow the brownies to cool completely in the silicone mold. This cooling period is necessary for setting the texture and preventing the frosting from melting. Plan for about 30-45 minutes, depending on your kitchen temperature, ensuring that your Easter Deviled Brownies are ready for the fun decorating ahead.
Step 8: Frost the Brownies
Once cooled, transfer the brownies to a decorating station. Using a piping bag fitted with a star tip, pipe vanilla frosting into the cavity of each brownie, resembling the yolk of a deviled egg. Take your time to create a beautiful swirl, as this adds to the charming appearance of your Easter Deviled Brownies.
Step 9: Add the Finishing Touches
To make your Easter Deviled Brownies truly festive, sprinkle colored sprinkles over the frosting. Choose pastel or Easter-themed sprinkles to enhance the whimsical look. This final touch not only adds flavor but also creates the playful and charming appeal that makes these brownies a standout on your dessert table.
Make Ahead Options
These Easter Deviled Brownies are perfect for busy home cooks looking to save time and make dessert prep a breeze! You can prepare the brownie batter and fill the silicone mold up to 24 hours in advance—simply cover the mold with plastic wrap and refrigerate it. Alternatively, bake the brownies and store them unfrosted in an airtight container at room temperature for up to 3 days. When you’re ready to serve, create the indentations while they are still warm, then allow them to cool completely before frosting. This ensures your Easter Deviled Brownies are just as delicious, allowing you to focus on enjoying the festivities with family and friends!
Storage Tips for Easter Deviled Brownies
Room Temperature: Store unfrosted brownies in an airtight container at room temperature for up to 3 days to maintain their fudgy texture.
Fridge: If desired, you can store frosted brownies in the refrigerator for up to a week; just keep them covered to prevent drying out.
Freezer: For longer storage, freeze unfrosted brownies for up to 2 months. Wrap them tightly in plastic wrap before placing in an airtight container. Thaw before frosting.
Reheating: If you prefer warm brownies, reheat individual pieces in the microwave for about 10-15 seconds; enjoy with a dollop of freshly whipped cream!
Easter Deviled Brownies Variations & Substitutions
Feel free to get creative with your Easter Deviled Brownies to make them uniquely yours; let’s explore some delightful twists!
-
Dairy-Free: Substitute the eggs with flaxseed meal and use dairy-free frosty alternatives, like coconut cream, for a vegan version! Rich and creamy, these brownies maintain all the appeal without the dairy.
-
Nutty Add-In: Add chopped walnuts or pecans to the brownie mix for a delightful crunch that pairs beautifully with the fudgy texture. The added richness from the nuts elevates these brownies to a new level!
-
Flavor Boost: Experiment with flavored extracts like almond or orange in the frosting for a hint of zesty surprise, making each bite more intriguing. This subtle change can create a memorable sensory experience.
-
Chocolate Swirl: For a fun twist, swirl in some chocolate hazelnut spread into the brownie batter before baking to create a beautiful marbled effect. The added chocolate makes each brownie even more indulgent!
-
Lemon Zest: Add lemon zest to the vanilla frosting for a refreshing bright flavor that cuts the sweetness and adds a lively touch. It’s a perfect spring element that complements the festive theme!
-
Spicy Kick: Mix in a teaspoon of cayenne pepper to the brownie batter for an unexpected heat that contrasts nicely with the sweetness. This daring touch makes your brownies a conversation starter at any gathering!
-
Mini Versions: Bake the brownie batter in a mini muffin tin for bite-sized treats, perfect for parties. Serve these mini versions on a fun platter for added charm!
Plus, don’t forget, if you want to explore more ways to create the perfect frosting, check out our vanilla frosting recipe that can easily be customized. Each variation keeps the essence of these festive brownies while giving you a chance to personalize your treat!
Expert Tips for Easter Deviled Brownies
• Warm Indentations: Press the cavity into the brownies while they are still warm for clean, defined shapes. This trick helps create the perfect space for your frosting.
• Cooling Time: Make sure to let the brownies cool completely before frosting them. Otherwise, you risk melting the frosting and losing that lovely deviled egg appearance.
• Frosting Tips: For a more authentic look, tint your frosting a pale yellow using gel food coloring; it will enhance the illusion of deviled egg yolks.
• Piping Perfection: Use a star-shaped piping tip for a beautiful swirl that mimics the classic look of deviled eggs; it adds an attractive touch to your Easter Deviled Brownies.
• Chill for Firmness: Consider chilling the frosted brownies briefly to firm up the frosting. This helps keep their shape and makes them easier to serve.
What to Serve with Easter Deviled Brownies
Springtime gatherings call for delightful treats that make even the simplest meal feel festive and special.
-
Vanilla Ice Cream: The creamy sweetness of vanilla ice cream balances the rich brownie flavor, creating a heavenly contrast.
-
Fresh Berries: Juicy strawberries or raspberries add a refreshing burst of flavor, cutting through the richness of the brownies and brightening the dessert table.
-
Whipped Cream: A dollop of freshly whipped cream adds a light, airy texture that harmonizes beautifully with the fudgy brownies.
-
Mint Tea: Sip on mint tea to cleanse the palate while enjoying the chocolatey goodness, making this combination not only refreshing but also delightful.
-
Chocolate Sauce: Drizzling warm chocolate sauce over each brownie can elevate the dessert experience by intensifying the chocolate flavor and adding a luscious touch.
-
Carrot Cake: For a full Easter dessert table, include carrot cake, as its spices and textures complement the brownies and create a colorful presentation.
-
Lemonade: A zesty lemonade adds a refreshing tang that pairs wonderfully with chocolate, making it a perfect drink choice for spring festivities.
-
Colorful Fruit Salad: A vibrant mix of seasonal fruits will bring a burst of color and a healthy balance to your dessert spread.
-
Pecan Pie Bars: Rich and nutty, these bars provide a delightful contrast to the brownies and add variety to your dessert selection.
-
Coffee or Espresso: For the adults, serving a cup of coffee or espresso can enhance the chocolate flavors while providing a cozy warmth.
Easter Deviled Brownies Recipe FAQs
How do I choose the best brownie mix for Easter Deviled Brownies?
Absolutely! When selecting a brownie mix, look for one labeled “fudgy,” as this will yield the moist, rich texture you want. Avoid those marked as “cakey,” since they can lead to a dry result. If you’re feeling adventurous, you can also make your own brownie batter from scratch, ensuring it’s thick and decadent!
What’s the best way to store leftover Easter Deviled Brownies?
The more the merrier! You can store unfrosted brownies in an airtight container at room temperature for up to 3 days. If they’re frosted, you can keep them covered in the fridge for about a week. Always ensure they’re sealed well to prevent drying out!
Can I freeze Easter Deviled Brownies for later?
Absolutely! For long-term storage, freeze unfrosted brownies for up to 2 months. Just wrap each brownie tightly in plastic wrap and place them in an airtight container. When you’re ready to enjoy, simply thaw them at room temperature for a few hours before frosting.
What do I do if the brownies overflow in the mold during baking?
Don’t fret! If you accidentally overfill your mold, it can create a bit of a mess, but it’s a common issue. If you notice that overflow occurs, next time fill the cavities only about ¾ full to allow room for rising. Also, keep a baking sheet under the mold to catch any drips.
Is there a way to make these brownies more gluten-friendly?
Very! You can easily swap the regular brownie mix for a gluten-free version. Just ensure your frosting ingredients are also gluten-free, and you’re good to go. This way, everyone can enjoy the fun without worry!
Should I frost the brownies ahead of time or right before serving?
I recommend frosting your Easter Deviled Brownies on the same day you plan to serve them. This helps ensure they look fresh and appealing, plus it keeps the frosting from becoming too soft. If there’s any leftover frosting, feel free to stash it in the fridge for a couple of days for another sweet use!
Easter Deviled Brownies: A Fun Twist on a Classic Treat
Ingredients
Equipment
Method
- Preheat your oven according to the brownie mix instructions, typically around 350°F (175°C).
- In a large mixing bowl, combine your fudgy brownie mix with the required eggs, oil, and water. Whisk until smooth.
- Lightly spray the egg-shaped silicone mold with nonstick spray.
- Carefully fill each cavity of the silicone mold about three-quarters full with the prepared brownie batter.
- Place the filled silicone mold in the preheated oven and bake according to the package instructions, usually around 25-30 minutes.
- Once baked, remove the brownies from the oven and gently press the back of a tablespoon into the center of each egg cavity.
- Allow the brownies to cool completely in the silicone mold, approximately 30-45 minutes.
- Once cooled, pipe vanilla frosting into the cavity of each brownie, resembling the yolk of a deviled egg.
- Sprinkle colored sprinkles over the frosting for a festive look.
Leave a Reply