
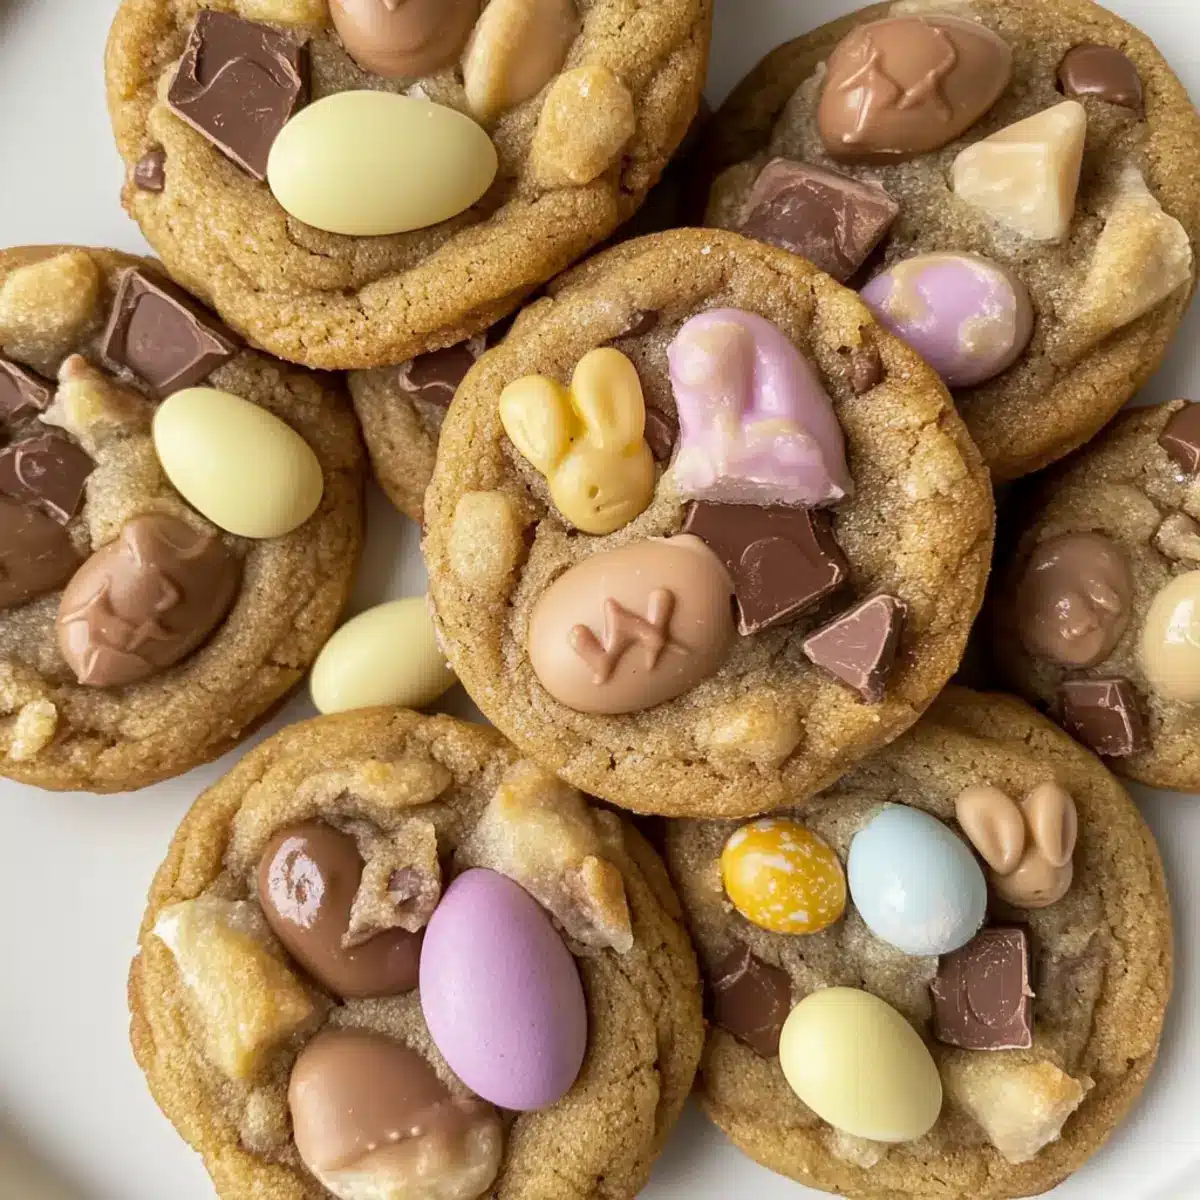
As the sweet scents of baking waft through the kitchen, it’s impossible not to get excited about making my delightful Easter Chocolate Cookies. This easy, one-bowl recipe makes preparing these soft and chewy cookies not just quick, but also incredibly fun—perfect for the hustle of the holiday season! Bursting with double chocolate chunks and adorned with adorable Malteser Bunnies and Mini Eggs, these cookies are sure to be a hit with both kids and adults alike. Plus, their versatility allows you to switch up the mix-ins or toppings to suit your taste, which means everyone can enjoy a personal twist on this festive treat. Curious about how to create these mouthwatering cookies? Let’s dive into the magic of Easter baking!

Why are these cookies a must-try?
Irresistible Flavor: The combination of rich chocolate chunks and festive candies creates a taste explosion that’s hard to resist.
Quick and Easy: This one-bowl recipe means less mess and more fun, perfect for busy holiday baking sessions.
Versatile Treat: Feel free to swap out toppings for different holidays or use various chocolates, making it a year-round favorite.
Crowd-Pleasing Appeal: With their adorable decorations, these cookies are perfect for gatherings and will surely impress guests.
Texture Perfection: Expect a chewy exterior and gooey center that melts in your mouth—just like a warm chocolate chip cookie!
For a cozy spin, check out these delightful Apple Snickerdoodles Cozy for a complementary dessert option.
Easter Chocolate Cookies Ingredients
• Bring the joy of Easter into your kitchen with these essential components!
For the Cookies
- Unsalted Butter – Provides moisture and richness; substitute with coconut oil for a dairy-free option.
- White Caster Sugar – Adds sweetness for a tender crumb; regular granulated sugar works as a backup.
- Light Brown Sugar – Infuses moisture with a hint of caramel; replace with dark brown sugar for added richness.
- Egg – Binds the ingredients and enriches the cookies; use 1/4 cup unsweetened applesauce for an egg-free version.
- Egg Yolk – Boosts richness and chewiness; can be omitted if using applesauce instead of a whole egg.
- Vanilla Extract – Brings depth of flavor; pure vanilla is preferable, but imitation works too.
- Self-Raising Flour – Provides structure and lift; can substitute with all-purpose flour mixed with baking powder (1 cup flour + 1 1/2 tsp baking powder).
- Salt – Enhances flavor and balances sweetness; an essential ingredient, don’t skip it.
- Chocolate (milk/white mix) – Adds richness and texture; choose your favorite type for personal preference.
For the Festive Topping
- Mini Malteser Bunnies and Mini Eggs – Adorable decorations that bring festive flair; feel free to use any Easter-themed candies for a colorful touch.
Step‑by‑Step Instructions for Easter Chocolate Cookies
Step 1: Prepare the Dough
Begin by melting 150g of unsalted butter in a microwave-safe bowl, heating in short 15-second bursts until fully melted. Once melted, mix in 100g of white caster sugar and 100g of light brown sugar until well combined. Then, add 1 egg, 1 egg yolk, and 1 teaspoon of vanilla extract, stirring until all the ingredients are smoothly incorporated.
Step 2: Mix Flour and Salt
Gradually fold in 225g of self-raising flour along with a pinch of salt into the wet mixture until a crumbly dough begins to form. Next, add 200g of chocolate chunks—feel free to mix dark and white chocolate for extra richness—gently folding until the dough is even and the chocolate is evenly distributed.
Step 3: Chill Dough
Cover the bowl with cling film and place it in the refrigerator to chill for at least 5 hours, ideally overnight. Chilling is key for your Easter Chocolate Cookies as it helps develop flavor and achieve the perfect chewy texture. This step prevents the cookies from spreading too much during baking.
Step 4: Preheat Oven
When ready to bake, preheat your oven to 180°C for fan-assisted or 200°C for conventional. While the oven is heating, line a baking tray with greaseproof paper to prevent sticking and ensure easy cleanup after your delightful cookies emerge.
Step 5: Shape Cookies
Once the dough is chilled and firm, scoop out portions and roll them into balls, about 30g each. Space 3-5 cookie balls evenly on the prepared baking tray, allowing room for spreading as they bake. This step ensures that each Easter Chocolate Cookie has enough space to become beautifully puffy!
Step 6: Bake
Slide the baking tray into the preheated oven and bake for approximately 10 minutes. Keep an eye on them as you want the edges to be pale golden while the centers remain soft. This slight underbaking guarantees that signature gooey center you crave in a decadent cookie.
Step 7: Add Toppings
As soon as the cookies are out of the oven, gently press a Mini Malteser Bunny and a few Mini Eggs into the top of each cookie. This fun and festive decorating touch makes your Easter Chocolate Cookies even more delightful and visually appealing—perfect for the holiday season!
Step 8: Cool
Let your cookies cool on the tray for about 20 minutes to allow them to firm up. This resting period is essential, as it helps them maintain their shape and texture, allowing you to enjoy that perfect combination of chewy and gooey in every bite. Once cooled, transfer them to a wire rack to finish cooling completely.

Easter Chocolate Cookies Variations & Substitutions
Feel free to get creative and customize these cookies to fit your taste, creating a delightful twist everyone will love!
-
Dairy-Free: Replace unsalted butter with coconut oil or dairy-free margarine for a creamy, vegan-friendly option.
Imagine the same rich flavor with a hint of coconut, bringing a tropical vibe to your cookies! -
Sugar Swap: Use coconut sugar for a lower-glycemic option, or maple syrup for a natural sweetness.
These alternatives add unique flavors while keeping the sweetness intact, making your cookies stand out. -
Gluten-Free: Substitute self-raising flour with a gluten-free flour blend and add 1 1/2 teaspoons of baking powder.
This ensures everyone can join in on the Easter fun, enjoying cookies without gluten. -
Nutty Adventure: Incorporate chopped walnuts or pecans into the dough for a delightful crunch and nutty flavor.
These additions create a wonderful texture, giving your chewy cookies an unexpected twist that’s hard to resist! -
Flavor Boost: Experiment with flavored extracts, such as almond or hazelnut, to add depth to your cookies.
A teaspoon of almond extract can transport your taste buds while perfectly complementing the chocolate. -
Texture Twist: Fold in rolled oats or crushed graham crackers for a heartier bite and added chewiness.
This will create an exciting texture contrast, making every mouthful even more enjoyable! -
Spicy Kick: Add a sprinkle of cinnamon or a dash of cayenne pepper for a surprising warmth in every bite.
It’s a fun twist that wakes up your taste buds and adds a unique festive flair to your cookies! -
Festive Variations: Swap Malteser Bunnies with chocolate-covered marshmallows or pastel-colored candies for a vibrant look.
This way, you can customize the decorations to fit any holiday or personal theme while making the cookies even more adorable!
For more delightful ideas, you can take a cozy look at these incredible Apple Snickerdoodles Cozy for even more options. Additionally, don’t hesitate to try different chocolates in your Easter Chocolate Cookies—dark, milk, or even white, each offers its own delicious profile!
Make Ahead Options
These Easter Chocolate Cookies are perfect for meal prep, allowing you to enjoy festive treats with minimal fuss! You can prepare the dough and refrigerate it for up to 48 hours before baking, which helps deepen the flavors while ensuring are just as delicious when baked. Simply cover the bowl tightly with cling film to prevent the dough from drying out. When you’re ready to enjoy, scoop chilled dough onto your baking tray and follow the baking instructions, adding your adorable Malteser Bunnies and Mini Eggs right after they come out of the oven. With this make-ahead strategy, you’ll have more time to relax and savor the holiday moments!
What to Serve with Easter Chocolate Cookies
As you prepare these delightful treats, consider pairing them with complementary dishes and drinks for the ultimate holiday experience.
- Fresh Fruit Salad: A vibrant mix of seasonal fruits adds a refreshing contrast to the rich cookies while bringing a burst of color to your table.
- Vanilla Ice Cream: The creamy, smooth texture of vanilla ice cream offers a perfect balance to the warm, gooey cookies for an indulgent dessert duo.
- Rich Hot Chocolate: Cozy up with a cup of hot chocolate, allowing the warmth to enhance the chocolate flavors in your Easter Chocolate Cookies.
- Coffee: The robust flavors of a freshly brewed coffee beautifully complement the sweetness of the cookies, making for a delightful treat pairing.
- Chocolate-Covered Strawberries: Elevate your dessert table with chocolate-covered strawberries for a delightful crunch and a playful touch mirroring the cookie’s festive vibes.
- Lemonade Spritzers: A refreshing lemonade spritzer provides a zesty counterpoint to the cookies, cleansing the palate for an enjoyable balance of flavors.
- Pecan Pie Bars: These rich and nutty bars add a sweet and savory twist to your dessert options, perfect for holiday gatherings and family feasts.
- Sparkling Water: Keep things light and refreshing with sparkling water, making the sweet experience of cookies more enjoyable without being overly heavy.
- Marshmallow Fluff Dip: A fun, sweet dip for fruits or graham crackers, this light dessert adds an additional layer of indulgence to your Easter celebration.
- Carrot Cake: Reminiscent of Easter celebrations, a slice of carrot cake offers a warm spice flavor that pairs well with the chocolatey goodness of your cookies.
Storage Tips for Easter Chocolate Cookies
- Room Temperature: Store your Easter Chocolate Cookies in an airtight container at room temperature for up to 5 days to maintain their softness and freshness.
- Fridge: If you prefer a chewier texture, keep them in the fridge, where they will last for up to a week—but be sure to let them come to room temperature before enjoying!
- Freezer: For longer enjoyment, freeze the cookies in a single layer for up to 3 months. Once frozen, transfer them to an airtight container, separating layers with parchment paper to prevent sticking.
- Reheating: To revive the goodness, warm the cookies in the microwave for about 10-15 seconds. This will restore the gooey, melt-in-your-mouth feel that makes these Easter Chocolate Cookies so delightful!
Expert Tips for Perfect Easter Chocolate Cookies
-
Chill Time Matters: Ensure to chill the dough for at least 5 hours; this enhances flavor and helps achieve that chewy texture.
-
Mind the Bake Time: Underbake by 1-2 minutes for soft centers—remember, they’ll continue to cook while cooling.
-
Chocolate Distribution: Chop chocolate into small chunks for even melty goodness throughout the cookies, ensuring that every bite is heavenly.
-
Use Quality Ingredients: Opt for good-quality chocolates and vanilla extract; their flavors shine in these Easter Chocolate Cookies, elevating the overall taste.
-
Experiment with Toppings: Feel free to swap Malteser Bunnies with different Easter-themed candies, allowing for personal twists to suit everyone’s taste.
Easter Chocolate Cookies Recipe FAQs
How do I choose the best chocolate for my Easter Chocolate Cookies?
Absolutely! For the best flavor, I recommend using high-quality chocolate. Look for bars with a high cocoa percentage for rich taste. You can mix milk and dark chocolate for a nice contrast, or use white chocolate for a sweeter option. Always chop the chocolate into small chunks for even distribution throughout the dough.
What’s the best way to store my cookies after baking?
To keep your Easter Chocolate Cookies fresh and delightful, store them in an airtight container at room temperature for up to 5 days. If you want to maintain their chewiness longer, you can keep them in the fridge for up to a week, but allow them to come to room temperature before enjoying!
Can I freeze the cookie dough for later use?
Very! Freezing cookie dough is a fantastic idea for quick treats. Shape the dough into balls, place them on a baking sheet lined with parchment paper, and freeze for about 2 hours until firm. Then transfer the dough balls to an airtight container or a zip-top bag, separating them with parchment paper to prevent sticking. They’ll last in the freezer for up to 3 months! When you’re ready to bake, you can cook them straight from frozen; just add a couple of extra minutes to the baking time.
What if my cookies spread too much while baking?
It can be frustrating when cookies spread unexpectedly! To troubleshoot this, ensure that the dough is properly chilled for at least 5 hours; this helps keep the cookies from spreading too much during baking. If your cookies still spread, consider adding a bit more self-raising flour to the dough next time to provide extra structure.
Are there any dietary considerations for these cookies?
Of course! For a dairy-free option, substitute unsalted butter with coconut oil or a dairy-free margarine. To make them egg-free, you can replace the egg with 1/4 cup of unsweetened applesauce. Always check the labels on your ingredients for allergens if you have dietary restrictions!

Easter Chocolate Cookies That Melt in Your Mouth
Ingredients
Equipment
Method
- Melt the butter in a microwave-safe bowl, heating in short bursts until fully melted. Mix in white caster sugar and light brown sugar until well combined.
- Add the egg, yolk, and vanilla extract, stirring until smoothly incorporated.
- Gradually fold in self-raising flour and salt until a crumbly dough forms. Add chocolate chunks, folding until evenly distributed.
- Cover with cling film and chill in the refrigerator for at least 5 hours, ideally overnight.
- Preheat oven to 180°C for fan-assisted or 200°C for conventional. Line a baking tray with greaseproof paper.
- Scoop and roll dough into balls, about 30g each. Space cookie balls evenly on the baking tray.
- Bake for approximately 10 minutes until edges are pale golden and centers remain soft.
- Immediately press a Mini Malteser Bunny and Mini Eggs into each cookie.
- Cool on the tray for about 20 minutes before transferring to a wire rack to finish cooling.
Leave a Reply