
As I sat on my couch, engrossed in a late-night binge of my favorite anime, my stomach grumbled with an unmistakable craving for sushi. But let’s be real—who wants to roll sushi at midnight? Enter my Quick Canned Tuna Sushi Bake, the perfect answer to those late-night urges without the fuss of rolling. This cozy casserole combines the comfort of a warm dish with the vibrant flavors of a spicy tuna roll, making it not only a delicious choice but also budget-friendly. It’s an easy-to-prepare recipe that satisfies your sushi yearnings on any weekday evening. Ready to dive into this delightful twist on traditional sushi? The layers of creamy tuna mingling with seasoned rice will have your heart—and taste buds—singing!
Why is this tuna bake a must-try?
Budget-friendly goodness: This Quick Canned Tuna Sushi Bake is a wallet-friendly way to enjoy sushi flavors at home without breaking the bank.
Effortless preparation: Say goodbye to complicated rolling techniques—this dish comes together in simple layers, making it manageable for everyone.
Crowd-pleaser appeal: Perfect for families or gatherings, its unique taste will impress friends and loved ones alike, just like our Cheesecake Stuffed Baked Apples can satisfy your dessert cravings!
Flavorful versatility: Customize it by adding your favorite toppings or ingredients; try swapping in crispy cucumbers or switching up the mayo for a twist! Discover other delightful meals like Baked Feta Pasta to keep your dinner lineup fresh!
Comforting textures: Enjoy the warm, creamy inner layers contrasted by a golden, crispy topping that feels like a hug on a plate.
Quick Canned Tuna Sushi Bake Ingredients
For the Rice
- Short-Grain Rice – Provides structure and base; rinse thoroughly before cooking for a non-sticky texture.
For the Tuna Mixture
- Canned Tuna – A source of protein and flavor; drain thoroughly for the best texture and to prevent sogginess.
- Japanese Mayo – Adds creaminess and richness to the tuna mixture; a staple for authentic flavor.
- Sriracha Sauce – Enhances flavor with a spicy kick; adjust according to your heat preference.
For the Toppings
- Avocados – Provides creaminess and fresh flavor; thinly sliced to layer on top for beautiful presentation.
- Sesame Seeds & Furikake – Adds garnish and extra flavor; sprinkle generously for a festive touch.
- Green Onions – Provides a freshness garnish; chop finely to brighten up the final dish.
Final Touches
- Additional Japanese Mayo & Sriracha – For drizzling over the avocado layer before baking; these elevate the taste profile.
Dive into the comforting layers of this Quick Canned Tuna Sushi Bake and make your weeknight dinners unforgettable!
Step‑by‑Step Instructions for Quick Canned Tuna Sushi Bake
Step 1: Prepare Rice
Begin by cooking the short-grain rice according to the package instructions. Typically, this involves rinsing the rice under cold water until the water runs clear, then simmering it in a pot with the right amount of water. Once cooked, transfer the rice into a greased 9×9-inch baking dish and gently press it down. While the rice is still warm, season it with a mixture of salt, sugar, and rice vinegar for tangy flavor.
Step 2: Prepare Tuna Mixture
While the rice cools, open the canned tuna and drain it thoroughly. In a mixing bowl, combine the drained tuna with Japanese mayo, sriracha sauce, and a pinch of salt. Use a fork to break apart the tuna and mix until all ingredients are well incorporated, creating a creamy, flavorful mixture that will become the star of your Quick Canned Tuna Sushi Bake.
Step 3: Layer Ingredients
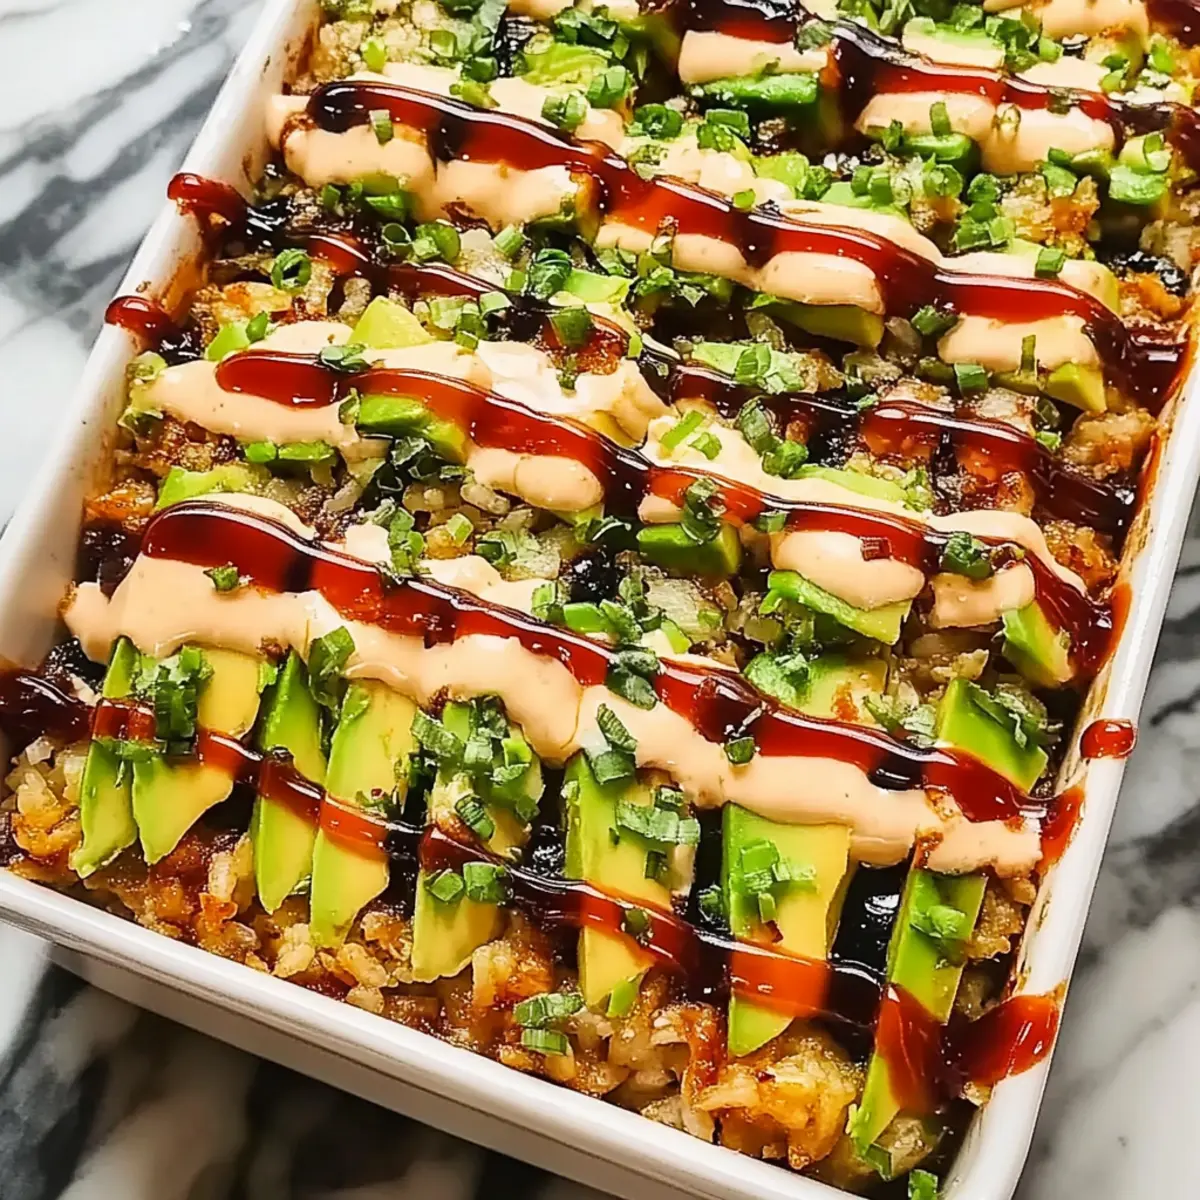
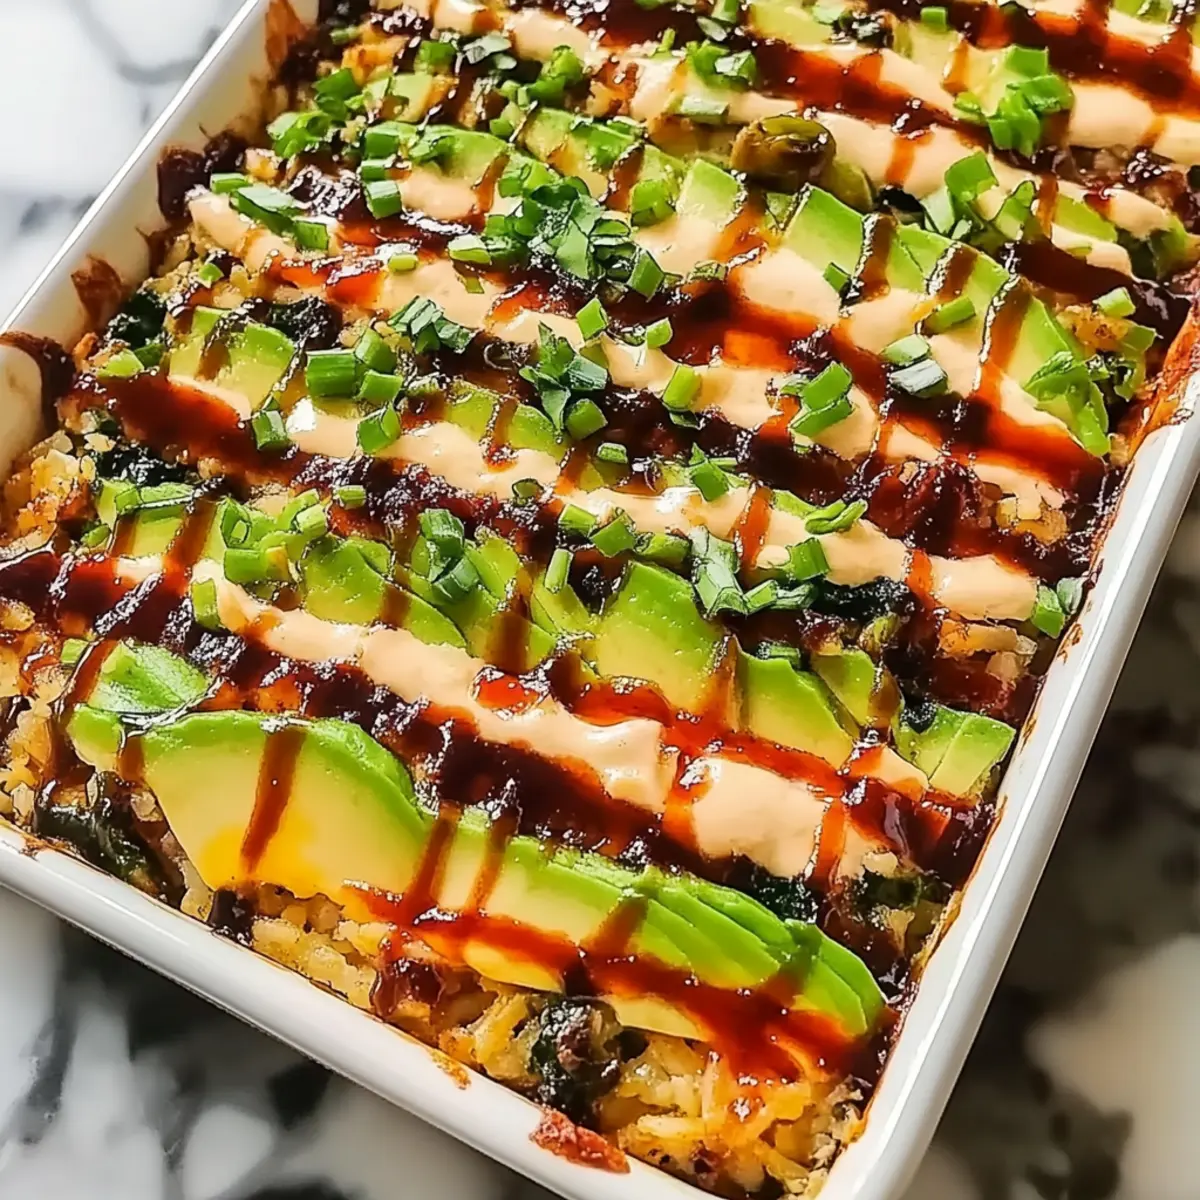
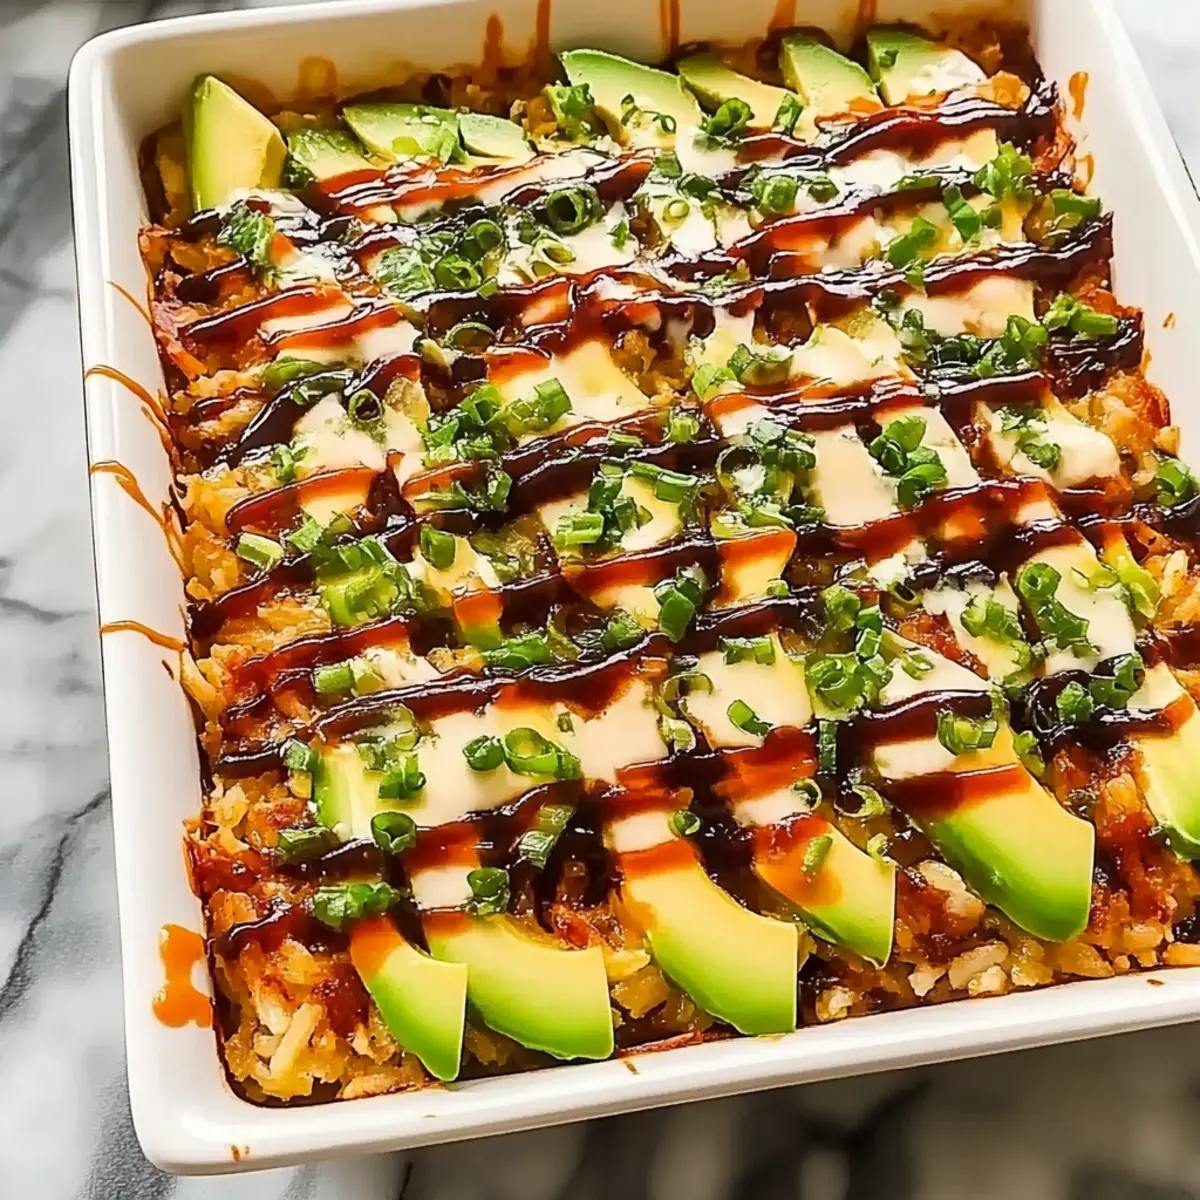
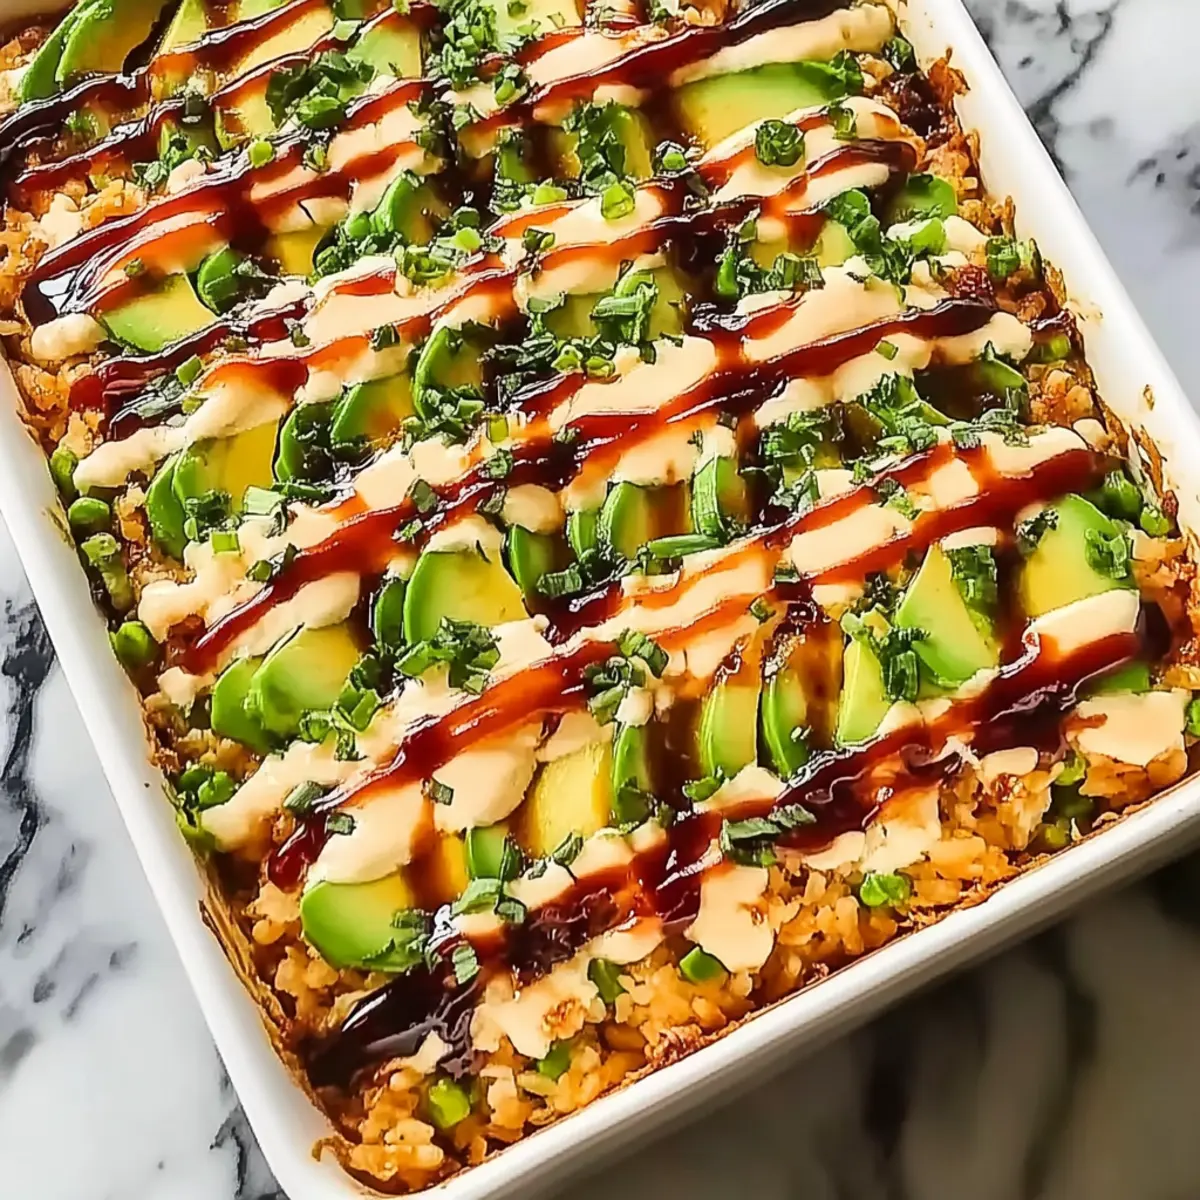
Once the rice has cooled slightly, evenly spread the tuna mixture over the top of the seasoned rice, ensuring all areas are covered. Follow this by layering thinly sliced avocados on top of the tuna. The avocado will add creaminess and a pop of color, transforming the sushi bake into a visually appealing dish ready for the oven.
Step 4: Add Sauces
Drizzle additional Japanese mayo and sriracha sauce generously over the avocado layer. This step not only enhances the flavor but also creates a deliciously creamy topping as it bakes. Use a spoon to gently spread the sauces if needed, ensuring an even distribution for optimal taste in every bite of your Quick Canned Tuna Sushi Bake.
Step 5: Bake
Preheat your oven to 500°F (260°C) and place the baking dish in the oven. Broil the sushi bake for about 10 minutes or until the topping is bubbling and beautifully golden brown. Keep a close eye on it as it bakes, as broiling can quickly go from perfect to overdone. The crispy top layer will contrast beautifully with the warm, creamy interior.
Step 6: Garnish & Serve
Once baked, carefully remove the dish from the oven and let it cool for about 5-10 minutes to allow the flavors to settle. Garnish your Quick Canned Tuna Sushi Bake with sliced green onions and a sprinkle of furikake or sesame seeds for added texture and flavor. Finally, cut into squares and serve with nori sheets on the side for an authentic touch.
Make Ahead Options
These Quick Canned Tuna Sushi Bake are perfect for meal prep enthusiasts looking to save time on busy weeknights! You can prepare the seasoned rice and the creamy tuna mixture up to 24 hours in advance. Simply cook the rice, let it cool, and store it in an airtight container in the fridge. Mix the drained tuna with Japanese mayo and sriracha, and refrigerate it separately to maintain freshness. When you’re ready to serve, layer the tuna over the rice, add the avocado, drizzle the sauces, and bake as instructed. With these make-ahead steps, you’ll enjoy a comforting, flavorful meal with minimal last-minute effort!
Quick Canned Tuna Sushi Bake Variations
Feel free to get creative with your Quick Canned Tuna Sushi Bake and explore these delightful twists that can elevate your home-cooked meal.
- Budget-Friendly Swap: Substitute chunk light tuna for solid white albacore to save a few bucks while still enjoying a tasty dish.
- Veggie Boost: Add diced cucumber or shredded carrots for a fresh crunch. They’ll brighten up the dish both in flavor and appearance.
- Dairy-Free Delight: Use an egg-based mayonnaise alternative if you want to keep things light while enjoying that creamy texture.
- Spice it Up: Incorporate jalapeños or sprinkle red pepper flakes into the tuna mixture for that extra kick. Your taste buds will thank you!
- Savory Crunch: Toss in a handful of crushed tempura flakes on top before baking for irresistible crunch and additional flavor.
- Herb Infusion: Mix in fresh herbs like cilantro or green onion into the tuna for a garden-fresh flavor that compliments the creaminess.
- Texture Twist: Layer the rice with shredded seaweed for added texture—this will complement the rice and enhance the sushi experience.
- Nutritional Boost: Add cooked quinoa or bulgur wheat in place of some rice for an added nutritional punch and a chewy texture that pairs well with the creamy toppings.
If you’re looking for meals to pair with your sushi bake or want more recipe inspiration, consider trying our delicious Baked Feta Pasta or the comforting Mashed Potato Bake next! Each offers unique flavors that can make your dinner rotation even more exciting.
Expert Tips for Quick Canned Tuna Sushi Bake
-
Choose the Right Rice: Use short-grain rice for the best texture as it clumps together nicely, improving the overall bite of your Quick Canned Tuna Sushi Bake.
-
Drain Tuna Well: Always drain the canned tuna thoroughly to avoid a soggy dish. A little extra effort here goes a long way in maintaining texture.
-
Layer Evenly: Spread the tuna mixture evenly over the rice to ensure every bite is flavorful. Uneven layers can lead to a dish that isn’t as delicious as intended.
-
Adjust Spice Levels: Start with small amounts of sriracha when preparing your tuna mixture and adjust according to your taste. You can always add more but can’t take it out!
-
Cool Before Serving: Allow the dish to cool for 5-10 minutes after baking. This enhances the contrast between the crispy top and creamy interior, providing the best dining experience.
What to Serve with Quick Canned Tuna Sushi Bake
Elevate your meal experience with delightful pairings that enhance the cozy flavors of your sushi bake.
- Miso Soup: A comforting bowl of miso soup adds umami richness, perfectly balancing the creaminess of the tuna bake.
- Cucumber Salad: Crisp and refreshing, this salad provides a delightful crunch and can cut through the richness of the dish.
- Steamed Edamame: These nutrient-packed pods are a crowd-pleasing appetizer, adding a touch of elegance and simplicity to your meal.
- Pickled Ginger: Bright and tangy, pickled ginger serves as a palate cleanser that complements the overall flavors beautifully.
- Sake: This traditional Japanese rice wine can elevate your dining atmosphere while pairing exquisitely with the flavors of your sushi bake.
- Nori Sheets: Serve with toasted nori for an authentic sushi experience; wrap bites for an extra crunch and flavor.
- Sesame Cucumber Rolls: These add a fresh and crunchy component, perfect for those who enjoy a vegetable side that matches the meal’s essence.
- Mango Sticky Rice: As a sweet dessert option, this classic Thai treat offers a wonderful contrast to the savory sushi bake, rounding out your meal.
Storage Tips for Quick Canned Tuna Sushi Bake
- Fridge: Store the leftovers in an airtight container for up to 2 days. This keeps your Quick Canned Tuna Sushi Bake fresh while allowing easy access for quick meals.
- Freezer: If you want to store it longer, freeze the cooled sushi bake for up to 2 months. Wrap it tightly in plastic wrap and then foil to prevent freezer burn.
- Reheating: When ready to enjoy, thaw it in the fridge overnight before reheating. Warm individual portions in the microwave or bake in the oven at 350°F (175°C) until heated through.
- Texture Tip: Consider adding fresh avocado slices after reheating for an added burst of flavor and texture, making your Quick Canned Tuna Sushi Bake feel freshly made.
Quick Canned Tuna Sushi Bake Recipe FAQs
What type of rice should I use for the Quick Canned Tuna Sushi Bake?
I highly recommend using short-grain rice for this recipe! It provides the best texture, clumping together nicely to create a perfect base for your sushi bake. Rinse the rice under cold water until the water runs clear to avoid any stickiness during cooking.
How long can I store leftovers of the Quick Canned Tuna Sushi Bake?
Store any leftovers in an airtight container in the refrigerator for up to 2 days. This way, you can enjoy the flavors again without worrying about spoilage. Just remember to reheat it in the microwave or oven before serving!
Can I freeze the Quick Canned Tuna Sushi Bake?
Absolutely! If you’d like to make it ahead, you can freeze the bake for up to 2 months. Let it cool completely, then wrap it tightly with plastic wrap followed by aluminum foil to prevent freezer burn. When you’re ready to enjoy, thaw it overnight in the fridge before reheating.
What should I do if my tuna mixture seems too dry?
If your tuna mixture feels a bit dry after mixing, you can add a touch more Japanese mayo or a splash of sriracha to achieve the desired creaminess. If you’re looking for a slightly different profile, a bit of olive oil can also help make it more moist.
Can I substitute ingredients in the Quick Canned Tuna Sushi Bake?
Very! You can easily swap in chunk light tuna for a more budget-friendly option. If you want to mix it up, consider adding crispy cucumbers instead of avocados, or even using regular mayonnaise if Japanese mayo isn’t available. Feel free to get creative based on your taste preferences!
Is this recipe safe for my pets or those with allergies?
Since this recipe includes canned tuna, be cautious. While it’s generally safe for most dogs in moderation, avoid giving it to cats as they can develop an allergy with excessive consumption. Always check for specific allergies, especially with ingredients like mayo or sriracha, which may cause reactions in some individuals. If you’re unsure, consult with your veterinarian or an allergy specialist.
Quick Canned Tuna Sushi Bake for a Cozy Family Feast
Ingredients
Equipment
Method
- Cook the short-grain rice according to package instructions, rinse under cold water, then season with salt, sugar, and rice vinegar.
- Open the canned tuna, drain thoroughly, and mix with Japanese mayo, sriracha sauce, and salt in a bowl until well combined.
- Spread the tuna mixture evenly over the seasoned rice and layer with thinly sliced avocados.
- Drizzle additional Japanese mayo and sriracha sauce over the avocado layer, ensuring even distribution.
- Preheat the oven to 500°F (260°C) and bake the dish for about 10 minutes or until the top is golden brown.
- Let it cool for 5-10 minutes, then garnish with green onions and sprinkle with furikake or sesame seeds before serving.
Leave a Reply