
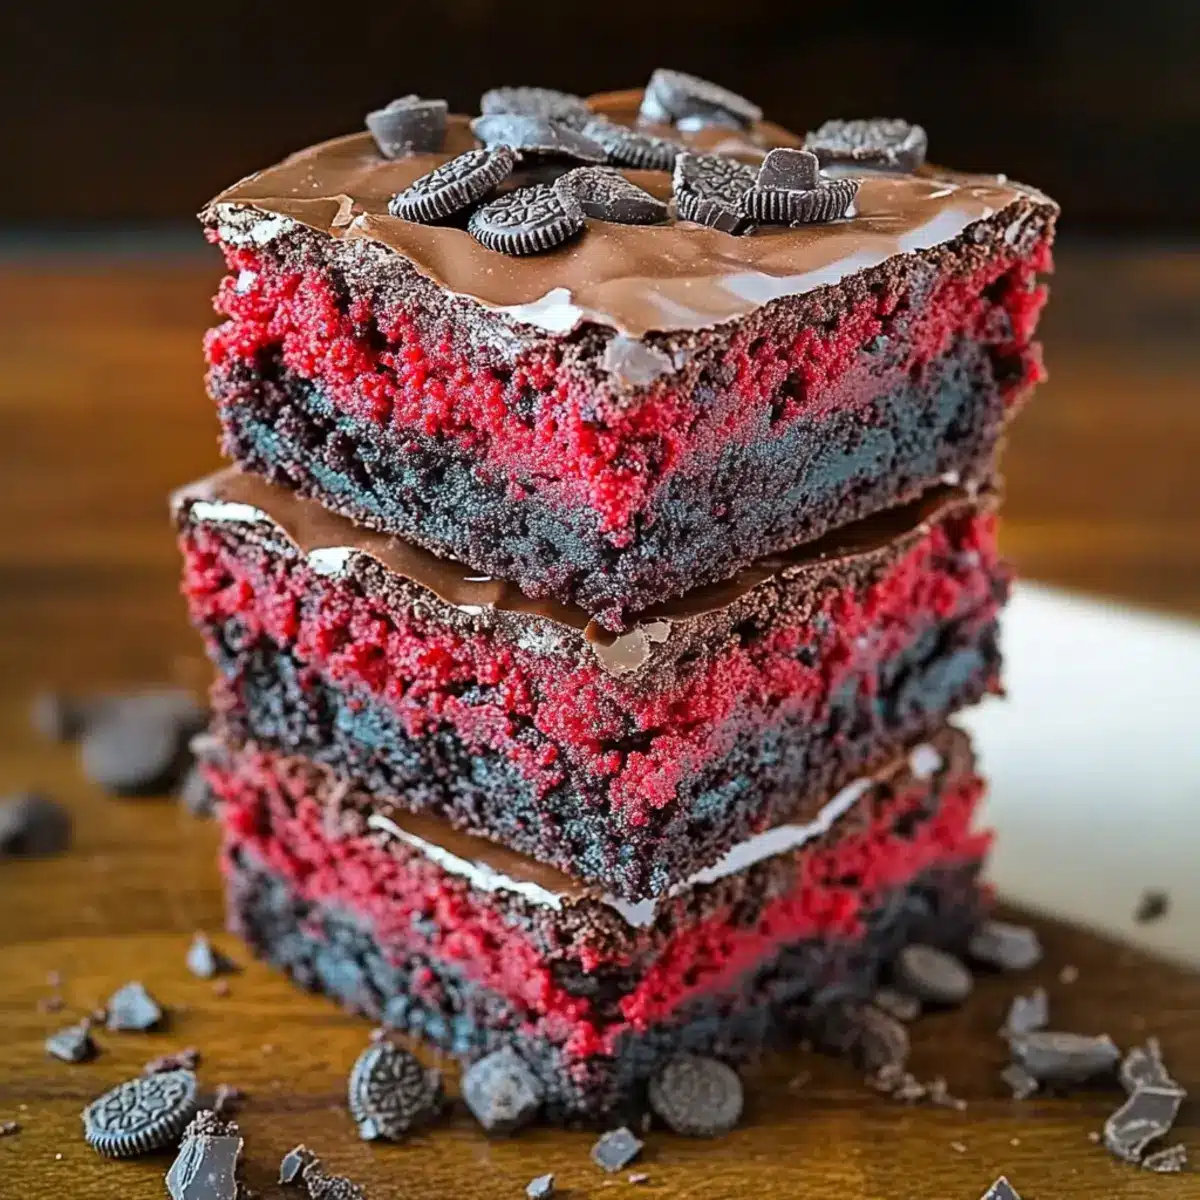
“Did you see the latest dessert trend?” I overheard at a gathering, as whispers of luscious Red Velvet Oreo Truffle Brownies floated through the air. It turns out that this vibrant treat is stealing the show, thanks to its playful twist on traditional brownies. Picture this: a chewy, rich red velvet brownie base layered with a creamy Oreo truffle filling, all topped with a glossy chocolate ganache. Not only are these brownies a feast for the eyes, but they are also incredibly easy to make—perfect for bakers at any skill level! They bring an irresistible charm to any celebration, especially around Valentine’s Day or holiday festivities. Ready to impress your friends and family with a dessert that tastes as amazing as it looks? Keep scrolling to discover how to make these show-stopping Red Velvet Oreo Truffle Brownies that are sure to disappear in no time!
Why Are These Brownies So Irresistible?
Decadence in Every Bite: With a perfect blend of red velvet and Oreo flavors, these brownies are a showstopper for any gathering.
Easy to Prepare: Using cake mix means less fuss and quicker prep time—ideal for busy bakers!
Visually Stunning: The layered look, vibrant red color, and glossy ganache will impress your guests!
Perfect for Any Occasion: Whether it’s a romantic evening or a festive gathering, these Red Velvet Oreo Truffle Brownies are a delightful treat.
Versatile Variations: Feel free to swap in yellow cake mix or use white chocolate for a unique twist! Treat yourself and your loved ones to this festive dessert that delivers on flavor and wow factor!
Red Velvet Oreo Truffle Brownies Ingredients
For the Brownies
• Red Velvet Cake Mix – This forms the luscious base and gives the brownies their signature color and flavor; use homemade red velvet cake if you prefer.
• Melted Butter – Adds a rich, moist texture to the brownies; you can substitute with vegetable oil for a lighter option.
• Eggs – Essential for binding the ingredients and keeping the brownies moist; make sure they are at room temperature for optimal mixing.
For the Oreo Filling
• Oreos – The crumbled cookies create a creamy truffle layer that’s both classic and delightful; feel free to use any cream-filled chocolate cookie for a different flavor.
• Melted Butter – Helps bind the Oreo crumbs together; use just enough to hold the mixture without excess pooling.
For the Ganache
• Heavy Whipping Cream – Creates a smooth and indulgent ganache; substitute with half-and-half for a lighter consistency if desired.
• Chocolate Chips (Milk or Dark) – Forms the rich ganache topping; semi-sweet or dark chocolate will provide a deeper flavor.
For Garnishing
• Mini Chocolate Chips – These tiny chocolates add an extra touch of richness; feel free to use any chocolate chip type, or omit them for simplicity.
These Red Velvet Oreo Truffle Brownies promise to enchant both your taste buds and your guests!
Step‑by‑Step Instructions for Red Velvet Oreo Truffle Brownies
Step 1: Prepare the Brownie Base
Begin by preheating your oven to 350°F (175°C). In a large mixing bowl, combine one box of red velvet cake mix, ½ cup of melted butter, and two room-temperature eggs. Using a hand mixer or a whisk, beat the ingredients together until the mixture is smooth and creamy, which should take about 1-2 minutes.
Step 2: Bake the Brownies
Next, grease a 9×13 inch baking dish or line it with foil for easy removal. Pour the red velvet mixture into the dish and spread it evenly. Bake in your preheated oven for 15-18 minutes, checking for doneness; the edges should be set while the center remains slightly soft for that fudgy texture.
Step 3: Create the Oreo Layer
Once the brownies have cooled for about 10 minutes, take a package of whole Oreos and crush them into fine crumbs using a food processor or a ziplock bag and a rolling pin. In a bowl, mix the crushed Oreos with ½ cup of melted butter until combined. Spread this mixture over the cooled brownies, pressing gently to create an even layer.
Step 4: Make the Ganache
In a saucepan, heat 1 cup of heavy whipping cream over medium heat until it reaches a low boil. Once boiling, remove it from the heat and pour it over 1.5 cups of milk or dark chocolate chips in a separate bowl. Allow the mixture to sit for about 5 minutes before whisking until it’s silky smooth and glossy, forming a delightful ganache.
Step 5: Chill and Set
Pour the luscious ganache over the Oreo layer, spreading it evenly with a spatula. For an extra touch, sprinkle mini chocolate chips on top. Refrigerate the brownies for 30-45 minutes, allowing the ganache to set and firm up perfectly, making slicing easier.
Step 6: Serve and Enjoy
After chilling, remove the brownies from the fridge and cut them into squares with a sharp knife. Here’s the best part—dive in immediately for a rich, indulgent bite of your amazing Red Velvet Oreo Truffle Brownies, or share them at your next gathering and watch them disappear!
Make Ahead Options
These Red Velvet Oreo Truffle Brownies are a fantastic choice for meal prep, saving you time during busy weeknights or special occasions! You can prepare the brownie base up to 24 hours in advance—simply mix your red velvet batter and bake as directed. Once cooled, store the brownies in an airtight container at room temperature to maintain moisture. The Oreo layer can also be prepared ahead—just crush the Oreos and mix with melted butter, refrigerating this mixture until you’re ready to assemble. When you’re ready to serve, add the ganache on top, let it set in the fridge for about 30-45 minutes, and voilà! You’ll have a stunning dessert that tastes just as delicious as if you made it fresh!
Red Velvet Oreo Truffle Brownies Variations
Feel free to explore these delightful twists to make your brownies even more enjoyable!
- Dairy-Free: Substitute the heavy whipping cream with coconut cream and use dairy-free chocolate chips for a creamy ganache without the dairy.
- Nutty Delight: Add crushed walnuts or pecans in the brownie layer for an extra crunch that beautifully complements the soft textures.
- Gluten-Free: Use a gluten-free cake mix instead of traditional red velvet cake mix, ensuring everyone can enjoy this luscious treat.
- Minty Fresh: Incorporate a few drops of peppermint extract into the ganache for a refreshing twist that pairs wonderfully with chocolate.
- Spicy Kick: Add a pinch of cayenne pepper or cinnamon to the brownie mix for a subtle heat that enhances the chocolate flavor beautifully.
- Fruit Fusion: Fold in fresh raspberries or strawberries into the brownie mix for bursts of fruity flavor, creating a refreshing contrast.
- Caramel Swirl: Drizzle caramel sauce on top of the ganache for an additional layer of sweetness and a gourmet dessert experience.
- Dark Chocolate Ganache: Utilize dark chocolate for the ganache instead of milk chocolate, giving your brownies an intense rich flavor, like those in our Red Wine Braised Meatballs that many love for their depth.
Feel free to let your creativity shine with these variations—your kitchen will be filled with delightful aromas and flavors in no time!
Storage Tips for Red Velvet Oreo Truffle Brownies
Room Temperature: Store these brownies in an airtight container at room temperature for up to 3 days to maintain their soft and chewy texture.
Fridge: If you want them to last longer, refrigerate in the same airtight container for up to a week. Allow them to come to room temperature before serving for the best taste.
Freezer: For longer storage, wrap individual brownies in plastic wrap and place them in a freezer-safe container. They can be frozen for up to 3 months.
Reheating: To enjoy a warm treat, thaw frozen brownies overnight in the fridge, then microwave for 10-15 seconds or until warm. Your delicious Red Velvet Oreo Truffle Brownies will taste as good as fresh!
Expert Tips for Red Velvet Oreo Truffle Brownies
- Room Temperature Eggs: Make sure to use eggs at room temperature for better mixing and a fluffier texture in your brownies.
- Don’t Overbake: Keep a close eye on your baking time; pulling the brownies out when slightly underdone gives them a fudgy texture—perfect for indulgence!
- Even Ganache: Allow the ganache to cool slightly before pouring it over the Oreo layer to prevent melting the filling and ensure perfect layering.
- Crush Oreos Well: For the best Oreo layer, crush your cookies into fine crumbs without leaving large chunks, which helps create a smooth texture.
- Storage Tips: Store your Red Velvet Oreo Truffle Brownies in an airtight container at room temperature to keep them fresh and moist for up to 3 days.
What to Serve with Ultimate Red Velvet Oreo Truffle Brownies
Indulging in rich, creamy desserts like these brownies creates the perfect opportunity for thoughtful accompaniments that enhance their delightful flavors.
- Vanilla Ice Cream: A scoop of creamy vanilla ice cream adds a cool, smooth contrast to the rich chocolate ganache, creating a satisfying balance.
- Fresh Berries: Juicy strawberries or raspberries offer a burst of brightness, cutting through the decadence while adding a touch of freshness to every bite.
- Chocolate-Covered Strawberries: For a romantic touch, serve chocolate-covered strawberries alongside the brownies; the blend of textures is a true delight.
- Whipped Cream: A dollop of light, fluffy whipped cream elevates each square of brownie, adding a lightness against the dense layers and richness.
- Mint Tea: A warm, refreshing mint tea can cleanse the palate between bites, offering a soothing herbal note that complements the sweet flavors beautifully.
- Sparkling Wine: For an elegant touch, serve with a glass of sparkling wine; its effervescence pairs wonderfully with the richness, making it perfect for special occasions.
- Coffee: A strong cup of freshly brewed coffee brings out the chocolate notes in the brownies, while also providing a comforting contrast.
- Chocolate Sauce: Drizzling extra chocolate sauce over the top intensifies the indulgence and makes for a visually stunning presentation.
- Peanut Butter Drizzle: For an unexpected twist, a light drizzle of creamy peanut butter amplifies the flavor profile and adds a savory element that complements the sweetness.
Red Velvet Oreo Truffle Brownies Recipe FAQs
How do I select the right red velvet cake mix?
Absolutely! When choosing a red velvet cake mix, look for one that has a rich color and flavor listed in the ingredients. It’s always good to check for the freshness date on the box to ensure the best results. If you prefer, you can opt for a homemade red velvet cake recipe for an extra special touch.
What’s the best way to store my Red Velvet Oreo Truffle Brownies?
Very! You can store these luscious brownies in an airtight container at room temperature for up to 3 days, ensuring they stay soft and delightful. If you’re looking to keep them fresh for a longer period, stash them in the fridge for up to a week. Just let them warm up a bit at room temperature before serving for the best flavor!
Can I freeze my brownies for later?
Absolutely! Wrap each individual brownie in plastic wrap tightly, then place them in a freezer-safe container. They can be frozen for up to 3 months. When you’re ready to enjoy them, simply thaw overnight in the fridge and then microwave for 10-15 seconds to bring back their indulgent texture.
What if my Oreo layer becomes soggy?
Oh no! To avoid a soggy Oreo layer, ensure you’re using the right amount of melted butter—just enough to bind the crumbs without excess pooling. Mix until the consistency holds together nicely, and watch the butter amount closely during mixing. Additionally, pressing the Oreo layer gently but firmly onto the brownies helps to keep it together.
Are these brownies safe for my pets or anyone with allergies?
Good thought! These Red Velvet Oreo Truffle Brownies contain ingredients like chocolate and Oreos, which aren’t safe for pets. As for allergies, those with gluten sensitivity should be cautious with the cake mix. If needed, you can explore gluten-free options and also check the ingredient labels for any potential allergens!
Can I substitute ingredients for a healthier version?
Very! You can replace the melted butter with a healthier alternative like unsweetened applesauce or coconut oil to reduce the overall fat content. Additionally, using egg substitutes or plant-based chocolate chips can make these brownies suitable for a vegan diet. Not only do these swaps keep the flavors intact, but they can also help cater to various dietary preferences!
Decadent Red Velvet Oreo Truffle Brownies for Sweet Moments
Ingredients
Equipment
Method
- Preheat your oven to 350°F (175°C). In a mixing bowl, combine red velvet cake mix, melted butter, and eggs. Beat until smooth.
- Grease a 9x13 inch baking dish and pour the mixture, spreading evenly. Bake for 15-18 minutes until edges are set and center is slightly soft.
- After cooling for 10 minutes, crush Oreos and mix with melted butter. Spread this Oreo mixture over the cooled brownies.
- In a saucepan, heat heavy whipping cream until boiling. Pour it over chocolate chips and whisk until smooth to make ganache.
- Pour ganache over the Oreo layer, spread evenly, and garnish with mini chocolate chips. Refrigerate for 30-45 minutes to set.
- Cut into squares and serve immediately or share at a gathering.
Leave a Reply