
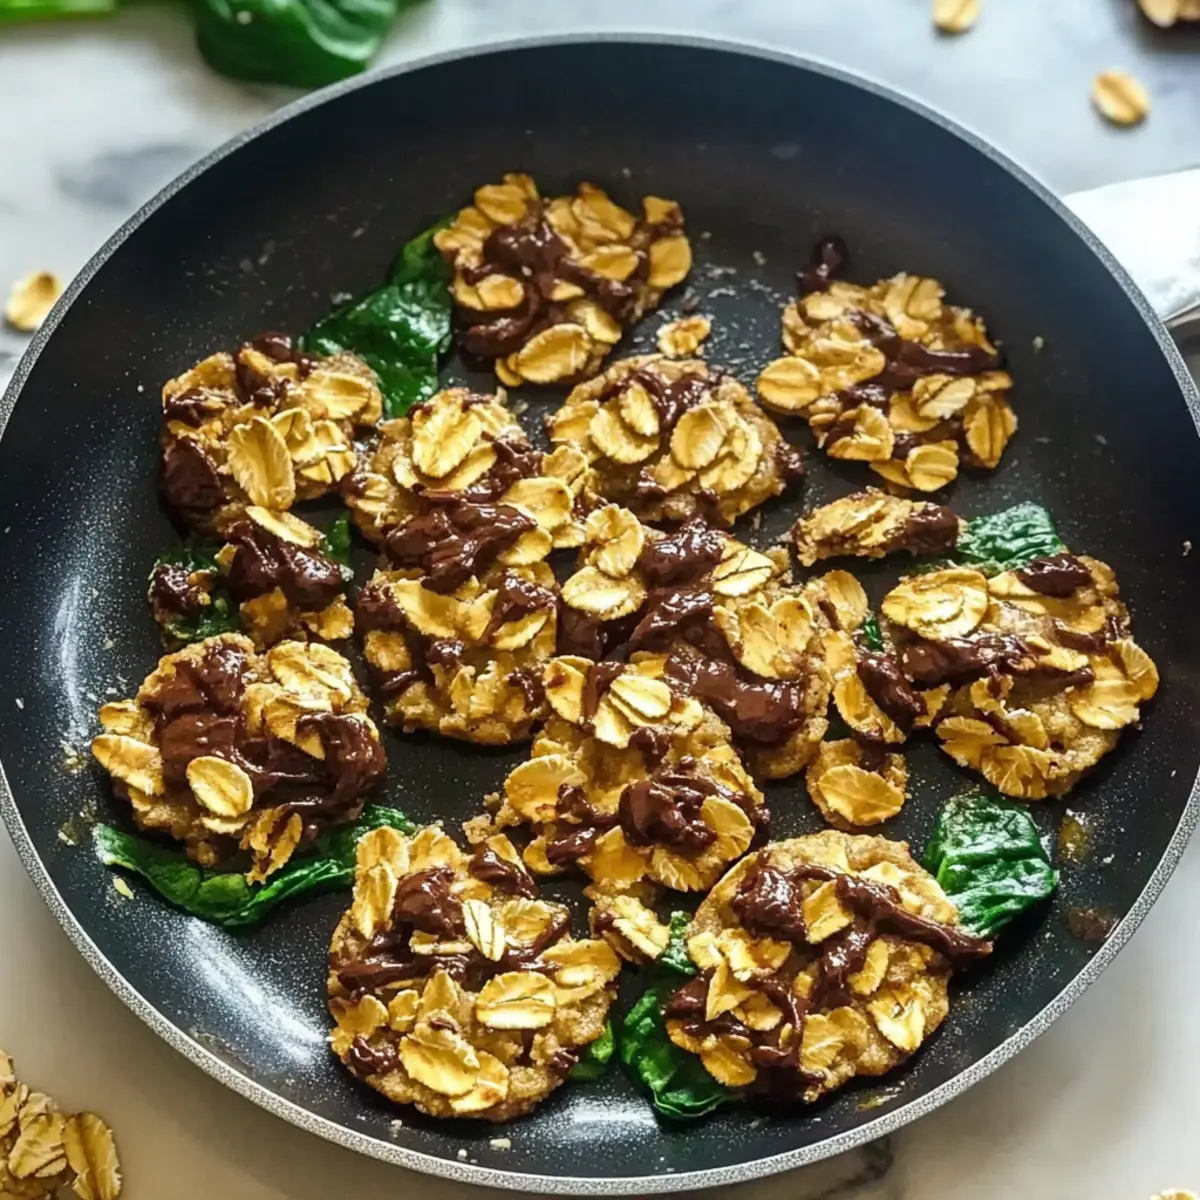
“Can you believe it? Just four ingredients and no baking required! If you’re in the mood for a delightful kitchen adventure, these 4-Ingredient No-Bake Chocolate Oat Cookies are about to become your new go-to treat. Perfect for those days when you crave something sweet but want to keep it simple, these cookies strike the ideal balance of chewy and satisfying. You’ll love how they cater to a gluten-free lifestyle while still being bursting with chocolatey goodness. Plus, they come together so quickly that you’ll have more time to savor the little moments. What delicious mix-ins will you choose to make these even more irresistible?”
Why You’ll Crave These Cookies
Simplicity at Its Best: With just four ingredients, these cookies are ultra-simple to whip up, making them ideal for busy weeknights.
Guilt-Free Indulgence: They deliver all the chocolatey flavor you desire without any guilt, as they’re gluten-free and made from wholesome ingredients.
Quick to Prepare: No baking required means your cookies are ready to enjoy in just 30 minutes!
Customizable Creations: Feel free to swap out nut butters or sweeteners to suit your taste, or throw in some nuts or dried fruit for a fun twist.
Perfect Anytime Snack: Whether for breakfast, a post-workout boost, or a sweet treat, they fit seamlessly into your day. Pair these with some Spinach Feta Puff for a delightful meal!
Chocolate Oat Cookie Ingredients
• Dive into the deliciousness of these cookies with just four simple ingredients!
For the Cookies
- Rolled Oats – Provide structure and a hearty texture; use gluten-free oats to keep it gluten-free.
- Nut Butter (e.g., almond or peanut) – Acts as a binding agent while adding creaminess; sunbutter is a great nut-free swap.
- Cocoa Powder – Infuses rich chocolate flavor; make sure it’s unsweetened for the best results.
- Sweetener (e.g., honey or maple syrup) – Introduces sweetness and moisture; maple syrup is an excellent vegan alternative.
Step‑by‑Step Instructions for 4-Ingredient No-Bake Chocolate Oat Cookies
Step 1: Prepare the Dry Ingredients
In a large mixing bowl, combine 2 cups of rolled oats and ½ cup of unsweetened cocoa powder. Use a whisk to ensure even distribution, creating a uniform dry mix with no lump formation. This foundational step enhances the chocolate flavor and texture of your 4-Ingredient No-Bake Chocolate Oat Cookies, setting the stage for the delightful treat to come.
Step 2: Incorporate the Wet Ingredients
Next, add 1 cup of your favorite nut butter and ½ cup of sweetener, such as honey or maple syrup, to the oat mixture. Using a spatula, stir until a cohesive dough forms, ensuring all dry ingredients are well-integrated. The mixture should be thick and slightly sticky, making it easy to mold into cookie shapes.
Step 3: Shape the Cookies
Once the dough is ready, scoop tablespoon-sized amounts onto a parchment-lined baking sheet or tray. This is where the fun begins—use your hands or a spoon to form the mixture into round shapes, leaving space between each mound for even chilling. Visualize bright, chocolaty bites that are about to come to life with each cookie, ready for chilling.
Step 4: Flatten for Texture
With the back of a spoon or your fingers, gently flatten each cookie into a disc shape, about ½ inch thick. This step ensures even texture and helps the cookies set properly when chilled. You’re aiming for a delightful blend of chewy and firm, creating a perfect treat that will hold together wonderfully after chilling.
Step 5: Chill to Set
Place the tray of cookies in the refrigerator to chill for 30 minutes. This crucial step will firm up the cookies, allowing the nut butter and wet ingredients to bind the oats and cocoa together. Keep an eye on them; they should feel slightly soft yet firm when you take them out, ready to satisfy your cravings.
Step 6: Serve and Enjoy
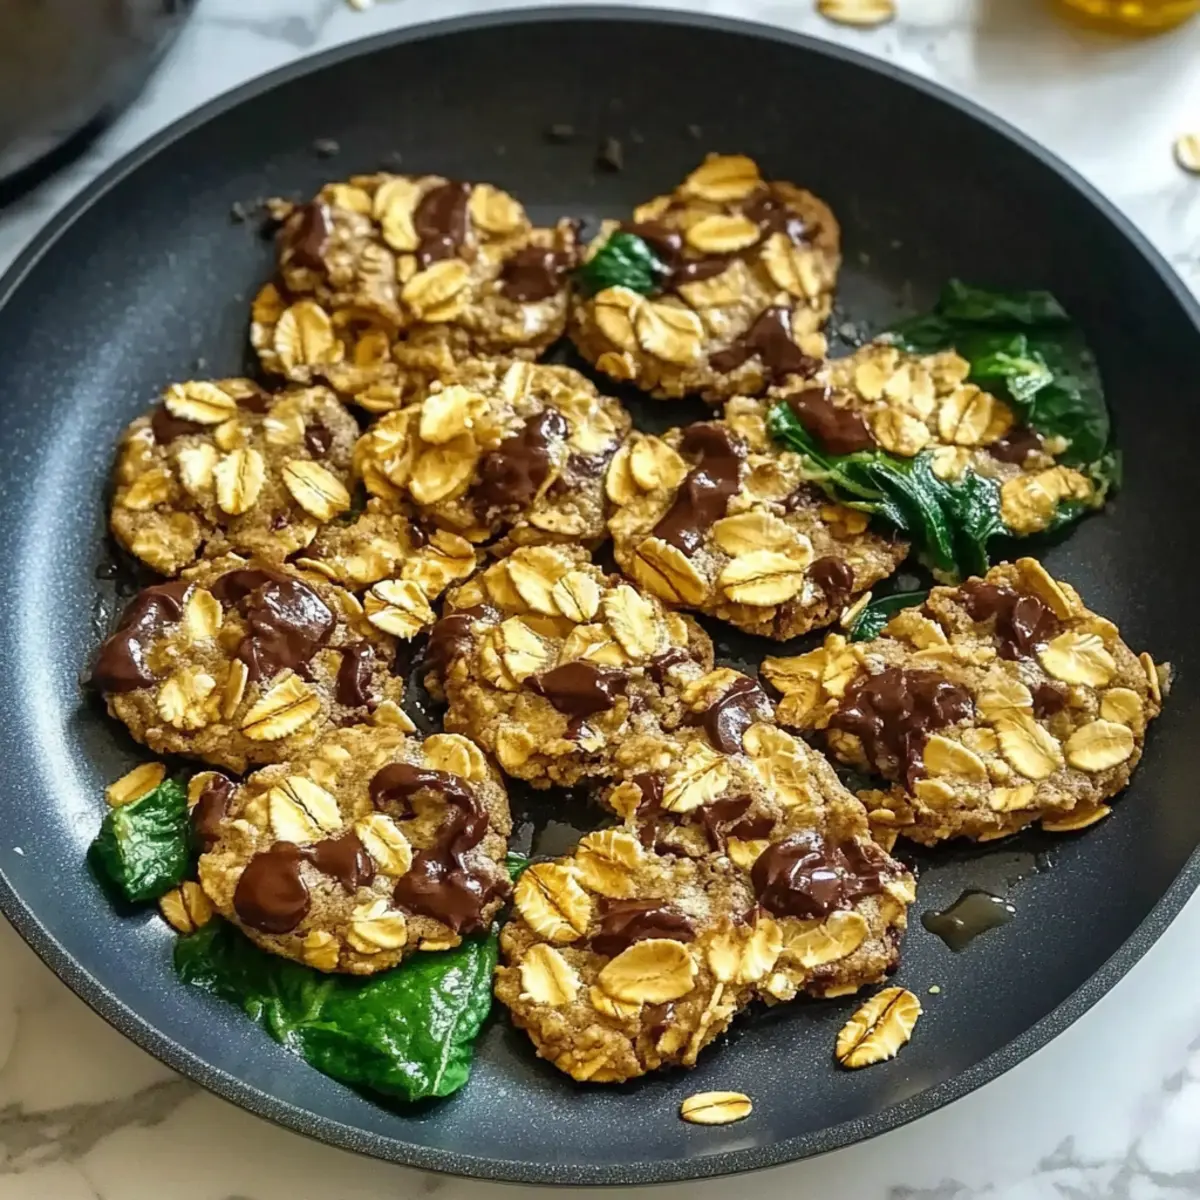
After chilling, remove the cookies from the fridge and transfer them to a serving plate. These delicious 4-Ingredient No-Bake Chocolate Oat Cookies can be enjoyed chilled or at room temperature, making them versatile for any occasion. Pair them with a glass of almond milk or your favorite coffee for a delightful snack!
Make Ahead Options
These 4-Ingredient No-Bake Chocolate Oat Cookies are perfect for meal prep enthusiasts looking to save time during busy weeks! You can mix the dry ingredients (2 cups of rolled oats and ½ cup of cocoa powder) and store them in an airtight container for up to 3 days. Additionally, you can combine the wet ingredients (1 cup of nut butter and ½ cup of sweetener) and refrigerate for up to 24 hours before mixing them with the dry components. When you’re ready to enjoy, simply stir everything together, shape the cookies, and chill them for 30 minutes. This way, you can have delicious chocolate oat cookies prepped in advance, ensuring they’re just as delightful when you need a sweet snack!
Expert Tips for Chocolate Oat Cookies
-
Ingredient Temperature: Ensure all ingredients are at room temperature to achieve better consistency in your dough. This simple trick makes a world of difference!
-
Mixing Technique: Avoid overmixing your cookie dough to maintain a tender texture. Just mix until combined for those perfect chewy 4-ingredient cookies.
-
Setting Time Watch: Keep an eye on your cookies during the chilling process. They should be firm yet slightly soft, ensuring they’ll hold their shape without being too dry.
-
Add Flavor: Explore variations by swapping in flavored nut butters or trying different sweeteners like agave syrup for a fresh take on your chocolate oat cookies.
-
Texture Matters: If the dough feels too dry, add a bit more nut butter or sweetener. Aim for a sticky consistency that still holds shape when scooped.
What to Serve with 4-Ingredient No-Bake Chocolate Oat Cookies
Indulging in these rich, chewy cookies opens the door to a delightful world of pairings that will elevate your sweet treat experience.
-
Cold Almond Milk: A refreshing glass of creamy almond milk beautifully complements the chocolatey flavors while keeping the snack light and satisfying.
-
Fresh Fruit Salad: Bright, juicy fruits like strawberries and blueberries add a burst of freshness that balances the sweetness of the cookies.
-
Vanilla Yogurt Parfait: Layer your cookie bits with creamy vanilla yogurt and granola for a deliciously fun and crunchy dessert that’s great for breakfast too!
-
Rich Coffee: A cup of hot coffee provides a warm contrast to the chilled cookies, deepening the chocolate flavor and making for a cozy afternoon snack.
-
Nutty Trail Mix: A handful of nutty trail mix gives a satisfying crunch and a delightful textural contrast, making for an energizing boost any time of day. Try tossing in some chocolate-covered nuts for a special treat!
-
Coconut Whipped Cream: Light and airy coconut whipped cream alongside chocolate oat cookies is a match made in heaven, offering a tropical twist to your dessert experience.
-
Chocolate Smoothie: Blend up a chocolate banana smoothie to enhance the indulgence! It’s a creamy, nourishing beverage that pairs beautifully with the cookies.
-
Ice Cream Sandwiches: For a playful touch, sandwich your cookies with your favorite ice cream flavor for a decadent frozen treat that’s irresistible during warm days.
These pairings take your cookie snack to new levels, ensuring there’s something delightful for everyone to savor!
Chocolate Oat Cookies Variations
Feel free to get creative and personalize these delightful cookies with your favorite flavors and substitutions!
-
Nut-Free: Swap nut butter for sunflower seed butter to enjoy a delicious nut-free treat.
-
Vegan Swap: Substitute honey with agave syrup or maple syrup for a fully vegan alternative; perfect for plant-based diets.
-
Flavor Boost: Experiment with flavored nut butters like chocolate almond or cashew for a unique twist; imagine the exciting depths of flavor.
-
Sweetness Levels: Adjust sweetness by using stevia or monk fruit sweetener if you’re watching sugar intake; just a little goes a long way!
-
Mix-ins Galore: Add in chopped nuts, dried fruit, or even chocolate chips for an extra texture and delicious bite; you’ll love discovering these flavor surprises with each cookie!
-
Spice It Up: Sprinkle in a pinch of cinnamon or a dash of vanilla extract for a warm, inviting aroma that enhances the overall experience.
-
Texture Twist: Try using quick oats instead of rolled oats for a softer texture, making these cookies some melty bites of goodness.
-
Choco Delight: Fold in some cocoa nibs or chocolate chunks for an extra dose of chocolate; it’ll take your cookie experience to a whole new level!
And while crafting your perfect cookie, don’t forget to pair them with a glass of cold almond milk or give these delightful Spinach Ricotta Rolls a try for a cozy meal that balances both savory and sweet!
How to Store and Freeze Chocolate Oat Cookies
Fridge: Store your chocolate oat cookies in an airtight container for up to 7 days. This keeps them fresh and chewy, ready to satisfy your sweet tooth whenever the craving strikes!
Freezer: For longer preservation, freeze the cookies in a single layer on a baking sheet before transferring them to an airtight container or freezer bag. They can be frozen for up to 3 months.
Thawing: To enjoy the cookies from the freezer, simply let them thaw in the fridge for a few hours or at room temperature for about 30 minutes. They’ll taste just as delicious as when they were freshly made!
Reheating: If you prefer them warmed, pop them in the microwave for about 10-15 seconds. The chocolatey goodness will melt slightly, creating an indulgent treat that’s hard to resist!
4-Ingredient No-Bake Chocolate Oat Cookies Recipe FAQs
How do I choose the best oats for these cookies?
Absolutely! Look for rolled oats that are labeled gluten-free if you’re following a gluten-free diet. They should be whole and free of any visible spoilage, such as dark spots or a musty smell. Avoid quick oats as they may not hold up as well and could alter the texture of your cookies.
What’s the best way to store these cookies?
You can store your chocolate oat cookies in an airtight container in the fridge for up to 7 days. This will keep them chewy and fresh. If you want to save them longer, they can be frozen and will last up to 3 months. Just remember to layer them with parchment paper to prevent sticking!
Can I freeze the cookie dough before baking?
Of course! To freeze the cookie dough, scoop the mixture into cookie shapes and place them on a baking sheet. Freeze until solid, then transfer to an airtight container or a freezer bag. When you’re ready, just pull out the desired number of cookies and let them thaw in the fridge for a few hours before enjoying.
What if my cookie dough is too dry or crumbly?
Very! If you notice that your dough is too dry, add a bit more nut butter or sweetener (like honey or maple syrup), a tablespoon at a time until it reaches the desired sticky consistency. This will help the cookies bind together better and prevent crumbliness!
Are these cookies suitable for people with nut allergies?
While they do contain nut butter, you can swap it out for sunflower seed butter or even soy nut butter for a nut-free option. Just ensure to check for any additional ingredients that may contain allergens, especially if you’re serving them to others.
Can I use different sweeteners in this recipe?
Absolutely! You can replace honey with agave syrup or use a sugar substitute like stevia if you’re looking for lower-calorie options. However, be sure to adjust the amount according to the sweetness level of the alternative to keep your cookies perfectly delicious!
Mushroom Spinach Scrambled Eggs for a Cozy Breakfast Boost
Ingredients
Equipment
Method
- In a skillet, heat olive oil over medium heat. Add mushrooms and sauté until soft.
- Add the chopped spinach to the skillet and cook until wilted.
- In a mixing bowl, whisk the eggs. Pour the eggs into the skillet with the vegetables.
- Stir gently until the eggs are scrambled and cooked through.
- Serve immediately and enjoy your Mushroom Spinach Scrambled Eggs!
Leave a Reply