
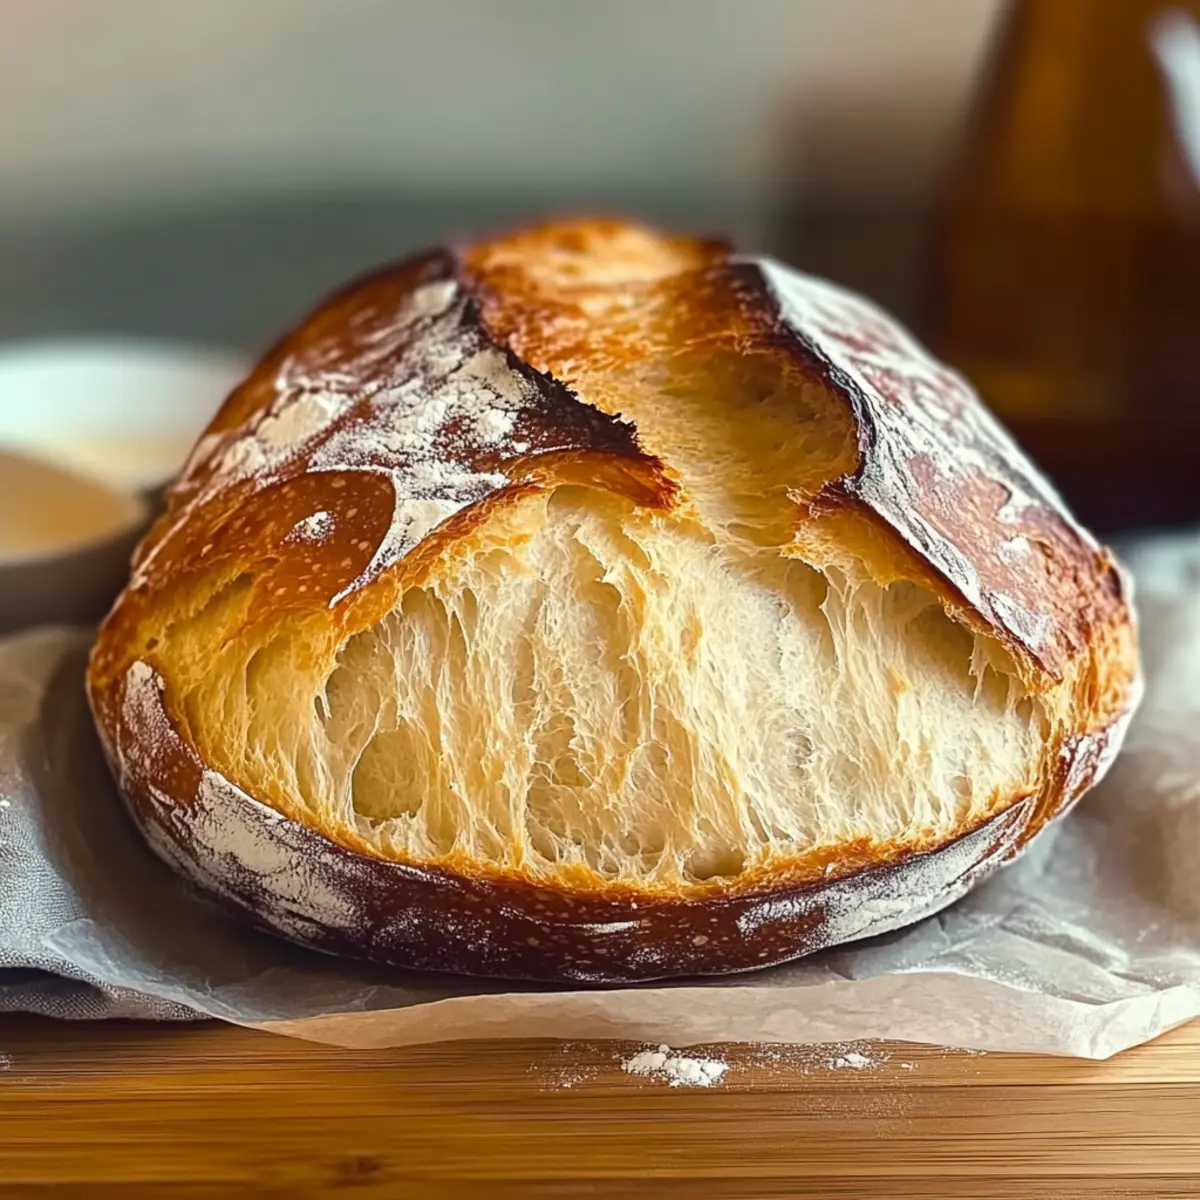
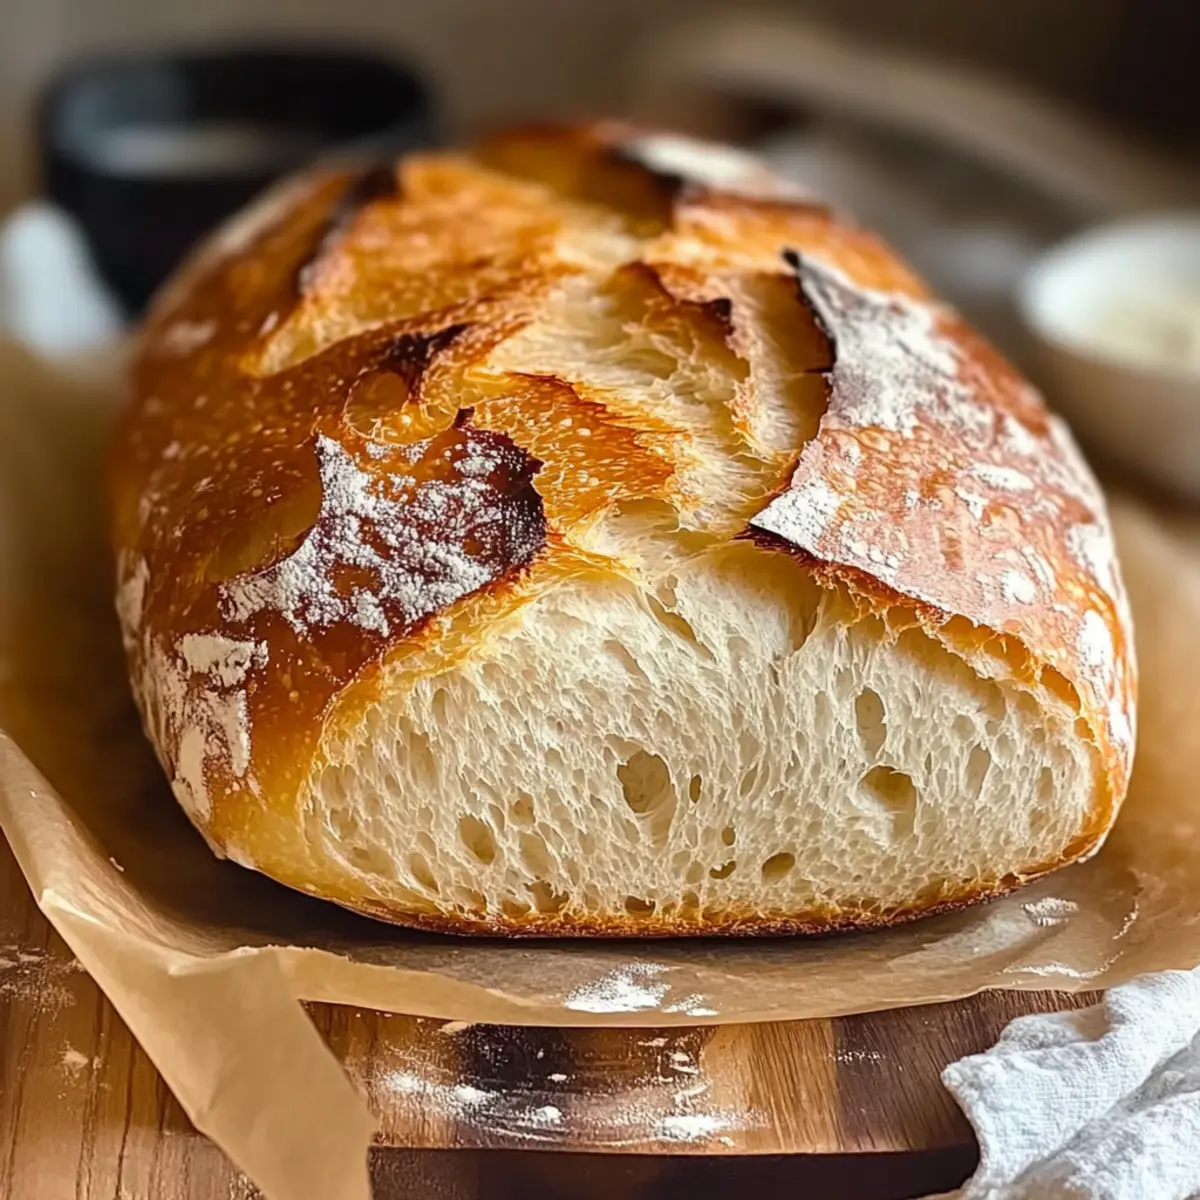
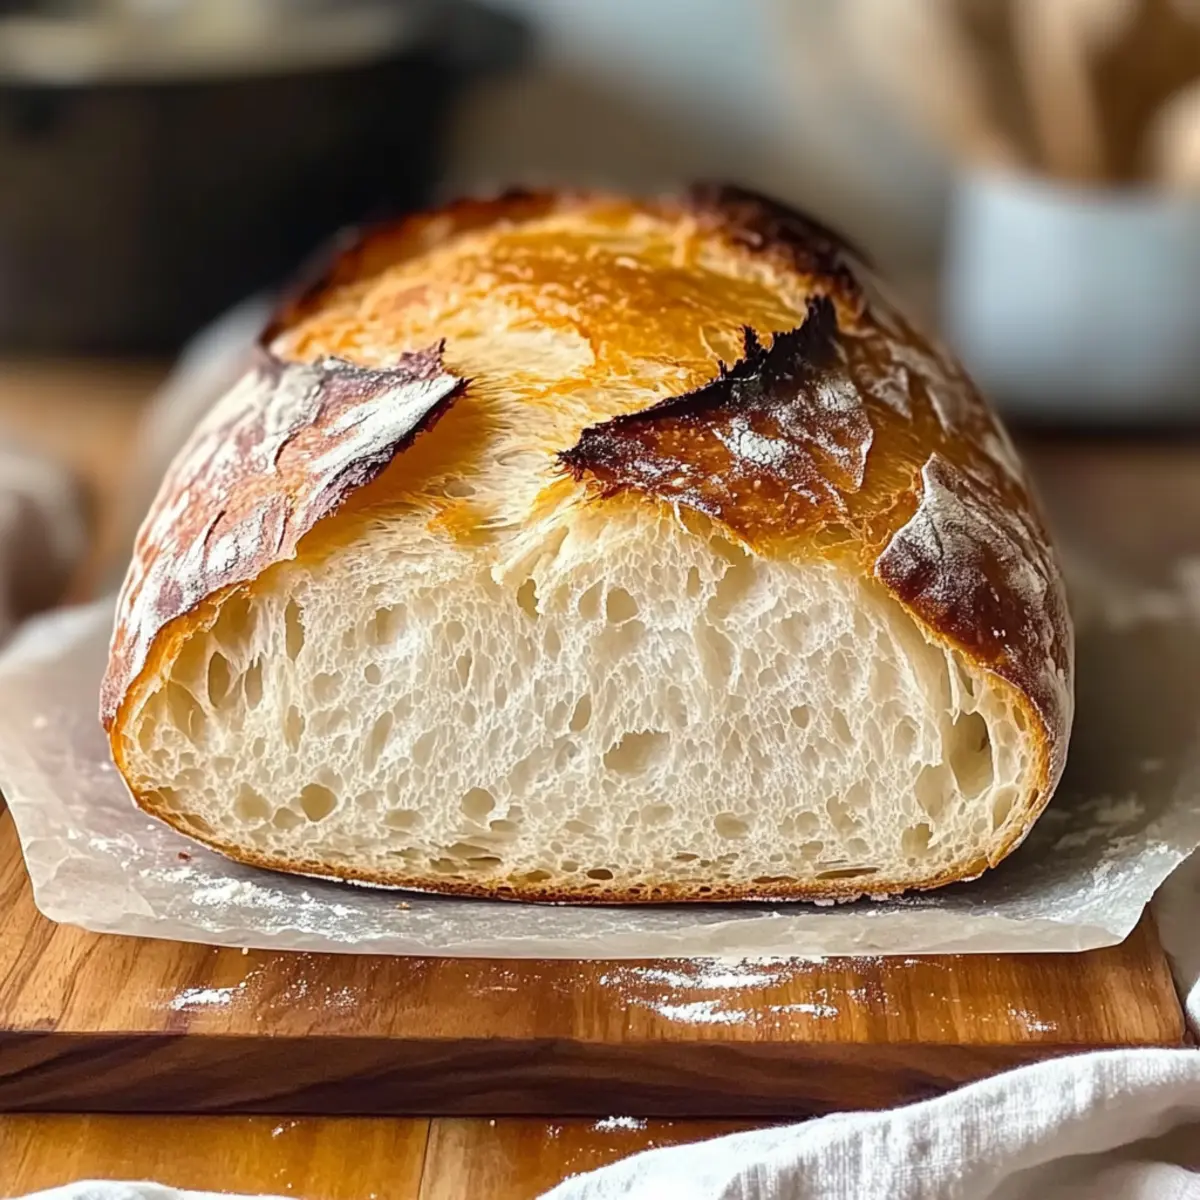
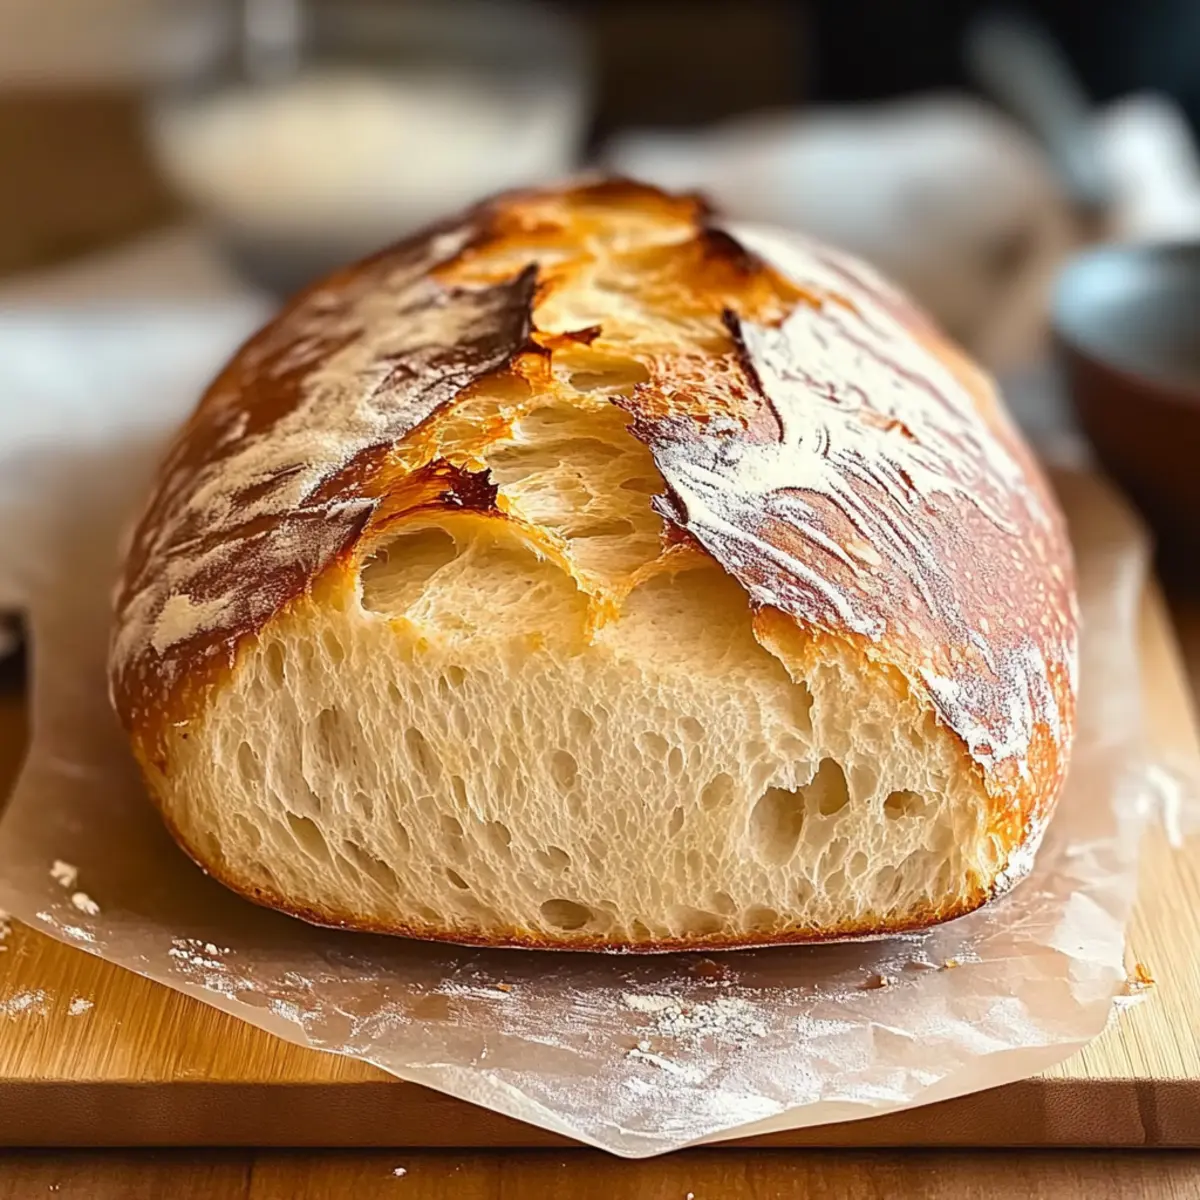
The aroma of freshly baked bread wafted through my kitchen, instantly transporting me to simpler times when a warm loaf graced the table. That’s why I’m thrilled to share the World’s Easiest Yeast Bread recipe with you! With zero kneading involved, this versatile and beginner-friendly loaf has quickly become my go-to for busy evenings and spontaneous gatherings. Imagine biting into a soft, golden slice perfect for sandwiches or toasting with a pat of butter. Plus, you can whip it up in just ten minutes of hands-on time! Whether you’re a seasoned chef or just starting your culinary journey, let’s dive into making this delightful bread that promises to impress anyone who’s lucky enough to taste it. Ready to fill your home with the irresistible scent of baking bread?
Why Make Your Own Yeast Bread?
Homemade Elevation: There’s nothing quite like the satisfaction of pulling a warm loaf from your oven, filling your home with delightful aromas.
Effortless Simplicity: With minimal ingredients and no kneading required, this recipe is tailor-made for busy individuals.
Endless Variations: You’re free to get creative! Try the Herb and Cheese Loaf for a savory twist or the Sweet Cinnamon Bread for a sweet breakfast treat.
Crowd-Pleasing Delight: Impress your family and friends with a slice that rivals bakery offerings; it’s perfect for gatherings or a cozy night in.
Healthy Choices: Want a nutritious boost? Experiment with Multigrain Bread or Gluten-Free Bread to cater to diverse dietary needs. Enjoy a slice of homemade goodness that everyone will love!
World’s Easiest Yeast Bread Ingredients
For the Dough
- All-purpose flour – Provides structure and texture; substitute with bread flour for a chewier crust.
- Active dry yeast – Leavens the bread, creating lightness; instant yeast can be used directly without proofing.
- Sugar – Enhances browning and feeds the yeast; can be substituted with honey or agave syrup.
- Salt – Essential for flavor and controlling yeast activity; kosher salt works well as an alternative.
- Warm water (110°F/43°C) – Activates the yeast; use a thermometer for precision.
- Olive oil (optional) – Adds richness and moisture; can be replaced with melted butter or omitted for a lighter loaf.
Step‑by‑Step Instructions for World’s Easiest Yeast Bread
Step 1: Activate the Yeast
In a mixing bowl, combine 1¼ cups of warm water (about 110°F or 43°C) with 1 tablespoon of sugar. Gently sprinkle 2¼ teaspoons of active dry yeast over the surface and allow it to sit undisturbed for 5–10 minutes. You’ll know it’s ready when the mixture becomes foamy, signaling that the yeast is alive and eager to work its magic in the World’s Easiest Yeast Bread.
Step 2: Mix in the Essentials
Once the yeast is bubbly, stir in 1 tablespoon of salt and, if desired, 1 tablespoon of olive oil to enhance the flavor and moisture. Use a wooden spoon for this task, combining well until the salt dissolves completely. This is a critical step for building the flavor profile of your delicious homemade bread!
Step 3: Incorporate the Flour
Gradually add 3 cups of all-purpose flour to the mixture, one cup at a time, stirring continually. Aim for a shaggy dough consistency as the flour is mixed in; it should pull away from the sides of the bowl but remain slightly sticky to the touch. This step is crucial, as it forms the foundation for your World’s Easiest Yeast Bread.
Step 4: Optional Light Knead
If you wish, you can lightly knead the dough for 1–2 minutes on a floured surface to bring it together nicely. However, this is optional because this no-knead recipe is designed for simplicity! After kneading, shape the dough into a ball and place it back in the bowl, ensuring it remains slightly tacky for the best results.
Step 5: First Rise
Cover the bowl with a clean kitchen towel or plastic wrap and let it rise in a warm spot for about 1 hour, or until it doubles in size. This step allows the yeast to work its magic, creating air bubbles that will result in a fluffy loaf. You’ll know it’s ready when the dough is significantly puffed and enlarged.
Step 6: Shape the Loaf
After the dough has risen, gently punch it down to release excess air. Turn it out onto a lightly floured surface and shape it into a loaf, tucking the ends beneath for a neat finish. Place your shaped dough in a greased 9×5-inch loaf pan, ensuring it fits snugly for even baking on your next adventure in making the World’s Easiest Yeast Bread.
Step 7: Second Rise
Cover the shaped loaf once more with a towel or wrap and let it rise for an additional 30 minutes. During this time, the dough will expand again, preparing it for the oven. You’ll notice that the dough will have risen to the edge of the pan, indicating it’s ready for baking.
Step 8: Preheat the Oven
While your dough finishes its rise, preheat your oven to 375°F (190°C). This ensures the oven is hot and ready for your loaf, and you’ll be able to achieve that perfect golden brown crust. Make sure to position an oven rack in the center for optimal heat distribution.
Step 9: Bake the Bread
Place the loaf in the preheated oven and bake for about 30 minutes. You’ll know it’s done when the crust turns a lovely golden brown and sounds hollow when tapped on the bottom. This baking time creates a beautifully soft interior and a mouthwatering aroma that will fill your kitchen.
Step 10: Cool the Loaf
Once baked, remove the loaf from the oven and let it cool in the pan for 10 minutes. After that, gently transfer it to a wire rack to cool completely. Allowing your World’s Easiest Yeast Bread to cool properly not only enhances its flavor but also ensures the perfect texture for slicing.
Expert Tips for World’s Easiest Yeast Bread
-
Foam Check: Ensure your yeast is active by looking for foam during proofing; this guarantees your World’s Easiest Yeast Bread rises properly.
-
Temperature Matters: Use a thermometer to confirm your water temperature is around 110°F; too hot can kill the yeast, while too cool may slow down the activation.
-
No Over-kneading: Remember, it’s a no-knead recipe! Lightly knead only if desired; overworking will lead to denser bread.
-
Second Rise Importance: Don’t skip the second rise! Allowing the shaped loaf to puff up ensures a better texture and delicious crumb.
-
Creative Variations: Feel free to experiment with herbs or spices in your dough; adding garlic or rosemary can elevate your World’s Easiest Yeast Bread to gourmet levels.
-
Proper Storage: Keep your bread in an airtight container; for long-term, freeze it wrapped tightly to preserve freshness for months.
What to Serve with World’s Easiest Yeast Bread
A warm loaf of freshly baked bread beckons delightful pairings that elevate any meal and tantalize your taste buds.
- Creamy Tomato Soup: A classic duo, the tangy warmth of tomato soup perfectly complements the soft, fluffy texture of your bread, making every bite a comforting experience.
- Garlic Herb Butter: Slathering warm slices with this fragrant butter enhances both aroma and flavor, transforming each piece into a gourmet treat.
- Crunchy Salad: Pair with a fresh garden salad, where crisp vegetables contrast beautifully with the bread’s tender crumb, creating a delightful balance of textures.
- Savory Cheese Platter: Serve the bread alongside a selection of cheeses—such as sharp cheddar or creamy brie—for a delectable appetizer or indulgent snack.
- Honey and Fresh Fruit: Drizzle slices of bread with honey and add seasonal fruit for a sweet breakfast or an irresistible brunch option; the combination makes for a fragrant and flavorful dish.
- Hearty Stews: This bread is perfect for mopping up savory stews, allowing you to soak up all the rich flavors and making your meal heartier.
- Wine Pairing: A low-bodied red wine, like Pinot Noir, complements the subtle flavors of the yeast bread, making it ideal for relaxed evenings or festive gatherings.
- Chocolate Spread: For a decadent dessert or afternoon treat, smear your bread with chocolate spread and top with sliced bananas—pure bliss!
- Roasted Vegetables: Serve the bread alongside roasted root vegetables; the caramelized sweetness contrasts perfectly with the bread’s homely flavor, inviting comfort to your plate.
- Classic Butter and Jam: A simple yet timeless pairing, a pat of creamy butter and a spoonful of your favorite jam make for a delightful snack or breakfast option.
Storage Tips for World’s Easiest Yeast Bread
Room Temperature: Store your bread in an airtight container or a zip-top bag for up to 3 days to maintain freshness and prevent staleness.
Freezer: Wrap the cooled loaf tightly in plastic wrap, then in aluminum foil, to freeze for up to 3 months. This keeps your World’s Easiest Yeast Bread deliciously intact.
Reheating: When ready to enjoy, thaw at room temperature and reheat wrapped in foil at 350°F (175°C) for 10–15 minutes to refresh the crust and warmth.
World’s Easiest Yeast Bread Variations
Get ready to personalize your baking adventure with these delightful twists on the classic loaf! Each alternative offers an exciting sensory experience that will brighten your kitchen.
-
Herb and Cheese Loaf: Mix in shredded cheese and minced garlic for a fragrant, savory delight. Imagine the aroma filling your home as it bakes—fantastic for pairings with soup!
-
Sweet Cinnamon Bread: Swirl in cinnamon and raisins for a warming breakfast treat. Perfect for drizzling with honey or pairing with a cup of coffee, this variation brings so much joy to your mornings.
-
Multigrain Bread: Add oats, seeds, or whole wheat flour for a hearty upgrade. This nutritious twist caters to health-conscious family members, ensuring everyone enjoys homemade goodness.
-
Gluten-Free Bread: Use a gluten-free flour blend for your gluten-sensitive friends. It bakes beautifully and stays fluffy, making it a fantastic option for everyone to enjoy.
-
Garlic and Herb Artisan Bread: Infuse the dough with minced garlic and chopped fresh herbs. This version transforms your loaf into a gourmet treat, perfect served alongside dishes like Shrimp Scampi Bowls with Garlic Bread.
-
Sweet Honey Loaf: Substitute sugar with honey for a subtle sweetness. This delightful twist will have your family reaching for more, and it pairs wonderfully with butter or jam.
-
Pizza Bread: Incorporate Italian herbs and shredded mozzarella for a fun pizza-inspired loaf. Slice it up for a unique appetizer or snack at gatherings; it pairs well with Hot Honey Flatbread Pizza.
-
Chocolate Chip Bread: Add chocolate chips for a sweet treat. Slather it with cream cheese for a luscious breakfast or dessert that will make everyone smile!
With these variations, you can tailor your baking experience to fit any occasion or palate. Happy baking!
Make Ahead Options
These World’s Easiest Yeast Bread preparations are perfect for meal prep enthusiasts looking to save time during busy weeknights! You can prepare the dough up to 24 hours in advance by mixing and allowing it to rise before shaping it into a loaf. After the first rise, punch it down and refrigerate the dough, covering it tightly to prevent drying out. When you’re ready to bake, simply shape it into a loaf and let it rise for 30 minutes at room temperature before baking. This method ensures that your bread will be just as delicious and fluffy, giving you freshly baked bread with minimal effort whenever you need it!
World’s Easiest Yeast Bread Recipe FAQs
What type of flour should I use for the best results?
For this recipe, I recommend using all-purpose flour, as it provides the perfect structure and texture. If you prefer a chewier crust, you can substitute it with bread flour. Just make sure to measure accurately for the best outcome!
How should I store my homemade yeast bread?
Store your World’s Easiest Yeast Bread in an airtight container or a zip-top bag for up to 3 days at room temperature. This will keep it fresh without letting it get stale. For longer-term storage, wrap the cooled loaf tightly in plastic wrap and then in aluminum foil before freezing. It can last up to 3 months while retaining its fantastic flavor.
Can I freeze this bread for future use?
Absolutely! To freeze your World’s Easiest Yeast Bread, once it has completely cooled, wrap it tightly in plastic wrap and then cover it with aluminum foil. This double-wrapping prevents freezer burn and keeps your bread tasting fresh. When you’re ready to enjoy it, simply thaw at room temperature and reheat wrapped in foil at 350°F (175°C) for 10–15 minutes to rejuvenate that lovely crust.
What should I do if my bread doesn’t rise properly?
If your yeast bread doesn’t rise, it might be due to inactive yeast. Always check for foam when activating your yeast; if you don’t see it after 5–10 minutes, your yeast may be expired or the water was too hot or too cold. Make sure the water temperature is around 110°F (43°C) for best activation results.
Can I make this bread gluten-free?
Yes! To make a gluten-free version of the World’s Easiest Yeast Bread, simply use a gluten-free all-purpose flour blend that includes xanthan gum. Follow the same instructions, and you’ll have a delightful gluten-free loaf suited for everyone at your table!
World’s Easiest Yeast Bread for Effortless Homemade Joy
Ingredients
Equipment
Method
- In a mixing bowl, combine warm water with sugar. Sprinkle active dry yeast over the surface and let it sit for 5–10 minutes until foamy.
- Stir in salt and olive oil until the salt dissolves completely.
- Gradually add flour, one cup at a time, stirring until a shaggy dough forms.
- Optionally knead the dough for 1–2 minutes on a floured surface and shape into a ball.
- Cover with a towel and let it rise for about 1 hour until doubled in size.
- Punch down the dough, shape into a loaf, and place in a greased 9x5-inch loaf pan.
- Cover and let it rise for an additional 30 minutes.
- Preheat your oven to 375°F (190°C).
- Bake the loaf for about 30 minutes until golden brown and hollow sounding when tapped.
- Cool the loaf in the pan for 10 minutes, then transfer to a wire rack to cool completely.
Leave a Reply