
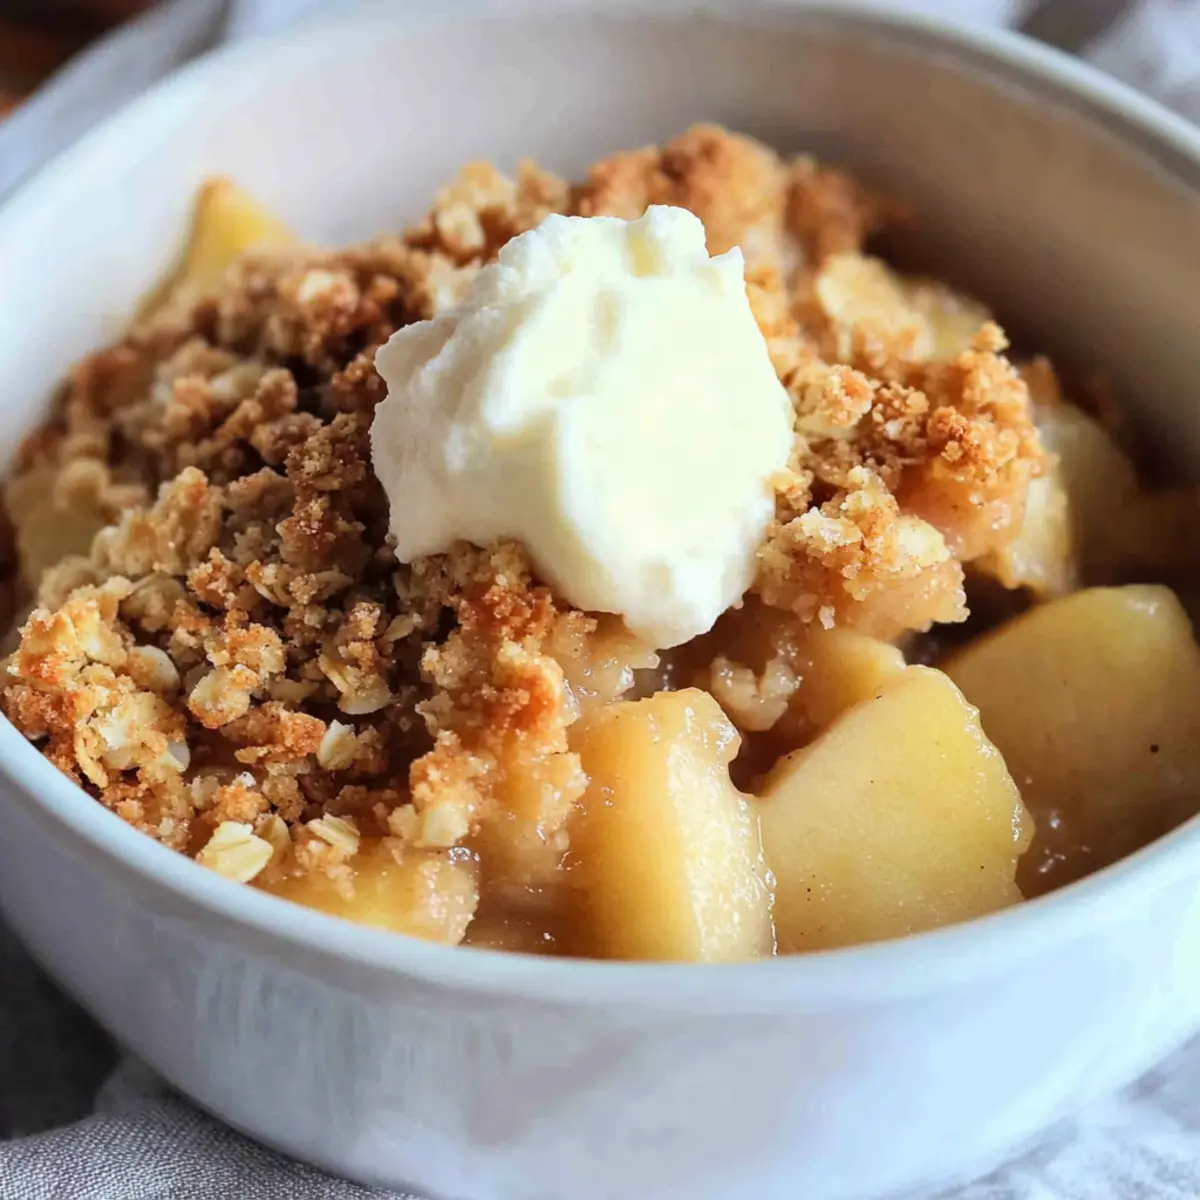
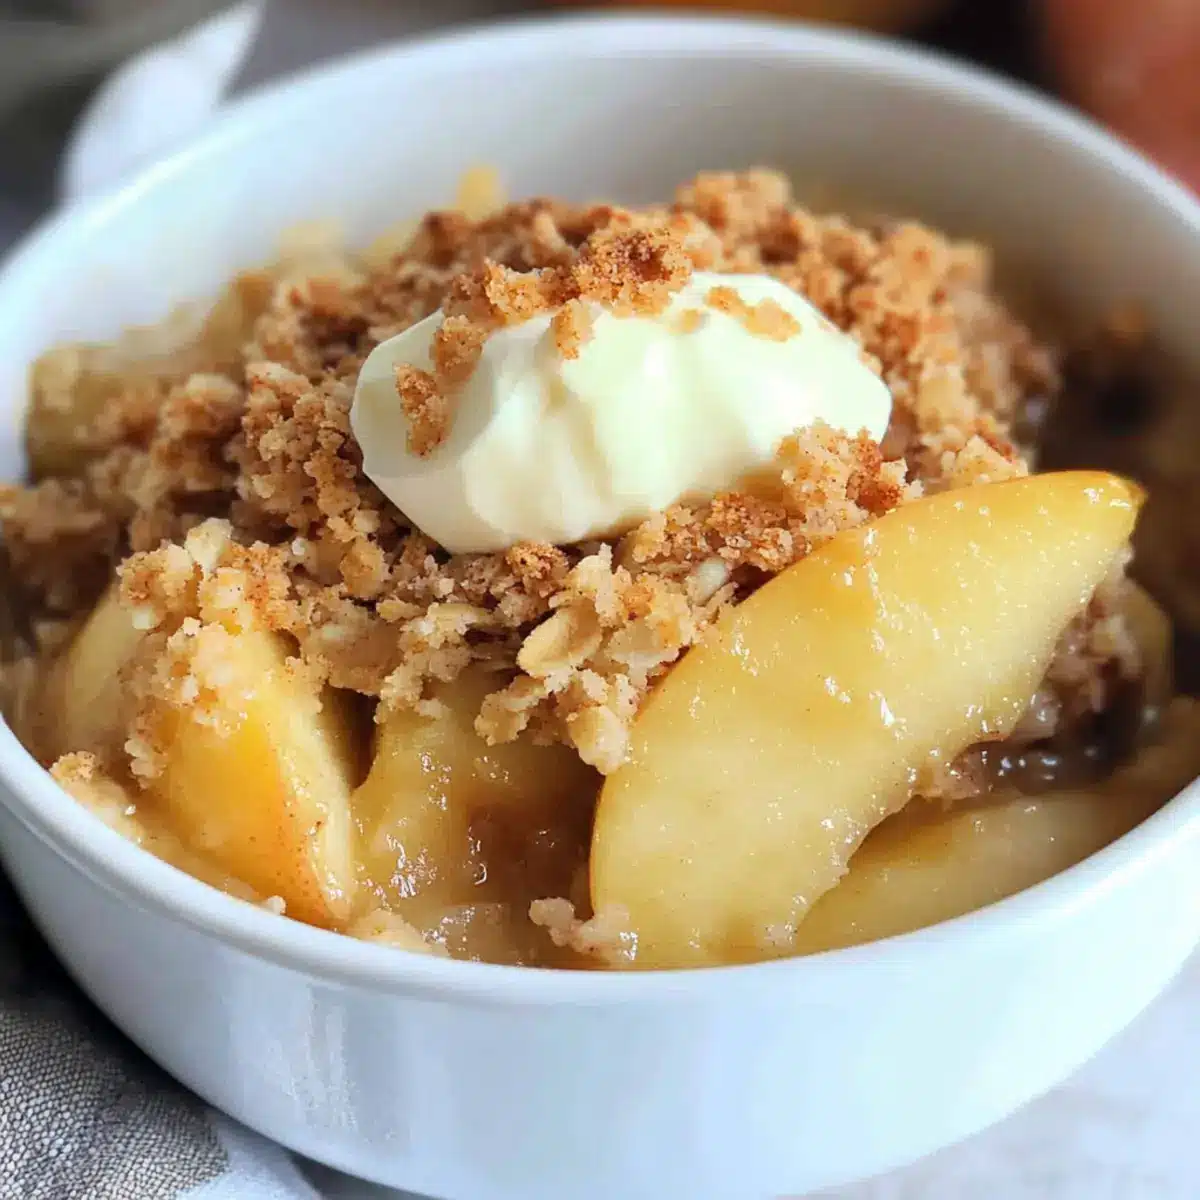
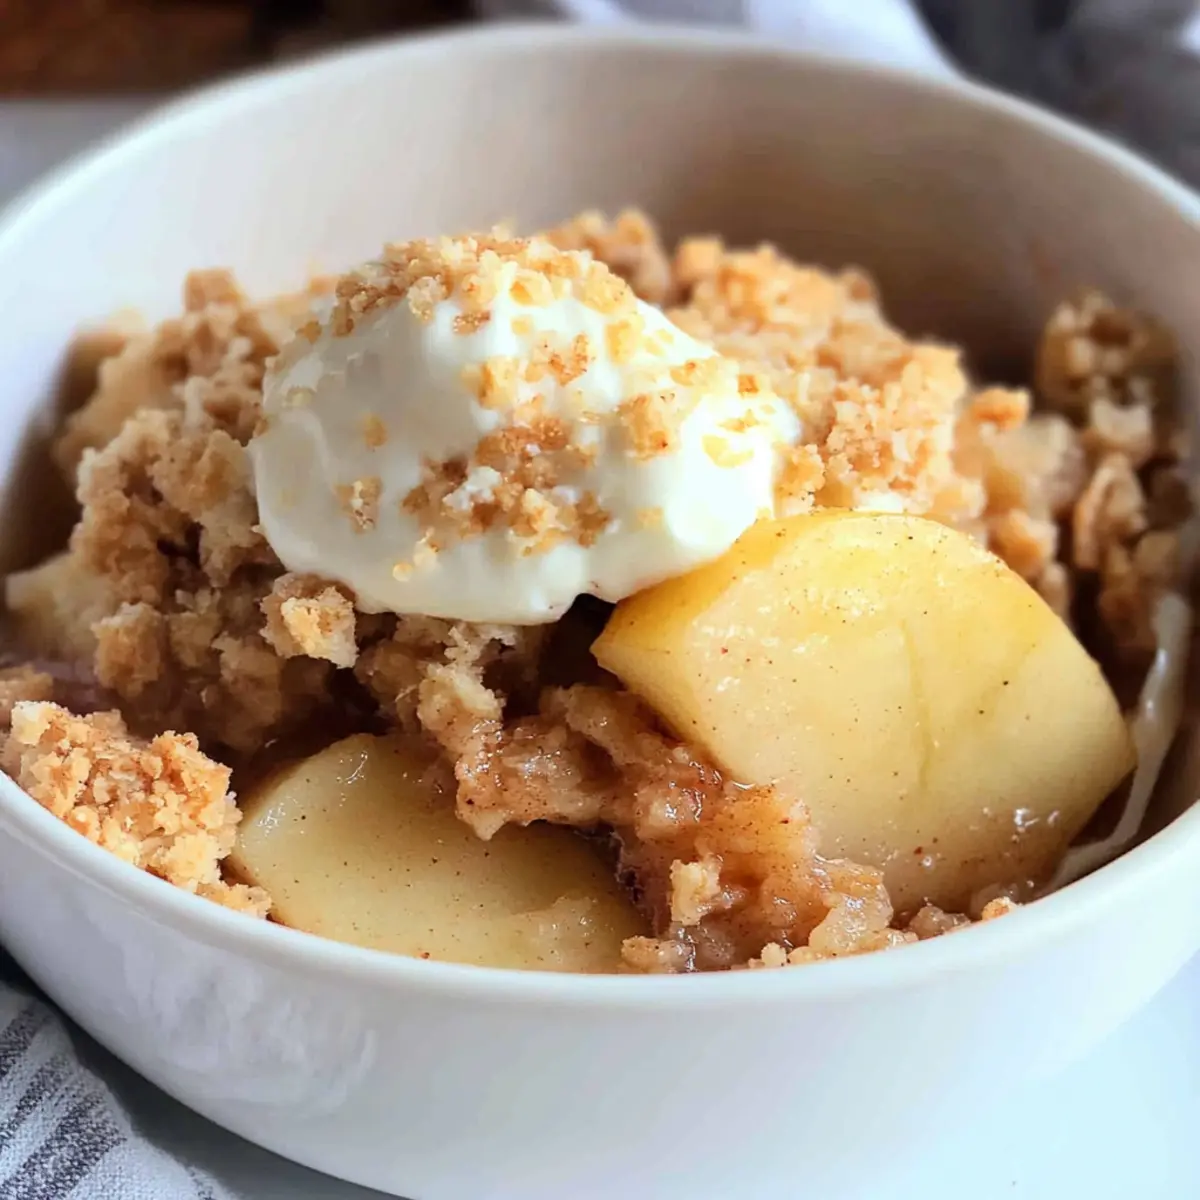
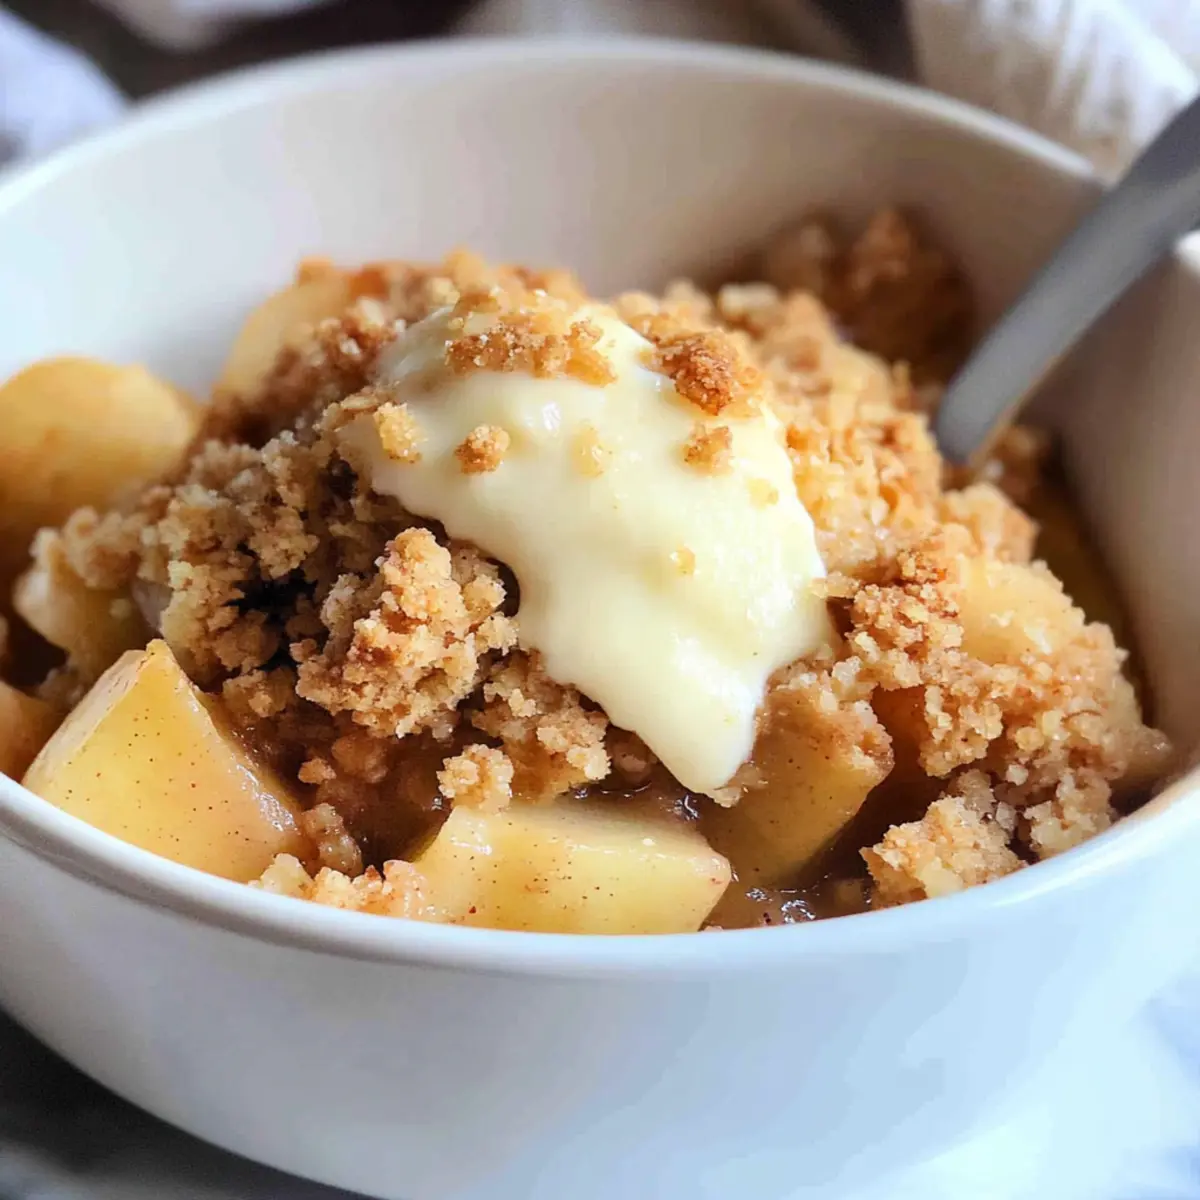
As the leaves turn and the air becomes crisp, I find myself craving comforting desserts that evoke the warmth of home. Enter my Sugar-Free Apple Crisp—a delightful twist on a classic that allows us to indulge without the worry! This low-carb, diabetic-friendly treat combines fresh, tart apples with a hint of cinnamon and a crunchy topping, making it a perfect guilt-free dessert. Not only is it easy to whip up on a busy day, but its gluten-free variations ensure that everyone can enjoy a slice (or two) during those cozy fall gatherings. Could this be your new go-to dessert for sharing with friends? Let’s dive into the recipe!
Why Is This Apple Crisp a Must-Try?
Deliciously Guilt-Free: The Sugar-Free Apple Crisp lets you indulge your sweet tooth without the sugar overload, ensuring it fits seamlessly into low-carb and diabetic-friendly diets.
Versatile Options: Whether you prefer vegan alternatives or gluten-free swaps, this recipe adapts easily to your dietary needs, making it a go-to for everyone!
Simple Preparation: With minimal prep and cooking time, you can whip this delightful dessert together in no time, perfect for busy weeknights or spontaneous gatherings.
Perfectly Balanced Flavors: Each bite bursts with the natural sweetness of apples complemented by warm cinnamon, creating a cozy, comforting dessert that feels indulgent.
Crowd-Pleasing Appeal: Serve it warm with a scoop of sugar-free vanilla ice cream to wow family and friends, making it the highlight of your fall gatherings! Discover other tasty options like Apple Snickerdoodles Cozy for even more sweet moments!
Sugar Free Apple Crisp Ingredients
For the Topping
• ½ cup old fashioned oats – Provides a delightful crunch; swap with gluten-free oats if needed.
• ½ cup almond flour – Adds a nutty flavor and structure; coconut flour works too, but use less.
• ¼ cup brown sweetener – Infuses sweetness and depth; consider stevia or monk fruit as alternatives.
• ½ teaspoon cinnamon – Enhances the warm flavor; it’s a must for that comforting taste!
• ½ teaspoon baking powder – Provides leavening for a lighter texture in the topping.
• ¼ cup unsalted butter (cold) – Adds richness and crumbly texture; can be replaced with coconut oil or vegan butter.
• ½ teaspoon salt – Balances sweetness to enhance the overall flavor profile.
For the Apple Filling
• 2 medium apples (peeled and sliced) – The star of the dish, providing natural sweetness; Granny Smith is a great lower-carb option.
• 3 tablespoons unsalted butter (melted) – Binds filling ingredients together nicely; melted coconut oil is a suitable substitute.
• 2 tablespoons almond flour – Helps thicken the apple mixture for better consistency.
• 1 tablespoon lemon juice – Adds acidity that beautifully balances the flavors.
• 3 tablespoons unsweetened almond milk – Combines ingredients smoothly; feel free to use regular milk.
• ½ teaspoon vanilla extract – An essential flavor booster that enhances sweetness.
• ¼ cup brown sweetener – Sweetens the filling; similar sugar substitutes can be used here.
• ½ teaspoon cinnamon – Infuses the apple mixture with warm, inviting flavor.
• ¼ teaspoon salt – Elevates the taste of the apple filling.
This Sugar Free Apple Crisp is ready to become a staple in your dessert lineup, offering you all the comforting flavors with none of the guilt!
Step‑by‑Step Instructions for Sugar Free Apple Crisp
Step 1: Preheat the Oven
Begin by preheating your oven to 375°F (190°C) to ensure it’s hot and ready for your delightful Sugar Free Apple Crisp. This temperature allows the apples to soften and the topping to develop a delicious, golden-brown crust. As the oven heats, prepare your baking dish so everything is ready for the next steps.
Step 2: Prepare the Topping
In a mixing bowl, combine ½ cup of old-fashioned oats, ½ cup of almond flour, ¼ cup of brown sweetener, ½ teaspoon of cinnamon, ½ teaspoon of baking powder, and ½ teaspoon of salt. Use a pastry cutter or your fingers to incorporate ¼ cup of cold unsalted butter until the mixture becomes crumbly. Set this topping aside as it will create the perfect crunchy finish for your Sugar Free Apple Crisp.
Step 3: Mix the Apple Filling
In another large bowl, mix together 3 tablespoons of melted butter, 2 tablespoons of almond flour, 1 tablespoon of lemon juice, ½ teaspoon of vanilla extract, 3 tablespoons of unsweetened almond milk, ¼ cup of brown sweetener, ½ teaspoon of cinnamon, and ¼ teaspoon of salt. Stir well until everything is combined; this mixture will infuse your apples with wonderful flavor and create a luscious filling for your crisp.
Step 4: Coat the Apples
Take 2 medium apples, peel and slice them evenly for uniform cooking, then add the sliced apples to the bowl containing your filling mixture. Toss the apples gently until they are thoroughly coated with the flavorful mix. This step is essential for ensuring every bite of your Sugar Free Apple Crisp is packed with sweet, tangy goodness.
Step 5: Assemble the Crisp
Grease a 9-inch pie dish with a little butter or oil to prevent sticking. Pour the apple mixture into the dish, ensuring it’s evenly spread out. Top the apples with the crumbly mixture you prepared earlier, spreading it evenly over the apples for maximum crunch. This layered approach will create a delightful contrast between the tender filling and the crispy topping.
Step 6: Bake to Perfection
Place the assembled Sugar Free Apple Crisp in the preheated oven and bake for 30-35 minutes. You’ll know it’s ready when the topping is golden brown and you can see the filling bubbling up around the edges. This delightful baking aroma will fill your kitchen, inviting everyone to gather and enjoy this healthy treat.
Step 7: Cool and Serve
Once baked, remove the crisp from the oven and let it cool for about 10 minutes. This cooling period helps the filling set slightly, making it easier to serve. When ready, dish out generous portions and enjoy your warm Sugar Free Apple Crisp—perhaps with a scoop of sugar-free ice cream or a dollop of whipped cream for an irresistible finish!
Sugar Free Apple Crisp: Delicious Variations
Feel free to personalize your Apple Crisp experience with these delightful twists and substitutions that will excite your taste buds!
- Gluten-Free: Use certified gluten-free oats and almond flour for a completely gluten-free dessert.
- Nut-Free: Swap out almond flour for sunflower seed flour or oat flour for a nut-free alternative.
- Vegan: Replace butter with coconut oil or vegan butter, ensuring all other ingredients are dairy-free.
- Sweetness Adjustments: Experiment with various sweeteners like erythritol or yacon syrup for a unique flavor profile.
- Fruity Twists: Add berries or chopped pears to the filling for an extra layer of fruity goodness, making it a delightful medley.
- Cinnamon Lovers: Amp up the flavor by increasing the cinnamon to 1 teaspoon or adding a pinch of nutmeg for warmth.
- Crunchy Topping: Incorporate chopped nuts like walnuts or pecans into the topping for a delightful crunch.
- Serving Suggestions: Pair with a scoop of sugar-free vanilla ice cream or a drizzle of sugar-free syrup for an extra indulgent touch.
This Sugar Free Apple Crisp is just the beginning! Pair it with wonderful snacks like Crispy Honey Garlic Glazed Salmon for an amazing fall feast or check out Apple Biscuits with Honey Butter Glaze for more apple-inspired delights. Enjoy crafting your perfect dessert!
Make Ahead Options
Preparing your Sugar-Free Apple Crisp in advance can save you valuable time during busy evenings! You can make the topping and assemble the filling up to 24 hours ahead of time. Simply store the dry topping mixture in an airtight container at room temperature, and refrigerate the apple filling in a covered bowl to keep it fresh and prevent browning. When you’re ready to bake, just combine the topping with the prepared apple mixture in your baking dish, and pop it in the oven. This way, you’ll enjoy the same delicious, comforting flavors without the rush—making mealtime a breeze!
Expert Tips for Sugar Free Apple Crisp
-
Uniform Slices: Ensure your apple slices are of even thickness to help them cook evenly, preventing some from being mushy while others remain crunchy.
-
Taste Before Baking: Don’t forget to taste the apple mixture before baking! Adjust the sweetness according to your preference to make sure it’s perfectly balanced.
-
Cold Butter Technique: Use a pastry cutter or your fingers to incorporate cold butter into the topping for the ideal crumbly texture that enhances your Sugar Free Apple Crisp.
-
Variations Galore: Feel free to swap out different apple varieties or add nuts for extra crunch! Recipes like this one allow versatility without sacrificing flavor.
-
Baking Duration: Keep an eye on your crisp while baking; oven temperatures can vary. Look for a golden-brown topping and bubbling filling to signal it’s time to enjoy!
What to Serve with Sugar Free Apple Crisp?
As the enticing aroma of baked apples wafts through your kitchen, let’s explore delightful pairings that enhance your dessert experience.
-
Creamy Vanilla Ice Cream: A scoop of sugar-free vanilla ice cream creates a delightful contrast with the warm, spiced crisp, enriching every mouthful.
-
Fresh Whipped Cream: Light and airy whipped cream adds a luscious touch, enhancing the crisp’s inviting flavors while keeping it light and guilt-free.
-
Vanilla Bean Yogurt: A dollop of vanilla bean yogurt offers a creamy, tangy note that complements the sweetness of the apples, making each bite refreshing.
-
Toasted Nuts: Chopped walnuts or pecans add crunchy texture and a flavorful nutty contrast to the fruity filling, enhancing the overall experience.
-
Hot Cinnamon Tea: A warm cup of cinnamon-infused tea enhances the spices of the apple crisp, creating a cozy, comforting ambiance that’s perfect for fall gatherings.
-
Cranberry Sauce: A tart cranberry sauce balances the sweetness beautifully, offering a burst of flavor that cuts through the richness of the crisp.
-
Caramel Drizzle: For those who want a touch of extravagance, a sugar-free caramel drizzle can elevate your dish into a decadent dessert without the guilt.
-
Apple Cider: A refreshing glass of chilled apple cider pairs beautifully, tying in the apple theme while providing a crisp, fruity contrast to the dish.
-
Fruit Salad: A medley of fresh, seasonal fruits adds a burst of color and freshness, balancing the warm spices of the crisp with natural sweetness.
Savor the sensory symphony of flavors that turns your Sugar Free Apple Crisp into a memorable celebration!
How to Store and Freeze Sugar Free Apple Crisp
Room Temperature: Allow the crisp to cool completely before covering it loosely with foil. It can be kept at room temperature for up to 1 day.
Fridge: Store leftover apple crisp in an airtight container in the refrigerator for up to 3-4 days. Reheat in the oven to restore its crunchy topping and warm apple filling.
Freezer: To freeze, wrap portions tightly in plastic wrap and place them in a freezer-safe container or bag. The Sugar Free Apple Crisp can be frozen for up to 3 months.
Reheating: For best results, reheat from frozen, thawing overnight in the fridge, then bake at 350°F for about 20-30 minutes until heated through.
Sugar-Free Apple Crisp Recipe FAQs
What type of apples should I use for the best flavor?
Absolutely! For a delightful Sugar-Free Apple Crisp, I recommend using Granny Smith apples for their tartness and lower carb content. If you prefer a sweeter taste, Galas or Honeycrisps work beautifully as well. Just be sure to slice them evenly to ensure they cook perfectly!
How can I store leftovers properly?
Store leftover apple crisp in an airtight container in the refrigerator for up to 3-4 days. If you want to keep that scrumptious topping crispy, reheat it in the oven rather than the microwave. Just pop it in a preheated oven at 350°F (175°C) for about 10-15 minutes to restore that delightful crunch!
Can I freeze Sugar-Free Apple Crisp?
Definitely! To freeze your prepared Sugar-Free Apple Crisp, allow it to cool completely, then tightly wrap individual portions in plastic wrap. Place the wrapped portions in a freezer-safe container or bag. It can be frozen for up to 3 months. When you’re ready to enjoy it, thaw overnight in the fridge and reheat at 350°F (175°C) for about 20-30 minutes until heated through.
What should I do if my crisp topping is not crunchy enough?
Very! If your topping ends up a bit too soft, try adding a little more oats or almond flour to the mixture before baking, ensuring a better crunch. It’s also helpful to use cold butter and incorporate it well into the mix – this creates that desirable crumble texture. Remember, baking it long enough until golden brown also contributes to a perfectly crispy topping!
Is this recipe suitable for people with nut allergies?
Absolutely! To make this Sugar-Free Apple Crisp nut-free, you can replace almond flour with oat flour – just use a little less due to its absorbent properties. Ensure that your oats are certified gluten-free, and you’re all set for a safe and delicious dessert that everyone can enjoy!
Can I adapt it for a vegan diet?
Certainly! To make your Sugar-Free Apple Crisp vegan, simply replace the butter with coconut oil or a vegan butter alternative. Additionally, make sure all other ingredients, like almond milk, are also dairy-free. With these swaps, you can whip up a delightful dessert that everyone can savor!
Sugar Free Apple Crisp to Satisfy Your Sweet Tooth Guilt-Free
Ingredients
Equipment
Method
- Preheat your oven to 375°F (190°C) to ensure it’s hot and ready for your delightful Sugar Free Apple Crisp.
- In a mixing bowl, combine the topping ingredients and incorporate cold unsalted butter until the mixture becomes crumbly. Set aside.
- In another large bowl, mix together the apple filling ingredients and stir well until everything is combined.
- Peel and slice the apples and add them to the filling mixture, tossing gently until thoroughly coated.
- Grease a 9-inch pie dish and pour in the apple mixture, then top with the prepared crumbly mixture.
- Bake the assembled Sugar Free Apple Crisp in the preheated oven for 30-35 minutes until the topping is golden brown.
- Remove the crisp from the oven and let it cool for about 10 minutes before serving.
Leave a Reply