
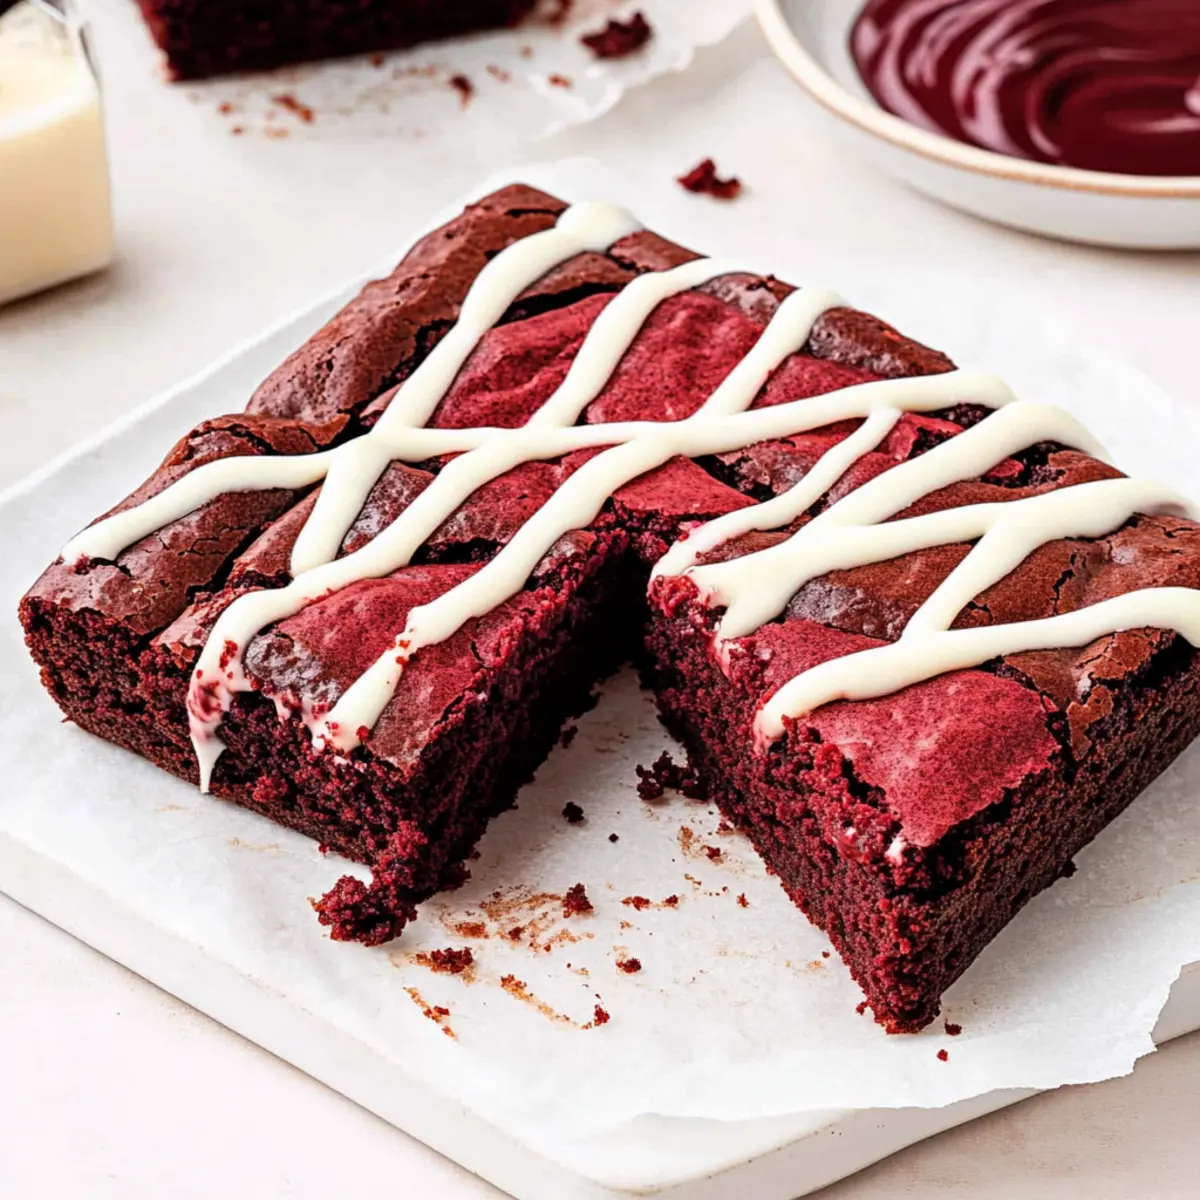
The aroma of warm, fudgy Red Velvet Brownies wafts through my kitchen, and in that moment, all the chaos of the day fades away. These brownies are an instant crowd-pleaser and the perfect kitchen companion for anyone looking to impress friends or that special someone. With a luscious, dense texture, they blend rich chocolate and a hint of sweet vanilla, topped with a creamy layer of cream cheese icing. You’ll find that these delights are not only an eye-catching treat for festive occasions like Valentine’s Day and Christmas but also surprisingly quick to make, giving you more time to savor every moment (and every bite!). So, are you ready to fall head over heels for this splendid dessert? Let’s dive into this recipe together!
Why Make Red Velvet Brownies?
Decadent, indulgent flavor: Each bite of these Red Velvet Brownies promises a rich fusion of chocolate and vanilla, making it a heavenly dessert for any occasion.
Quick preparation: With simple steps and minimal fuss, you’ll have these fudgy delights ready in no time.
Festive presentation: The striking red color and creamy icing make these brownies an eye-catching centerpiece for celebrations.
Versatile delight: Whether served warm with ice cream or enjoyed chilled, they are perfect for satisfying any sweet craving.
Perfect for sharing: Impress friends and loved ones with a treat that’s both delightful and easy to make—perfect for gatherings or romantic evenings!
Explore more festive recipes, like our Roasted Red Pepper Salmon or Red Wine Braised Meatballs, to complement your brownie experience!
Red Velvet Brownie Ingredients
For the Brownies
• Unsalted Butter – Provides richness and moisture. Substitution: Can use salted butter, but reduce additional salt in the recipe.
• 70% Dark Chocolate – Adds rich chocolate flavor and depth. Substitution: Semi-sweet chocolate can be used for a sweeter result.
• White Caster Sugar – Sweetens the brownies and helps achieve a soft texture. Substitution: Granulated sugar can be used, but texture may vary slightly.
• Large Eggs – Adds structure and moisture. Note: Room temperature eggs incorporate better into the batter.
• Vanilla Extract – Enhances flavor. Substitution: Almond extract can be used for a different flavor profile.
• White Wine Vinegar – Reacts with baking soda to provide lift. Substitution: Apple cider vinegar may be used.
• Self-Raising Flour – Provides structure and lift to the brownies. Substitution: Can use all-purpose flour plus baking powder (about 1 tsp per cup).
• Cocoa Powder – Adds depth of chocolate flavor. Substitution: Dutch-process cocoa for a different taste.
• Red Food Coloring (gel or oil-based) – Gives the brownies their signature color. Note: Can adjust to reach desired shade.
For the Cream Cheese Icing
• Full-Fat Cream Cheese – Rich base for icing. Note: Must be refrigerated before use.
• Icing Sugar – Sweetens and thickens cream cheese icing. Substitution: Powdered sugar works well.
Step‑by‑Step Instructions for Fudgy Red Velvet Brownies with Cream Cheese Icing
Step 1: Preheat the Oven and Prepare the Tin
Preheat your oven to 160°C fan or 180°C conventional. While it warms up, line a 20cm square baking tin with baking paper, allowing some overhang for easy removal later. This step will ensure your fudgy Red Velvet Brownies bake evenly and slide out without sticking.
Step 2: Melt the Chocolate and Butter
In a glass bowl, combine the dark chocolate and unsalted butter, then microwave them together for 60-90 seconds. After the initial heating, stir the mixture until completely smooth and glossy. This melted blend will form the rich foundation of your brownies, enhancing their delectable texture.
Step 3: Whisk Sugar and Eggs
In a separate bowl, whisk together the white caster sugar and large eggs until the mixture turns thick and pale, taking about 2 minutes of vigorous mixing. This step is crucial as it incorporates air into the batter, contributing to the luscious, fudgy texture of your Red Velvet Brownies.
Step 4: Combine the Mixtures
Gently mix in the vanilla extract, white wine vinegar, melted chocolate-butter mixture, and red food coloring. Stir until the mixture is smooth and uniform, allowing the flavors to meld beautifully. Make sure the vibrant red hue is evenly distributed, setting the stage for these stunning brownies.
Step 5: Add the Dry Ingredients
Sift the self-raising flour and cocoa powder into the wet mixture. Carefully fold the dry ingredients into the batter until just combined, avoiding overmixing. This step ensures your brownies retain their rich, fudgy consistency while preventing any lumps, crucial for the overall texture.
Step 6: Transfer to the Baking Tin
Spoon the brownie batter into the prepared baking tin, using a spatula to spread it evenly. Smooth the top to promote even baking, ensuring there are no air pockets. This step is important to achieve that perfect fudgy finish in your Red Velvet Brownies.
Step 7: Bake to Perfection
Place the tin in the preheated oven and bake for 22-25 minutes. You’ll know they’re done when the top is set with cracks around the edges but still has a slight wobble in the center. Bring them out of the oven to cool, ensuring that irresistible fudginess remains.
Step 8: Cool Before Slicing
Allow your Red Velvet Brownies to cool for 3-4 hours at room temperature, or refrigerate them for about 2 hours for quicker chilling. This cooling time is essential for allowing the brownies to firm up, making slicing much easier and ensuring a delightful chewy texture.
Step 9: Prepare the Cream Cheese Icing
For the icing, mix the full-fat cream cheese and icing sugar together in a bowl until smooth. Aim for a creamy, thick texture that can be drizzled beautifully over the cooled brownies. This decadent icing completes the mouthwatering experience of your Red Velvet Brownies.
Step 10: Ice and Serve
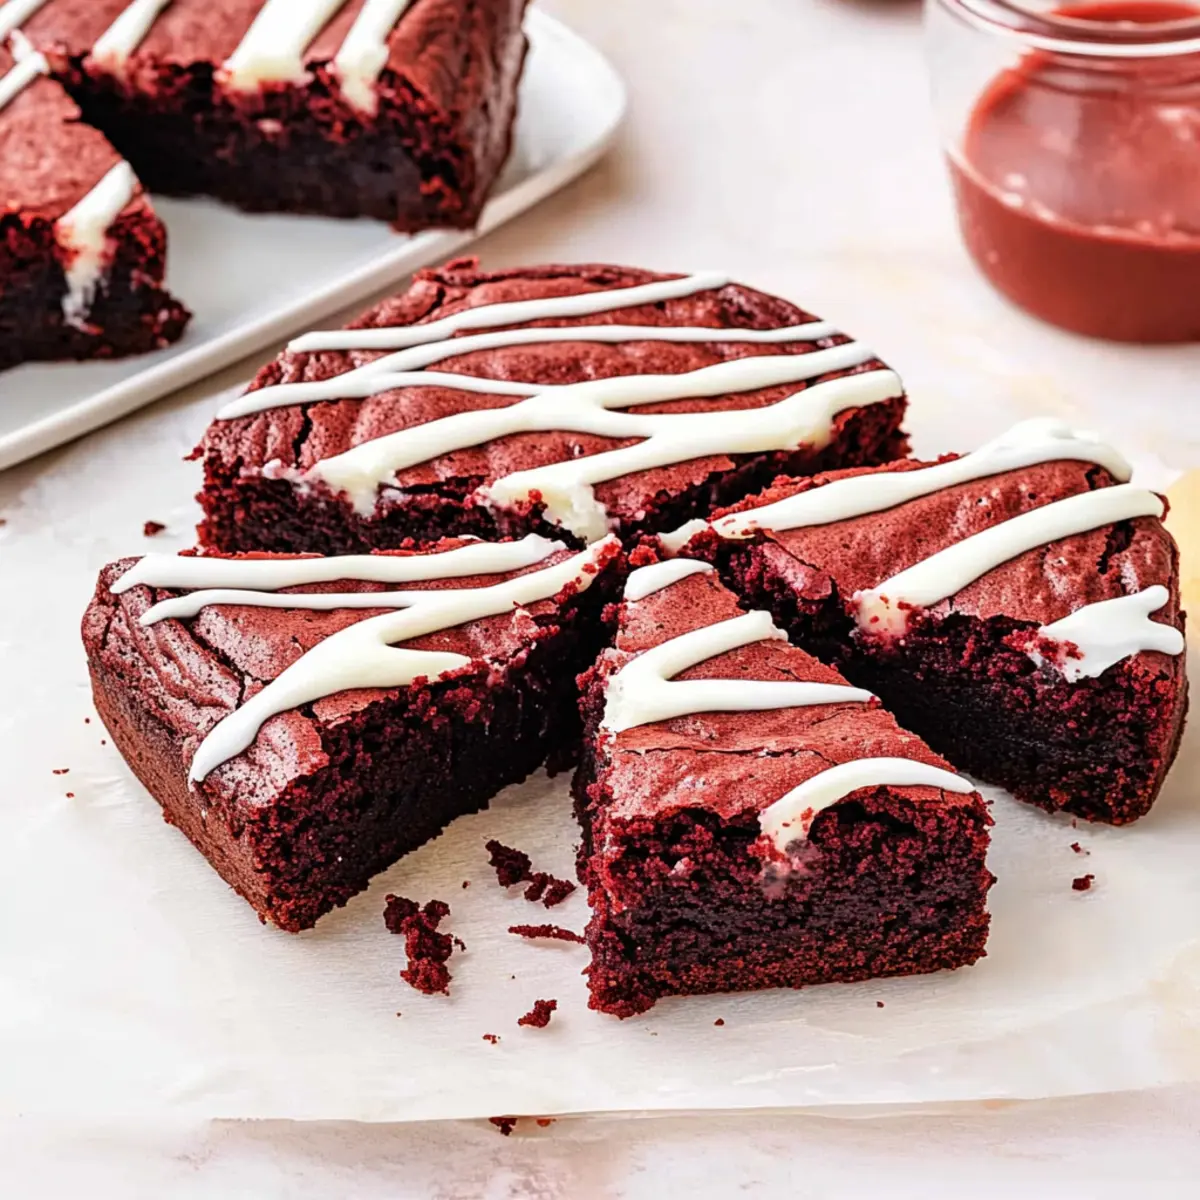
Once the brownies are completely cool, drizzle the cream cheese icing over the top, allowing it to cascade gracefully. Cut the brownies into squares and serve them to your delighted guests. The stunning presentation and irresistible flavor of these treats will leave everyone craving more!
Red Velvet Brownies Variations & Substitutions
Feel free to let your creativity shine while making these delectable brownies, adding your personal touch to each bite!
-
White Chocolate: Swap dark chocolate for white chocolate for a sweeter and creamier brownie experience. This twist adds a delightful contrast to the traditional flavor.
-
Nutty Addition: Incorporate chopped walnuts or pecans for extra texture and a nutty flavor. The crunch balances beautifully with the fudginess of the brownies.
-
Fruit Swirl: Add a layer of raspberry or strawberry jam in between the brownie batter for a fruity zing. The vibrant flavor enhances the sweetness and brings a fresh touch to every slice.
-
Spicy Kick: Include a pinch of cayenne pepper for a surprising warmth that complements the chocolate. This option is perfect for those who love a sweet and spicy contrast!
-
Gluten-Free: Substitute self-raising flour with a gluten-free flour blend to make these brownies suitable for gluten-sensitive friends. They’ll be just as fudgy and delicious!
-
Dairy-Free: Replace butter with coconut oil and cream cheese with a dairy-free alternative for a vegan-friendly option. You won’t sacrifice flavor or texture with these smart swaps.
-
Flavor Boost: For an extra kick of flavor, try adding espresso powder to the batter. This enhances the chocolate taste and creates a richer brownie.
-
Chocolate Chips: Fold in semi-sweet or white chocolate chips for an indulgent chocolate burst. These little treasures will melt in your mouth with every bite.
Once you’ve decided on your variations, don’t forget to check out how they pair with other delicious recipes like our Smothered Cheesy Sour Cream Chicken for a full meal experience!
Make Ahead Options
These fudgy Red Velvet Brownies are perfect for meal prep enthusiasts! You can prepare the brownie batter up to 24 hours in advance by mixing all the dry and wet ingredients and storing the combined mixture in the refrigerator (this slightly thickens the batter). The baked brownies can also be cooled and sliced up to 3 days ahead of time, just be sure to store them in an airtight container to maintain their moist texture. When ready to enjoy, simply drizzle with the cream cheese icing before serving to maintain its freshness and creamy consistency. With these make-ahead options, you’ll save valuable time on busy days without compromising on flavor!
What to Serve with Fudgy Red Velvet Brownies?
Indulging in these rich, velvety brownies can be even more delightful when paired with the perfect accompaniments.
- Vanilla Ice Cream: A scoop of creamy vanilla ice cream adds a luscious contrast to the dense brownies, enhancing their fudgy texture.
- Fresh Berries: Juicy strawberries or raspberries introduce a burst of freshness and tartness, beautifully balancing the sweetness of the brownies.
- Chocolate Sauce: Drizzle warm chocolate sauce on top for an extra touch of decadence that every chocolate lover will adore.
- Whipped Cream: Light and airy whipped cream provides a delightful contrast, making each bite feel even more indulgent and festive.
- Coffee or Espresso: A cup of rich coffee or espresso pairs perfectly, its bold flavor enhancing the chocolate notes of the brownies while cutting through the sweetness.
- Mint Tea: For a refreshing twist, serve with chilled mint tea; its cooling effect complements the warm, rich brownies beautifully.
With these delightful pairings, you’re sure to create an experience that not only pleases the palate but also warms the heart!
Expert Tips for Red Velvet Brownies
-
Underbake for Fudginess: Remove the brownies while they are slightly underbaked; this ensures a gooey, fudgy texture that everyone loves.
-
Cool Completely: Let the brownies cool completely before slicing. This helps achieve perfect squares and enhances their rich taste.
-
Icing Consistency: Mix the cream cheese icing until just smooth to avoid a runny consistency. A thick coating will add a delightful texture to your Red Velvet Brownies.
-
Use Room Temperature Eggs: Make sure your eggs are at room temperature for better incorporation into the batter, ensuring a smooth mix and even baking.
-
Avoid Overmixing: When combining dry and wet ingredients, fold gently until just combined. Overmixing can lead to tough brownies instead of the desired tender, fudgy delight.
How to Store and Freeze Red Velvet Brownies
Fridge: Store your brownies in an airtight container in the refrigerator for up to 3 days to maintain their freshness and fudgy texture.
Freezer: Wrap individual brownies tightly in plastic wrap or aluminum foil, then place them in a freezer-safe bag; they can be frozen for up to 3 months.
Thawing: To thaw, simply remove the brownies from the freezer and let them sit at room temperature for about 30 minutes before enjoying.
Reheating: For a warm treat, gently reheat brownies in the microwave for about 10-15 seconds, just until warm, keeping their delightful fudginess intact.
Fudgy Red Velvet Brownies Recipe FAQs
What type of butter should I use for the brownies?
I recommend using unsalted butter for these brownies to ensure you have control over the saltiness. If salted butter is what you have on hand, no worries—just reduce any additional salt you might add to the recipe!
How should I store leftover brownies?
To keep your brownies fresh, store them in an airtight container in the refrigerator. They will maintain their delightful fudginess for up to 3 days. If you’re looking to enjoy them later, wrap them up snugly and pop them in the freezer!
Can I freeze Red Velvet Brownies?
Absolutely! To freeze, first let the brownies cool completely. Then, wrap each piece tightly in plastic wrap or aluminum foil, and place them in a freezer-safe bag. They can be enjoyed even after being frozen for up to 3 months.
What if my brownies come out too dry?
If your brownies turn out dry, it may be due to overbaking. For that moist, chewy texture, make sure to pull them out of the oven when the top is set but still has a slight wobble in the center. Also, always allow them to cool completely before slicing to lock in moisture!
Can my pet have a taste of my Red Velvet Brownies?
It’s best to keep these brownies away from pets. Ingredients like chocolate and sweeteners can be harmful to dogs and cats, so it’s a good idea to enjoy them yourself and treat your furry friend to their specially-made treats.
How can I avoid a runny cream cheese icing?
To achieve a thick, drizzle-friendly cream cheese icing, make sure to mix the cream cheese and icing sugar until they reach a smooth, creamy consistency, but don’t overmix. If your icing appears too runny, try adding a bit more icing sugar until you achieve your desired thickness!
Decadent Red Velvet Brownies to Delight Your Taste Buds
Ingredients
Equipment
Method
- Preheat your oven to 160°C fan or 180°C conventional. Line a 20cm square baking tin with baking paper.
- Combine the dark chocolate and unsalted butter in a glass bowl, then microwave for 60-90 seconds. Stir until smooth.
- Whisk together the white caster sugar and large eggs until thick and pale, about 2 minutes of vigorous mixing.
- Gently mix in the vanilla extract, white wine vinegar, melted chocolate-butter mixture, and red food coloring until smooth.
- Sift the self-raising flour and cocoa powder into the wet mixture and fold until just combined.
- Spoon the brownie batter into the prepared baking tin and smooth the top to promote even baking.
- Bake for 22-25 minutes until set with cracks around the edges but still slightly wobbly in the center.
- Allow the brownies to cool for 3-4 hours at room temperature or refrigerate for about 2 hours.
- Mix the full-fat cream cheese and icing sugar in a bowl until smooth.
- Drizzle the cream cheese icing over the cooled brownies, cut into squares, and serve.
Leave a Reply