
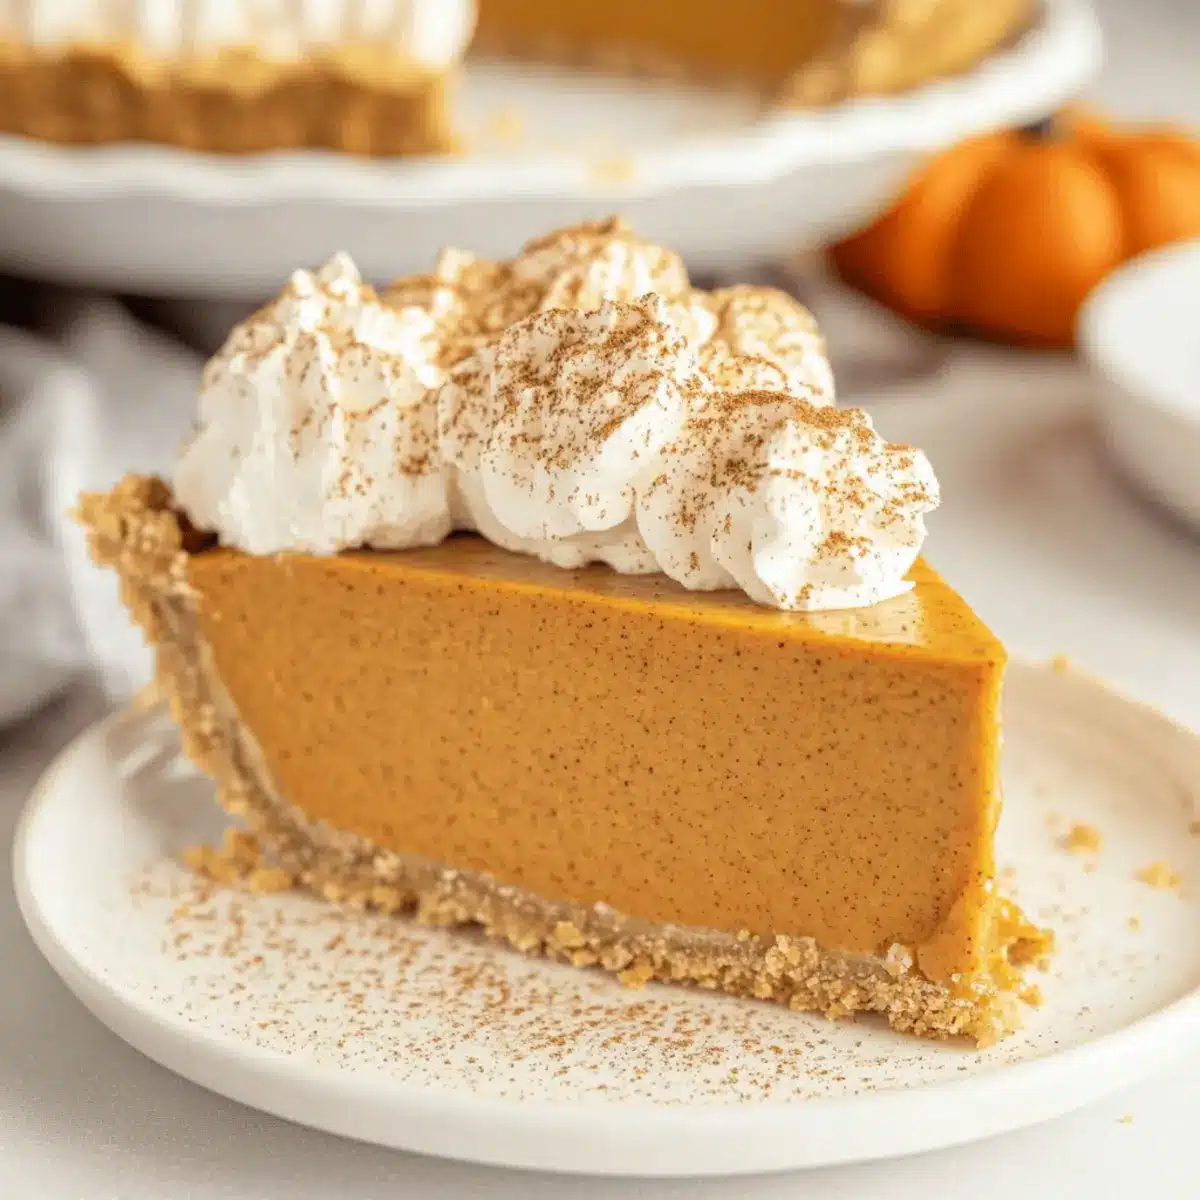
As the sunlight dances through the kitchen window, a delicious aroma fills the air, evoking warm memories of festive gatherings and laughter. This No Bake Marshmallow Pumpkin Pie is my go-to dessert for any celebration, blending the beloved flavors of fall with a light, airy twist. The marriage of marshmallows and Cool Whip creates a fluffy texture that melts in your mouth, making it both a crowd-pleaser and a delightful alternative to traditional baked pies. On top of that, its no-bake simplicity means you can whip it up in no time, leaving you with more moments to cherish with loved ones. So, are you ready to indulge in this delightful dessert that’s sure to make your holiday table shine?
Why is this pie a must-try?
Easy to Make: In just a few simple steps, you can create this delightful dessert that doesn’t require an oven, perfect for those last-minute gatherings.
Lighter Flavor: The fluffy texture from the marshmallows and Cool Whip offers a unique take on the classic pumpkin pie, making it a refreshing addition to your holiday menu.
Versatile Options: Whether you want to change up the crust or mix in some chocolate chips, this recipe is a fantastic canvas for your creativity, just like my Pumpkin Pie Tacos.
Perfect for Thanksgiving: As a crowd-pleaser, it’s ideal for festive gatherings, ensuring everyone leaves the table with a smile.
Make Ahead & Store: Enjoy the convenience of preparing it a day in advance, which not only saves time but enhances the flavors, similar to my Pumpkin Spice Gooey Cake. Giving it a night in the fridge guarantees a rich, delicious treat.
No Bake Marshmallow Pumpkin Pie Ingredients
For the Filling
- Large Marshmallows – Adds sweetness and fluffiness to the pie filling. Substitution: Marshmallow fluff may be experimented with, but sweetness level might differ.
- Pure Pumpkin (1 cup) – Provides the classic pumpkin flavor and rich color. Ensure to use 100% pure pumpkin, not pumpkin pie filling.
- Cinnamon (1 teaspoon) – Adds warmth and depth of flavor. No direct substitution, but can reduce if sensitive to spice.
- Pumpkin Pie Spice (1/2 teaspoon) – Enhances the traditional pumpkin flavor. Can replace with nutmeg or allspice if unavailable.
- Salt (1/2 teaspoon) – Balances sweetness and enhances flavor. Not recommended to omit.
- Cool Whip (8 oz, thawed) – Contributes to the pie’s creamy and fluffy texture. Substitution: Homemade whipped cream made from heavy cream and powdered sugar can be used.
For the Crust
- Graham Cracker Crust (6 oz, store-bought) – Offers a sweet, crunchy base. Can replace with a gluten-free crust or a homemade version if preferred.
Step‑by‑Step Instructions for No Bake Marshmallow Pumpkin Pie
Step 1: Melt the Marshmallows
In a medium saucepan over low to medium heat, combine the large marshmallows, pure pumpkin, cinnamon, pumpkin pie spice, and salt. Stir continuously for about 5-7 minutes until the marshmallows are completely melted and the mixture is smooth and cohesive, with no lumps remaining. This careful melting process ensures a creamy filling for your No Bake Marshmallow Pumpkin Pie.
Step 2: Cool the Mixture
Once your mixture is smooth, remove it from the heat and transfer it to a mixing bowl. Allow it to cool at room temperature for approximately 30 minutes. As it cools, it will thicken, creating a delightful texture that is perfect for folding in the whipped topping. Keep an eye on it— you want it to be just warm, not hot, when you mix in the Cool Whip.
Step 3: Fold in the Cool Whip
After the pumpkin mixture has cooled, take your thawed Cool Whip and gently fold it into the pumpkin mixture. Use a spatula to combine them, being careful to maintain the light and airy texture. The filling should become noticeably lighter in color and fluffy. This is the key step in ensuring your No Bake Marshmallow Pumpkin Pie has that wonderfully airy quality.
Step 4: Prepare the Crust
Grab your store-bought graham cracker crust and pour the fluffy pumpkin filling evenly into it. Use a spatula to spread the filling smoothly across the crust, ensuring an even layer that fills all corners. This step helps to create a beautifully presented pie that will impress everyone at your gathering.
Step 5: Refrigerate to Set
Cover your No Bake Marshmallow Pumpkin Pie with plastic wrap or a lid, and place it in the refrigerator. Let it chill for a minimum of 8 hours, but if you can, refrigerate it overnight. This time allows the flavors to meld and the pie to fully set, resulting in a creamy, sliceable dessert.
Step 6: Serve and Enjoy
When you’re ready to serve, remove the pie from the refrigerator and slice it into generous pieces. You can optionally top each slice with additional whipped cream for an extra touch of sweetness and decoration. Serve chilled, savoring the light, fluffy goodness of this no-bake delight that is sure to be a favorite at your table.
Make Ahead Options
These No Bake Marshmallow Pumpkin Pies are perfect for meal prep enthusiasts! You can prepare the filling and store it in the refrigerator up to 24 hours in advance, allowing the flavors to deepen while saving you time on the day of your gathering. Simply follow the instructions to melt the marshmallows and combine them with pumpkin, then fold in the Cool Whip and refrigerate in a covered container. On the day you plan to serve, pour the fluffy filling into a graham cracker crust, cover, and refrigerate for a minimum of 8 hours (overnight preferred) to set. By prepping ahead, you’ll enjoy a deliciously light dessert with minimal effort!
Expert Tips for No Bake Marshmallow Pumpkin Pie
-
Chill Time Matters: Allow the pie to refrigerate overnight for the best flavor and texture. The longer it sets, the fluffier it will be.
-
Marshmallow Melting: Ensure marshmallows melt thoroughly without burning, scraping the pan edges while stirring. Unevenly melted marshmallows can ruin the fluffy filling.
-
Fold Gently: When combining the Cool Whip with the pumpkin mixture, fold gently to retain airiness. Overmixing can lead to a denser dessert.
-
Use Fresh Ingredients: Opt for fresh, high-quality ingredients like real pumpkin and fresh Cool Whip to elevate your No Bake Marshmallow Pumpkin Pie experience.
-
Customize Your Crust: Experiment with different crusts like gingersnap or chocolate for added flavor twists, giving your pie a unique personality!
-
Serving Suggestions: For an elegant touch, grate some nutmeg on top before serving or add chocolate shavings to impress your guests!
What to Serve with No Bake Marshmallow Pumpkin Pie
Picture the warmth of family gathered around the table, delighting in the sweet tastes of fall along with your fluffy pumpkin pie.
-
Cranberry Sauce: The tartness of fresh cranberry sauce perfectly balances the sweetness of the pie, adding a zesty contrast.
-
Whipped Cream: Top slices of pie with an extra dollop of whipped cream for creaminess that enhances the light texture of the pie.
-
Apple Cider: A chilled glass of apple cider pairs beautifully, echoing the cozy fall flavors and adding a refreshing touch.
-
Maple Pecan Salad: Crunchy pecans and a hint of maple in a green salad add texture and a sweet contrast. It’s light yet satisfying.
-
Caramel Drizzle: A drizzle of caramel over each slice can elevate the dessert experience, adding rich sweetness to each bite.
-
Pumpkin Spice Latte: A warm, spiced latte brings the essence of fall to your dessert table, creating a delightful seasonal theme.
-
Chocolate Chip Cookies: Serve alongside for a fun twist; the combination of fluffy pumpkin pie and chewy chocolate cookies is irresistible.
-
Vanilla Ice Cream: For those who want to indulge further, a scoop of vanilla ice cream beside the pie adds an extra layer of creaminess.
No Bake Marshmallow Pumpkin Pie Variations
Feel free to get creative and customize this delightful dessert to suit your taste buds and festive mood!
-
Chocolate Delight: Fold in mini chocolate chips for a rich, melty surprise that complements the pumpkin wonderfully. The combination of chocolate and pumpkin is always a hit!
-
Gingersnap Crust: Swap the graham cracker crust for a gingersnap one to add a spicy twist. This swap not only enhances flavor but also adds an exciting crunch to each bite.
-
Nutty Twist: Add chopped pecans or walnuts to the filling or as a topping for a delightful crunch. This will give a lovely textural contrast to the creamy filling.
-
Spicy Variation: Increase the pumpkin pie spice to 1 teaspoon for a more robust spiced flavor or add a pinch of cayenne for some heat. This variation is perfect for those who love a little kick!
-
Flavored Whipped Cream: Use flavored whipped cream, such as cinnamon or vanilla, for a unique topping twist. The added flavor will surprise your guests and elevate the presentation.
-
Fruit Fusion: Incorporate chopped apples or pears into the filling for a fruity touch. The fresh fruit adds a delightful contrast to the creamy filling, echoing the essence of autumn.
-
Vegan Friendly: Replace the Cool Whip with coconut whipped cream and use a vegan crust for a plant-based alternative that doesn’t skimp on flavor. Everyone will love this option!
-
Butterscotch Bliss: Mix in butterscotch chips for a caramel-like sweetness that pairs beautifully with pumpkin. It’s a fun twist that brings rich flavor to the pie—sure to satisfy any sweet tooth!
Whichever variation you choose, you’ll find that this No Bake Marshmallow Pumpkin Pie can transform effortlessly while still being the comforting dessert you love. For more delicious treats, don’t forget to check out my recipes for Cheesecake Stuffed Baked Apples and Baked Feta Pasta; they’ll definitely bring a smile to your table!
How to Store and Freeze No Bake Marshmallow Pumpkin Pie
Fridge: Store the pie in an airtight container in the refrigerator for up to 4-5 days. Its flavors deepen after a day, making it even more delightful.
Freezer: If you need to freeze it, wrap the pie tightly in plastic wrap and then in aluminum foil for up to 1 month. To serve, thaw it overnight in the fridge before enjoying.
Reheating: This No Bake Marshmallow Pumpkin Pie is best served chilled, so there’s no need to reheat. Just slice and indulge in its fluffy texture straight from the fridge!
No Bake Marshmallow Pumpkin Pie Recipe FAQs
What kind of marshmallows should I use?
Absolutely! For this recipe, stick with large marshmallows for the best texture and sweetness. You can experiment with marshmallow fluff, but keep in mind that it’s sweeter so you might want to adjust the sugar in the filling if you use it.
How should I store leftovers of my No Bake Marshmallow Pumpkin Pie?
After you enjoy your pie, store leftovers in an airtight container in the refrigerator for up to 4-5 days. It actually tastes even better the next day as the flavors have time to meld.
Can I freeze No Bake Marshmallow Pumpkin Pie?
Yes, you can! To freeze, wrap the pie tightly in plastic wrap and then cover it with aluminum foil. This method will keep it fresh for up to 1 month. When you’re ready to enjoy, simply thaw it overnight in the fridge.
What if my filling mixture isn’t smooth?
Don’t worry! If your filling isn’t smooth after combining the melted marshmallows and pumpkin, continue to stir over low heat for an additional minute or two. Just make sure to scrape down the sides of the saucepan to avoid any marshmallow lumps. That way, you’ll ensure a delightful and fluffy filling!
Is this recipe suitable for those with allergies?
It’s important to note that this No Bake Marshmallow Pumpkin Pie contains marshmallows, which often contain gluten, and dairy from the Cool Whip. Those with gluten sensitivities or lactose intolerance can use gluten-free graham cracker crusts and dairy-free whipped topping available in stores. Always check labels to ensure they meet your dietary needs!
No Bake Marshmallow Pumpkin Pie: Easy, Fluffy Thanksgiving Delight
Ingredients
Equipment
Method
- In a medium saucepan over low to medium heat, combine the large marshmallows, pure pumpkin, cinnamon, pumpkin pie spice, and salt. Stir continuously for about 5-7 minutes until the marshmallows are completely melted and the mixture is smooth and cohesive, with no lumps remaining.
- Once your mixture is smooth, remove it from the heat and transfer it to a mixing bowl. Allow it to cool at room temperature for approximately 30 minutes.
- After the pumpkin mixture has cooled, take your thawed Cool Whip and gently fold it into the pumpkin mixture.
- Grab your store-bought graham cracker crust and pour the fluffy pumpkin filling evenly into it.
- Cover your No Bake Marshmallow Pumpkin Pie with plastic wrap or a lid, and place it in the refrigerator. Let it chill for a minimum of 8 hours, but refrigerate it overnight for best results.
- When you're ready to serve, remove the pie from the refrigerator and slice it into generous pieces.
Leave a Reply