
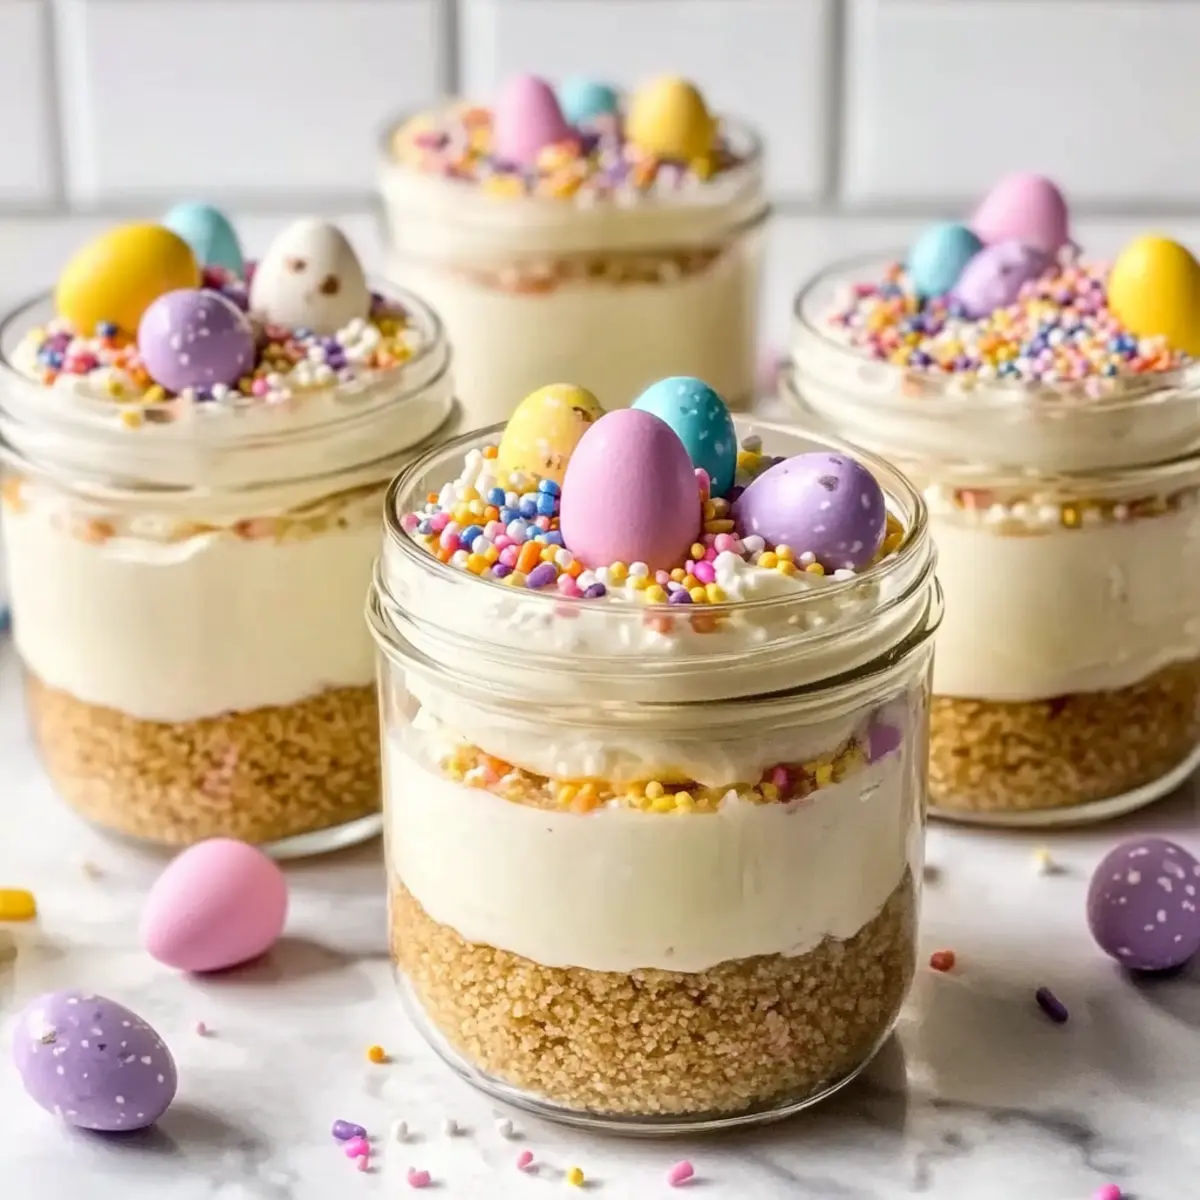
As I placed the last dollop of whipped cream on top of my Mini Easter Cheesecake Jars, a wave of excitement washed over me. These delightful no-bake treats combine a creamy, velvety filling with a buttery crust, elevating any spring celebration. With the easing of busy kitchen tasks, these portion-controlled, kid-friendly desserts take the cake—or should I say, the jar! Their make-ahead nature means you can whip them up well before your guests arrive, allowing you to enjoy the festivities without breaking a sweat. Plus, who can resist the festive colors and toppings that bring joy to every bite? Curious how to make this enchanting dessert the star of your spring gatherings? Let’s dive in!
Why Make Mini Easter Cheesecake Jars?
No-Bake Wonder: These Mini Easter Cheesecake Jars are a breeze to whip up, making them perfect for busy schedules or novice bakers.
Festive Appeal: Adorned with colorful toppings like mini chocolate eggs and sprinkles, they add a celebratory flair to your spring gatherings and brighten any table.
Kid-Friendly Delight: Their portion-controlled size makes them a hit with kids and adults alike, ensuring everyone gets a sweet treat without overwhelming servings.
Make-Ahead Magic: With the ability to prepare these jars a day in advance, you can savor the fun without the last-minute stress—leaving more time for memories!
Endless Variations: From fruity layers to chocolatey swaps, customize these jars to suit your family’s tastes, making each batch uniquely delightful!
If you love creative dessert ideas, be sure to check out Fried Strawberry Cheesecake for another fun twist on cheesecake.
Mini Easter Cheesecake Jars Ingredients
For the Crust
• Graham Cracker Crumbs – Provides structure and a crunchy base; substitute with digestive biscuits for similar texture.
• Unsalted Butter – Binds the crust together; use coconut oil for a dairy-free alternative.
• Sugar – Adds sweetness to the crust; brown sugar can be used for a deeper flavor.
For the Cheesecake Filling
• Cream Cheese – Forms the creamy filling; ensure it’s softened for ease of mixing, avoiding overly warm cream cheese to prevent runniness.
• Powdered Sugar – Sweetens the cheesecake filling; can be reduced slightly if desired.
• Vanilla Extract – Enhances flavor; possible to substitute with almond extract for a different profile.
• Lemon Juice – Provides brightness and tang; substitute with lime juice for a different citrus flavor.
• Heavy Whipping Cream – Adds lightness and structure to the filling; replace with mascarpone or whipped topping for a different texture.
For Optional Decoration
• Gel Food Coloring – Optional for tinting; consider using natural food colors for a healthier option.
• Toppings (Mini chocolate eggs, jelly beans, sprinkles, shredded coconut) – Decorative elements that enhance the festive appearance; use seasonal candies to suit themes.
These Mini Easter Cheesecake Jars will be the perfect centerpiece at your spring celebrations!
Step‑by‑Step Instructions for Mini Easter Cheesecake Jars
Step 1: Prepare the Crust
Begin by combining 1 cup of graham cracker crumbs, 2 tablespoons of sugar, and a pinch of salt in a mixing bowl. Pour in 5 tablespoons of melted unsalted butter, stirring until the mixture resembles wet sand. This crumb mixture is the delicious foundation for your Mini Easter Cheesecake Jars.
Step 2: Pack the Crust
Next, evenly distribute the crumb mixture into individual jars, about 4-6 jars depending on size. Using the back of a spoon or your fingers, press down firmly to create a solid crust layer at the bottom. This step ensures each bite of your cheesecake jars has that satisfying crunch.
Step 3: Whip the Cream
In a chilled mixing bowl, pour in 1 cup of heavy whipping cream. Using an electric mixer, whip the cream on medium-high speed until it forms medium-stiff peaks, roughly 3-5 minutes. Once whipped, place the bowl in the refrigerator to keep the cream cool while preparing the cheesecake filling.
Step 4: Beat Cream Cheese
In a separate bowl, add 8 ounces of softened cream cheese, ½ cup of powdered sugar, 1 teaspoon of vanilla extract, and 1 tablespoon of lemon juice. Beat the mixture on medium speed until smooth and creamy, about 2-3 minutes. Ensuring it’s lump-free will give your filling a velvety texture.
Step 5: Combine Mixture
Gently fold the whipped cream into the cream cheese mixture using a spatula. Do this in three parts to maintain the lightness of the whipped cream. As you mix, aim for a uniform color and texture that embodies the creamy filling of your Mini Easter Cheesecake Jars.
Step 6: Optional Tinting
If you want to add a pop of color, divide the cheesecake mixture into separate bowls and add a few drops of gel food coloring to each. Mix gently until you achieve the desired pastel hues, making your Mini Easter Cheesecake Jars visually appealing and fun for spring celebrations.
Step 7: Fill the Jars
Carefully layer the colored cheesecake filling over the prepared crust in each jar. Leave a little space at the top for toppings, which will enhance both the appearance and the taste of your creations. Using a small spatula can help smooth the filling evenly.
Step 8: Chill
Once filled, cover the jars with lids or plastic wrap and refrigerate for at least 2 hours, or up to 24 hours. Chilling allows the cheesecake to set properly, resulting in a firmer consistency that enhances the flavors of your Mini Easter Cheesecake Jars.
Step 9: Decorate
Just before serving, add your favorite toppings such as mini chocolate eggs, jelly beans, or colorful sprinkles on top of each jar. These sweet decorations not only make the Mini Easter Cheesecake Jars festive but also bring a joyful look to your spring presentation.
Expert Tips for Mini Easter Cheesecake Jars
-
Avoid Overmixing: Gently fold the whipped cream into the cheesecake to keep it light and fluffy; overmixing can lead to a dense texture.
-
Press Firmly: When packing the crust, make sure to press down firmly to avoid crumbling during serving. A solid base makes all the difference!
-
Chill Time Matters: Refrigerate for at least 2 hours, but not beyond 24 hours, to maintain the perfect texture of your Mini Easter Cheesecake Jars.
-
Add Toppings Last Minute: To keep the toppings fresh, only add them right before serving. This ensures they stay crunchy and vibrant.
-
Customize Flavors: Feel free to experiment with the cheesecake filling by adding extracts or different fruit blends to make your Mini Easter Cheesecake Jars uniquely yours!
How to Store and Freeze Mini Easter Cheesecake Jars
Fridge: Store covered Mini Easter Cheesecake Jars in the refrigerator for up to 3 days. This helps maintain their creamy texture and freshness.
Freezer: If you need to freeze them, remove the toppings first and wrap the jars tightly. They can last in the freezer for up to 2 months. Thaw overnight in the fridge before enjoying.
Reheating: These jars are best enjoyed chilled, so no reheating is necessary. Just serve straight from the fridge for a refreshing treat!
Topping Guidance: Add your favorite toppings right before serving, as this keeps them vibrant and crispy—ensuring each bite is a delightful experience!
Mini Easter Cheesecake Jars Variations
Feel free to get creative and make these Mini Easter Cheesecake Jars uniquely yours with these fun ideas!
-
Citrus Twist: Substitute lemon juice with lime or orange for a bright, zesty flavor. The citrusy notes will elevate your cheesecake, making each bite refreshing and vibrant!
-
Chocolate Lover: Create a chocolate version by using chocolate cookie crumbs for the crust and adding cocoa powder to the filling. This decadent twist is sure to delight any chocolate fanatic at your gathering.
-
Berry Bliss: Layer in some homemade berry compote or fresh fruit between the crust and filling. This added flavor and texture will brighten your cheesecake jars with delightful fruity goodness.
-
Nutty Delight: For a nutty flavor, fold in some almond paste to the cheesecake mixture or sprinkle crushed nuts on top. It introduces a wonderful crunch that perfectly complements the creamy cheesecake.
-
Savory Surprise: Add a pinch of sea salt into the whipped cream for a salted caramel-like contrast that will take your jars to a new level of deliciousness! This unexpected flavor will leave your guests guessing the secret ingredient.
-
Dairy-Free Dream: Use coconut cream instead of heavy whipping cream for a dairy-free option that retains that creamy texture. Now everyone can enjoy these tasty treats, regardless of dietary preferences!
-
Seasonal Swap: During different holidays, switch out traditional toppings like mini chocolate eggs with themed candies, such as heart-shaped sprinkles for Valentine’s Day or ghost-shaped chocolates for Halloween. Keep the festive spirit alive all year round!
Don’t forget, if you’re looking for more creative dessert ideas, check out Cheesecake Stuffed Baked Apples for another fun twist on cheesecake!
What to Serve with Mini Easter Cheesecake Jars?
When planning a delightful spring gathering, pair these jarred wonders with complementary flavors and textures for a truly memorable experience!
-
Fresh Fruit Salad: A medley of juicy fruits provides a refreshing contrast, enhancing the sweetness of the cheesecakes while adding a burst of color. Mixing strawberries, kiwis, and blueberries celebrates the season beautifully.
-
Coffee or Tea: A warm cup of coffee or a refreshing iced tea offers the perfect balance to the creamy richness of the cheesecake jars. You can even opt for herbal teas to add a floral note, enhancing the overall spring vibe.
-
Lemon Sorbet: The light and tangy notes of lemon sorbet will cleanse the palate between bites while echoing the citrus hints in the cheesecake filling. This simplicity elevates the dessert experience!
-
Chocolate-Dipped Strawberries: These sweet treats add a touch of indulgence and pair beautifully with the cheesecake flavors. Their crunchy exterior complements the creamy filling, creating a satisfying textural contrast.
-
Mini Quiches: Savory mini quiches make for a fulfilling complement to the sweet dessert. With their tender crusts and flavorful fillings, they provide a hearty balance, perfecting your brunch spread.
-
Homemade Lemonade: A glass of homemade lemonade adds a zesty twist and refreshing pop to your meal, harmonizing with the vibrancy of the Mini Easter Cheesecake Jars and bringing joy to each gathering!
-
Creamy Coleslaw: A light coleslaw with a tangy dressing can provide a crunchy, refreshing counterpoint to the cheesecakes. It adds a lovely crisp element, ensuring a balanced meal.
-
Carrot Cake Bites: Lean into the Easter theme by offering mini carrot cake bites for those who crave more seasonal flavors. These bites are moist, spiced, and perfect for sharing alongside the cheesecakes!
-
Sparkling Water: For a palate-cleansing sip, serve fizzy sparkling water with fresh citrus slices for a festive touch. The effervescence brightens your dessert experience!
-
Chocolate Mousse: For chocolate lovers, a rich, silky chocolate mousse can be graceful indulgence following the cheesecake. It offers a weighty contrast that rounds out your dessert table beautifully!
Make Ahead Options
These Mini Easter Cheesecake Jars are a fantastic choice for busy home cooks who want to simplify their meal planning! You can prepare the crust and cheesecake filling up to 24 hours in advance, storing them in separate airtight containers. Just be sure to pack the crust tightly to maintain that lovely crunch. When you’re ready to serve, simply layer the cheesecake filling over the crust, refrigerate for 2 hours, and add your favorite toppings right before presenting to ensure they stay vibrant and fresh. This prep-ahead strategy saves you time and stress, letting you enjoy your spring celebrations without a last-minute rush!
Mini Easter Cheesecake Jars Recipe FAQs
How do I choose ripe ingredients for my Mini Easter Cheesecake Jars?
Absolutely! For the best cheesecake, make sure your cream cheese is at room temperature for easy mixing. When selecting lemons for juice, look for ones that are firm and heavy for their size, as this indicates juiciness. If you’re using any fruits for decoration or mixing, opt for those that are vibrant and firm, avoiding any that show dark spots or softness.
How should I store Mini Easter Cheesecake Jars?
Very simple! Store your covered Mini Easter Cheesecake Jars in the refrigerator for up to 3 days. Keeping them tightly sealed will help maintain their creamy texture and delightful freshness. If you find them getting too softened, you can place them in smaller jars for added support.
Can I freeze Mini Easter Cheesecake Jars?
Certainly! To freeze, begin by removing any toppings from the jars. Wrap each jar tightly in plastic wrap and then place them in an airtight container. They can be kept in the freezer for up to 2 months. When you’re ready to enjoy, simply thaw them overnight in the fridge, and they’ll be as tasty as the day you made them!
What if my whipped cream doesn’t achieve stiff peaks?
No worries! If your whipped cream doesn’t reach medium-stiff peaks, it may need a little more time. Continue whipping, but watch closely to avoid over-whipping, which can turn it grainy. If you’re facing issues, ensure your mixing bowl and beaters are completely cold. You can also try adding a tablespoon of powdered sugar to help stabilize the cream.
Are there any dietary considerations for Mini Easter Cheesecake Jars?
Absolutely! If you’re making these for people with allergies or dietary restrictions, you can create a gluten-free version by using gluten-free graham crackers. For dairy-free needs, substitute the cream cheese and whipped cream with dairy-free alternatives, such as cashew cream or coconut whipped cream. Always double-check ingredient labels for any allergens, especially with toppings!
When is the best time to add toppings to my jars?
I highly recommend adding the toppings right before serving! This preserves their crunch and visual appeal, ensuring that each jar looks vibrant and inviting. If you need to prepare ahead, keep the toppings stored separately until you’re ready to serve—this way, your Mini Easter Cheesecake Jars will be the star of the show!
Mini Easter Cheesecake Jars – Easy No-Bake Delight for Spring
Ingredients
Equipment
Method
- Combine graham cracker crumbs, sugar, and a pinch of salt in a mixing bowl. Pour in melted butter and stir until resembling wet sand.
- Distribute crumb mixture into individual jars and press down to create a solid crust layer.
- In a chilled bowl, whip heavy cream until medium-stiff peaks form, and refrigerate.
- Beat cream cheese, powdered sugar, vanilla extract, and lemon juice in a separate bowl until smooth.
- Gently fold whipped cream into cream cheese mixture in three parts to maintain lightness.
- Optionally, divide mixture and add gel food coloring for tinting.
- Layer cheesecake filling over the prepared crust in each jar, leaving space for toppings.
- Cover jars and refrigerate for at least 2 hours, up to 24 hours.
- Add toppings just before serving.
Leave a Reply