
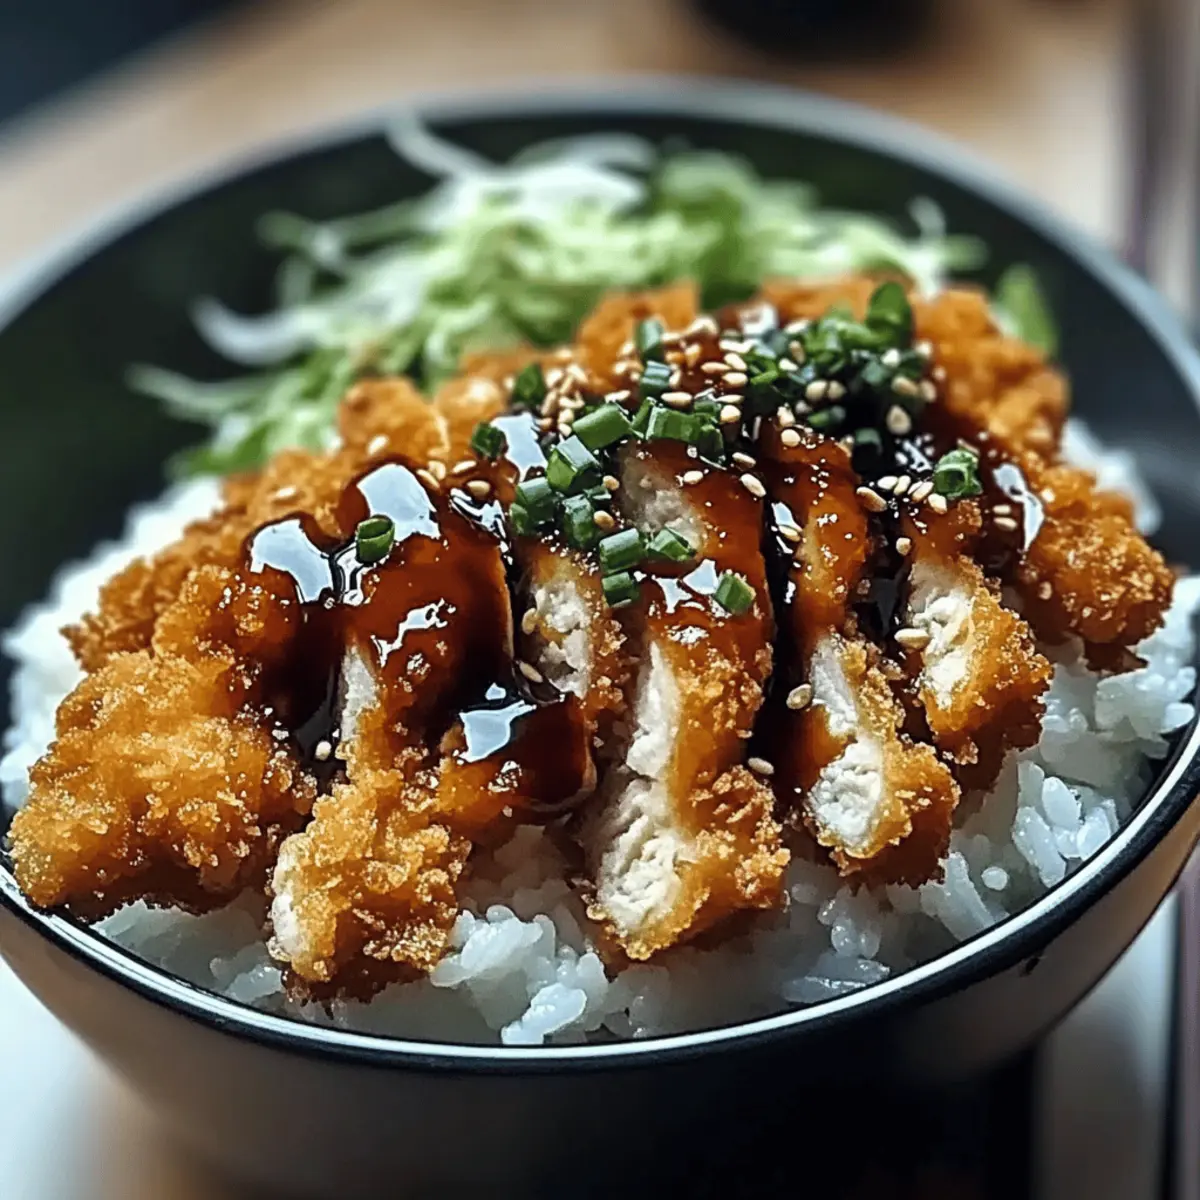
As I stood in my kitchen, the aroma of sizzling oil whispered promises of comfort. Japanese Katsu Bowls capture that essence, combining crispy, golden-brown breaded cutlets atop fluffy rice, all smothered in a savory sauce. This dish not only offers a quick weeknight dinner solution but is also customizable, allowing you to choose between chicken, pork, or even vegetarian options like eggplant or tofu. With its crunchy exterior and tender center, it’s a meal that brings family and friends together, making every bite a celebration of homemade goodness. Ready to dive into the world of flavorful katsu? Let’s explore how to make this delicious dish come alive in your own kitchen!
Why is Katsu the Ultimate Comfort Food?
Heartwarming Comfort: Japanese Katsu Bowls deliver the warm hug of home-cooked meals, featuring golden-brown cutlets that are impossible to resist.
Quick and Easy: Perfect for busy weeknights, this recipe comes together in no time, making it an ideal choice for those craving a satisfying meal without long prep.
Customizable Delight: Whether you prefer chicken, pork, or a vegetarian option, you can easily customize your bowl to suit different tastes and dietary needs.
Crowd-Pleasing Appeal: This dish is great for family gatherings or casual dinners, ensuring every guest leaves the table smiling.
Savory Sauce: The rich, tangy tonkatsu sauce beautifully complements the katsu, bringing a burst of flavor that elevates each bite. Once you’ve tried this, you’ll want to explore our delicious Bbq Steak Bowls for another comforting meal!
Japanese Katsu Bowls Ingredients
For the Katsu
• Boneless Chicken Breasts or Pork Loin – Main protein choice; chicken offers a classic taste while pork provides a robust alternative.
• Salt and Pepper – Essential seasoning; adjust according to taste to enhance the meat’s flavors.
• All-Purpose Flour – Coating base for katsu; can substitute with gluten-free flour for dietary needs.
• Large Eggs – Binds breadcrumbs to the meat, adding richness and moisture.
• Panko Breadcrumbs – Key for achieving a light, crispy texture; regular breadcrumbs can be used but alter the outcome.
• Vegetable Oil – Crucial for frying, ensuring even cooking and a perfectly crispy crust.
For the Rice
• Japanese Short-Grain Rice – The heart of the bowl known for its sticky texture; sushi rice is a fitting substitute.
• Water – Necessary for cooking the rice until fluffy.
• Rice Vinegar, Sugar, and Salt – These flavors enhance the rice; mix them in after cooking for a delicious twist.
For the Sauce
• Tonkatsu Sauce – Offers a savory-sweet glaze essential for Katsu Bowls; store-bought versions save time.
• Soy Sauce, Worcestershire Sauce, Ketchup – Flavor enhancers to create a delicious balance; modify quantities to personal preference.
For the Toppings
• Shredded Cabbage – Adds a fresh crunch, lightening the richness of the katsu.
• Green Onions – Brings color and a pop of flavor to each bite.
• Sesame Seeds – For garnish; they add both flavor and an attractive finish.
• Pickled Ginger (optional) – Introduces a tangy zest that brightens the dish.
These ingredients will come together to make a comforting, delicious Japanese Katsu Bowl that you and your family will love!
Step‑by‑Step Instructions for Japanese Katsu Bowls
Step 1: Prepare the Rice
Start by rinsing 2 cups of Japanese short-grain rice under cold water until the water runs clear, which helps remove excess starch. After rinsing, let the rice soak in water for 30 minutes to achieve the perfect texture. Bring a pot of water to a boil, add the soaked rice, cover, and reduce the heat to low. Simmer for 15 minutes, then remove from heat and let it sit, covered, for 10 minutes. Mix rice vinegar, sugar, and salt together, folding them into the rice gently after resting.
Step 2: Prepare the Katsu
While the rice is cooking, take your boneless chicken breasts or pork loin and pound them to an even thickness, about half an inch, for consistent cooking. Season both sides with salt and pepper. Set up a breading station with three shallow dishes: fill the first with all-purpose flour, the second with beaten eggs, and the third with panko breadcrumbs. Dredge each piece of meat in flour, dip it into the egg mixture, and finally coat it thoroughly with panko breadcrumbs for extra crunch.
Step 3: Fry the Katsu
In a large skillet, heat about half an inch of vegetable oil over medium-high heat until it’s hot enough to sizzle when a small piece of bread is added. Carefully place the breaded katsu into the hot oil, ensuring not to overcrowd the pan. Fry for 4 to 5 minutes on each side, or until the coating is a beautiful golden brown and the meat is cooked through. Use tongs to transfer the cooked katsu to a paper towel-lined plate to drain excess oil.
Step 4: Make the Sauce
In a small bowl, whisk together the tonkatsu sauce, soy sauce, Worcestershire sauce, and ketchup until well combined. This sauce will add a rich and tangy flavor to your Japanese Katsu Bowls. Taste and adjust the seasoning as desired; you can make it sweeter by adding more ketchup or tangier by using more Worcestershire sauce.
Step 5: Assemble the Bowls
To bring your Japanese Katsu Bowls together, start by fluffing the cooked rice and lacing it into serving bowls. Slice the fried katsu into strips and gracefully place them on top of the rice. Drizzle generously with the homemade sauce, and then crown the dish with a handful of shredded cabbage, diced green onions, and a sprinkle of sesame seeds for some added crunch. If desired, add a touch of pickled ginger for that extra zest.
Make Ahead Options
Preparing your Japanese Katsu Bowls ahead of time can save you precious minutes on busy weeknights! You can cook the rice and store it in an airtight container in the refrigerator for up to 4 days. The katsu can be breaded and stored in the fridge for up to 24 hours; just make sure to cover it properly to prevent it from drying out. When it’s time to serve, simply fry the katsu and assemble your bowls. To maintain that essential crunch, reheat the cooked katsu in a hot oven instead of the microwave. This way, you’ll enjoy that crispy, golden texture once again, making family mealtime both easy and delightful!
How to Store and Freeze Japanese Katsu Bowls
Fridge: Store cooked katsu and rice separately in airtight containers. They can be kept in the refrigerator for up to 4 days while maintaining their flavors and textures.
Freezer: If you want to store katsu for longer, freeze the breaded but uncooked katsu pieces. They can be frozen for up to 3 months when tightly wrapped in plastic wrap and placed in a freezer-safe bag.
Reheating: To reheat, place cooked katsu on a baking sheet and warm it in a preheated oven at 375°F (190°C) for about 10-15 minutes until heated through and crispy again. Reheat rice in the microwave, adding a splash of water to avoid drying.
Make-Ahead Tip: You can prepare the rice and katsu in advance and store them separately, making it easy to assemble your Japanese Katsu Bowls for a quick meal on busy days!
Japanese Katsu Bowls Variations & Substitutions
Feel free to play around with your Japanese Katsu Bowls—there are so many delightful ways to customize this comforting dish!
- Pork Swap: Use pork loin instead of chicken for a richer flavor that perfectly complements the crispy texture.
- Veggie Delight: Substitute meat with eggplant or tofu for a delicious vegetarian option that doesn’t compromise on taste.
- Gluten-Free Twist: Use gluten-free flour and breadcrumbs to accommodate dietary restrictions without losing that signature crunch.
- Sauce Shift: Replace tonkatsu sauce with a spicy mayo for a creamy kick or a citrusy ponzu sauce for a refreshing twist.
- Topping Adventure: Add soft-boiled eggs or avocado as toppings for an indulgently creamy layer that enhances the overall dish.
- Crunchy Extra: Sprinkle on some crushed nuts or fried onions to introduce an extra crunch, elevating your bowl experience!
- Fresh Greens: Top with arugula or spinach instead of cabbage for a fresh, peppery flavor that brightens each bite.
- Heat it Up: Mix in some chili flakes or sriracha to the regular sauce for those who enjoy a bit of heat!
These variations make your Japanese Katsu Bowls not just versatile but an absolute crowd-pleaser. Don’t forget to try pairing them with a side of our delightful Bbq Steak Bowls or a zesty salad for a complete meal experience!
What to Serve with Japanese Katsu Bowls
Enjoying Japanese Katsu Bowls can be a delightful experience on its own, but pairing with the right side dishes will elevate your meal to new heights.
- Fresh Cucumber Salad: Crisp cucumbers tossed in a light vinaigrette provide a refreshing crunch that complements the katsu’s richness beautifully.
- Miso Soup: Warm and savory, a bowl of miso soup adds an umami punch and warms the soul on cooler evenings.
- Pickled Vegetables: A vibrant assortment of pickled veggies introduces tangy flavors that cut through the savory katsu, balancing the palette.
- Edamame: Steamed and lightly salted, edamame delivers a satisfying texture and protein boost, perfect alongside your main dish.
- Sesame Noodles: Cold sesame noodles offer a delightful contrast in temperatures and textures, creating an enjoyable dining experience.
- Steamed Broccoli: Bright green broccoli drizzled with a hint of soy sauce provides a nutrient-packed, colorful addition bursting with flavor.
- Japanese Beer or Sake: For a beverage pairing, a crisp Japanese lager or warm sake will perfectly complement the savory elements of katsu.
- Matcha Green Tea Dessert: End on a sweet note with a matcha-flavored dessert; its subtle earthiness will balance the meal delightfully.
Expert Tips for Japanese Katsu Bowls
Oil Temperature: Ensure your oil is hot enough: Test with a small piece of bread; it should sizzle immediately. This creates a perfect crispy texture for your katsu.
Avoid Overcrowding: Fry in batches if necessary: Overloading the pan reduces oil temperature, resulting in soggy katsu rather than crispy perfection.
Breading Technique: Don’t press down while frying: This will keep the coating light and airy, contributing to that delightful crunch we all love in Japanese Katsu Bowls.
Fluffy Rice: Rinse and soak rice well: This removes excess starch and helps achieve that ideal sticky consistency for your rice base.
Taste as You Go: Adjust sauce flavorings to your preference: Personalize the tangy and sweet balance of your tonkatsu sauce by adding more soy sauce or ketchup as desired.
Japanese Katsu Bowls Recipe FAQs
What type of meat is best for Japanese Katsu Bowls?
Absolutely! Boneless chicken breasts are classic for katsu, offering a tender juicy bite. Pork loin is another fantastic option, providing a richer flavor. For a vegetarian twist, try using eggplant or tofu, which both work wonderfully when breaded and fried.
How should I store leftover Japanese Katsu Bowls?
To keep your katsu and rice fresh, store them separately in airtight containers. When properly stored, cooked katsu can last up to 4 days in the refrigerator, while the rice also remains good for the same duration. This way, you can enjoy your delicious katsu again without compromising taste or texture!
Can I freeze katsu for later use?
Yes, you can! If you want to prepare your katsu in advance, bread the uncooked pieces and wrap them tightly in plastic wrap before placing them in a freezer-safe bag. They can be stored in the freezer for up to 3 months. When you’re ready to enjoy them, simply fry from frozen, allowing a few extra minutes to ensure they cook through.
What if my katsu isn’t crispy after frying?
Very common! If your katsu turns out soggy, ensure your oil is hot enough before frying—test it with a small piece of bread; it should sizzle right away. Additionally, avoid overcrowding the pan, as this can lower the oil temperature, causing the katsu to steam instead of fry. You can also try using more panko breadcrumbs or letting the fried katsu rest on a paper towel to absorb excess oil.
Is there a gluten-free option for the panko breadcrumbs?
Certainly! You can find gluten-free panko breadcrumbs at most grocery stores, or you could make your own by processing gluten-free bread into crumbs. This way, you can still enjoy the crunchy texture of katsu while accommodating dietary needs.
Can I use Japanese Katsu Bowls for my pets?
While it’s tempting to share your katsu with furry friends, it’s best to keep it to yourself. The seasoning, particularly salt and sauces, can be harmful to pets. Instead, share plain cooked chicken or pork without any seasoning, as a special treat!
Savor the Comfort of Japanese Katsu Bowls for Dinner Delight
Ingredients
Equipment
Method
- Rinse the rice under cold water until clear and soak for 30 minutes. Cook in boiling water for 15 minutes, then let sit for 10 minutes. Mix vinegar, sugar, and salt into the rice.
- Pound the chicken or pork to 1/2 inch thick, season with salt and pepper. Set up a breading station: flour, eggs, then panko breadcrumbs.
- Heat vegetable oil in a skillet. Fry katsu for 4-5 minutes per side until golden brown. Transfer to a paper towel-lined plate.
- Whisk together tonkatsu sauce, soy sauce, Worcestershire sauce, and ketchup in a bowl.
- Assemble the bowls with rice, katsu slices, sauce, cabbage, green onions, and sesame seeds. Add pickled ginger if desired.
Leave a Reply