
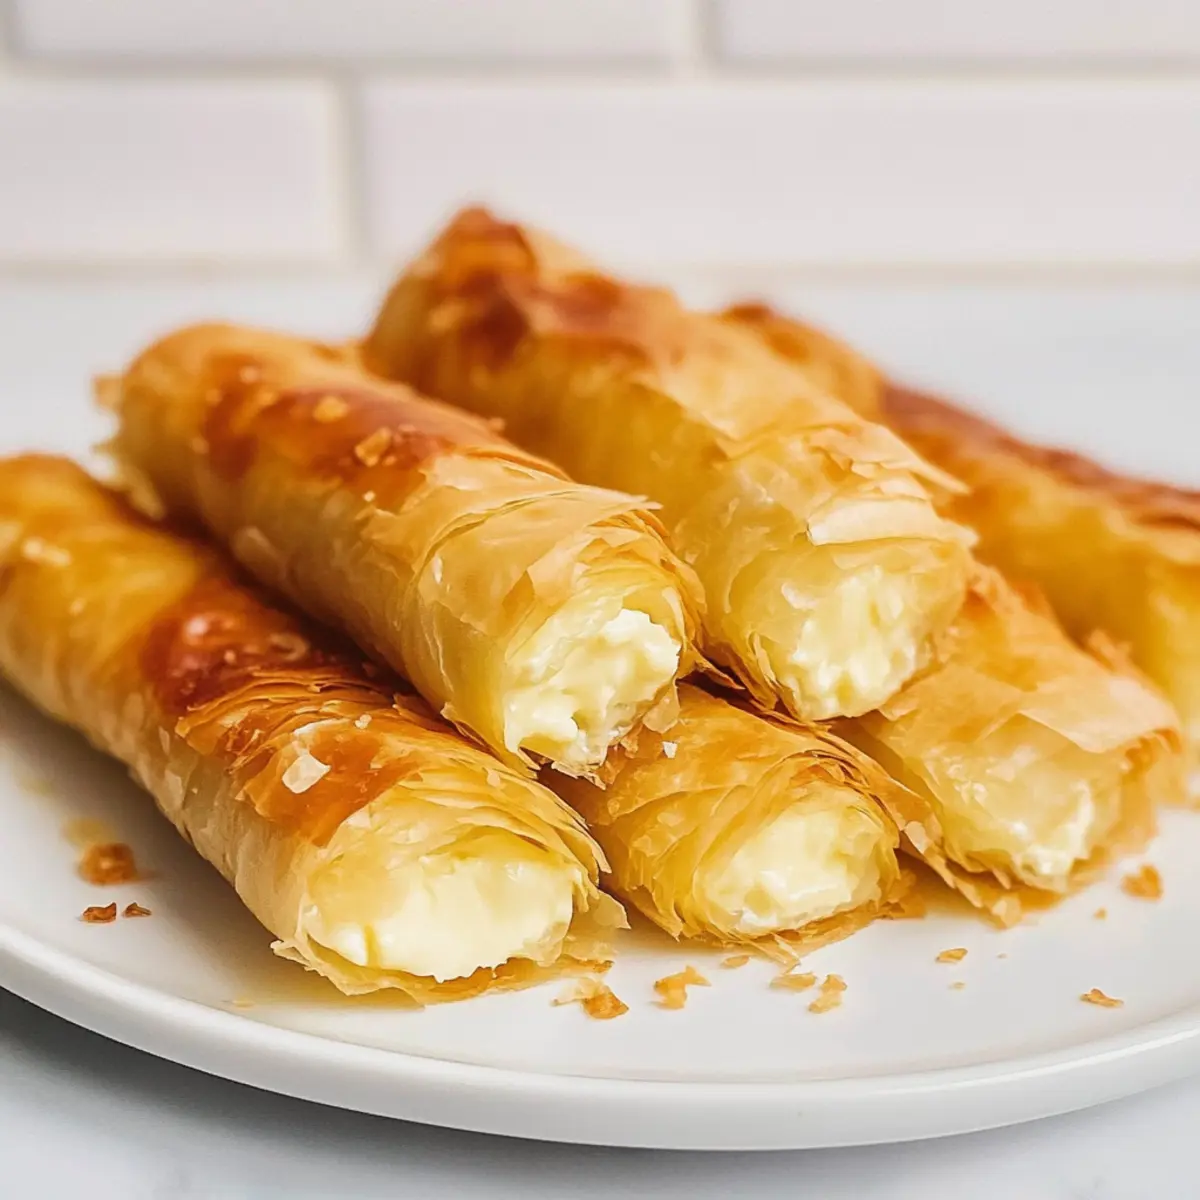
The aroma of golden-brown pastries wafted through the kitchen as I turned toward the oven, the promise of something crispy and cheesy igniting my excitement. These Extra Crispy Tiropita Rolls embody the essence of Greek comfort food, delivering a flaky, buttery crunch that’s impossible to resist. With just 25 minutes between you and a delightful appetizer, this recipe is not only quick to whip up but also kid-friendly, making it ideal for family gatherings and casual get-togethers. The rich feta cheese filling pairs perfectly with the delicate filo, offering a mouthwatering snack that feels both indulgent and wholesome. Are you ready to roll up your sleeves and dive into this scrumptious tradition? Let’s get started!

Why Are These Tiropita Rolls So Irresistible?
Quick Preparation: With just 25 minutes needed, these rolls are perfect for busy days or last-minute gatherings.
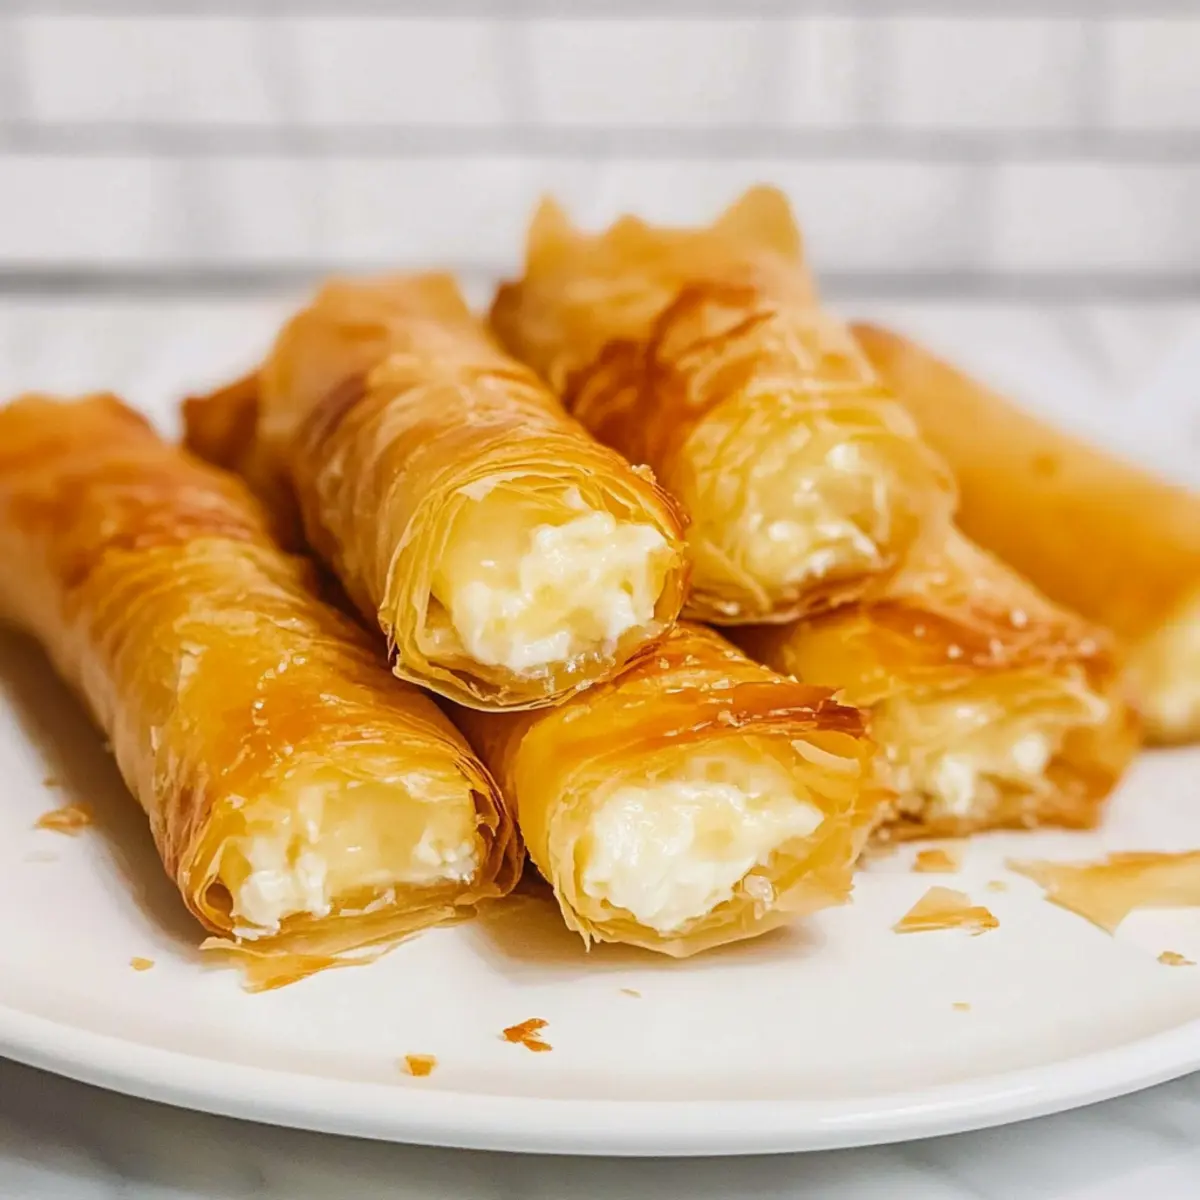
Crispy Perfection: The double layers of filo create an irresistible crunch, enhancing the flavor of the creamy feta filling.
Kid-Friendly: Even the pickiest eaters will love these cheesy bites, making snack time a breeze.
Versatile Twist: Feel free to customize your filling! Add veggies or different cheeses to suit your family’s taste.
Classic Comfort: Experience a bit of Greece at home with each flaky bite, making it a truly delightful addition to your recipe collection. Pair these with a refreshing Horiatiki salad for a complete meal!
Crispy Tiropita Rolls Ingredients
For the Filling
- Feta Cheese – This is the star ingredient, providing that signature creamy and tangy flavor; crumbled feta works best for easy blending.
- Milk – Adds moisture to the filling; any type of milk can be used for great results.
- Egg – Binds the ingredients together while adding richness; just a large egg, lightly beaten will do.
- Fine Semolina – Absorbs any excess moisture to ensure your filling stays firm and delicious, preventing soggy filo sheets.
For the Rolls
- Filo Pastry Sheets – The secret to crispy Tiropita rolls! Don’t forget to thaw before use, and for extra crunch, stack two layers.
- Olive Oil – Used for brushing the filo, it enhances the flavor, helping achieve that perfect golden brown finish.
Feel free to explore variations like adding spinach or different cheeses to give your crispy Tiropita rolls your own unique twist! These ingredients come together to create an incredible snack experience that your family is sure to love.
Step‑by‑Step Instructions for Crispy Tiropita Rolls
Step 1: Whisk the Filling
Begin by whisking together a large egg and a splash of milk in a mixing bowl for approximately 1-2 minutes until fully combined. Next, fold in the fine semolina and crumbled feta cheese gently, ensuring everything is well mixed. Season lightly with salt and pepper to taste, then set this creamy mixture aside as it will be the heart of your crispy Tiropita rolls.
Step 2: Preheat the Oven
As you prepare the filling, preheat your oven to 180°C (350°F). This temperature is ideal for achieving that perfectly golden and crispy exterior while baking. Make sure your oven rack is in the middle position, allowing for even heat distribution while the crispy Tiropita rolls bake to perfection.
Step 3: Prepare the Filo Pastry
On a clean, flat surface, lay out a sheet of thawed filo pastry. Lightly brush the surface with olive oil using a pastry brush to enhance flavor and crispiness. For the crispiest results, layer another sheet of filo on top of the oiled one and gently press down to adhere them together. This double-layer technique is key for those irresistible, crispy Tiropita rolls.
Step 4: Add the Filling
Once your filo layers are ready, place a thick line of the cheese filling along one narrow edge of the pastry. Be careful not to overfill, as you want to maintain the structural integrity of the rolls. Aim for around 1-2 inches from the edge of the pastry to allow folding and rolling without spilling.
Step 5: Roll the Pastry
Now, it’s time to form your crispy Tiropita rolls! Fold the edges of the filo over the filling, then carefully roll the pastry upwards to create a log shape. Ensure the filling remains securely inside as you roll, sealing the edges as you go. Aim for a tight roll to enhance the tenderness of the filling and the crispiness of the outer layer.
Step 6: Brush and Prick
Once rolled, place the Tiropita roll seam-side down on your prepared baking sheet. Brush the outside lightly with olive oil for an enticing golden finish. Take a toothpick and prick the rolls several times to allow steam to escape during baking, preventing soggy spots and ensuring they stay crispy.
Step 7: Bake to Perfection
Now it’s time to bake! Place the baking sheet with the assembled Tiropita rolls in the preheated oven. Bake for about 25 minutes or until they are wonderfully deep golden brown and crispy. Keep an eye on them in the last few minutes to prevent over-baking, as the aroma will let you know they are nearly ready.
Step 8: Cool and Slice
Once baked, remove the crispy Tiropita rolls from the oven and allow them to cool on the baking sheet for 5-10 minutes. This cooling period helps to set the filling and makes them easier to handle. After cooling, slice them into bite-sized pieces and serve warm, embodying that delightful feta goodness that will have everyone coming back for more.
How to Store and Freeze Crispy Tiropita Rolls
Fridge: Store leftover Crispy Tiropita Rolls in an airtight container in the refrigerator for up to 3 days to maintain freshness and flavor.
Freezer: For longer storage, freeze the rolls before baking. Wrap each roll tightly in plastic wrap and then in aluminum foil, keeping for up to 3 months.
Reheat: When ready to enjoy, bake from frozen at 180°C (350°F) for 25–30 minutes or until heated through and crispy. This way, you can savor that perfect crunch!
What to Serve with Extra Crispy Tiropita Rolls
The delightful crunch and rich flavor of these rolls invite you to create a mouthwatering meal experience.
- Horiatiki Salad: A refreshing Greek salad packed with ripe tomatoes, cucumbers, and olives, providing a perfect contrast to the savory cheese rolls.
- Tzatziki Sauce: This creamy yogurt and cucumber dip complements the crispy tiropita rolls, enhancing their richness with cool, refreshing flavors.
- Marinated Tomato Salad: Bursting with flavor, this salad adds a juicy element and a touch of acidity that balances the crispy texture beautifully.
- Spanakopita: Another beloved Greek pastry, filled with spinach and herbs, this dish echoes the flavors of tiropita and makes for a delightful appetizer duo.
- Pita Bread: Soft, warm pita serves as a great side to soak up any leftover tzatziki or sauces, creating a fulfilling meal.
- Greek Lemonade: The bright, tangy notes of this refreshing drink cleanse the palate, making each bite of the crispy tiropita rolls even more enjoyable.
- Baklava: Finish your meal with a sweet note! The flaky dessert filled with nuts and honey offers a textural contrast to the savory rolls.
- Grilled Vegetables: Charred zucchini, bell peppers, and eggplant add a smoky depth that complements the rich, cheesy filling.
- Feta and Olive Platter: This simple yet elegant pairing enhances the Greek theme, inviting snacking alongside the crispy tiropita rolls.
- Sparkling Water: Lightly flavored sparkling water adds a refreshing effervescence that uplifts the meal without overpowering the delicious flavors of the rolls.
Expert Tips for Crispy Tiropita Rolls
• Layered Delight: Use two layers of filo pastry for an unbeatable crispy texture; this ensures each bite is wonderfully crunchy.
• Cover to Preserve: Keep the filo sheets covered while assembling to prevent them from drying out; dryness can lead to cracks and tears.
• Oil Wisely: Brush the filo lightly with olive oil; over-brushing can weigh down the pastry and reduce crispiness.
• Steam Control: Don’t forget to prick the rolls with a toothpick before baking; this allows steam to escape, keeping your crispy Tiropita rolls perfectly golden.
• Even Baking: Rotate the baking sheet halfway through baking for optimal browning; uneven baking can result in some rolls being overcooked while others remain pale.
Make Ahead Options
These Extra Crispy Tiropita Rolls are a perfect solution for meal prep enthusiasts! You can prepare the filling and roll the Tiropita ahead of time, storing them in the refrigerator for up to 24 hours. To do this, assemble the rolls according to the instructions, then cover them tightly with plastic wrap to prevent drying out. When you’re ready to enjoy them, simply bake the rolls straight from the refrigerator, adding an extra 5 minutes to the baking time to ensure they are heated thoroughly. This way, you’ll benefit from quick, homemade goodness right when you need it most, without sacrificing flavor or quality!
Crispy Tiropita Rolls Variations
Feel free to make these delightful rolls your own with tasty twists and substitutions!
-
Veggie Boost: Add chopped spinach or sautéed mushrooms to the filling for a flavorful nutritional boost. The earthy tones from the veggies elevate the dish and enhance its heartiness.
-
Cheese Blend: Swap feta with ricotta or a mix of cheeses like mozzarella for a creamier texture. This variation offers a wonderful cheesy surprise in every bite!
-
Herb Infusion: Incorporate fresh herbs like dill or parsley into the filling to brighten the flavor profile. A touch of freshness can elevate these rolls to another level.
-
Spicy Kick: For those who love a little heat, add crushed red pepper flakes to the filling or serve with a spicy dipping sauce on the side. A hint of spice can make your taste buds dance!
-
Dinner Variety: Transform these crispy rolls into a meal by adding cooked and crumbled ground meat, such as beef or turkey, to the filling. This substantial twist makes it a more filling dish for dinner.
-
Pesto Flavor: Mix in a spoonful of pesto with your cheese filling for an herby, aromatic twist. This adds layers of flavor that will keep everyone guessing.
-
Sweet Treat: For a fun dessert version, use sweet cheese or cream cheese filling and a sprinkle of sugar. After baking, drizzle with honey to create a decadent treat.
To enjoy another delicious option, try out these Honey Garlic Glazed salmon bites or make some delightful Spinach Ricotta Rolls for a heartwarming meal experience!
Crispy Tiropita Rolls Recipe FAQs
How do I choose the right feta cheese?
Absolutely! When selecting feta cheese, look for a block of crumbled feta that appears creamy and moist. Avoid overly dry feta, as it can lead to a crumbly filling. If the feta has dark spots all over, it may not be fresh.
What is the best way to store leftover Tiropita Rolls?
I recommend storing any leftover Crispy Tiropita Rolls in an airtight container in the refrigerator for up to 3 days. This helps maintain their flavor and texture. When reheating, use the oven instead of a microwave to retain that beloved crispiness.
Can I freeze Tiropita Rolls?
Absolutely! If you want to freeze your Crispy Tiropita Rolls, do it before baking. Wrap each roll in plastic wrap, followed by aluminum foil, and store in the freezer for up to 3 months. When you’re ready to enjoy, bake from frozen at 180°C (350°F) for 25-30 minutes, or until heated through and crispy.
What can I do if my filo pastry tears?
Don’t worry, this can happen to the best of us! If your filo pastry tears while assembling, simply layer another sheet over the torn section and continue. Brush the new layer with olive oil to ensure the roll stays together, and it will still bake beautifully.
Are these rolls suitable for individuals with dietary restrictions?
For those with lactose intolerance, substitute feta with a dairy-free cheese alternative, or try a combination of nutritional yeast and cashew cream for added creaminess. As for allergies, always check the ingredient labels to avoid cross-contamination, especially with store-bought filo pastry, which can contain gluten.
How do I ensure my Tiropita Rolls stay crispy?
Great question! To ensure that your Crispy Tiropita Rolls maintain their delightful crunch, use two layers of filo pastry, brush lightly with olive oil, and remember to prick the rolls with a toothpick before baking to allow steam to escape. This prevents soggy spots and makes each bite heavenly!

Crispy Tiropita Rolls That Make Snack Time Unforgettable
Ingredients
Equipment
Method
- Whisk together the egg and a splash of milk in a bowl. Fold in semolina and crumbled feta. Season with salt and pepper and set aside.
- Preheat the oven to 180°C (350°F). Ensure the oven rack is positioned in the middle.
- Layer a sheet of filo pastry and brush lightly with olive oil. Place another sheet on top and press down.
- Place a thick line of the cheese filling along one edge of the pastry. Don't overfill.
- Fold edges over the filling and roll the pastry upwards tightly to form a log shape.
- Place the roll seam-side down on a baking sheet. Brush with olive oil and prick with a toothpick.
- Bake for 25 minutes until golden brown and crispy. Watch closely in the last few minutes.
- Cool for 5-10 minutes before slicing into bite-sized pieces and serve warm.
Leave a Reply