
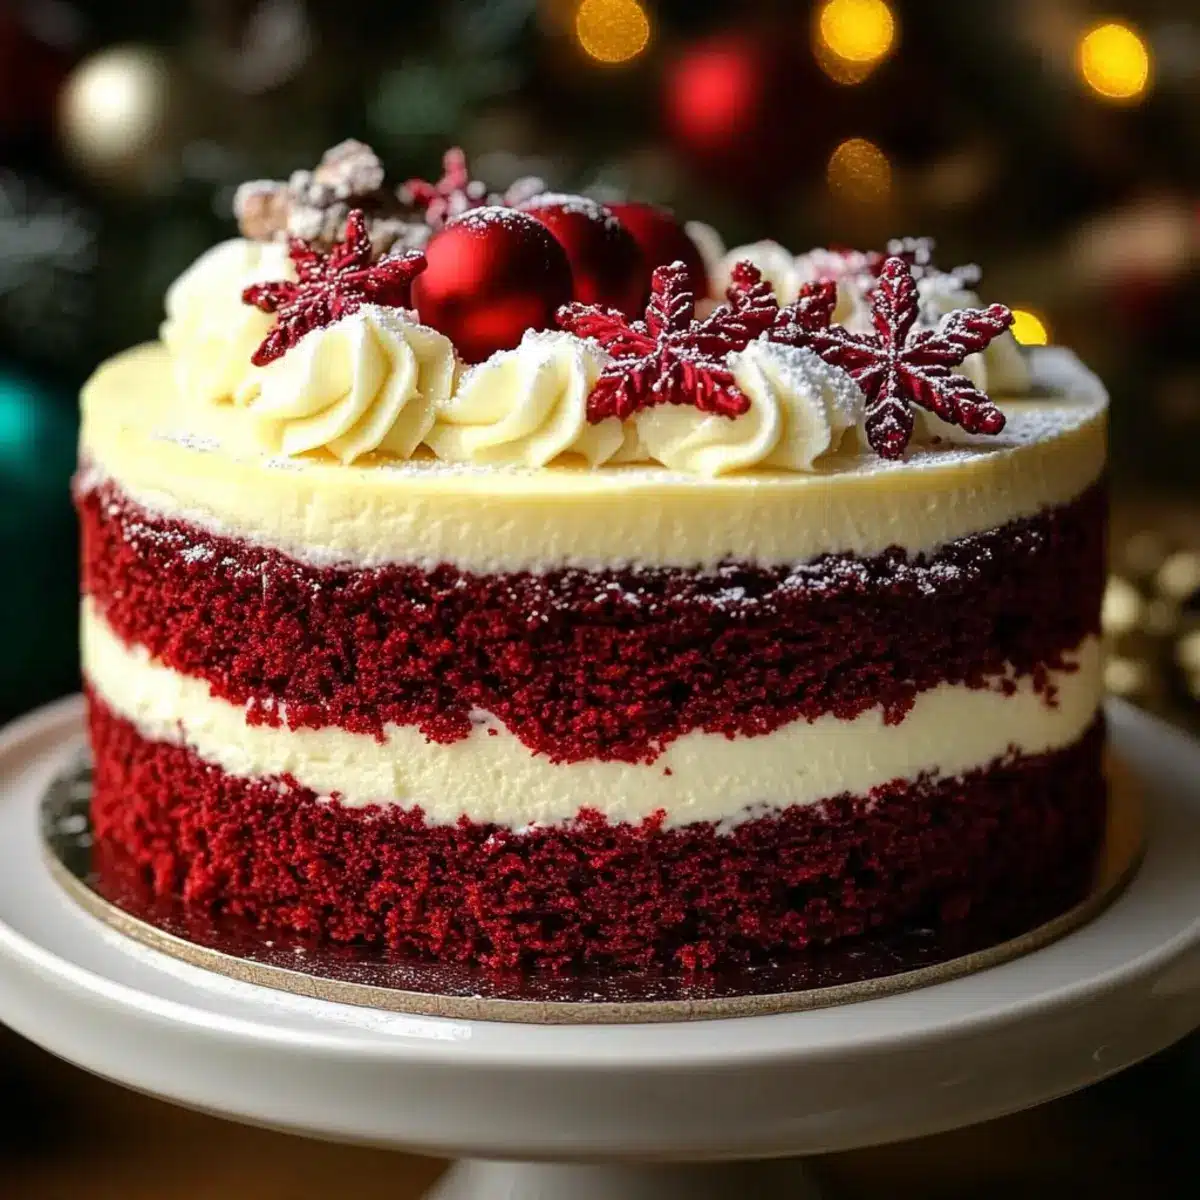
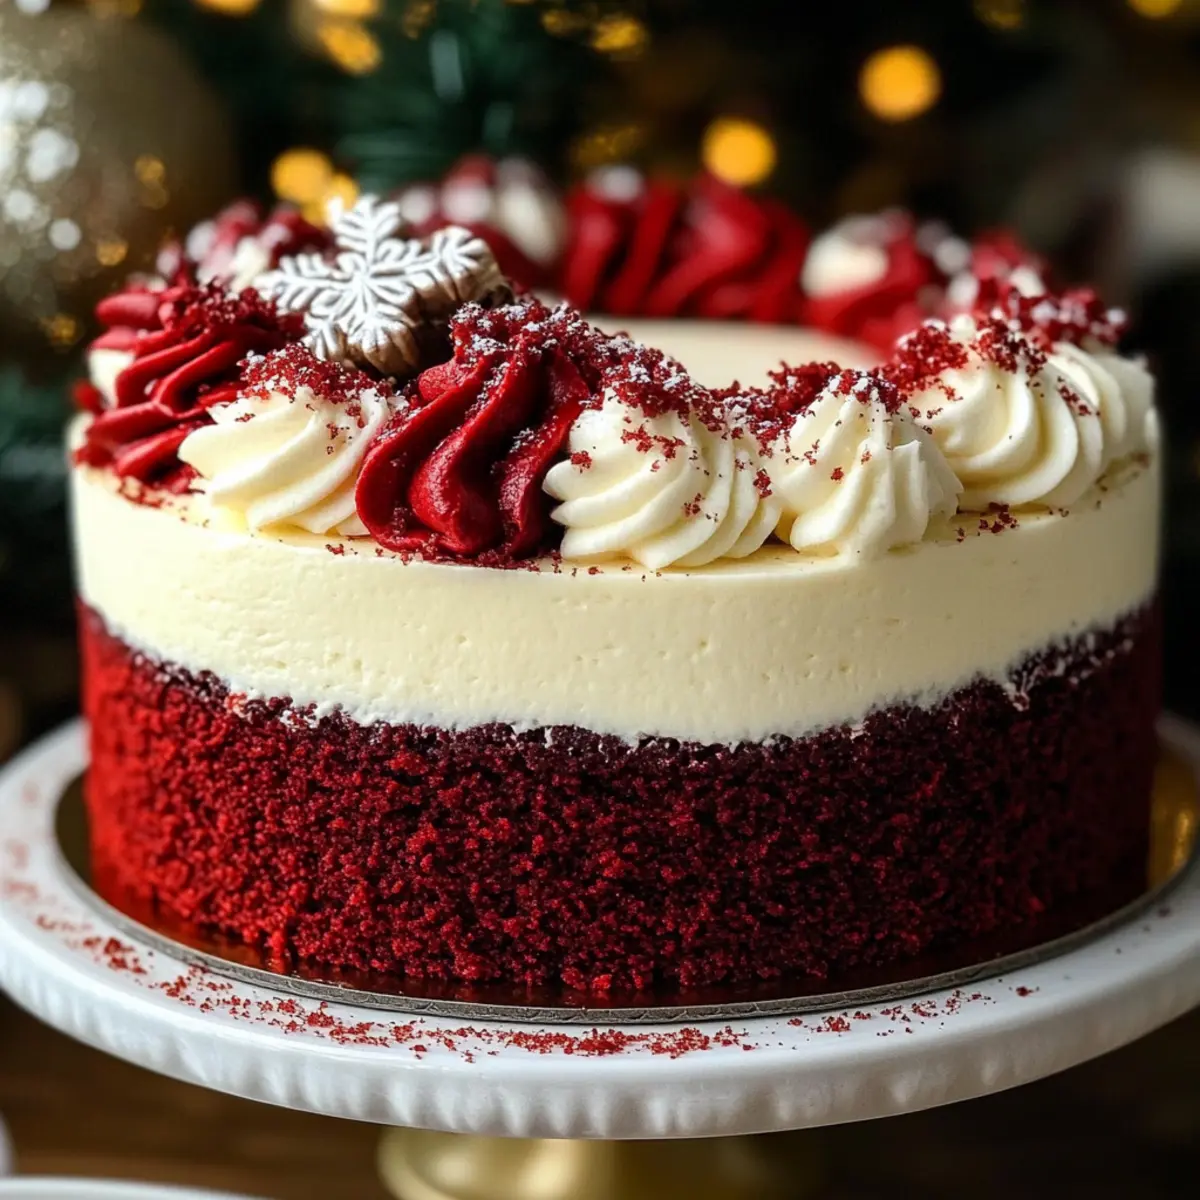
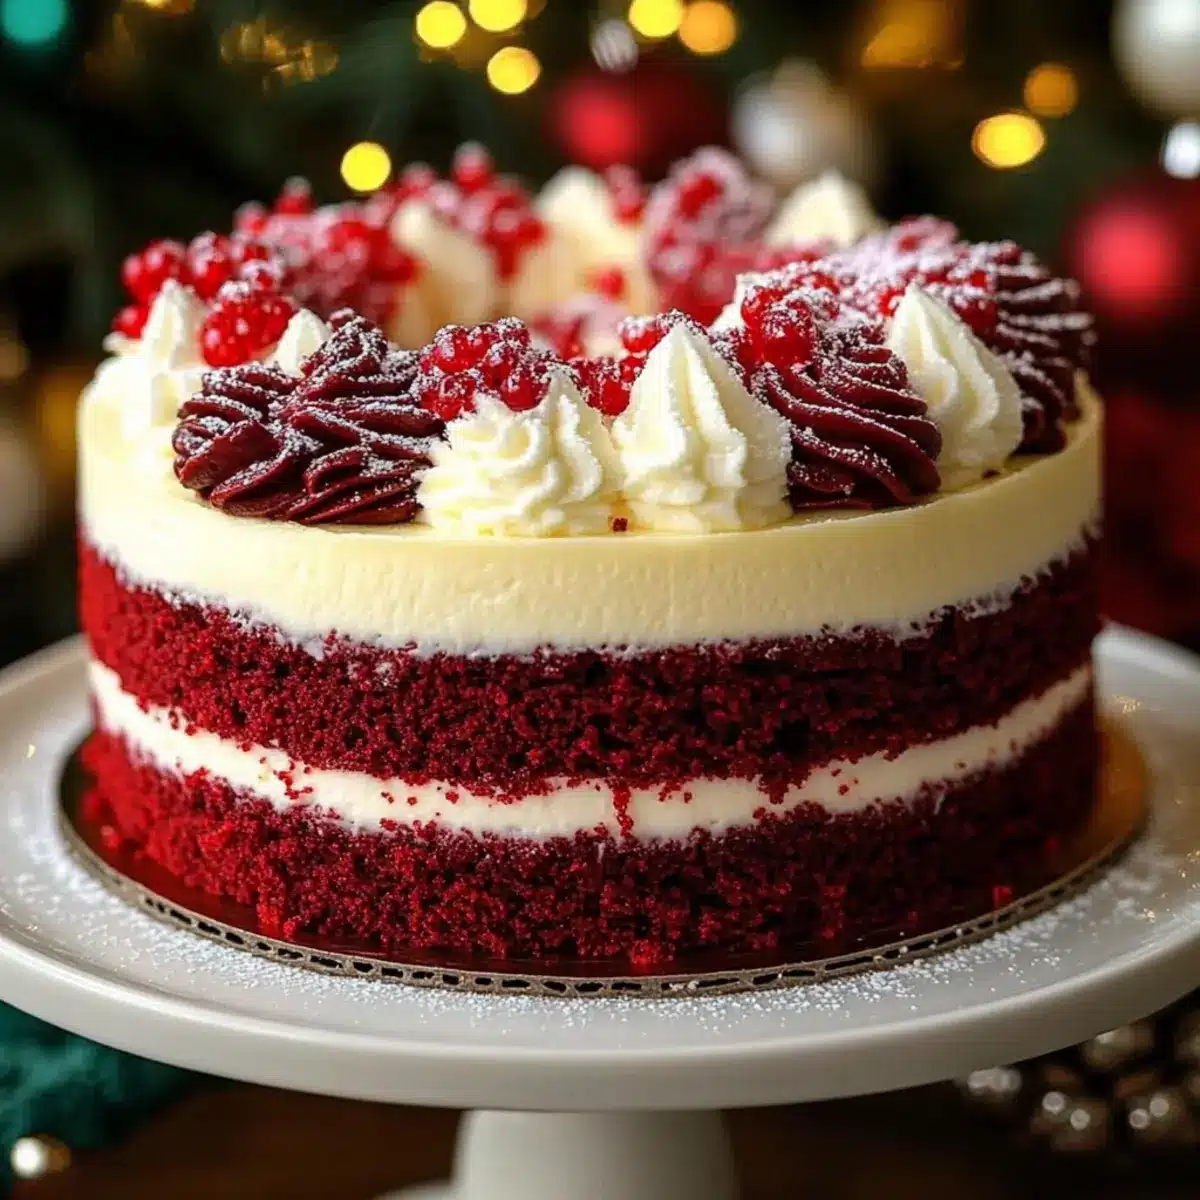
Every holiday season brings its own charm, but have you ever considered the magic of a showstopper dessert? Enter the Christmas Red Velvet Cheesecake—an extraordinary creation that artfully combines the classic allure of red velvet cake with the creamy delight of cheesecake. This festive treat not only dazzles the eye with its vibrant red and elegant white layers, but it also transforms ordinary gatherings into memorable celebrations. With a preparation time that won’t steal your entire day and taste so rich it’ll have everyone asking for seconds, this cheesecake is perfect for making spirits bright. Are you ready to impress your loved ones and elevate your holiday dessert game? Let’s dive into the details!
Why Is This Cheesecake a Holiday Must-Have?
Indulgent Richness: The blend of velvety red velvet cake and creamy cheesecake creates a rich flavor that’s perfect for festive celebrations.
Visually Stunning: With its deep red and white contrast, this cheesecake is a true showstopper that will impress your guests at any gathering.
Easy to Make: Simplifying the traditional cheesecakes, this recipe is designed to be accessible for everyone, even if you’re new to baking!
Versatile Variations: Feeling adventurous? Try adding chocolate chips or natural beet juice for a healthier hue—endless possibilities await!
Perfect for Sharing: This delightful dessert is sure to be a crowd-pleaser, making it an ideal choice for holiday parties or family dinners.
Elevate your dessert game this holiday season and don’t forget to check out other festive ideas like our Fried Strawberry Cheesecake or Cheesecake Stuffed Baked Apples for more delicious treats!
Christmas Red Velvet Cheesecake Ingredients
For the Cake Layers
• All-purpose flour – Provides structure; substitute with gluten-free flour blends for a gluten-free version.
• Unsweetened cocoa powder – Enhances the chocolate flavor; high-quality cocoa is recommended for the best results.
• Baking powder – Helps the cake rise; always check for freshness to ensure it works effectively.
• Baking soda – Acts as a leavening agent for the cake.
• Salt – Balances sweetness and enhances flavor throughout.
• Granulated sugar – Sweetens both the cake and cream cheese layers; adjust to taste if desired.
• Vegetable oil – Adds moisture; can be swapped with melted coconut oil for a different flavor.
• Buttermilk – Provides acidity for a tender crumb; milk mixed with vinegar can be used in a pinch.
• Eggs – Bind the ingredients; use flax eggs for a vegan alternative.
• Red food coloring – Achieves that vibrant red hue; gel food coloring is recommended to avoid any texture changes.
• Vanilla extract – Adds depth to flavors in both the cake and cheesecake layers.
• White vinegar – Reacts with baking soda to create a lighter texture in the cake.
For the Cheesecake Layer
• Cream cheese – Forms the core filling; using full-fat cream cheese will offer richer flavor.
• Sour cream – Adds moisture and a tangy taste; Greek yogurt is a great substitute.
• Unsalted butter – Used for frosting, enhancing richness; vegan butter can be used for a dairy-free version.
• Powdered sugar – Sweetens the frosting and gives it a smooth texture; sifted for best results.
Make your holiday gatherings unforgettable with this luxurious Christmas Red Velvet Cheesecake!
Step‑by‑Step Instructions for Christmas Red Velvet Cheesecake
Step 1: Prepare Cake Layers
In a mixing bowl, whisk together 2 cups of all-purpose flour, 2 tablespoons of unsweetened cocoa powder, 1 teaspoon of baking powder, 1 teaspoon of baking soda, and ½ teaspoon of salt. In another bowl, combine 1 cup of granulated sugar, 1 cup of vegetable oil, 1 cup of buttermilk, 2 large eggs, 2 tablespoons of red food coloring, 2 teaspoons of vanilla extract, and 1 teaspoon of white vinegar. Mix until smooth, then gradually add the dry ingredients and stir until just combined.
Step 2: Bake
Preheat your oven to 350°F (175°C) and grease two 9-inch round cake pans. Pour the prepared red velvet batter evenly into the pans, smoothing the tops as needed. Bake for 25-30 minutes, or until a toothpick inserted into the center of the cakes comes out clean. Allow the cakes to cool in the pans for 10 minutes before transferring them to wire racks to cool completely.
Step 3: Make Cheesecake Filling
In a large mixing bowl, beat 16 ounces of cream cheese and ¾ cup of granulated sugar on medium speed until smooth and creamy. Add in 1 cup of sour cream, 2 large eggs, and 1 teaspoon of vanilla extract, mixing until fully combined and no lumps remain. The cheesecake filling should be thick and creamy, perfect for layering in between the red velvet cake.
Step 4: Bake Cheesecake Layer
Preheat your oven to 325°F (160°C) and grease a 9-inch springform pan. Pour the cheesecake filling into the prepared pan and spread it evenly. Bake for 50-60 minutes, or until the edges are set but the center still has a slight jiggle. Turn off the oven and leave the cheesecake inside with the door slightly ajar to cool gradually, which helps prevent cracking.
Step 5: Assemble Cake
Once all the layers are completely cooled, place one red velvet cake layer on a serving plate. Carefully remove the cheesecake layer from the springform pan and set it on top of the first cake layer. Finish by placing the second red velvet cake layer on top, aligning it carefully to create a beautiful layered effect with the Christmas Red Velvet Cheesecake.
Step 6: Frost
In a mixing bowl, whip ½ cup of unsalted butter and 1 teaspoon of vanilla extract until creamy and smooth. Gradually add in 4 cups of sifted powdered sugar, mixing until fluffy and well combined. Use this creamy frosting to generously coat the top and sides of the assembled Christmas Red Velvet Cheesecake, creating a festive finish.
Step 7: Chill & Serve
Refrigerate the frosted cake for at least 2 hours to allow it to set properly. This cooling time not only firms up the cheesecake but also intensifies the flavors. Once chilled, slice the cake and serve it to your holiday guests, enjoying the delightful combination of red velvet and cheesecake layers!

What to Serve with Christmas Red Velvet Cheesecake
The perfect festive dessert deserves delightful companions that enhance its charm and flavors.
-
Creamy Mashed Potatoes: The buttery richness of creamy mashed potatoes contrasts beautifully, providing a savory counterpoint to the sweet cheesecake.
-
Sparkling Wine: A crisp sparkling wine elevates the celebration, balancing the cheesecake’s richness with refreshing bubbles that cleanse the palate.
-
Hot Cocoa: Cozy hot cocoa topped with whipped cream warms the heart and complements the indulgent flavors of the cheesecake during chilly holiday nights.
-
Roasted Brussels Sprouts: These caramelized, slightly bitter Brussels sprouts add a crunch and earthy flavor that lightens the meal’s heaviness, serving as a vibrant side.
-
Peppermint Mocha: This festive coffee drink with its minty twist accentuates the seasonal spirit and pairs wonderfully with the sweet, decadent dessert.
-
Fresh Fruit Salad: A fruity medley brings brightness to your plate, offering a refreshing finish to balance the richness of the Christmas Red Velvet Cheesecake.
-
Gingerbread Cookies: The warm spices of gingerbread cookies create an inviting atmosphere, enhancing the holiday delight of your dessert table.
-
Whipped Cream: A dollop of fresh whipped cream adds lightness and enhances the cheesecake’s creamy texture, making the dessert even more enjoyable.
Create a memorable feast this holiday season by pairing your Christmas Red Velvet Cheesecake with these delightful options!
Make Ahead Options
These Christmas Red Velvet Cheesecake layers are perfect for meal prep, allowing you to enjoy more time with your loved ones during the holidays. You can prepare the red velvet cake layers up to 24 hours in advance. Simply bake and cool the layers, wrap them tightly in plastic wrap, and refrigerate to maintain their moisture. The cheesecake layer can be baked up to 3 days ahead; let it cool completely before covering it with plastic wrap and placing it in the fridge. On the day of serving, assemble the cake by stacking the layers and frosting it. This way, you’ll have a stunning dessert that’s just as delicious, while saving precious time for holiday festivities!
How to Store and Freeze Christmas Red Velvet Cheesecake
Fridge: Store leftover cheesecake in an airtight container for up to 5 days; this preserves its rich flavor and creamy texture until you’re ready to enjoy another slice.
Freezer: Wrap the cheesecake tightly in plastic wrap, then place it in a freezer-safe container to prevent freezer burn. It can be frozen for up to 2 months.
Thawing: When you’re ready to indulge, transfer the frozen cheesecake to the fridge for 6-8 hours to thaw gently, allowing flavors to revive beautifully.
Reheating: Avoid reheating cheesecake in the microwave; instead, let it come to room temperature on the counter for an hour before serving to enhance its flavor and texture.
Tips for the Best Christmas Red Velvet Cheesecake
-
Room Temperature Ingredients: Ensure that your cream cheese and eggs are at room temperature for a smooth, lump-free cheesecake filling.
-
Fresh Baking Powder: Always check the freshness of your baking powder. Old baking powder can result in a dense cake instead of light layers.
-
Cool Gradually: After baking the cheesecake layer, let it cool in the oven with the door slightly open. This prevents cracks and maintains a beautiful texture in your Christmas Red Velvet Cheesecake.
-
Sift Powdered Sugar: For the frosting, sift your powdered sugar before mixing. This ensures a smooth, fluffy frosting that spreads beautifully.
-
Chill Before Serving: Refrigerate your assembled cake overnight if possible. This allows the flavors to meld and results in a more cohesive slice.
-
Gel Food Coloring: Always use gel food coloring for that vibrant red hue without altering the texture of your cake.
Christmas Red Velvet Cheesecake Variations
Feel free to get creative and customize this beautiful cheesecake to match your flavor preferences and dietary needs!
-
Gluten-Free: Use a gluten-free flour blend to make this delightful dessert accessible for everyone at your holiday table.
-
Vegan Option: Swap eggs for flax eggs and use dairy-free cream cheese and butter for a completely vegan dessert that doesn’t compromise on flavor.
-
Chocolate Chip Delight: Incorporate semi-sweet or white chocolate chips into the cheesecake filling for added richness and a delightful surprise in every slice.
-
Natural Coloring: Replace red food coloring with natural beet juice for a healthier alternative that still gives a lovely hue to your cheesecake.
-
Flavor Infusions: Experiment with almond or peppermint extract instead of vanilla for a unique flavor twist that complements the festive spirit.
-
Moisture Boost: Add a layer of homemade fruit jam, like raspberry or cherry, between the cheesecake and cake layers. The burst of fruitiness will elevate the entire dessert.
-
Nutty Crunch: Fold in crushed walnuts or pecans into the cake batter for a delightful crunch and added texture that contrasts beautifully with the smooth cheesecake.
-
Heat Factor: For a spicy kick, mix in a touch of cinnamon or cayenne pepper into the cake batter. This unexpected twist can elevate the flavors while enhancing the holiday spirit.
Explore these variations, and don’t miss out on other festive treats like our Roasted Red Pepper Salmon or Red Wine Braised Meatballs to make your holiday spread even more memorable!
Christmas Red Velvet Cheesecake Recipe FAQs
What type of food coloring should I use in the cheesecake?
Absolutely, I recommend using gel food coloring for the brightest and most vibrant red color! Gel food coloring ensures that the texture of your cake remains unaffected while providing that stunning holiday hue. Liquid food coloring can make your batter runny, so stick with gel when creating your festive showstopper.
How long can I store leftover cheesecake in the fridge?
You can keep your Christmas Red Velvet Cheesecake in the refrigerator for up to 5 days. Make sure to store it in an airtight container to maintain its rich flavor and creamy texture. If you’re like me and love dessert with a coffee in the morning, I find that this cheesecake tastes great as a breakfast treat too!
Can I freeze the cheesecake? If so, how?
Yes, you can freeze your cheesecake for up to 2 months! Just wrap it securely in plastic wrap and then place it inside a freezer-safe container. This two-step process prevents freezer burn and keeps your cheesecake fresh. When you’re ready to enjoy it again, simply thaw it in the refrigerator for about 6-8 hours before serving.
What should I do if my cheesecake cracks during baking?
Very! It’s important to cool your cheesecake slowly to prevent cracks. After baking, turn off the oven and leave the cheesecake inside with the door slightly ajar for about an hour. This gradually brings down the temperature and helps avoid those unsightly cracks, ensuring a beautiful presentation when you slice into it.
Can I make this cheesecake gluten-free?
Absolutely! Substitute the all-purpose flour with a gluten-free flour blend, and your Christmas Red Velvet Cheesecake will be just as delightful. Ensure that your other ingredients, like baking powder, are gluten-free as well. There’s no need to miss out on this festive treat during the holidays!
Are there any dairy-free alternatives I can use?
Yes! To make this cheesecake dairy-free, use vegan cream cheese and vegan butter for the frosting. You can also swap regular butter with coconut oil for added flavor. This way, everyone can indulge in this luscious Christmas Red Velvet Cheesecake with their dietary preferences in mind!
Christmas Red Velvet Cheesecake for a Festive Holiday Treat
Ingredients
Equipment
Method
- In a mixing bowl, whisk together 2 cups of all-purpose flour, 2 tablespoons of unsweetened cocoa powder, 1 teaspoon of baking powder, 1 teaspoon of baking soda, and ½ teaspoon of salt. In another bowl, combine 1 cup of granulated sugar, 1 cup of vegetable oil, 1 cup of buttermilk, 2 large eggs, 2 tablespoons of red food coloring, 2 teaspoons of vanilla extract, and 1 teaspoon of white vinegar. Mix until smooth, then gradually add the dry ingredients and stir until just combined.
- Preheat your oven to 350°F (175°C) and grease two 9-inch round cake pans. Pour the prepared red velvet batter evenly into the pans, smoothing the tops as needed. Bake for 25-30 minutes, or until a toothpick inserted into the center comes out clean. Allow to cool in the pans for 10 minutes before transferring to wire racks to cool completely.
- In a large mixing bowl, beat 16 ounces of cream cheese and ¾ cup of granulated sugar on medium speed until smooth and creamy. Add 1 cup of sour cream, 2 large eggs, and 1 teaspoon of vanilla extract, mixing until fully combined and no lumps remain.
- Preheat your oven to 325°F (160°C) and grease a 9-inch springform pan. Pour the cheesecake filling into the prepared pan and spread it evenly. Bake for 50-60 minutes, or until the edges are set but the center still has a slight jiggle. Turn off the oven and leave the cheesecake inside with the door slightly ajar to cool gradually.
- Once all the layers are completely cooled, place one red velvet layer on a serving plate. Carefully remove the cheesecake layer from the springform pan and set it on top of the first cake layer. Finish by placing the second red velvet layer on top.
- In a mixing bowl, whip ½ cup unsalted butter and 1 teaspoon vanilla extract until creamy and smooth. Gradually add in 4 cups sifted powdered sugar, mixing until fluffy and well combined. Use this frosting to coat the top and sides of the cheesecake.
- Refrigerate the frosted cake for at least 2 hours to allow it to set properly. Once chilled, slice the cake and serve to your holiday guests.
Leave a Reply