
As I stood in my kitchen preparing dinner, the aroma of sizzling chicken with a sweet teriyaki glaze whisked me away to the bustling streets of Tokyo, where flavors dance in perfect harmony. That’s the magic of Chicken Onigiri—a delightful and quick snack that’s both portable and satisfying. With just a few ingredients and a simple prep process, you can create these finger-friendly rice triangles filled with tender chicken, making them the ultimate solution for a busy day or a stylish appetizer for your next gathering. Plus, they’re not only delicious but also a fantastic way to embrace a taste of Japanese culture right at home. Are you ready to twist up your snack game? Let’s dive into this mouthwatering recipe!
Why is Chicken Onigiri a must-try?
Simplicity of Preparation: Just a few ingredients and straightforward steps make this recipe so approachable, even for busy home cooks.
Savory, Sweet Fusion: The teriyaki chicken filling brings a delectable balance of flavors, making each bite a burst of deliciousness.
Perfect for Meal Prep: These portable rice triangles are great for on-the-go snacking, ideal for busy lunches or picnics.
Crowd-Pleasing Delight: With a unique taste profile, they are sure to impress at your next event — think of them as little gourmet treasures!
Versatile Filling Options: Feel free to experiment with different marinades, like spicy gochujang or even vegetables, to suit everyone’s palate.
Whether you’re planning a cozy meal or looking for a quick snack, these Chicken Onigiri will elevate your dining experience. Enjoy them warm or with a side of soy sauce for dipping, just like you would with Garlic Parmesan Chicken for a twist on flavor!
Chicken Onigiri Ingredients
For the Rice
• Cooked Sushi Rice – Use short-grain rice for the best sticky texture.
• Fine Salt – Enhances flavor distribution; ensure it’s fine to mix well.
• Furikake – Optional seasoning for extra taste; can be omitted if desired.
For the Chicken Filling
• Boneless Skinless Chicken Meat – Use thighs or ground chicken as alternatives for a tender filling.
• Soy Sauce – Offers umami flavor, essential for both the marinade and teriyaki sauce.
• Sake (or Water) – Helps to tenderize the chicken and adds flavor.
• Baking Soda – Critical for achieving a desirable chicken texture.
• Cornstarch – Thickens the chicken during cooking, ensuring a good consistency.
• Brown Sugar – Balances the saltiness of the teriyaki sauce with sweetness.
• Mirin – Adds depth and sweetness to the sauce for enhanced flavor.
• Minced Garlic – Contributes fragrant aroma and boosts the chicken’s flavor.
• Oil – For cooking; consider a lighter oil as a healthier alternative.
For Assembly
• Nori – Seaweed used for wrapping the finished onigiri; cut into small rectangles.
These Chicken Onigiri ingredients are simple yet flavorful, perfect for creating a memorable Japanese-inspired snack!
Step‑by‑Step Instructions for Chicken Onigiri
Step 1: Prepare the Sushi Rice
Rinse 4 cups of sushi rice under cold water until the water runs clear, ensuring any excess starch is removed. Cook the rice according to package instructions, typically by steaming for about 20 minutes. Once cooked, transfer the rice to a bowl and let it cool slightly. Gently fold in ½ teaspoon of fine salt and 2 tablespoons of furikake for added flavor, creating a savory base for your Chicken Onigiri.
Step 2: Marinate the Chicken
While the rice cools, cut boneless skinless chicken meat into small, bite-sized pieces. In a mixing bowl, combine chicken with 3 tablespoons of soy sauce, 2 tablespoons of sake, ½ teaspoon of baking soda, and 1 tablespoon of cornstarch. Let the chicken marinate in the fridge for 30 minutes; this ensures it absorbs the flavors while tenderizing perfectly for the upcoming filling.
Step 3: Whisk the Teriyaki Sauce
In a separate small bowl, mix together the teriyaki sauce ingredients: 3 tablespoons of soy sauce, 2 tablespoons of mirin, and 1 tablespoon of brown sugar. Stir until the sugar is fully dissolved and the mixture is well combined. This simple yet delicious sauce will bring out the best in your marinated chicken when it’s cooked, adding a rich, savory glaze to your Chicken Onigiri.
Step 4: Cook the Chicken
Heat 1 tablespoon of oil in a nonstick pan over medium heat. Add the marinated chicken pieces to the hot pan and stir-fry for about 2-3 minutes, or until the chicken is cooked through and no longer pink. The chicken should be golden brown and deliciously fragrant, creating a perfect foundation for the next step of your Chicken Onigiri.
Step 5: Add Flavor to the Chicken
Lower the heat slightly and toss in 2 cloves of minced garlic. Cook for an additional 30 seconds until fragrant, taking care not to burn the garlic. Next, pour in the teriyaki sauce and stir well to coat the chicken. Continue cooking for another 1-2 minutes until the sauce thickens and glazes the chicken beautifully, creating a luscious filling for your onigiri.
Step 6: Shape the Onigiri
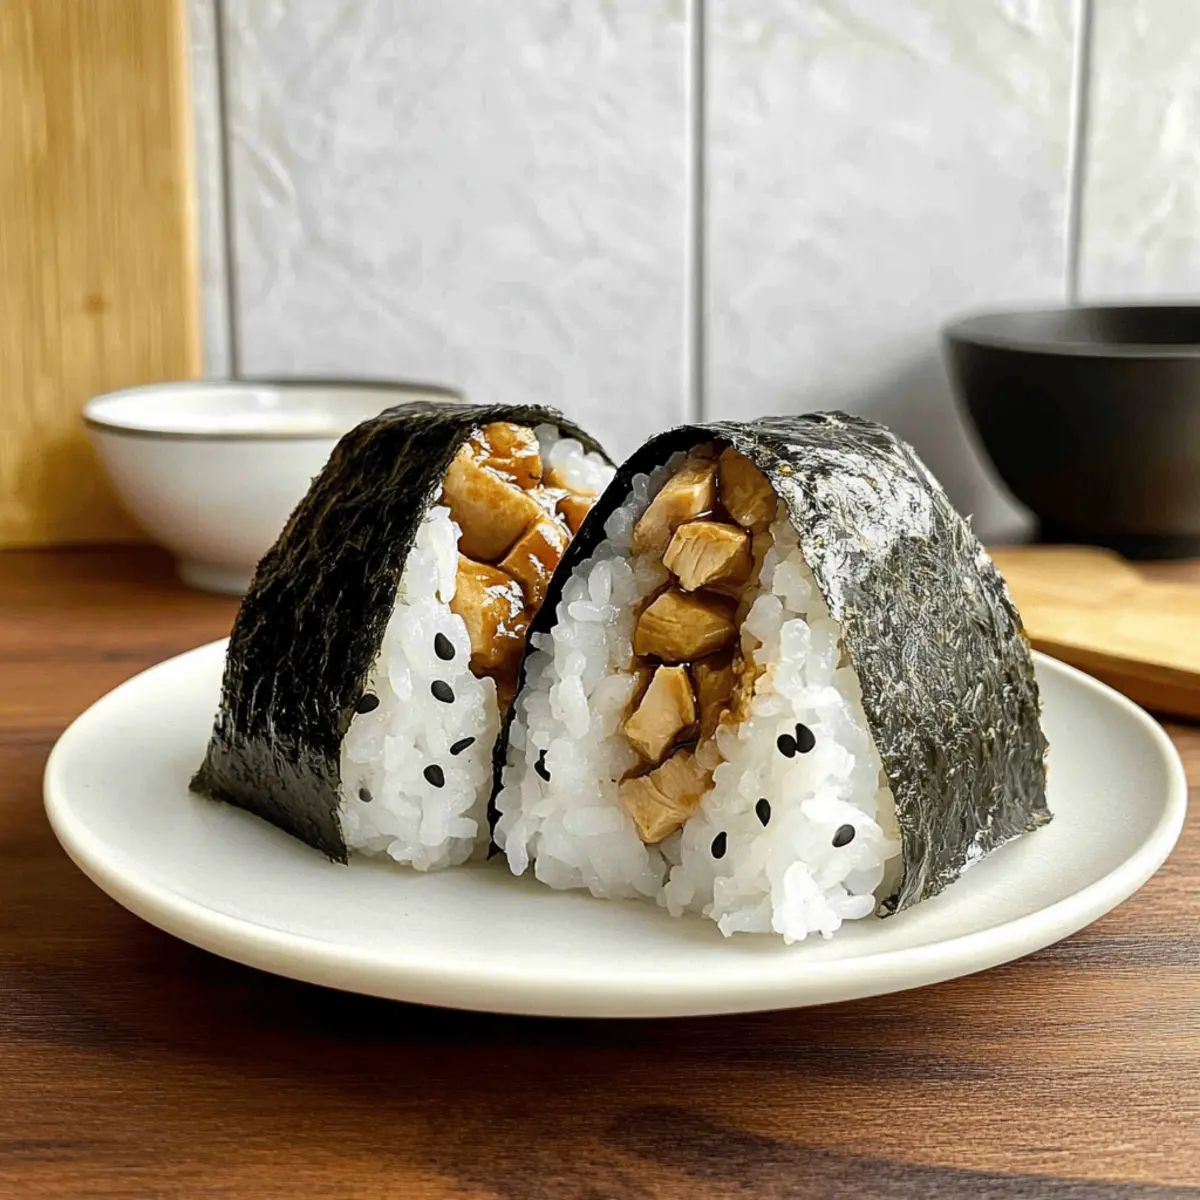
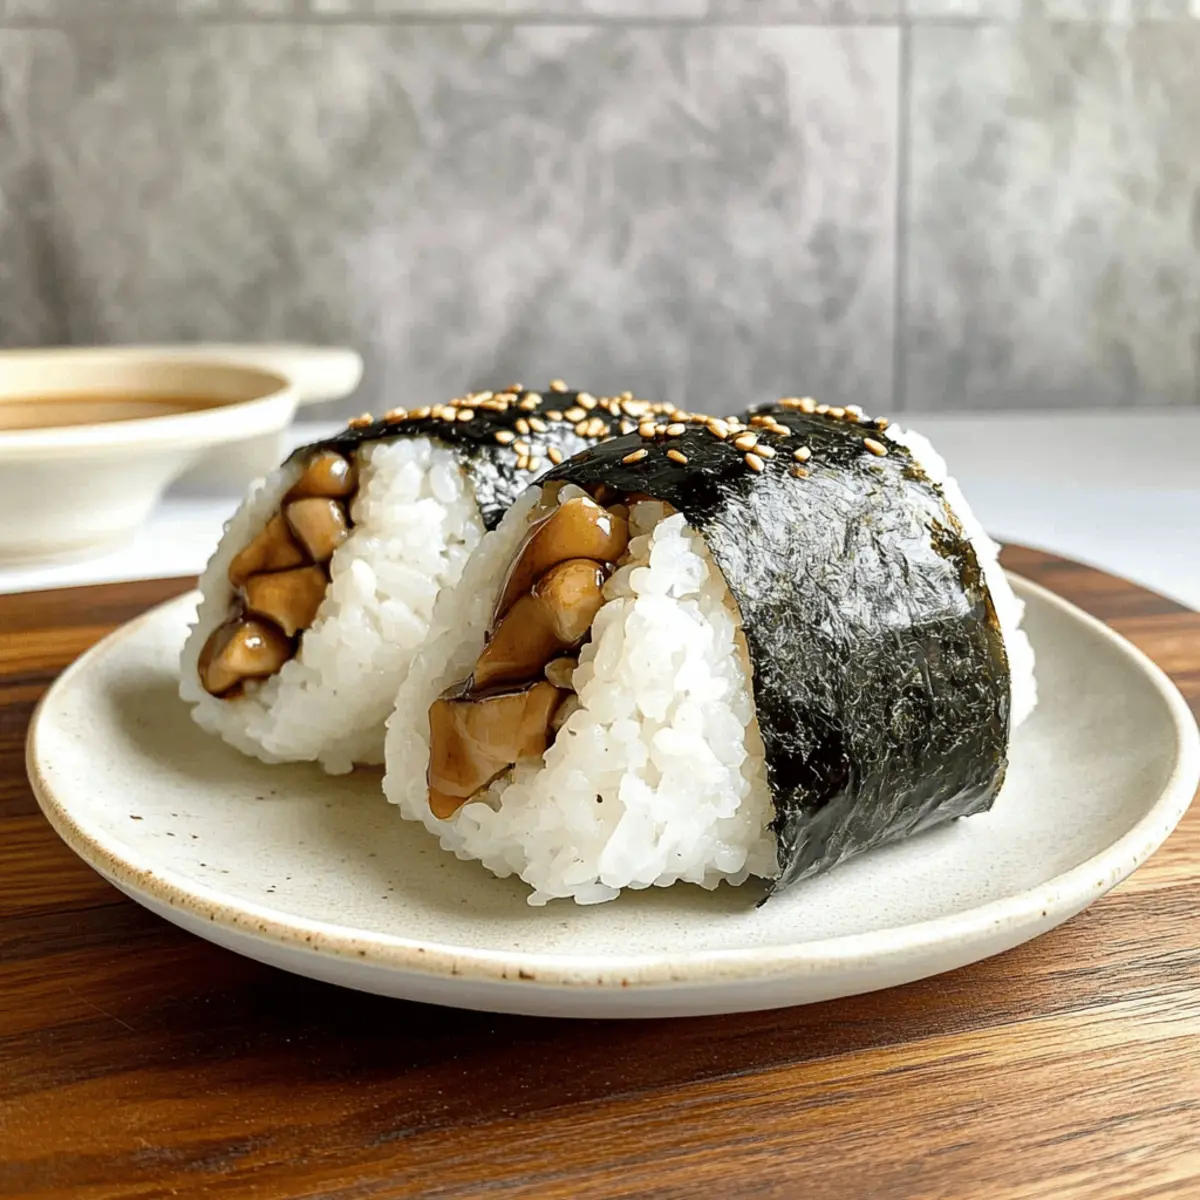
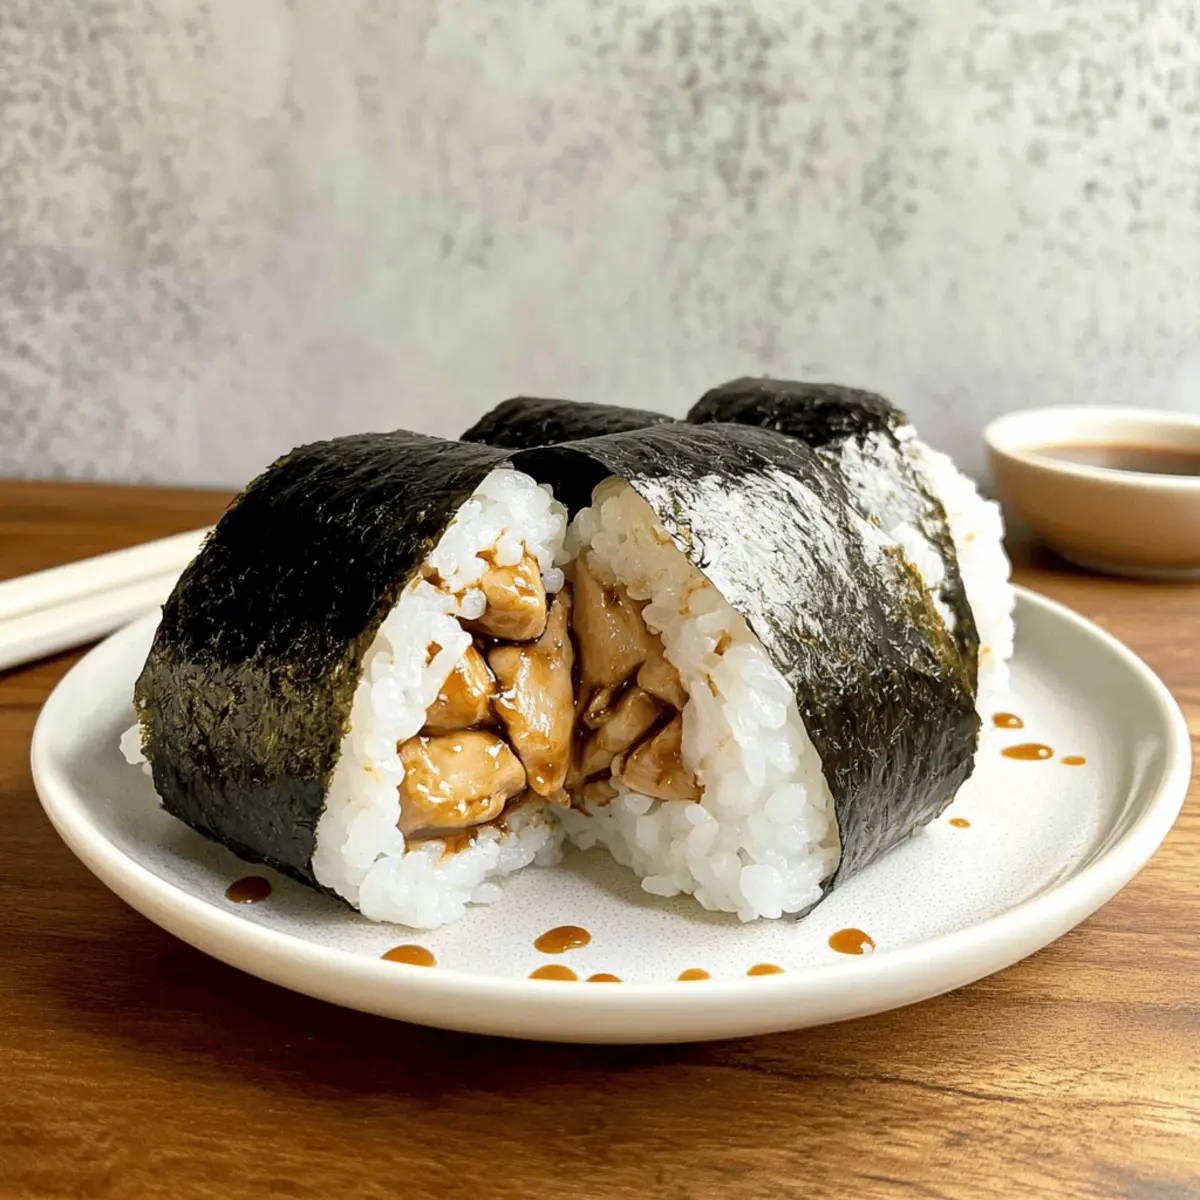
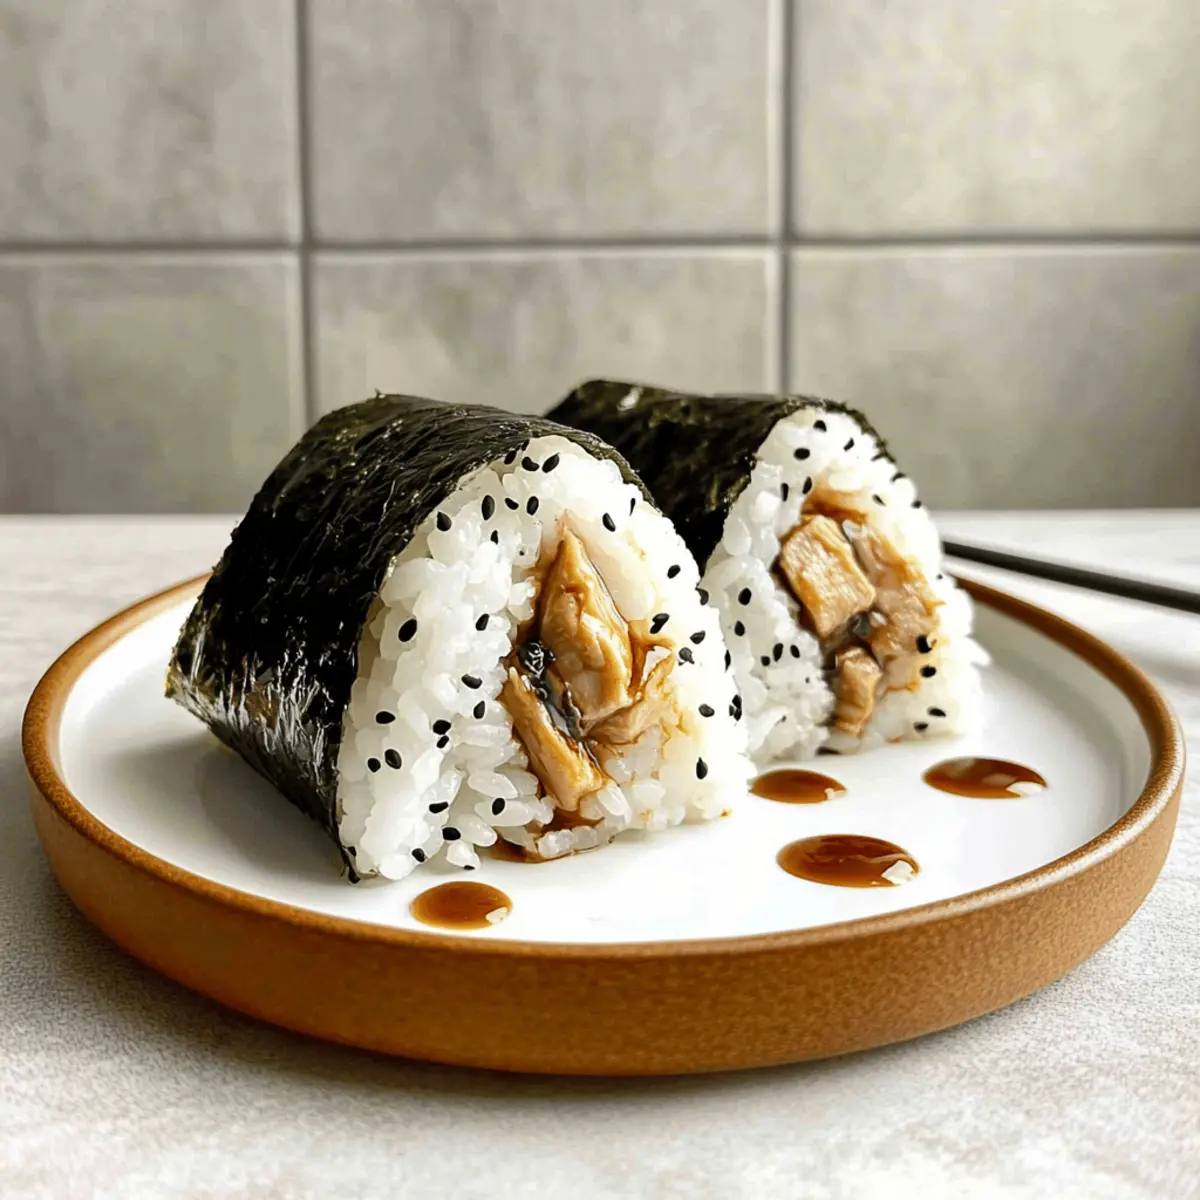
To form the Chicken Onigiri, wet your hands to prevent sticking. Scoop about ⅓ cup of the seasoned sushi rice into your palm, creating a shallow pocket in the center for the filling. Place 1 tablespoon of your teriyaki chicken mixture into the pocket and gently mold the rice around it. Press the rice firmly into a triangle shape, ensuring it holds together while maintaining that delightful filling.
Step 7: Wrap with Nori
Once shaped, take a small rectangle of nori and wrap it around the bottom of each Chicken Onigiri triangle, applying a gentle pressure to help it stick. The nori adds a crunchy texture and a hint of umami flavor to each bite, balancing the savory chicken within. Repeat this process with the remaining ingredients, producing a batch of delicious Chicken Onigiri ready for serving.
Storage Tips for Chicken Onigiri
Fridge: Store leftover Chicken Onigiri in an airtight container for up to 2 days. Keep them refrigerated to maintain freshness and flavor.
Freezer: You can freeze unwrapped Chicken Onigiri for up to 3 months. Wrap them individually in plastic wrap before placing them in a freezer-safe bag.
Reheating: To reheat, microwave the Chicken Onigiri for about 30-60 seconds until warm. For best texture, consider steaming them briefly to maintain that delightful stickiness.
Serving: Enjoy them at room temperature or warm, paired with soy sauce or pickled vegetables for dipping, to bring back the onigiri experience!
What to Serve with Teriyaki Chicken Onigiri?
Treat your taste buds to a delightful symphony of flavors and textures that perfectly complement your savory onigiri.
- Soy Sauce Dipping: A classic choice, soy sauce offers a salty kick, enhancing the umami flavor of the chicken filling.
- Pickled Vegetables: A refreshing crunch from pickled cucumbers or radishes cuts through the rich teriyaki taste, adding brightness to each bite.
- Edamame: Lightly salted steamed edamame provides a nutty flavor and chewy texture, making it a wonderful side for a complete meal.
- Miso Soup: This warm, comforting bowl balances the onigiri with its rich umami flavor, creating a cozy dining experience.
- Cucumber Salad: Thinly sliced cucumbers tossed in rice vinegar add a crispiness and tanginess that beautifully contrasts the savory rice triangles.
- Japanese Green Tea: Enjoy with a hot cup of green tea to cleanse the palate, enhancing the meal’s authentic Japanese experience with each sip.
- Fruit Skewers: Fresh fruit, like melon or strawberries, adds a sweet, refreshing finish to your meal, rounding out the flavors in a light way.
- Sweet Soy Glazed Brussels Sprouts: For an innovative twist, try these caramelized veggies that echo the teriyaki flavors while adding a delightful crunch.
Chicken Onigiri Variations & Substitutions
Get ready to unleash your culinary creativity with these delicious tweaks and swaps for your Chicken Onigiri!
- Dairy-Free: Replace any dairy-based sauces with coconut aminos for a soy-free, flavorful option.
- Spicy Kick: Add a tablespoon of sriracha or gochujang to the chicken marinade for that extra heat.
- Vegetarian Option: Substitute chicken with sautéed mushrooms and tofu for a delightful veggie-packed version.
- Crunchy Texture: Fold in finely chopped cucumbers or shredded carrots into your rice for a refreshing crunch.
- Umami Boost: Incorporate dried shiitake powder into the rice mixture for an earthy, savory depth.
- Pickled Fun: Tuck in some pickled ginger or daikon radish as a filling for a zesty bite that complements the teriyaki.
- Flavor Twist: Experiment with different sauces like hoisin or sweet chili to give your chicken a brand new taste profile.
- Seaweed Alternative: If nori isn’t available, try wrapping your onigiri in thinly sliced cucumber for a cool and crunchy touch.
With these ideas, you can transform your Chicken Onigiri into a whole new experience—just like the satisfying moments with Honey Pepper Chicken that leave your taste buds buzzing! Enjoy discovering your favorites!
Expert Tips for Chicken Onigiri
-
Perfect Rice Texture: Use short-grain sushi rice for the right stickiness. Make sure to rinse the rice thoroughly to remove excess starch.
-
Marination Time: Let the chicken marinate for at least 30 minutes to enhance the flavor depth. Skipping this step will diminish the teriyaki flavor in your chicken onigiri.
-
Avoid Sticking: Always wet your hands before handling rice to prevent sticking. However, don’t over-wet; a little moisture goes a long way.
-
Even Cooking: Don’t overcrowd the pan when cooking the chicken. This ensures uniform cooking and prevents steaming, which can lead to a less flavorful filling.
-
Storage Smart: Store any leftover chicken onigiri in an airtight container in the fridge. They’re best consumed within 2 days for optimal freshness.
Make Ahead Options
These Chicken Onigiri are perfect for meal prep enthusiasts! You can prepare the sushi rice up to 24 hours in advance by cooking and seasoning it, then refrigerating it in an airtight container. The marinated chicken filling can also be prepped up to 3 days ahead; simply cut the chicken and combine it with the marinade before storing it in the fridge. When you’re ready to serve, cook the marinated chicken as directed, form your onigiri, and wrap them with nori just before serving to maintain that delightful crunch. This way, you’ll have delicious, homemade Chicken Onigiri on hand for stress-free snacking or entertaining!
Chicken Onigiri Recipe FAQs
What type of rice should I use for Chicken Onigiri?
Absolutely, use short-grain sushi rice for the best sticky texture that holds the onigiri together. This type of rice has a higher starch content, which helps bind the rice into those perfect triangular shapes. Rinse the rice under cold water until the water runs clear to remove excess starch before cooking.
How long can I store Chicken Onigiri in the fridge?
You can store leftover Chicken Onigiri in an airtight container in the fridge for up to 2 days. To maintain their freshness and flavor, keep them tightly sealed. If you notice any dark spots or a change in texture, it’s best to discard them.
Can I freeze Chicken Onigiri and how?
Yes! You can freeze unwrapped Chicken Onigiri for up to 3 months. Simply wrap each onigiri individually in plastic wrap and place them in a freezer-safe bag or container. This method helps to preserve their flavor and texture. To reheat, microwave them for about 30-60 seconds or steam them briefly for the best results.
What can I do if my Chicken Onigiri fall apart?
If your onigiri are falling apart, it might be due to the rice being too dry or not sticky enough. Make sure to use short-grain sushi rice and rinse it thoroughly before cooking. Adding a little more water next time (about 15%) can really help achieve that ideal sticky consistency. Also, when shaping, ensure you’re pressing the rice firmly enough to hold its shape.
Are Chicken Onigiri suitable for individuals with gluten allergies?
If you have gluten allergies, you need to be cautious with Chicken Onigiri. The soy sauce traditionally used is made from wheat. As an alternative, you can use gluten-free soy sauce or tamari, which provides the same umami flavor without the gluten. Always check the labels to ensure safety.
Can I make Chicken Onigiri with alternative fillings?
Very! Chicken Onigiri is quite versatile, so feel free to experiment with different fillings. If you’re looking for something vegetarian, consider adding grilled vegetables, tofu, or even spicy gochujang paste for a kick. Don’t hesitate to mix and match to create your favorite flavors!
Savory Chicken Onigiri - Easy Snack for Busy Days
Ingredients
Equipment
Method
- Rinse sushi rice under cold water until the water runs clear. Cook according to package instructions, typically by steaming for about 20 minutes. Transfer to a bowl and let cool slightly. Fold in fine salt and furikake.
- Cut chicken into small pieces. In a bowl, combine with soy sauce, sake, baking soda, and cornstarch. Marinate in the fridge for 30 minutes.
- In a small bowl, mix teriyaki sauce ingredients: soy sauce, mirin, and brown sugar. Stir until well combined.
- Heat oil in a nonstick pan over medium heat. Add marinated chicken and stir-fry for 2-3 minutes until cooked through.
- Lower heat, add minced garlic, and cook for 30 seconds. Pour in teriyaki sauce and stir well to coat chicken. Cook for another 1-2 minutes until sauce thickens.
- Wet hands, scoop about ⅓ cup rice into palm, creating a pocket. Place 1 tablespoon of filling into the pocket and mold rice into a triangle shape.
- Wrap a small rectangle of nori around the bottom of each triangle, applying gentle pressure to help it stick.
Leave a Reply