
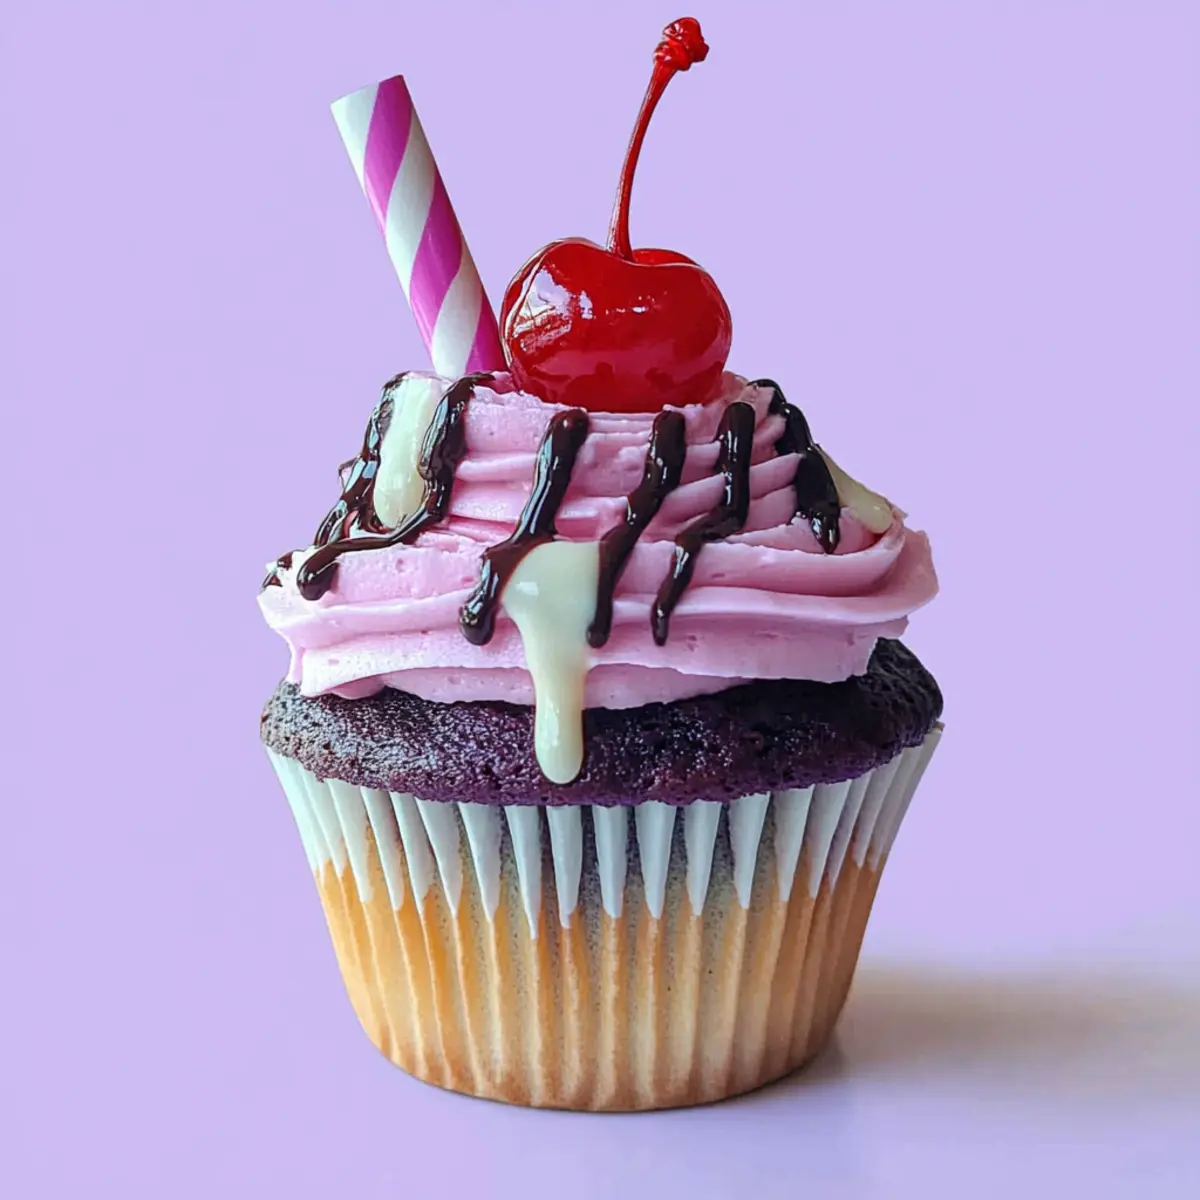
As I stood in my kitchen, the aroma of cherries and malt wafted through the air, transporting me back to sun-drenched summers and carefree days. These Cherry Malt Milkshake Cupcakes are my sweet homage to that nostalgia, combining the indulgent flavors of a classic milkshake with the fluffy delight of a cupcake. Not only are they visually stunning with pops of vibrant color, but they also offer a creamy texture that will have everyone reaching for seconds. Perfect for parties or simply as a delightful dessert, these treats come together quickly, making them ideal for busy home chefs who crave homemade goodness without the hassle. Are you ready to whip up a batch and create some cherry-flavored magic?
Why are these cupcakes so special?
Unique Twist: These Cherry Malt Milkshake Cupcakes are a refreshing twist on traditional cupcakes, combining the nostalgic flavors of a milkshake with the texture of a light and fluffy dessert.
Easy to Make: The straightforward steps mean even novice bakers can create stunning results, allowing you to impress your friends without feeling overwhelmed.
Crowd-Pleasing: Bright, vibrant colors and rich cherry flavor make these cupcakes perfect for any occasion, whether it’s a birthday party or a casual family gathering.
Versatile Ingredients: With adaptable substitutions for various dietary needs, these cupcakes can cater to gluten-free or vegan diets, so no one has to miss out on the fun!
Nostalgic Delight: Reminiscent of carefree summer days, the delightful cherry malt flavor brings smiles and sweet memories that everyone will love.
Elevate your dessert game and make these cupcakes the star of your next gathering!
Cherry Malt Milkshake Cupcake Ingredients
Discover the simple ingredients for these delightful Cherry Malt Milkshake Cupcakes that will make your taste buds dance!
For the Batter
- All-purpose flour – Provides the perfect structure and texture; can use gluten-free flour for a gluten-free version.
- Caster sugar (superfine) – Ensures sweetness and moisture retention; granulated sugar can also work if you grind it down for a finer texture.
- Baking powder – A crucial leavening agent for fluffiness; no substitutes recommended.
- Fine salt – Enhances the overall flavors; can be omitted for low-sodium versions.
- Unsalted butter – Adds richness and moisture; can use margarine or dairy-free butter for a vegan option.
- Large eggs – Essential for structure and moisture; substitute with flaxseed meal mixed with water for a vegan alternative.
- Whole milk – Contributes creaminess and moisture; almond milk or other non-dairy milk work as substitutes.
- Cherry juice – Delivers vibrant cherry flavor and moisture; use juice from canned cherries or substitute with pure cherry extract.
- Vegetable oil – Promotes tenderness and moisture; melted coconut oil or applesauce can be used instead.
- Greek yogurt or sour cream – Enhances moisture and texture; silken tofu can serve as a vegan substitute.
- Vanilla extract or vanilla bean paste – Elevates flavor; extra vanilla can also work if in a pinch.
- Canned cherries – Brings delightful sweet cherry bites; fresh cherries are a great seasonal alternative.
For Decoration
- Chocolate sauce – Adds a sweet drizzle and decorative flair; any chocolate syrup will do.
- Maraschino cherries – A classic topping for visual appeal; can omit or swap with chocolate-covered cherries.
- Pink food gel – Enhances the visual with a burst of color; any food color can achieve similar aesthetics.
- Purple food gel – An optional addition for extra visual appeal.
- Cherry brandy essence – Intensifies the rich cherry flavor; substitute with any cherry-flavored extract if unavailable.
- Malt powder – Infuses the delightful malt flavor reminiscent of milkshakes; can be omitted for simplicity.
Prepare to create a beautiful batch of delightful Cherry Malt Milkshake Cupcakes that will wow your family and friends!
Step‑by‑Step Instructions for Cherry Malt Milkshake Cupcakes
Step 1: Preheat the Oven
Start by preheating your oven to 180°C (356°F) for conventional or 160°C (320°F) for fan-forced settings. This ensures that your Cherry Malt Milkshake Cupcakes bake evenly and rise perfectly. While the oven warms up, you can start preparing your cupcake tin, setting the stage for your delicious treats.
Step 2: Prepare the Cupcake Tin
Line a cupcake tin with colorful cupcake liners. This step not only helps with easy removal of the cupcakes later but also adds a fun, festive touch to your baking. Make sure to have all your ingredients measured and ready, as this will streamline the baking process for your Cherry Malt Milkshake Cupcakes.
Step 3: Mix Dry Ingredients
In a stand mixer, combine all-purpose flour, baking powder, caster sugar, and fine salt. Mix these ingredients on low speed until fully combined, about 1-2 minutes. The mixture should resemble sandy granules when finished. This step lays the foundation for a fluffy cupcake, so take your time to ensure everything is well mixed.
Step 4: Incorporate Wet Ingredients
Add the softened unsalted butter to the dry mix, then beat on medium speed until the texture resembles fine sand, about 3 minutes. Next, in a separate bowl, whisk together the milk, eggs, Greek yogurt, vegetable oil, cherry juice, and vanilla extract until smooth. This rich mixture will bring moisture and flavor to your Cherry Malt Milkshake Cupcakes.
Step 5: Combine Wet and Dry Mixtures
Slowly incorporate the wet ingredients into the dry mixture, mixing on low speed until just combined. Be careful not to overmix; you want your batter to be smooth but not completely devoid of lumps. This mixing step is crucial for achieving the perfect fluffy texture in your cupcakes, reminiscent of a classic milkshake.
Step 6: Add Flavor Enhancements
Gently fold in the cherry brandy essence and the pink and purple food gels until the batter showcases a pleasing swirl of color. This step not only enhances the taste of your Cherry Malt Milkshake Cupcakes but also adds vibrant aesthetic appeal, making your treats irresistibly eye-catching.
Step 7: Fill the Cupcake Liners
Spoon the batter into the prepared cupcake liners, filling each about two-thirds full. Place 4 cherries in each cupcake liner, pressing them gently into the batter so they nestle in nicely. This step ensures that every bite bursts with juicy cherry flavor, enhancing the overall experience of your delightful cupcakes.
Step 8: Bake the Cupcakes
Bake the cupcakes in the preheated oven for 20-25 minutes, or until a toothpick inserted into the center comes out clean. Your Cherry Malt Milkshake Cupcakes should rise beautifully and take on a golden hue. Make sure to rotate the tin halfway through baking to ensure even cooking.
Step 9: Cool the Cupcakes
Allow the cupcakes to cool in the tin for about 10 minutes before transferring them to a wire rack to cool completely. This cooling step is vital, as it prevents the frosting from melting when you start decorating. Patience will pay off, making your cupcakes even more enjoyable to eat.
Step 10: Prepare the Frosting
In the meantime, prepare the frosting by mixing softened butter with food dyes and cherry brandy essence until combined. You want a smooth, creamy consistency with vibrant color, ideally suited for piping. This frosting will be the crown jewel of your Cherry Malt Milkshake Cupcakes, enhancing both flavor and presentation.
Step 11: Frost the Cupcakes
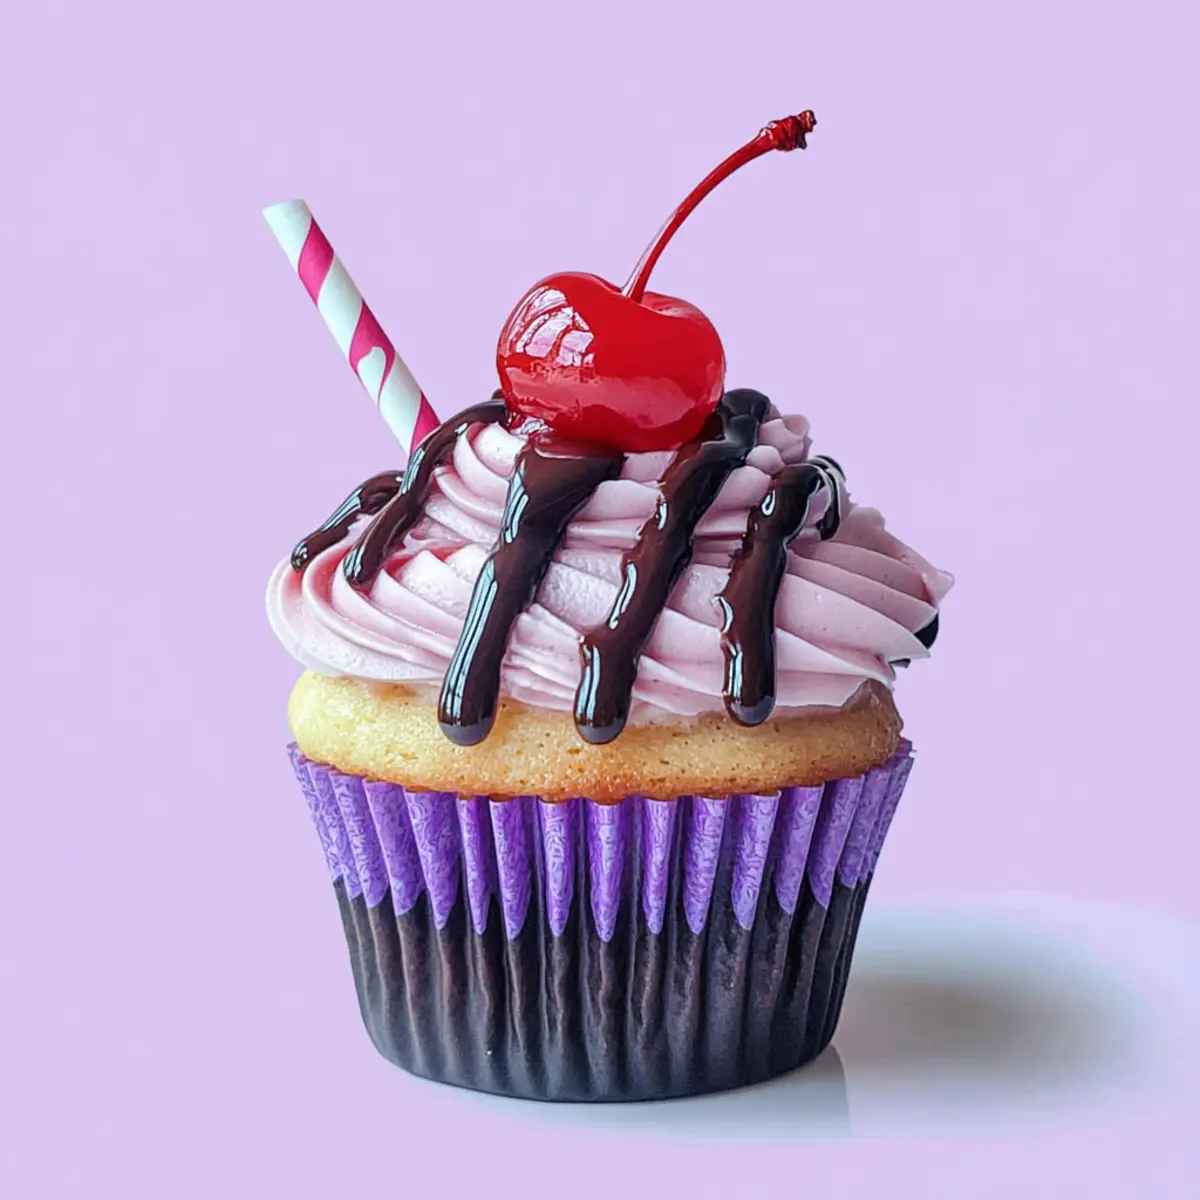
Once the cupcakes are completely cool, use a piping bag to decorate each one generously with the prepared frosting. Drizzle a bit of chocolate sauce over the top for added sweetness and visual appeal. This step will make your Cherry Malt Milkshake Cupcakes look decadent and tempting.
Step 12: Add Final Touches
Finish off by placing a maraschino cherry on each frosted cupcake as a delightful topping. This final touch not only adds an extra pop of color but also invites everyone to enjoy the nostalgic cherry flavor. Your beautifully decorated Cherry Malt Milkshake Cupcakes are now ready to dazzle and delight!

Cherry Malt Milkshake Cupcake Variations
Feel free to unleash your creativity and customize these cupcakes to match your flavor fantasies!
-
Berry Bliss: Swap cherry juice for strawberry or raspberry juice for a fruity twist that brightens up your cupcake experience.
-
Chocolate Cherry Delight: Use a chocolate cupcake base instead of vanilla for a decadent chocolate-cherry combination. Rich and satisfying, this variation is sure to delight chocolate lovers!
-
Cream Cheese Frosting: Frost with a tangy cream cheese icing instead of buttercream for a delightful contrast to the sweetness of the cupcake.
-
Nuts for Texture: Toss in some finely chopped nuts, like pecans or walnuts, into the batter for an extra crunch that pairs beautifully with the moist cupcake.
-
Miniature Versions: Bake these cupcakes in mini liners for bite-sized treats perfect for parties or dessert tables. They’ll be a hit among guests!
-
Spicy Kick: Add a dash of cayenne pepper to the frosting for a surprising hint of heat that complements the sweet cherry flavor, creating a unique and memorable experience.
-
Dairy-Free Delight: Use almond milk, coconut yogurt, and a dairy-free butter alternative to cater to vegan or lactose-intolerant friends without sacrificing taste.
-
Layered Cake: Transform this recipe into a layered cake by baking in two round pans and frosting each layer, turning your cupcakes into an impressive dessert centerpiece.
These variations are sure to add spark and excitement to your baking adventures. Consider pairing your cupcakes with a tall glass of cherry soda for a throwback to childhood or some homemade whipped cream for that luxurious touch!
How to Store and Freeze Cherry Malt Milkshake Cupcakes
-
Room Temperature: Store cupcakes in an airtight container at room temperature for up to 3 days. This keeps them fresh and perfect for snacking.
-
Fridge: If you want to prolong freshness, you can refrigerate the cupcakes for up to 5 days. Make sure they’re in a sealed container to prevent drying out.
-
Freezer: For longer storage, freeze unfrosted Cherry Malt Milkshake Cupcakes for up to 2 months. Wrap individually in plastic wrap and place in a freezer bag.
-
Reheating: When ready to enjoy, thaw at room temperature for a few hours, then frost and serve. If desired, warm slightly in the microwave for about 15 seconds to recreate that fresh-baked taste!
Expert Tips for Cherry Malt Milkshake Cupcakes
-
Proper Butter Temperature: Ensure your butter is softened but not melted; melted butter can lead to dense cupcakes instead of the desired fluffy texture.
-
Egg Beating: Beat the eggs until light and foamy to help create air pockets, making your Cherry Malt Milkshake Cupcakes soft and airy.
-
Don’t Overmix: When combining wet and dry ingredients, mix just until no dry flour remains. Overmixing can lead to tough cupcakes.
-
Cool Completely: Allow cupcakes to cool completely before frosting. If they’re warm, the frosting will melt, losing that delightful fluffy appearance.
-
Use Fresh Ingredients: Fresh ingredients always yield the best flavor. Substituting canned cherries can impact the overall taste, so choose quality additions.
-
Make Ahead: Consider baking the cupcakes a day in advance. The flavors meld beautifully overnight, enhancing the taste of your Cherry Malt Milkshake Cupcakes even more.
What to Serve with Cherry Malt Milkshake Cupcakes
Create a delightful dessert spread that entices all senses and captures the joy of sweet indulgence.
-
Chilled Milkshake Bar: Set up a milkshake bar with vanilla, cherry, and chocolate options to complement cupcake flavors. Guests can mix and create their dream combinations!
-
Fresh Fruit Salad: A vibrant mix of seasonal fruits adds a refreshing contrast. The juicy sweetness will enhance the cherry notes in the cupcakes.
-
Creamy Vanilla Ice Cream: Serve alongside to elevate the dessert experience, creating a perfect scoop that mirrors the milkshake taste while providing a cool, creamy texture.
-
Chocolate Dipped Strawberries: This classy treat introduces a pop of sophistication while staying playful. Fresh strawberries add an attractive contrast to the cherry-filled cupcakes.
-
Sparkling Cherry Lemonade: Offering a bubbly drink brings an extra touch of flair and is light enough to balance the richer dessert. The citrus tang nicely complements the sweetness of the cupcakes.
-
Whipped Cream Topping: A dollop of fluffy whipped cream adds luxurious creaminess. It’s an effortless yet elegant pairing, elevating each cupcake bite into decadent bliss.
-
Mini Cheesecakes: Serving mini cheesecakes plays with textures and flavors, inviting variety to your dessert table while keeping everything sweet and delightful.
-
Chocolate Sauce Drizzle: Provide extra chocolate sauce for drizzling, enhancing the cupcake’s flavor and inviting guests to customize their desserts even further.
-
Coconut Macaroons: This chewy treat suits the cupcake’s theme and delivers a tropical twist to your dessert spread, perfect for summer gatherings.
Consider these options to transform a simple night into a memorable dessert experience filled with joy and sweetness!
Make Ahead Options
These Cherry Malt Milkshake Cupcakes are a fantastic option for meal prep enthusiasts! You can prepare the cupcake batter and refrigerate it up to 24 hours before baking to save time on busy days. Simply mix the dry and wet ingredients together, then cover the mixing bowl tightly to prevent drying out. When you’re ready to bake, fill the prepared liners and bake them fresh for that just-out-of-the-oven taste. Additionally, you can frost the cupcakes ahead of time and store them in an airtight container for up to 3 days. This way, you’ll have delicious, vibrant cupcakes at your fingertips that are just as delightful as when freshly made!
Cherry Malt Milkshake Cupcakes Recipe FAQs
How do I select the best cherries for my cupcakes?
Absolutely! When selecting cherries, look for firm, plump ones with a deep red color and no dark spots all over. The fresher the cherries, the better the flavor in your Cherry Malt Milkshake Cupcakes. If using canned cherries, choose ones packed in juice rather than syrup for a more natural taste.
What is the best way to store leftover cupcakes?
Very! To keep your Cherry Malt Milkshake Cupcakes fresh, store them in an airtight container at room temperature for up to 3 days. If you need to extend their shelf life, refrigerate them for up to 5 days, but make sure they’re well-sealed to avoid drying out.
Can I freeze my Cherry Malt Milkshake Cupcakes?
Of course! To freeze unfrosted cupcakes, wrap each one individually in plastic wrap and place them in a freezer bag. They can be frozen for up to 2 months. When you’re ready to enjoy them, simply thaw at room temperature for a few hours, then frost and serve. For a warm, fresh taste, heat them in the microwave for about 15 seconds before frosting.
What should I do if my cupcakes didn’t rise properly?
Oh no! If your cupcakes didn’t rise, it might be due to old baking powder or not creaming the butter and sugar enough. Make sure to sift your dry ingredients and use fresh baking powder. Also, be gentle while mixing to keep air bubbles intact, which is essential for fluffiness.
Can I make these cupcakes vegan or gluten-free?
Absolutely! You can easily adapt the Cherry Malt Milkshake Cupcakes to cater to dietary preferences. For a vegan version, substitute eggs with flaxseed meal mixed with water, use dairy-free butter, and almond milk. For a gluten-free option, replace the all-purpose flour with a gluten-free flour blend. Don’t hesitate to experiment!
How long can I keep frosted cupcakes in the fridge?
Very well! Frosted Cherry Malt Milkshake Cupcakes can last in the fridge for up to 5 days if stored in an airtight container. However, for the best taste and texture, it’s recommended to frost them just before serving. The freshness of the frosting makes a significant difference!

Irresistible Cherry Malt Milkshake Cupcakes for Sweet Moments
Ingredients
Equipment
Method
- Preheat your oven to 180°C (356°F) for conventional or 160°C (320°F) for fan-forced settings.
- Line a cupcake tin with colorful cupcake liners.
- In a stand mixer, combine all-purpose flour, baking powder, caster sugar, and fine salt. Mix on low speed for 1-2 minutes.
- Add softened unsalted butter to the dry mix and beat on medium speed until it resembles fine sand, about 3 minutes.
- In a separate bowl, whisk together milk, eggs, Greek yogurt, vegetable oil, cherry juice, and vanilla extract until smooth.
- Slowly incorporate the wet ingredients into the dry mixture, mixing on low speed until just combined.
- Gently fold in the cherry brandy essence and pink and purple food gels until the batter showcases a pleasing swirl.
- Spoon the batter into cupcake liners, filling each about two-thirds full. Place 4 cherries in each liner.
- Bake for 20-25 minutes, or until a toothpick comes out clean. Rotate the tin halfway through.
- Allow cupcakes to cool in the tin for about 10 minutes before transferring them to a wire rack.
- Prepare the frosting by mixing softened butter with food dyes and cherry brandy essence until combined.
- Once cupcakes are cool, use a piping bag to frost each cupcake and drizzle chocolate sauce on top.
- Finish with a maraschino cherry on each frosted cupcake.
Leave a Reply