
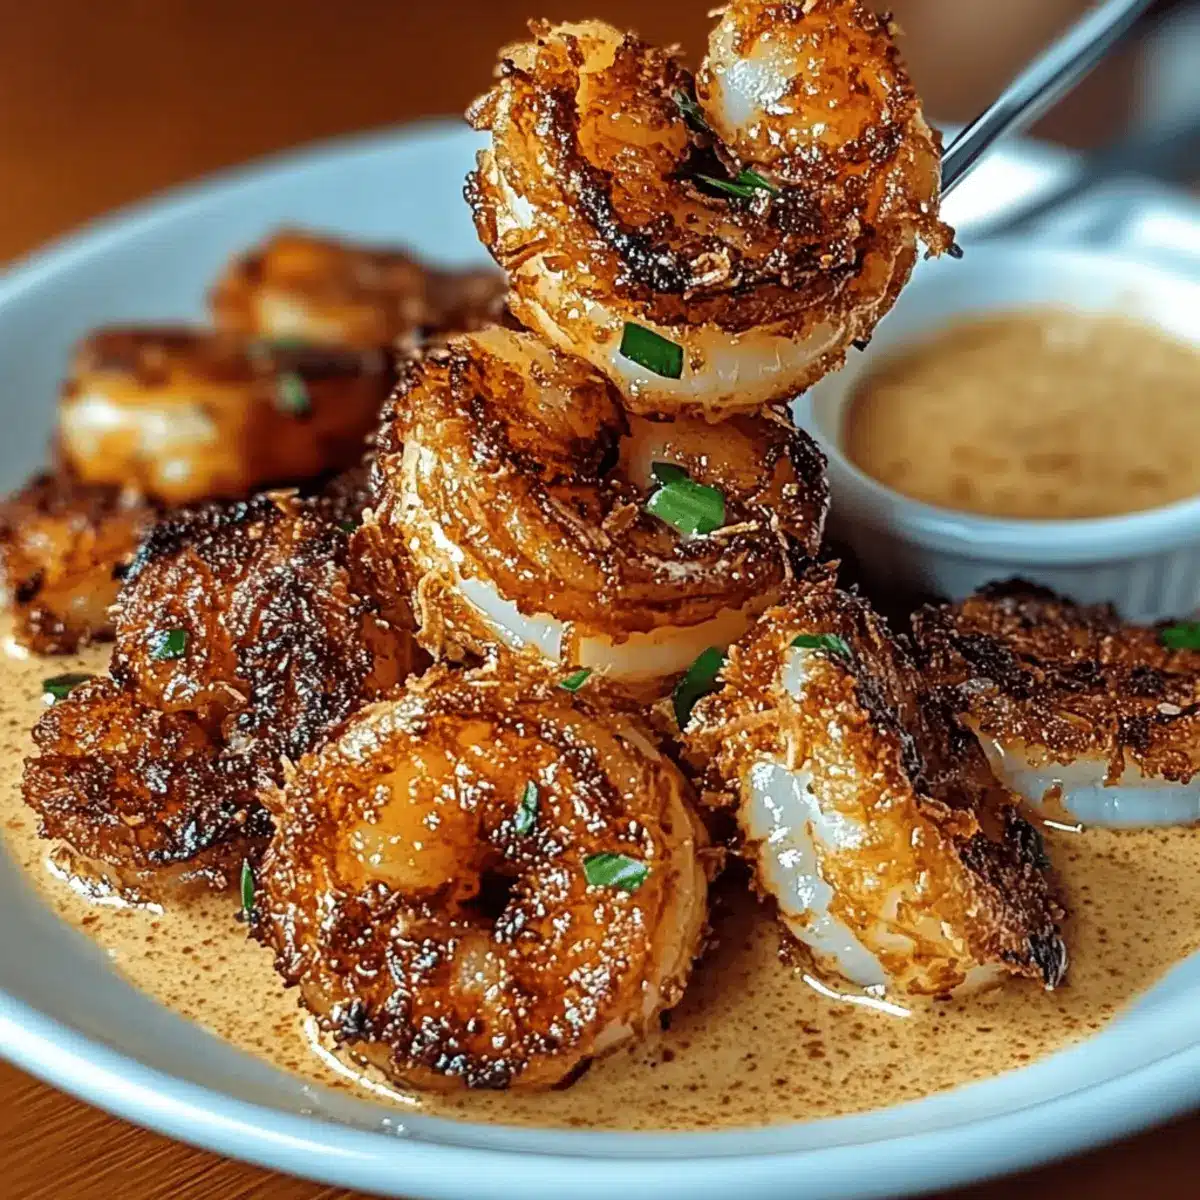
As I snagged a golden-brown piece of Baked Coconut Shrimp from the oven, the enticing aroma whisked me away to a sun-soaked beach with waves gently lapping the shore. This dish combines crispy coconut with tender shrimp, creating an unforgettable treat perfect for both casual evenings and festive gatherings. What makes this Baked Coconut Shrimp with Sweet Chili Mayo truly special is not just its quick prep time—ready in just 40 minutes—but also its delightful health benefits, boasting high-quality protein that satisfies without sacrificing taste. Whether you’re hosting friends or indulging in a cozy night on your own, this dish is designed to impress. Ready to transport your taste buds to a tropical paradise? Let’s dive in!

Why is Baked Coconut Shrimp a Must-Try?
Irresistible Crunch: Each bite delivers a satisfying, crispy exterior thanks to the golden coconut and Panko mixture, making it hard to stop at just one!
Quick Prep Time: In just 40 minutes, you can have this delightful dish on the table, perfect for a last-minute dinner or gathering.
Healthy Indulgence: Packed with high-quality protein from shrimp, this dish satisfies cravings while keeping health in mind, especially if you opt for almond flour for a gluten-free twist.
Crowd-Pleasing Flavor: With its combination of tropical coconut and the zingy sweetness of chili mayo, this dish is sure to impress guests at any gathering. Pair it with a fresh tropical fruit salsa for a complete meal experience or serve it alongside a light salad, just like my other popular recipes like Coconut Shrimp Sweet and Baked Feta Pasta.
Versatile Serving Options: Whether as a savory appetizer or a main course, it effortlessly fits into any dining scenario, bringing a taste of the tropics to your home.
Baked Coconut Shrimp Ingredients
For the Shrimp
• Large Shrimp – 1 lb, ensures you have tasty, juicy morsels as the main protein source.
• Salt – 1/2 teaspoon, this simple ingredient enhances the overall flavor of the shrimp.
• Black Pepper – 1/2 teaspoon, adds a mild heat that beautifully complements the sweetness of the dish.
• Paprika – 1 teaspoon, contributes color and a subtle smoky flavor that elevates the taste.
For the Coating
• Shredded Coconut (Unsweetened) – 1 cup, the star of the show, giving that delightful crunch and flavor.
• All-Purpose Flour – 1/2 cup, helping the coating stick to the shrimp perfectly—substitute with almond flour for a gluten-free option.
• Large Eggs – 2, beaten, acting as the binding agent that holds everything together.
• Breadcrumbs (Panko recommended) – 1 cup, creating a crispy texture that you’ll love.
For the Sweet Chili Mayo
• Mayonnaise – 1/2 cup, providing the creamy base for your dipping sauce—Greek yogurt is a great lighter alternative.
• Sweet Chili Sauce – 2 tablespoons, offering a perfect balance of sweetness and heat.
• Lime Juice – 1 teaspoon, adds a burst of acidity to balance out the richness of the mayo.
• Garlic Powder – 1/2 teaspoon, enhances the dipping sauce with savory depth.
This delicious Baked Coconut Shrimp with Sweet Chili Mayo is not only a feast for the eyes but also a dish that’s sure to land a spot in your heart and on your dinner table!
Step‑by‑Step Instructions for Baked Coconut Shrimp with Sweet Chili Mayo
Step 1: Preheat the Oven
Begin by preheating your oven to 400°F (200°C). This temperature will ensure your Baked Coconut Shrimp cooks perfectly, achieving that desirable golden crispiness. While the oven heats up, you can prepare the shrimp and coating, streamlining your cooking process for a smoother experience.
Step 2: Prepare the Shrimp
Take your 1 pound of large shrimp and pat them dry thoroughly with paper towels. This step is crucial for achieving a crispy coating, as excess moisture can lead to sogginess. Once dried, set the shrimp aside on a clean plate, ready for coating, and prepare your breading station.
Step 3: Set Up the Breading Station
Create a breading station by using three separate bowls. In the first bowl, combine 1/2 cup of all-purpose flour with 1/2 teaspoon of salt and 1/2 teaspoon of black pepper. The second bowl should hold the two beaten eggs, while the third bowl contains a mixture of 1 cup of shredded unsweetened coconut, 1 cup of Panko breadcrumbs, and 1 teaspoon of paprika. This organization will speed up the breading process for your Baked Coconut Shrimp.
Step 4: Coat the Shrimp
To coat the shrimp, take each shrimp and first dip it into the flour mixture, making sure it’s fully covered. Shake off any excess flour, then dip it into the beaten eggs, allowing any extra to drip back into the bowl. Finally, coat the shrimp in the coconut-breadcrumb mixture, pressing gently to ensure the coating adheres well. Repeat this process until all shrimp are coated.
Step 5: Arrange on Baking Sheet
Line a baking sheet with parchment paper to prevent sticking, and arrange your coated shrimp in a single layer on the sheet. Ensure there is enough space between each shrimp for even baking and crispiness. The aroma of the coconut and spices will begin to fill your kitchen, promising delicious Baked Coconut Shrimp.
Step 6: Bake the Shrimp
Place the baking sheet in your preheated oven and bake the shrimp for 12-15 minutes. At around the halfway mark, flip each shrimp gently for even cooking. You’ll know they are done when they are beautifully golden brown and reach an internal temperature of 145°F, signaling that they are perfectly cooked.
Step 7: Prepare the Sweet Chili Mayo
While the shrimp is baking, it’s time to whip up the sweet chili mayo. In a medium mixing bowl, combine 1/2 cup of mayonnaise, 2 tablespoons of sweet chili sauce, 1 teaspoon of lime juice, and 1/2 teaspoon of garlic powder. Whisk everything together until it’s smooth and creamy, creating a zesty dip to complement your Baked Coconut Shrimp.
Step 8: Serve Hot
Once the shrimp are golden and crispy, remove them from the oven and let them cool for a minute. Serve the Baked Coconut Shrimp immediately while hot, paired with the sweet chili mayo for dipping. This delightful combination is perfect for satisfying your appetite and impressing your guests!

Make Ahead Options
These Baked Coconut Shrimp with Sweet Chili Mayo are perfect for busy meal planners! You can prepare the shrimp up to 24 hours in advance by coating them and placing the breaded shrimp on a parchment-lined baking sheet. Cover the tray with plastic wrap and refrigerate to maintain their crispness. The sweet chili mayo can also be made ahead; simply whisk together the ingredients and store it in the fridge for up to 3 days. When you’re ready to bake, preheat your oven and pop the shrimp directly from the fridge into the oven, baking them for 12-15 minutes until golden brown. This meal prep method saves you valuable time while ensuring that your coconut shrimp are just as delicious!
Baked Coconut Shrimp with Sweet Chili Mayo Variations
Feel free to customize your Baked Coconut Shrimp for a flavor adventure that suits your taste buds and dietary needs!
-
Gluten-Free: Substitute all-purpose flour and Panko breadcrumbs with almond flour and crushed gluten-free crackers for a gluten-free option.
-
Heat Lover’s Delight: Add chili flakes to the coconut mixture for a spicy kick that will make your taste buds dance. A little heat will elevate the tropical flavors!
-
Different Texture: Swap Panko with crushed cornflakes for extra crunch. This twist offers a delightful variation in texture that can surprise your guests.
-
Sweet Citrus Flavor: Replace lime juice with orange juice in the mayo to create a sweeter, citrusy dip that pairs beautifully with the shrimp’s natural taste.
-
Vegan-Friendly Twist: Use chickpea flour instead of regular flour, and replace mayo with vegan yogurt mixed with sweet chili sauce for a completely plant-based version.
-
Herb Infusion: Sprinkle some fresh chopped cilantro or parsley into the breading mixture for a fresh burst of flavor that brings a garden-fresh note to each bite.
-
Tropical Dipping Sauce: Instead of sweet chili, make a mango salsa by mixing diced mango, red onion, and cilantro for a refreshing contrast.
Adding these variations can take your Baked Coconut Shrimp with Sweet Chili Mayo from delightful to extraordinary! For more delicious pairings, consider serving alongside a vibrant Sweet Corn Risotto or enjoy the savory end of dishes like Cheesecake Stuffed Baked Apples.
Expert Tips for Baked Coconut Shrimp
-
Dry the Shrimp: Ensure shrimp are pat-dried thoroughly before coating to achieve a perfectly crispy finish; moisture leads to sogginess.
-
Breading Order: Follow the exact coating order—flour, egg, and then coconut mixture—to help the ingredients adhere properly during baking.
-
Flip for Even Cooking: Remember to flip the Baked Coconut Shrimp halfway through cooking for golden brown crispiness all around.
-
Prep Ahead: For a time-saver, prepare the shrimp and breading ahead of time. Store them in the refrigerator until you’re ready to bake.
-
Check Internal Temp: To ensure the shrimp are perfectly cooked, use a food thermometer—145°F is the magic number for juicy, safe-to-eat shrimp.
Storage Tips for Baked Coconut Shrimp with Sweet Chili Mayo
-
Room Temperature: Best enjoyed fresh, but if necessary, leftover Baked Coconut Shrimp can sit at room temperature for up to 2 hours before needing refrigeration.
-
Fridge: Store any uneaten shrimp in an airtight container in the fridge for up to 2 days. Reheat thoroughly before serving to maintain crispiness.
-
Freezer: For longer storage, freeze the baked shrimp in a single layer on a baking sheet. Once frozen, transfer to a resealable freezer bag where they can be kept for up to 3 months.
-
Reheating: Reheat from frozen in an oven at 400°F (200°C) for about 15-20 minutes until heated through and crispy again. This method ensures your Baked Coconut Shrimp still taste delightful!
What to Serve with Baked Coconut Shrimp with Sweet Chili Mayo
Enjoying a crispy, tropical delight, Baked Coconut Shrimp, is just the beginning of your culinary adventure. Let’s elevate your meal further!
-
Crispy Sweet Potato Fries: The sweetness and crispy texture provide a delightful contrast to the tangy shrimp, adding an extra layer of enjoyment.
-
Tropical Fruit Salsa: Bursting with fresh fruits like mango, pineapple, and avocado, this salsa adds brightness and complements the shrimp’s flavors perfectly.
-
Coconut Rice: Creamy coconut rice echoes the tropical theme, balancing the heat of the sweet chili mayo while offering a satisfying base for your meal.
-
Crunchy Green Salad: A refreshing mix of greens with a citrus vinaigrette helps cut through richness and brings refreshing crunch to every bite.
-
Pineapple Ginger Sparkler: A light and fizzy drink that matches the tropical vibe, with refreshing spices that amplify the sweet heat of your shrimp.
-
Chocolate Coconut Macaroons: For dessert, these chewy treats echo your shrimp’s coconut flair and provide a sweet finish to your tropical-themed feast.
Crafting the perfect meal doesn’t have to be complex; each of these pairings will ensure your Baked Coconut Shrimp shines even brighter on your table!

Baked Coconut Shrimp with Sweet Chili Mayo Recipe FAQs
How do I choose the right shrimp for this recipe?
When selecting shrimp, opt for large shrimp that are fresh, peeled, and deveined. If using frozen shrimp, be sure to thaw them completely before cooking. Look for shrimp with a slight sheen and minimal odor, as these indicate freshness and quality.
What’s the best way to store leftover Baked Coconut Shrimp?
Leftover shrimp can be kept in an airtight container in the fridge for up to 2 days. Be sure to let them cool to room temperature before sealing. When you’re ready to enjoy them again, reheat in an oven at 400°F (200°C) for about 10 minutes to restore their crispiness.
Can I freeze Baked Coconut Shrimp? If so, how?
Absolutely! To freeze, lay the baked shrimp in a single layer on a baking sheet, and place them in the freezer until solid. Once frozen, transfer the shrimp to a resealable freezer bag, ensuring to remove as much air as possible, and store for up to 3 months. When you’re ready to enjoy, reheat them directly from frozen in the oven for 15-20 minutes at 400°F (200°C) until heated through and crispy.
What should I do if my coating falls off while baking?
If the coating falls off, first ensure the shrimp are patted dry before coating. It helps the breading stick better. Additionally, make sure to follow the correct order: flour, then egg, and lastly the coconut breadcrumb mixture. For extra adherence, you can lightly press the coating onto the shrimp after coating them before baking.
Are there any dietary considerations I should be aware of?
If you have gluten sensitivities, you can substitute all-purpose flour with almond flour and opt for gluten-free Panko breadcrumbs. Also, remember that some people may have shellfish allergies, so always check with your guests before serving shrimp dishes.
How can I make the sweet chili mayo healthier?
To lighten the sweet chili mayo, substitute Greek yogurt or avocado mayo for traditional mayonnaise. This swap not only reduces calories but also adds a creamy texture with good nutritional benefits. Enjoy a guilt-free dipping sauce alongside your delicious Baked Coconut Shrimp!
Baked Coconut Shrimp with Sweet Chili Mayo for Easy Tropical Bliss
Ingredients
Equipment
Method
- Preheat your oven to 400°F (200°C) to ensure perfect crispiness.
- Pat the shrimp dry thoroughly with paper towels.
- Create a breading station with three separate bowls.
- Coat each shrimp first in flour, then in beaten eggs, and finally in the coconut-breadcrumb mixture.
- Line a baking sheet with parchment paper and arrange the coated shrimp in a single layer.
- Bake the shrimp for 12-15 minutes, flipping halfway for even cooking.
- In a bowl, whisk together mayonnaise, sweet chili sauce, lime juice, and garlic powder to make the dipping sauce.
- Serve the baked shrimp immediately with the sweet chili mayo for dipping.
Leave a Reply