
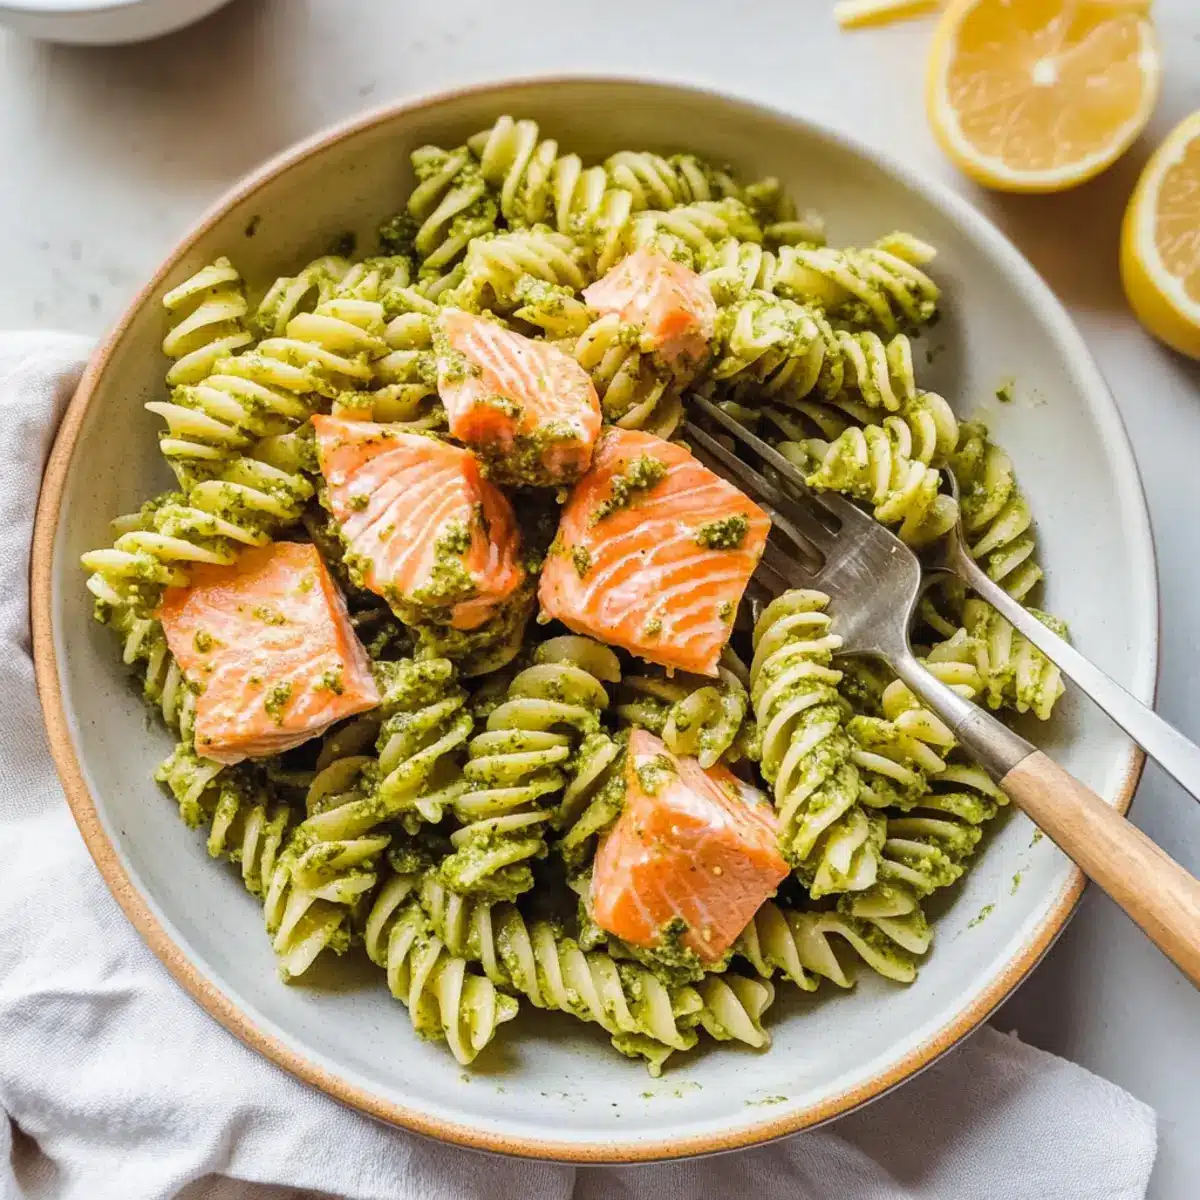
After a long day, I found myself staring at the fridge, weighed down by the idea of yet another uninspiring dinner. That’s when the thought of Salmon Pesto Pasta danced into my mind—a dish that brings together flaky roasted salmon and vibrant pesto in just 25 minutes! Not only is it a quick and healthful one-bowl meal, but it also feels special enough for a cozy date night or a gathering with friends. The beauty of this recipe lies in its versatility; whether you use homemade or store-bought pesto, this delightful pasta can easily be customized to suit your taste with fresh veggies or alternative pestos. Ready to elevate your weeknight dinner routine? Let’s dive into this comforting blend of flavors and textures that will make your taste buds sing!
Why is Salmon Pesto Pasta a must-try?
Quick Preparation: In just 25 minutes, you can whip up a delicious dinner that beats fast food any day.
Health Benefits: Packed with omega-3 fatty acids from salmon, this dish is not only tasty but also good for your heart!
Customizable Flavors: Whether you opt for homemade or store-bought pesto, you can tailor this meal to your personal preferences by adding seasonal veggies or different pasta types.
One-Bowl Wonder: Enjoy a satisfying experience without the fuss of multiple dishes; everything is perfectly blended in one bowl!
Crowd-pleaser: Ideal for both a cozy family dinner or entertaining guests, everyone loves the fresh, vibrant flavors of this dish.
Salmon Pesto Pasta Ingredients
• A delightful mix for a quick meal!
For the Pasta
- Dried Pasta (8 ounces) – Use whole wheat or chickpea pasta for extra fiber and protein.
For the Salmon
- Salmon Filets – Fresh salmon provides a tender and flaky texture that elevates the dish.
- Olive Oil – Adds richness; avocado oil works as a neutral substitute.
- Lemon Juice – Fresh juice brightens up the flavors beautifully.
- Kosher Salt and Black Pepper – Essential seasonings to enhance the salmon.
For the Pesto
- Pesto (2/3 cup) – Provides that signature herbaceous richness; homemade is best, but jarred works well too!
For the Finish
- Grated Parmesan Cheese (1/4 cup) – Adds creaminess and umami; swap with nutritional yeast for a dairy-free option.
This vibrant Salmon Pesto Pasta will not only delight your palate but also nourish your body, making it a must-have in your weeknight repertoire!
Step‑by‑Step Instructions for Salmon Pesto Pasta
Step 1: Preheat the Oven
Begin by preheating your oven to 400°F (200°C). While it warms up, line a baking sheet with parchment paper or foil to make cleanup a breeze later on. This step is essential for achieving that perfectly flaky salmon that pairs so well with the vibrant flavors of your Salmon Pesto Pasta.
Step 2: Prepare the Salmon
Once the oven is preheated, place the salmon filets on the prepared baking sheet. Brush each filet with a generous amount of olive oil and fresh lemon juice, then season them generously with kosher salt and black pepper. The seasoning will enhance the flavors and bring a delightful zest to your dish.
Step 3: Roast the Salmon
Slide the baking sheet into your cold oven and set a timer for 20 minutes. The slow roasting will infuse the salmon with moisture and make it incredibly tender. Keep an eye on it as it cooks; you’ll know it’s done when it flakes easily with a fork and has a lovely golden hue.
Step 4: Cook the Pasta
While the salmon is roasting, bring a large pot of salted water to a boil. Add in your choice of dried pasta and cook according to the package instructions until al dente, usually around 8-10 minutes. Once done, drain the pasta, reserving a cup of the pasta water for later use. This will help create a perfect sauce for your Salmon Pesto Pasta.
Step 5: Combine Pasta with Pesto
In the same pot, combine the drained pasta with 2/3 cup of your pesto and 1/4 cup of grated Parmesan cheese. Stir vigorously to coat the pasta evenly with the pesto. If you prefer a looser sauce, gradually add in some reserved pasta water until you reach your desired consistency, making the dish even more luscious.
Step 6: Flake and Serve the Salmon
Once the salmon is finished roasting, remove it from the oven and let it rest for a minute. Carefully flake the salmon into bite-sized pieces using a fork. Gently mix the salmon with the pesto-coated pasta or serve it beautifully on top, allowing its flaky texture to shine. Enjoy this quick and delightful Salmon Pesto Pasta with friends or family!
What to Serve with Salmon Pesto Pasta
Pairing the perfect side dishes can elevate your dining experience, making it even more delightful and satisfying.
- Fresh Arugula Salad: A light, peppery salad provides a refreshing contrast to the rich flavors of the pasta, adding a crisp texture.
- Roasted Seasonal Vegetables: Try roasting zucchini or asparagus alongside your salmon. Their caramelized sweetness complements the dish beautifully!
- Garlic Bread: Crispy, buttery garlic bread offers a comforting contrast to the light pasta, perfect for sopping up any leftover pesto.
- Lemon Water: A chilled glass of lemon-infused water brightens the meal, enhancing the zesty notes of your Salmon Pesto Pasta.
- Chardonnay: A chilled glass of Chardonnay, with its citrus notes, adds a sophisticated touch and pairs wonderfully with the salmon.
- Caprese Skewers: These skewers, featuring fresh mozzarella and tomatoes drizzled with balsamic glaze, add a burst of flavor and color to your table.
By mixing these elements, you can create a balanced meal that will turn any weeknight dinner into a special occasion!
Salmon Pesto Pasta Variations
Feel free to customize your dish and bring even more joy to your table with these tasty twists!
-
Vegetable Boost: Add seasonal roasted vegetables like zucchini or asparagus to introduce both flavor and texture to your meal. They’ll caramelize beautifully while enhancing the overall nutrition of your dish.
-
Gluten-Free Option: Swap out regular pasta for gluten-free varieties or spiralized veggies for a low-carb delight. This way, everyone can enjoy the wonderful flavors without compromising on their dietary needs!
-
Different Pestos: Experiment with various pestos such as sun-dried tomato or arugula for a unique spin. Each variety offers its own delightful taste profile that can completely transform the dish!
-
Spicy Kick: For some heat, toss in red pepper flakes or a drizzle of chili oil. Just a small amount can elevate the flavors and add excitement to your pasta experience.
-
Creamy Twist: If you’re in the mood for something creamier, stirring in a splash of heavy cream or a dollop of ricotta can create a luscious sauce. The added richness makes every bite irresistible.
-
Protein Variety: Swap salmon for grilled chicken or shrimp to suit your taste or pantry availability. Each protein will bring its own distinct flavor to the pasta while ensuring a hearty meal.
-
Herb Enhancement: Toss in fresh herbs like basil or parsley for an extra burst of freshness. These vibrant greens can brighten up the dish visually and aromatically.
-
**For a different impact, check out recipes like Cajun Chicken Pasta or Garlic Glazed Salmon that show just how versatile your ingredients can be!
Storage Tips for Salmon Pesto Pasta
Fridge: Store leftover Salmon Pesto Pasta in an airtight container for up to 3-4 days to keep it fresh and flavorful.
Freezer: If you want to keep it longer, freeze the pasta in a freezer-safe container for up to 2 months. It’s best to freeze without the salmon if possible, adding it fresh during reheating.
Reheating: When ready to enjoy, reheat gently on the stovetop with a splash of water or broth to revive the pesto sauce. Avoid using the microwave to prevent drying out the pasta.
Airtight Storage: Always ensure the container is airtight to prevent moisture buildup, which can spoil the Salmon Pesto Pasta faster.
Make Ahead Options
These Salmon Pesto Pasta preparations are perfect for busy home cooks looking to save time throughout the week! You can prep the pasta and pesto up to 3 days in advance. Simply cook the pasta until al dente, then drain and toss it with a little olive oil to prevent sticking. Store it in an airtight container in the refrigerator. You can also pre-cook the salmon, flaking it into pieces and refrigerating to preserve its moisture and flavor. When you’re ready to serve, reheat the pasta gently on the stove with a splash of water or broth, mix in the pesto and salmon, and you’ll have a delicious and effortless meal in no time!
Expert Tips for Salmon Pesto Pasta
-
Crispy Salmon Finish: For a delightful crispy topping, broil the salmon for the last 1-2 minutes of cooking, but keep an eye on it to prevent burning.
-
Uniform Filets: Ensure even cooking by choosing salmon filets of uniform thickness; this will help avoid overcooked edges and undercooked centers.
-
Perfect Pesto Blending: If using homemade pesto, opt for fresh basil for the best flavor, and consider blending in additional greens like spinach to enhance the nutritional profile.
-
Sauce Consistency: Adjust the pasta water gradually when mixing with pesto; some prefer a thicker coating while others enjoy a looser sauce for their Salmon Pesto Pasta.
-
Versatile Ingredients: Feel free to get creative with seasonal vegetables like zucchini or asparagus; they can be added alongside the salmon for an extra nutrient boost!
-
Flavor Variations: Don’t hesitate to experiment with different pestos, such as sun-dried tomato or arugula, for unique twists on your Salmon Pesto Pasta!
Salmon Pesto Pasta Recipe FAQs
What type of salmon should I use for the best flavor?
I recommend using fresh salmon filets for a tender, flaky texture that enhances your Salmon Pesto Pasta. Look for filets that are bright in color with minimal dark spots. If fresh is unavailable, frozen salmon can be a good alternative, as long as it’s thawed properly before cooking.
How should I store leftover Salmon Pesto Pasta?
Store any leftover Salmon Pesto Pasta in an airtight container in the refrigerator for up to 3-4 days. When you’re ready to enjoy it, reheat gently on the stovetop with a splash of water or broth to revive the sauce and keep it moist.
Can I freeze Salmon Pesto Pasta?
Absolutely! You can freeze Salmon Pesto Pasta in a freezer-safe container for up to 2 months. For the best results, I suggest freezing the pasta without the salmon. This way, you can add freshly cooked salmon when you reheat the dish, maintaining the perfect texture.
What if my pesto is too thick when mixing with the pasta?
If your pesto seems thick, fear not! Gradually add reserved pasta water, a little at a time, while stirring, until you achieve your desired sauce consistency. This will help create a luscious coating without making the pasta soggy.
Is this recipe suitable for those with dairy allergies?
Yes, if you’re concerned about dairy, you can easily modify the Salmon Pesto Pasta. Substitute grated Parmesan cheese with nutritional yeast for a dairy-free version, and ensure your pesto is also dairy-free or make a homemade version without cheese.
Can I add vegetables to this recipe?
Very much so! Feel free to incorporate seasonal vegetables into your Salmon Pesto Pasta. I often add roasted zucchini or asparagus for an extra nutrient boost, either alongside the salmon or mixed in with the pasta for great flavor and texture.
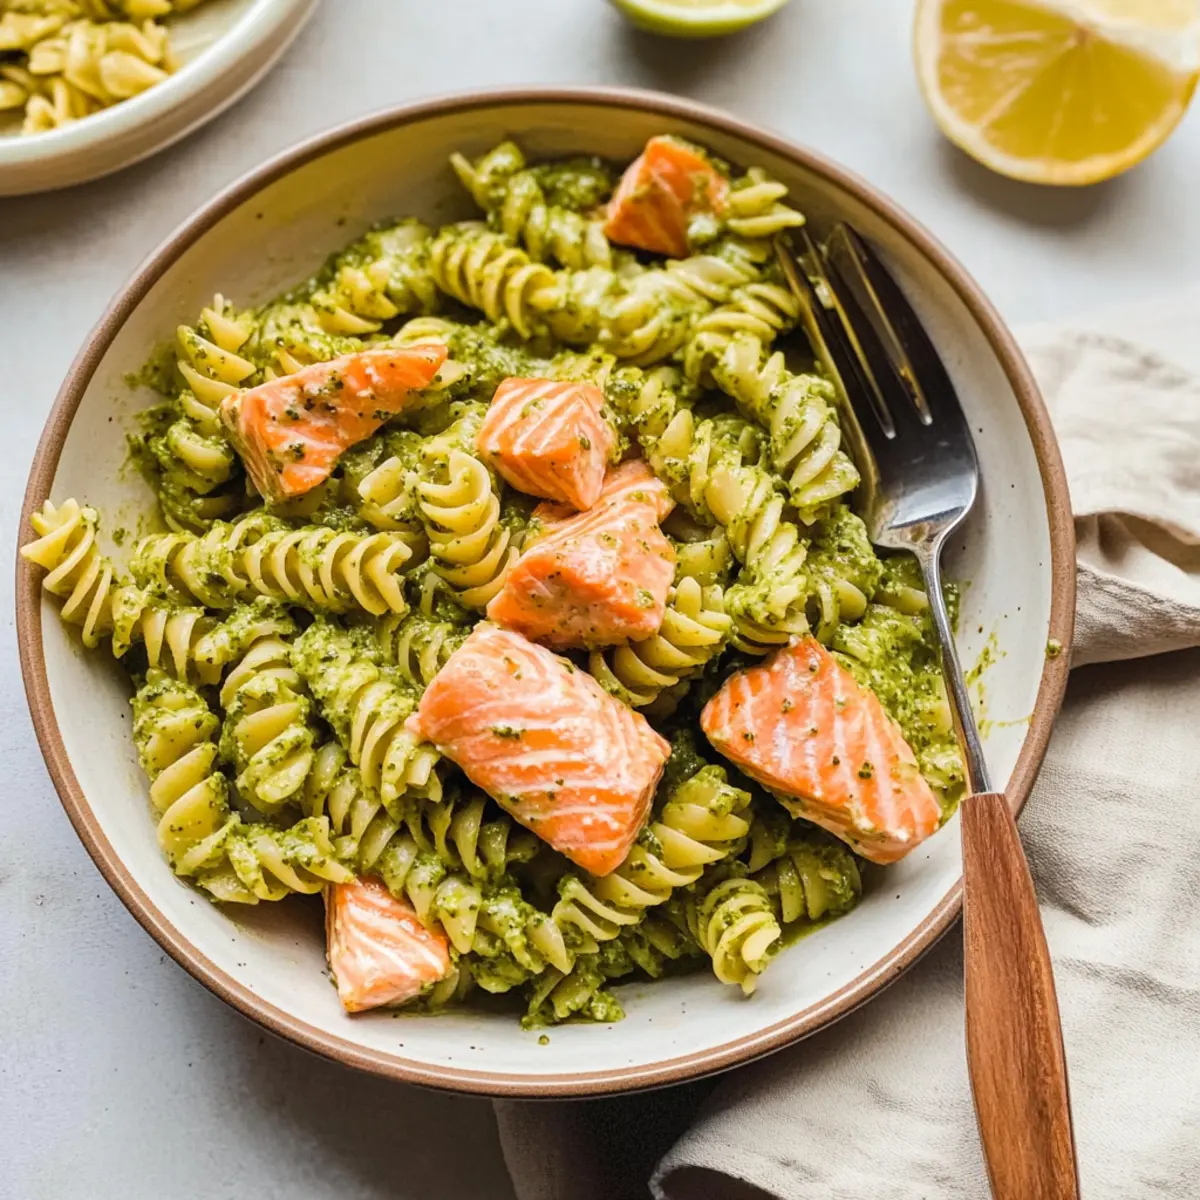
Quick and Flavorful Salmon Pesto Pasta in 25 Minutes
Ingredients
Equipment
Method
- Preheat your oven to 400°F (200°C) and line a baking sheet with parchment paper or foil.
- Place the salmon filets on the prepared baking sheet. Brush with olive oil and lemon juice, then season with salt and pepper.
- Slide the baking sheet into your cold oven and set a timer for 20 minutes.
- Bring a large pot of salted water to a boil. Add the dried pasta and cook according to package instructions until al dente, usually around 8-10 minutes. Drain the pasta, reserving a cup of the pasta water.
- In the same pot, combine the drained pasta with pesto and grated Parmesan cheese, stirring vigorously to coat. Add reserved pasta water gradually for desired sauce consistency.
- Once the salmon is roasted, remove it from the oven, let it rest briefly, then flake it into bite-sized pieces. Mix gently with the pasta or serve on top.
Leave a Reply