
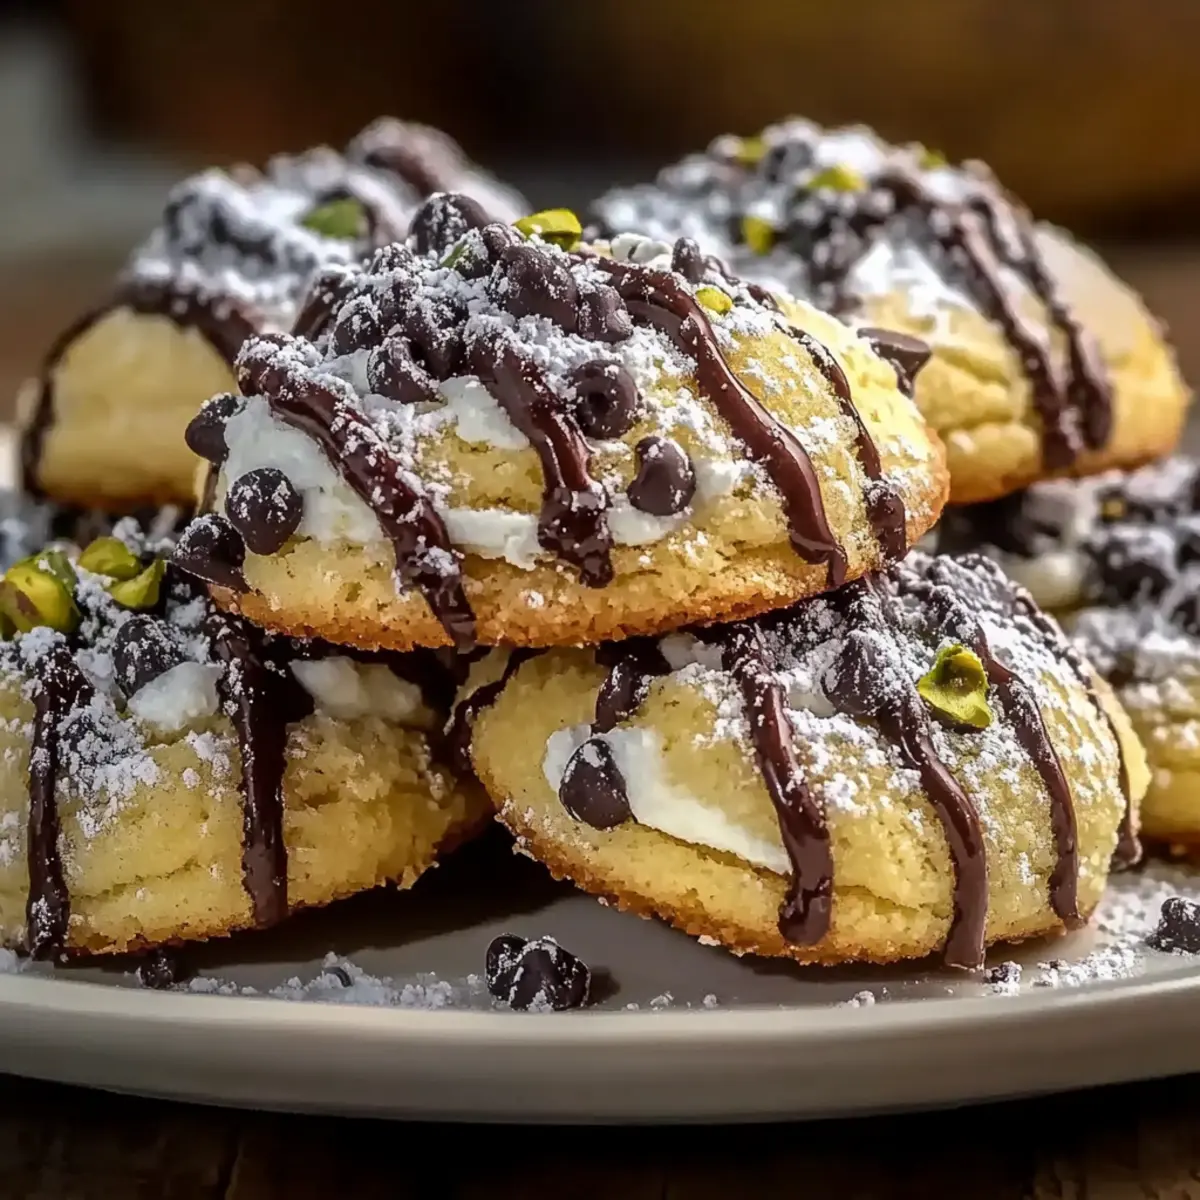
While pouring my morning coffee, I couldn’t shake the craving for something sweet—something that would wrap me in warmth and nostalgia. That’s when I flipped through my family recipe book and landed on the luscious Cannoli Cookies. This delightful treat encapsulates the essence of traditional Italian dessert while seamlessly blending into the cookie world. With only 45 minutes of prep time, these Cannoli Cookies turn an ordinary day into a special occasion, perfect for sharing with loved ones or savoring all on your own. The crispy outer shell gives way to a dreamy ricotta filling speckled with mini chocolate chips, making it a quick, crowd-pleasing favorite. Curious about how you can whip up these irresistible bites? Let’s dive into this recipe that’s sure to add a delightful touch to your baking adventures!
Why are Cannoli Cookies a must-try?
Deliciously Unique: These Cannoli Cookies combine the best of both worlds, fusing a classic Italian dessert with cookie-like ease. Quick and Simple: Ready in just 45 minutes, they fit seamlessly into any busy schedule, allowing you to indulge without lengthy preparations. Crowd-Pleaser: Perfect for family gatherings or as a sweet treat for guests, these cookies enchant everyone with their delightful flavors. Versatile Options: Feel free to swap in your favorite ingredients; think dried fruit or different nuts to personalize your batch. Nostalgic Comfort: Channel the warm memories of family gatherings with every bite, making these cookies an instant favorite! For an extra delightful treat, check out my Apple Snickerdoodles for another comforting, crowd-pleasing option.
Cannoli Cookies Ingredients
• Discover the delightful components of these Cannoli Cookies!
For the Cookie Dough
- All-purpose flour – Provides structure; make sure to sift for lightness.
- Granulated sugar – Adds sweetness and texture; substituting brown sugar can enhance moisture.
- Egg – Binds ingredients together for consistency; ensure it’s at room temperature for better mixing.
- Vanilla extract – Adds a sweet flavor that complements the ricotta; use pure vanilla for best results.
- Lemon zest – Brightens and contrasts the sweetness; can replace with orange zest for a different citrus note.
For the Filling
- Ricotta cheese – Key for a creamy filling; ensure it’s well-drained to maintain crispness.
- Mini chocolate chips – Provide sweetness and texture; opt for dark chocolate for a richer flavor.
- Chopped pistachios – Adds a crunchy texture; can substitute with chopped walnuts or almonds.
For the Dusting
- Powdered sugar – Perfect for dusting, offering a sweet finish; optional but enhances presentation.
Dive into creating your Cannoli Cookies where every bite brings a delightful blend of flavors and textures!
Step‑by‑Step Instructions for Cannoli Cookies
Step 1: Preheat the Oven
Begin by preheating your oven to 350°F (175°C). This step is crucial as it ensures a perfectly baked Cannoli Cookies with a golden-brown exterior. While the oven heats up, gather your baking sheets and line them with parchment paper to prevent sticking and facilitate easy cleanup later on.
Step 2: Mix the Dry Ingredients
In a large mixing bowl, whisk together the all-purpose flour and granulated sugar until they are well combined. This process should take about 1-2 minutes. The sugar will add sweetness and help create a nice structure for your Cannoli Cookies, while the flour provides the necessary base for the dough.
Step 3: Combine the Wet Ingredients
In another bowl, blend the ricotta cheese, egg, vanilla extract, and lemon zest until the mixture is smooth and creamy. Aim for about 2-3 minutes of mixing, making sure there are no lumps. The creamy texture is key to achieving a delightful filling that complements the cookies beautifully, evoking the essence of traditional cannoli.
Step 4: Form the Dough
Gradually add the dry ingredient mixture into the wet mixture, stirring gently until a soft dough forms. This should take about 2 minutes. Be careful not to overmix, as this will keep your Cannoli Cookies tender and light. Once combined, the dough should feel slightly sticky yet manageable for shaping.
Step 5: Rest the Dough
Cover the dough with plastic wrap or a clean kitchen towel and allow it to rest at room temperature for about 30 minutes. This resting period is essential, as it helps the ingredients meld together and makes rolling out the dough easier, resulting in a beautiful cookie texture.
Step 6: Prepare for Baking
While the dough rests, line your baking sheets with parchment paper. This ensures that your Cannoli Cookies don’t stick when baking and allows for even heat distribution. It’s a simple but important step that will help ensure perfect cookies every time.
Step 7: Roll and Cut the Dough
Once rested, roll out the dough on a lightly floured surface to a thickness of about ¼ inch. Cut the rolled dough into 2×3 inch rectangles. Aim for a uniform thickness, as this will allow your Cannoli Cookies to bake evenly, resulting in a delightful combination of crispy exterior and creamy filling.
Step 8: Fill the Cookies
In a bowl, mix together ricotta, mini chocolate chips, and chopped pistachios for the filling. Spoon this mixture onto one side of each dough rectangle, then fold the other side over the filling, pinching the edges to seal securely. This technique is key to delivering that traditional cannoli taste in a cookie form.
Step 9: Bake the Cookies
Place the filled cookies onto your prepared baking sheets and bake them in your preheated oven for 15-18 minutes. Keep an eye on them; they should turn golden brown around the edges. This visual cue indicates they are perfectly baked and ready to be removed from the oven.
Step 10: Cool and Dust
After baking, let the Cannoli Cookies cool on the baking sheets for about 5 minutes before transferring them to a wire rack. Once cooled, dust them generously with powdered sugar for a sweet finish. This step will enhance the presentation and add a lovely touch to your irresistible Cannoli Cookies!
What to Serve with Cannoli Cookies
Indulge in a perfectly curated meal that complements the sweet decadence of Cannoli Cookies.
-
Fresh Berries: A medley of strawberries, blueberries, and raspberries adds a vibrant contrast and refreshing burst of flavor.
-
Espresso: The strong, rich flavor of espresso balances the sweetness of the cookies, creating a classic Italian pairing that delights.
-
Zesty Lemon Sorbet: The bright, cool taste of lemon sorbet provides a palate-cleansing effect, enhancing the sweetness of the cookies.
-
Homemade Whipped Cream: Light and airy, whipped cream drizzled over the cookies elevates dessert to a new level of indulgence.
-
Chocolate Fondue: Dip your Cannoli Cookies in warm chocolate for an extra touch of indulgence, creating a fun, interactive dessert experience.
-
Toasted Hazelnuts: Crunchy, toasty hazelnuts sprinkled on top bring a nutty flavor explosion that beautifully complements the creamy filling.
-
Cheese Platter: Pair with a selection of cheeses like mascarpone or ricotta for a sweet and savory contrast that enlivens your dessert experience.
-
Sweet Dessert Wine: A glass of sweet dessert wine or Moscato enhances the overall flavors, wrapping up your meal with a touch of elegance.
How to Store and Freeze Cannoli Cookies
Airtight Container: Store your Cannoli Cookies in an airtight container at room temperature for up to 3 days to maintain their delicious texture and freshness.
Freezer: For longer storage, freeze cookies in a single layer on a baking sheet until solid. Once frozen, wrap each cookie tightly in plastic wrap and store in a freezer-safe bag for up to a month.
Reheating: When ready to enjoy, thaw the cookies at room temperature for 30 minutes. For a warm treat, gently reheat in the oven at 300°F (150°C) for about 5 minutes, allowing that crispy exterior to come back to life.
Dusting Sugar: Avoid dusting with powdered sugar before storing; wait until just before serving for the best visual appeal and flavor.
Cannoli Cookies: Delicious Variations
Feel free to get creative and tailor these Cannoli Cookies to your taste buds with delightful twists!
-
Nut Variation: Use almonds or hazelnuts instead of pistachios for a different nutty flavor. Each nut brings its own unique essence to the cookie, enriching the overall profile.
-
Fruity Fusion: Replace mini chocolate chips with dried fruit like raisins or cranberries. This swap adds a chewy texture and a hint of tartness that plays beautifully with the creamy filling.
-
Citrus Zing: Experiment with orange zest instead of lemon zest for a brighter, sweeter flavor. It’s a wonderful way to freshen up the taste and brings a sunshine vibe to every bite.
-
Dough Twists: For added depth, try adding almond or hazelnut extract into the dough. This subtle infusion will elevate the nutty flavors, reminiscent of a traditional Italian touch.
-
Chocolate Delight: Use dark chocolate instead of mini chocolate chips for a richer, more decadent feel. Dark chocolate lends depth and a bit of luxuriousness to each bite.
-
Spicy Kick: For an unexpected twist, sprinkle in a dash of cinnamon or even a pinch of cayenne pepper for those who love a hint of heat. This creates an intriguing flavor contrast that can surprise and delight.
-
Gluten-Free Option: Substitute almond flour or a gluten-free flour blend in place of all-purpose flour. Just ensure you balance wet and dry ingredients to maintain that perfect texture.
And if you’re ever looking for another charming treat, consider trying these delightful Apple Snickerdoodles—they’re sure to make your taste buds dance!
Make Ahead Options
These Cannoli Cookies are a fantastic option for meal prep enthusiasts! You can prepare the cookie dough up to 24 hours in advance. Simply mix all the ingredients, wrap the dough in plastic wrap, and refrigerate it until you’re ready to bake. For the filling, combine the ricotta, mini chocolate chips, and pistachios, and store it separately in an airtight container for up to 3 days. When you’re ready to enjoy these delightful Cannoli Cookies, roll out the dough, fill and seal the cookies, and bake them fresh for a warm, comforting treat that’s just as delicious as when made on the spot. This prep method saves you time and allows for an effortless baking experience!
Expert Tips for Cannoli Cookies
-
Well-Drained Ricotta: Ensure your ricotta cheese is thoroughly drained to avoid sogginess. A wet filling can make your cookies lose their ideal texture.
-
Room Temperature Egg: Using an egg at room temperature helps create a smoother, well-mixed batter. It binds the ingredients better, leading to a more consistent dough.
-
Gentle Mixing: When combining wet and dry ingredients, stir gently to keep your Cannoli Cookies tender. Overmixing can lead to a tougher texture.
-
Baking Time Monitor: Keep an eye on your cookies while they bake. They should be golden brown; a dark brown color indicates over-baking.
-
Parchment Paper: Use parchment paper on your baking sheets for easy removal and perfect baking. This prevents sticking and helps maintain cookie shape.
Cannoli Cookies Recipe FAQs
How do I choose the right ricotta cheese?
Absolutely! When selecting ricotta cheese, look for a brand that is creamy with a smooth texture. I recommend using whole milk ricotta for the best flavor and richness. Ensure it’s well-drained to avoid any excess moisture that could make your cookies soggy. If you notice any dark spots or watery separation, opt for a fresher batch.
What is the best way to store Cannoli Cookies?
You can keep your Cannoli Cookies in an airtight container at room temperature for up to 3 days. For longer storage, freeze them in a single layer on a baking sheet. Once frozen solid, wrap each cookie tightly in plastic wrap and transfer to a freezer-safe bag. They can be stored for up to a month without losing flavor!
Can I freeze Cannoli Cookies?
Very! Freezing Cannoli Cookies is simple and preserves their delightful flavor. Here’s how you can do it:
- Allow the cookies to cool completely at room temperature.
- Arrange them in a single layer on a baking sheet and freeze until solid (about 1-2 hours).
- Wrap each cookie individually in plastic wrap and then place them in a freezer-safe bag or container.
- Label with the date and store for up to 3 months. When ready to enjoy, thaw at room temperature for about 30 minutes.
What should I do if the dough is too sticky?
If you find the dough too sticky while shaping, don’t worry! Simply dust your work surface and rolling pin with a little flour to make it easier to roll out. Additionally, if it feels unmanageable, refrigerate the dough for about 15 minutes. This will firm it up and make it easier to handle without compromising the cookie’s texture.
Are there any allergy considerations with Cannoli Cookies?
Absolutely! If you or someone in your household has allergies, it’s essential to check all ingredients. These Cannoli Cookies contain gluten from flour and dairy from ricotta. You could substitute all-purpose flour with a gluten-free blend, and use lactose-free ricotta or a nut-based alternative to accommodate dietary restrictions. Always check the labels to ensure safety!
Decadent Cannoli Cookies That Will Steal Your Heart
Ingredients
Equipment
Method
- Preheat your oven to 350°F (175°C) and line your baking sheets with parchment paper.
- In a large mixing bowl, whisk together all-purpose flour and granulated sugar until well combined.
- In another bowl, blend ricotta cheese, egg, vanilla extract, and lemon zest until smooth.
- Gradually add the dry ingredient mixture into the wet mixture, stirring gently until a soft dough forms.
- Cover the dough and allow it to rest at room temperature for about 30 minutes.
- Roll out the dough to ¼ inch thick and cut into 2x3 inch rectangles.
- Mix ricotta, mini chocolate chips, and chopped pistachios for the filling. Spoon onto one side of each rectangle and fold over, sealing the edges.
- Bake the filled cookies in the preheated oven for 15-18 minutes until golden brown.
- Let them cool for 5 minutes before transferring to a wire rack and dusting with powdered sugar.
Leave a Reply