
“Have you ever found yourself in a cookie-crafting frenzy, searching for the ultimate treat that ticks all the boxes? Enter the irresistible soft and chewy Red Velvet Cookies! These delectable goodies capture the beloved essence of red velvet cake, seamlessly blending hints of chocolate and vanilla into a delightful bite. One of the best parts? This recipe requires no chill time—meaning you can whip them up and indulge in the bliss of warm, fresh cookies in no time! Perfect for adding a pop of color to any celebration, they are super versatile; whether you want to jazz them up with frosting or enjoy them plain, each cookie promises to be a crowd-pleaser. Curious about how to create this dreamy dessert experience? Let’s dive into the delicious details!”
Why Are These Cookies So Irresistible?
No Chill Time: Say goodbye to waiting! These Red Velvet Cookies come together quickly, allowing you to enjoy warm treats in a flash.
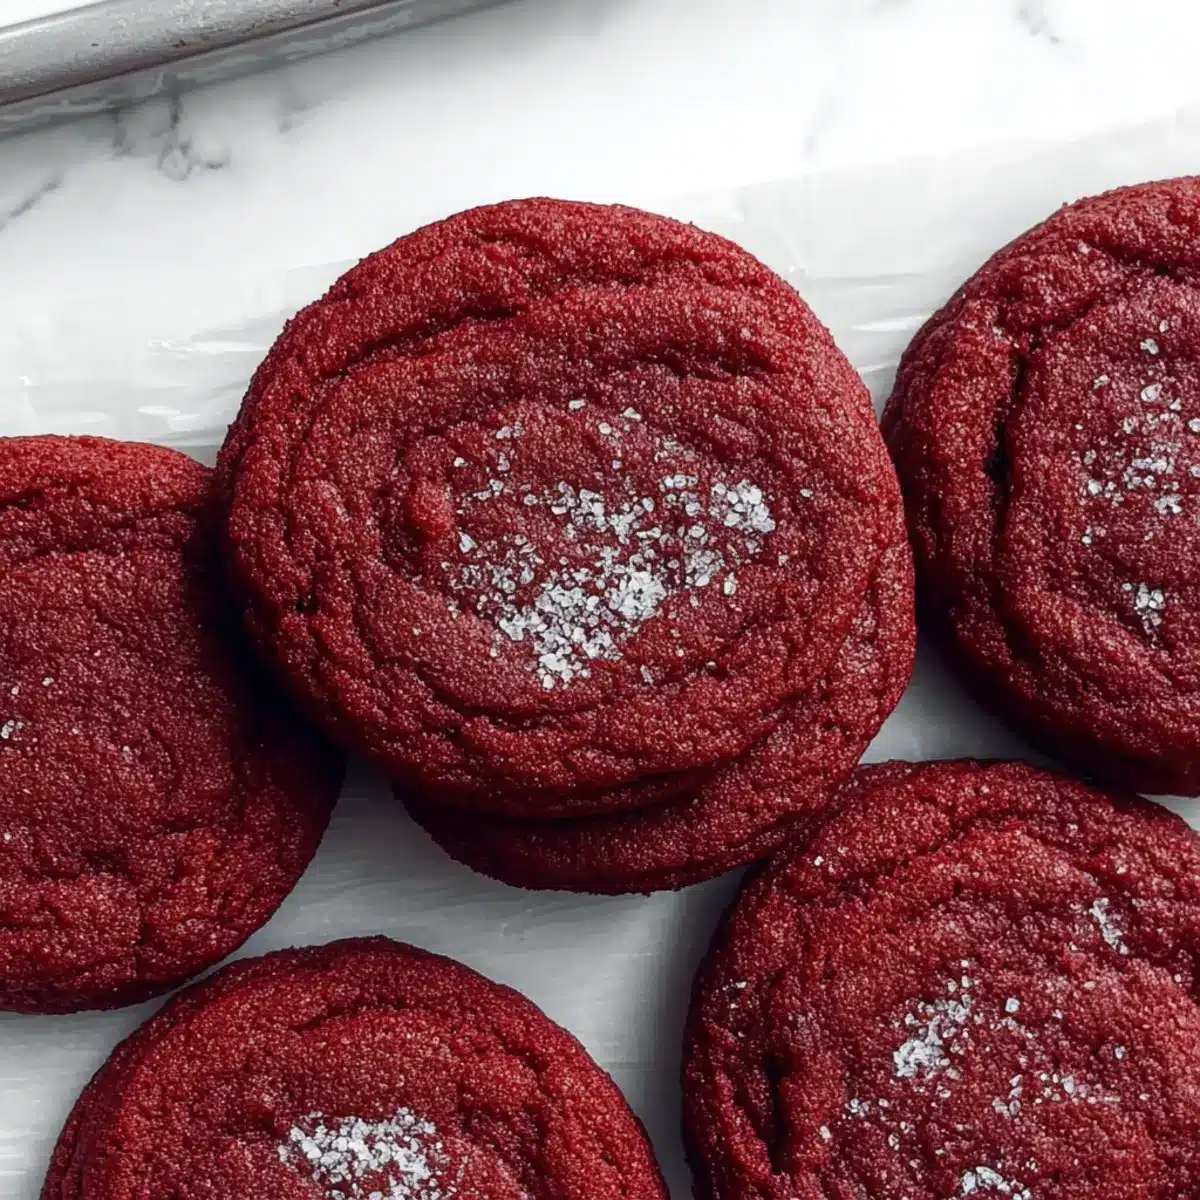
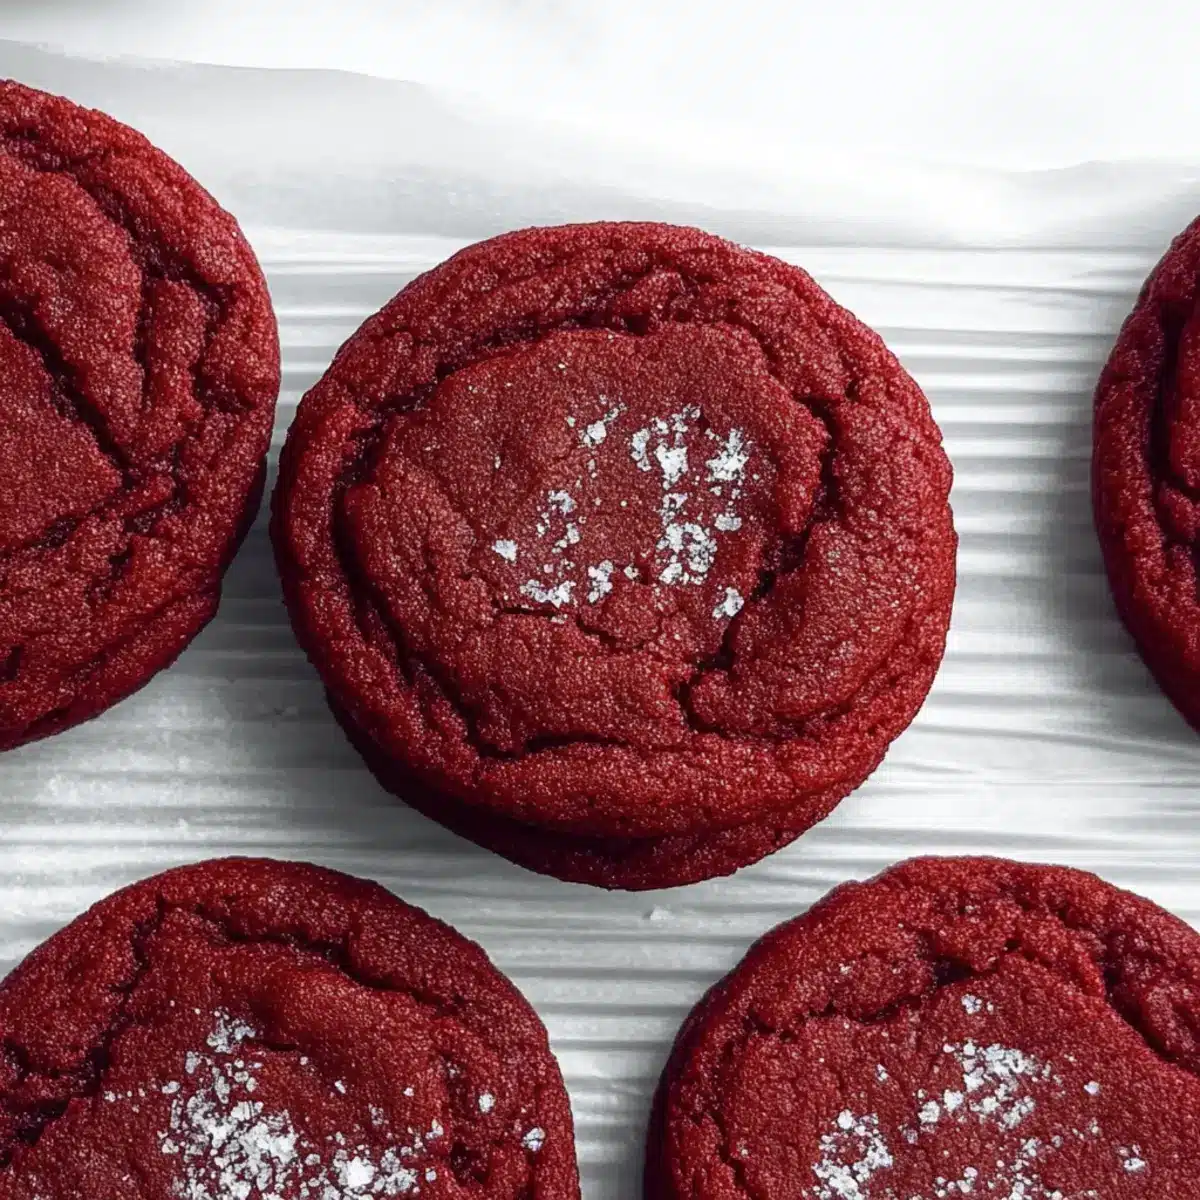
Soft & Chewy: Experience the bliss of a perfect texture as each bite reveals a chewy, fudgy center that’s simply delightful.
Versatile Toppings: Elevate your cookies with cream cheese frosting or enjoy them plain; the choice is yours! They fit any occasion, just like these Smothered Cheesy Sour treats.
Gluten-Free Option: With a simple swap, those with gluten sensitivities can also savor these beauties, ensuring everyone can indulge.
Quick & Easy: No fancy equipment needed—just mix and bake for delicious results! These irresistible cookies will quickly become a staple in your baking repertoire.
Red Velvet Cookies Ingredients
For the Dough
• Unsalted Butter – Adds richness and moisture; can substitute with margarine or coconut oil for a dairy-free option.
• Granulated Sugar – Sweetens the dough; substitute with brown sugar for a deeper flavor profile.
• Brown Sugar – Enhances moisture and adds caramel notes; equal amount of granulated sugar can replace it if necessary.
• Egg – Binds ingredients together; a flax egg works for a vegan version.
• Vanilla Extract – Provides depth of flavor; almond extract can be a delightful alternative.
• Red Gel Food Coloring – Gives the cookies their signature color; liquid food coloring may alter texture but can be used.
• All-Purpose Flour – The main structure; gluten-free flour blends can replace it for those with gluten sensitivities.
• Unsweetened Cocoa Powder – Contributes to the chocolate flavor; opt for Dutch-processed cocoa for a more intense taste.
• Baking Powder – Essential for helping the cookies rise; no direct substitutes recommended.
• Baking Soda – Works with acid in the dough for leavening.
• Salt – Balances sweetness and enhances overall flavors.
For the Topping
• Red Sanding Sugar – Adds extra visual appeal; regular granulated sugar can be a substitute if needed.
These Red Velvet Cookies are crafted with love and designed for indulgence—perfect for any occasion!
Step‑by‑Step Instructions for Irresistibly Chewy Red Velvet Cookies
Step 1: Melt Butter
Begin by melting unsalted butter in a small saucepan over low heat, stirring continuously until completely liquid. Once melted, transfer the butter to a bowl and place it in the freezer for about 15 minutes, or until it’s cold but not solid, achieving that perfect texture for mixing later on.
Step 2: Mix Wet Ingredients
In a mixing bowl, whisk together the chilled melted butter with granulated sugar, brown sugar, and one egg. Add in the vanilla extract and stir until the mixture is smooth and creamy in consistency. As you combine these ingredients, you’ll begin to smell that delightful aroma of sweet vanilla, building anticipation for your Red Velvet Cookies.
Step 3: Add Red Food Coloring
To the wet mixture, carefully add red gel food coloring, and mix thoroughly until the color is evenly distributed. This step creates the signature hue of your cookies, making sure to blend until there are no streaks. The vibrant red should gleam vividly, giving you a preview of the eye-catching treats that await.
Step 4: Combine Dry Ingredients
In a separate bowl, whisk together all-purpose flour, unsweetened cocoa powder, baking powder, baking soda, and salt until well mixed. This dry mix provides the foundation for your Red Velvet Cookies. Make sure there are no clumps, allowing the cookies to rise perfectly during baking for that soft and chewy texture.
Step 5: Mix Wet and Dry Ingredients
Gently fold the dry ingredients into the wet mixture using a spatula, being careful not to over-mix. You want to combine them just until there are no dry patches left, creating a thick dough that resembles brownie batter. This is where your cookies begin to take shape, and the smell of cocoa fills the air.
Step 6: Preheat the Oven
While the dough rests at room temperature, preheat your oven to 350°F (175°C). Allowing the dough to rest helps to develop its flavor and texture, ensuring each cookie comes out irresistibly soft and chewy. Meanwhile, prepare your baking sheets by lining them with parchment paper.
Step 7: Portion the Dough
Using a cookie scoop or your hands, portion out the dough into balls, about 1.5 inches in diameter. Roll each ball in red sanding sugar or granulated sugar for a lovely finish. Arrange the coated dough balls on the prepared baking sheets, leaving space between them to allow for spreading while baking.
Step 8: Bake the Cookies
Place the baking sheets in the preheated oven and bake for 9 to 10 minutes. Keep an eye on them—when the edges are set and the centers are just slightly puffy, they are done. This step is critical; under-baking slightly will ensure that your Red Velvet Cookies remain soft and chewy.
Step 9: Cool the Cookies
Once baked, remove the cookies from the oven and allow them to cool on the baking sheets for 5 to 10 minutes. During this time, the cookies will firm up a bit while maintaining their delicious softness. Transfer them carefully to a wire rack to cool completely, allowing you to enjoy them at their best texture.

Red Velvet Cookies Variations & Substitutions
Get ready to explore delicious ways to customize your Red Velvet Cookies, allowing your creativity in the kitchen to shine!
- Dairy-Free: Substitute butter with coconut oil or margarine. This simple change keeps the cookies rich while making them suitable for those avoiding dairy.
- Sugar Swap: Use coconut sugar instead of granulated sugar for a lower glycemic index and a hint of caramel flavor. They’ll have a subtle earthy sweetness that truly pleases.
- Extra Chocolate: Fold in ½ cup of chocolate chips, either milk or dark, for a delightful texture and extra chocolatey goodness. Imagine biting into a cookie and getting that surprise burst of melted chocolate!
- Nutty Twist: Incorporate ½ cup of chopped walnuts or pecans to add a lovely crunch and a nutty flavor that complements the rich red velvet base beautifully.
- Cream Cheese Frosting: For the ultimate indulgence, pipe cream cheese frosting on top or sandwiched between cookies. This classic pairing elevates the treat to a whole new level.
- Spiced Up: Add 1 teaspoon of cinnamon or a pinch of cayenne pepper for a warm, spicy kick that contrasts wonderfully with the sweetness. The dual flavors will dance harmoniously on your palate.
- Gluten-Free: Swap all-purpose flour with a gluten-free blend that contains xanthan gum. This ensures that your cookies remain soft and chewy without compromising texture.
- Festive Sprinkles: Top with red sanding sugar or holiday-themed sprinkles for a fun and festive touch, perfect for any celebration! Consider using the gorgeous shape of cookies and toppings for a delightful presentation, just like these amazing Smothered Cheesy Sour treats.
Each variation welcomes you to tailor the cookies to your taste, ensuring every batch is a delicious delight that speaks to your cravings!
Storage Tips for Red Velvet Cookies
- Room Temperature: Store cookies tightly covered at room temperature for up to 5 days. Use an airtight container to maintain their soft and chewy texture.
- Fridge: For longer freshness, you can refrigerate the cookies, but this may alter their texture slightly. They’ll last for up to 7 days in the fridge.
- Freezer: Freeze cookies for up to 3 months. Wrap them individually in plastic wrap and place them in a freezer bag. Thaw at room temperature or warm slightly in the oven for that freshly-baked taste.
- Reheating: Enjoy the best experience by reheating cookies in the microwave for about 10-15 seconds or in a preheated oven at 350°F for 5 minutes to restore their delightful softness.
What to Serve with Irresistibly Chewy Red Velvet Cookies
Elevate your cookie experience by pairing these delightful treats with complementary dishes that create a lovely dessert spread.
-
Chilled Milk:
A classic pairing, cold milk balances the sweetness of the cookies while enhancing their rich, fudgy flavor. -
Coffee:
Enjoy a cup of freshly brewed coffee for a delightful contrast. The bitterness perfectly offsets the cookies’ sweetness, making each bite more enjoyable. -
Cream Cheese Frosting:
Slathering some cream cheese frosting on top gives an extra layer of indulgence that stays true to the red velvet cake roots. -
Vanilla Ice Cream:
Serving these cookies warm alongside a scoop of vanilla ice cream creates a tempting dessert duo. The melting ice cream complements their soft texture beautifully. -
Fruit Salad:
A refreshing fruit salad adds a burst of freshness to the dessert table, balancing the richness of the cookies with some vibrant flavors and textures. -
Chocolate Milkshake:
Indulge in a thick chocolate milkshake alongside your cookies for a nostalgic twist. The creamy, chocolaty goodness is a fabulous treat with every nibble. -
Hot Chocolate:
Pairing these cookies with a cozy cup of hot chocolate brings out their luxurious nature, making for a comforting dessert experience.
With these servings, your irresistibly chewy red velvet cookies will shine even brighter!
Make Ahead Options
These Red Velvet Cookies are perfect for meal prep enthusiasts, allowing you to enjoy fresh-baked goodness with minimal effort. You can prepare the cookie dough up to 24 hours in advance; simply mix the ingredients as instructed and store the dough tightly covered in the refrigerator. This not only saves you time but also enhances the flavors! When you’re ready to bake, allow the dough to sit at room temperature for about 20 minutes before portioning and rolling in sugar. Bake them as directed for that soft and chewy texture just like you want! By prepping ahead, you can have warm, delightful cookies ready in a snap, ideal for busy weeknights or last-minute gatherings.
Expert Tips for Red Velvet Cookies
- Don’t Over-Bake: Keep a close eye on the cookies! Over-baking can lead to a dry texture instead of that soft and chewy bliss we crave.
- Use Gel Food Coloring: For the most vibrant color without affecting the dough’s moisture, opt for gel food coloring over liquid options.
- Chill Your Butter: Make sure the melted butter is properly cooled before mixing. This helps achieve the right cookie consistency, preventing overly greasy results.
- Mix Gently: When combining wet and dry ingredients, fold them together gently to avoid over-mixing. This ensures your cookies remain tender and chewy.
- Experiment with Frosting: For a decadent touch, try adding cream cheese frosting or ganache between two cookies for delightful dessert sandwiches!
- Perfect for Gluten-Free: If you’re using gluten-free flour, check that it contains xanthan gum to maintain the right structure in your Red Velvet Cookies.

Red Velvet Cookies Recipe FAQs
How do I choose the right red gel food coloring?
To achieve the vibrant hue that defines these Red Velvet Cookies, I recommend using gel food coloring because it gives you a deeper color without affecting the dough’s moisture. Avoid liquid food coloring, as it can change the cookie’s texture, making them less chewy and soft.
How should I store my Red Velvet Cookies?
Store your cookies tightly covered at room temperature for up to 5 days in an airtight container. This ensures they maintain that delightful soft and chewy texture. If you need them to last longer, you can refrigerate them for up to 7 days, but keep in mind that the texture may slightly change.
Can I freeze Red Velvet Cookies?
Absolutely! To freeze, wrap each cookie individually in plastic wrap and then place them in a freezer bag. They can last for up to 3 months in the freezer. When you’re ready to enjoy, thaw them at room temperature or warm them slightly in the microwave for about 10-15 seconds, or bake at 350°F for 5 minutes to restore that fresh-baked taste.
What should I do if my Red Velvet Cookies come out too dry?
If your cookies have turned out dry, it could be due to over-baking. Keep an eye on them while they bake; as soon as the edges are set and the centers are slightly puffy, take them out. For the next batch, aim for shorter baking time. Additionally, be sure to gently fold wet and dry ingredients to avoid over-mixing, which can also contribute to dryness.
Are there any dietary considerations for the ingredients?
Yes, if you’re baking for someone with dietary restrictions, you can easily make these cookies gluten-free by swapping out all-purpose flour for a gluten-free blend. Ensure that the flour you choose contains xanthan gum for optimal texture. Additionally, for a dairy-free version, you can substitute unsalted butter with coconut oil or margarine. Just remember to check for allergies, especially if you’re adding toppings or mix-ins like chocolate chips!
Can I add toppings to my Red Velvet Cookies?
Very! You can elevate these cookies further by adding cream cheese frosting between two cookies for a delightful treat. If you’re looking for variations, try mixing in chocolate chips, or rolling the cookies in colored sanding sugar for a festive appearance. Let your creativity soar!
Soft & Chewy Red Velvet Cookies You’ll Crave Daily
Ingredients
Equipment
Method
- Melt unsalted butter in a small saucepan over low heat, stirring continuously until liquid. Transfer to a bowl and freeze for about 15 minutes until cold but not solid.
- In a mixing bowl, whisk together the chilled melted butter with granulated sugar, brown sugar, and one egg. Add vanilla extract and stir until smooth and creamy.
- Carefully add red gel food coloring to the wet mixture and mix thoroughly until evenly distributed.
- In a separate bowl, whisk together all-purpose flour, cocoa powder, baking powder, baking soda, and salt until well mixed.
- Gently fold the dry ingredients into the wet mixture using a spatula until no dry patches remain.
- Preheat your oven to 350°F (175°C). Prepare baking sheets by lining with parchment paper.
- Portion the dough into balls about 1.5 inches in diameter and roll each in red sanding sugar.
- Place the baking sheets in the oven and bake for 9 to 10 minutes until edges are set and centers are slightly puffy.
- Allow cookies to cool on baking sheets for 5 to 10 minutes, then transfer to a wire rack to cool completely.
Leave a Reply