
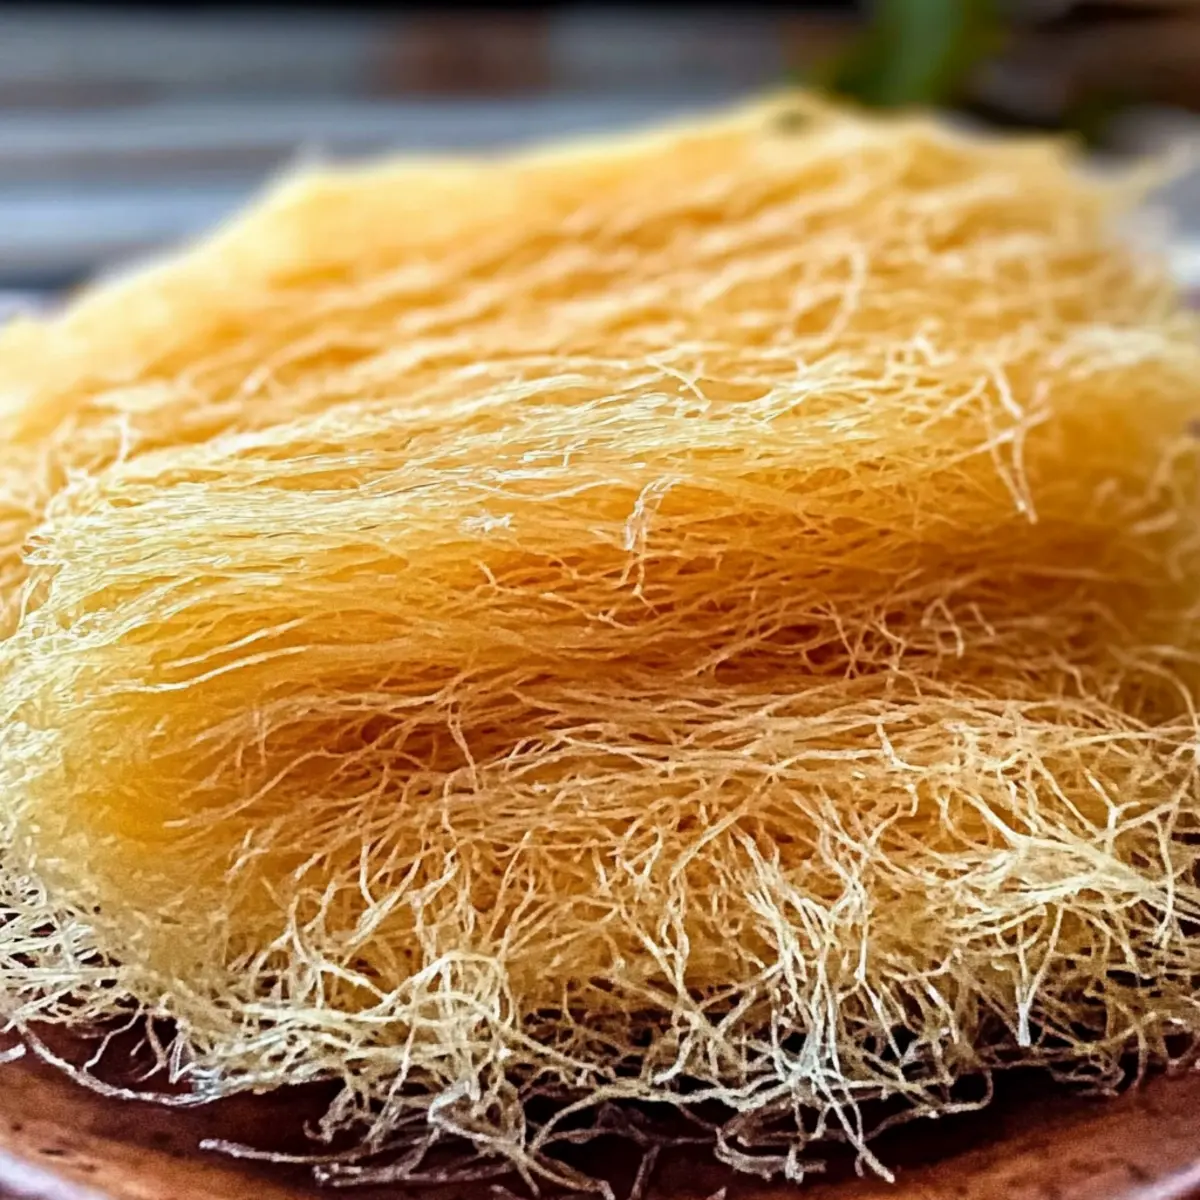
As I stood in my kitchen, the tantalizing scent of warm flour and oil wafted around me, instantly transporting me to bustling Middle Eastern markets. Today, I’m excited to share how to make kataifi from scratch—a flaky pastry that’s not just a treat for the eyes but incredibly versatile as well! This delightful dough can be transformed into sweet or savory masterpieces, whether you’re filling them with nuts, honey, or even a spicy mixture for an unexpected twist. In about 45 minutes, you’ll unleash your inner chef while impressing family and friends with your culinary craftsmanship. Plus, making kataifi is not only fun but also an amazing way to elevate your homemade food game. Are you ready to embark on this delicious journey? Let’s get started!
Why Love Making Kataifi from Scratch?
Flaky Delight: The process of creating kataifi from scratch gives a satisfying crunch that enhances any dish.
Versatile Canvas: You can fill this pastry with sweet or savory delights, allowing your creativity to shine.
Crowd-Pleasing: Impress family and friends alike with this unique treat at gatherings or holidays.
Quick and Easy: With just 45 minutes from start to finish, you can whip up something extraordinary without a long wait.
Cultural Connection: Making kataifi not only engages your culinary skills but also connects you to the rich traditions of Middle Eastern cuisine.
Kataifi From Scratch Ingredients
For the Dough
- All-Purpose Flour – Essential for the structure of your kataifi, helping it hold its shape while baking.
- Cornstarch – Provides an extra level of flakiness; if you’re in a pinch, potato starch is a workable alternative.
- Sugar – Enhances sweetness; feel free to omit for savory versions or adjust according to taste.
- Salt – Vital for flavor balance, even in sweet pastries like kataifi.
- Vegetable Oil – Keeps the dough moist; for a richer flavor, consider substituting with melted butter or ghee.
- Water – Binds the ingredients together; warm water works best for a smoother mixture.
Feel free to experiment, but these ingredients are key to crafting a delicious kataifi from scratch!
Step‑by‑Step Instructions for Kataifi From Scratch
Step 1: Prepare Dry Ingredients
In a medium bowl, whisk together 2 cups of all-purpose flour, ½ cup of cornstarch, 1 tablespoon of sugar, and ½ teaspoon of salt until thoroughly combined. The mixture should be uniform and slightly airy. This step lays the foundation for your kataifi, ensuring the right texture before you add the wet ingredients.
Step 2: Combine Wet Ingredients
Next, pour in ½ cup of vegetable oil and 1 cup of warm water into your dry mixture. Using a whisk, blend everything until you achieve a smooth and thick batter, free of lumps. This ensures your kataifi will hold together beautifully during cooking. The batter should flow smoothly but have enough body to create distinct strands.
Step 3: Prepare Piping Bag
To start forming your kataifi, fit a piping bag with a small round tip, then sieve the batter into it. This step prevents clumps from forming and ensures even distribution when you pipe the strands onto the pan. Make sure to secure the bag tightly so the batter doesn’t spill out from the top while you’re working.
Step 4: Cook Kataifi
Heat a non-stick pan over low heat, ensuring it’s warm but not too hot to prevent scorching. Squeeze the piping bag gently to create zig-zag patterns of thin strands across the pan, covering the surface lightly. Cook for about 2-3 minutes, or until the edges begin to lift and turn golden, indicating they are ready to be removed.
Step 5: Remove Pastry
Once the kataifi strands are lightly golden and easily peel away from the pan, use a spatula to transfer each piece onto a plate. Allow them to cool slightly; this process should be done swiftly to maintain the delicate texture of your kataifi. You’ll see how airy and flaky they are, ready to be filled or served as is.
Step 6: Repeat
Continue the process with the remaining batter, maintaining low heat. For each batch, pipe the mixture into the pan, cooking until golden and crispy before removing. This method allows you to create a delightful array of kataifi strands, ensuring each piece turns out perfectly flaky. With patience, you’ll have a lovely platter of kataifi ready for your next masterpiece.
Kataifi From Scratch: Creative Twists
Embrace your culinary spirit and let your imagination soar with these fun variations for kataifi!
-
Nutty Delight: Fill kataifi with a mixture of ground pistachios or walnuts mixed with sugar and cinnamon for a crunchy surprise. The rich flavors elevate this delicate pastry, making each bite an explosion of delight!
-
Chocolate Lovers: For a sweet twist, melt dark chocolate and drizzle it over cooked kataifi or create a chocolate filling. This indulgent option is perfect for satisfying those sweet cravings!
-
Savory Spin: Incorporate sautéed spinach and feta cheese into your kataifi for a savory appetizer that’s bursting with Mediterranean flavor. The saltiness of the feta complements the flaky pastry beautifully.
-
Spicy Kick: Add a touch of heat by blending finely chopped jalapeños or chili flakes into your filling. This twist will tickle your taste buds and give your dish an exciting edge!
-
Citrus Infusion: Brighten up your kataifi with a sweet citrus syrup made from orange or lemon juice. Drizzle this tangy goodness over the baked strands for a refreshing finish.
-
International Flair: Try adding a filling inspired by dim sum; use a mixture of shrimp and ginger with a dash of soy sauce. This combination takes your kataifi on a culinary adventure beyond borders!
-
Sweet Fruit Medley: Mix fresh fruits like strawberries or raspberries with a hint of honey for a vibrant and refreshing filling. Topped with a sprinkle of powdered sugar, it becomes a picturesque dessert!
-
Herb-Infused Fun: For a unique take, incorporate fresh herbs like dill or mint into your savory fillings. This adds a refreshing aroma and flavor that’s sure to impress at gatherings.
Enjoy experimenting with these variations, and don’t forget to explore homemade dips or sauces to complement your kataifi experience, enhancing the flavors even further. Happy cooking!
How to Store and Freeze Kataifi
Fridge: Store leftover kataifi in an airtight container for up to 2 days to maintain its crispness. Reheat briefly in a preheated oven to restore texture.
Freezer: Freeze kataifi strands by placing them in a single layer on a baking sheet until firm, then transfer to a freezer bag. They can be stored for up to 2 months.
Reheating: To reheat frozen kataifi, place it directly on a baking sheet in a preheated oven at 350°F (175°C) for about 10-15 minutes until hot and crispy.
Freshness Tip: For the best flavor and texture, enjoy kataifi from scratch within a day or two; it’s definitely at its peak when freshly made!
Expert Tips for Kataifi From Scratch
-
Ingredient Prep: Make sure to measure all ingredients in advance to streamline the cooking process and avoid any last-minute confusion.
-
Piping Technique: Take your time when piping the kataifi strands; maintaining an even speed will yield consistent shapes and even cooking.
-
Heat Control: Cook over low heat only; high temperatures will burn the kataifi quickly. Patience is key to achieving that beautiful, crunchy texture.
-
Experiment with Fillings: Don’t hesitate to fill your kataifi with unique ingredients like chopped nuts or sweetened cheese. It’s a great way to customize your flavors!
-
Storage Advice: Kataifi is best served immediately. If needed, store in an airtight container but reheat lightly to restore its crispiness.
-
Avoiding Common Mistakes: Ensure your batter is smooth to prevent clogs in the piping bag, which can disrupt the shape of your kataifi.
What to Serve with Kataifi From Scratch?
Indulge in the delightful experience of creating a meal that tantalizes all your senses, where every bite feels like a celebration.
- Honey Drizzle: A warm drizzle of honey brings a touch of sweetness that complements the flaky nature of kataifi beautifully.
- Chopped Nuts: Toasted pistachios or almonds add a delicious crunch and contrasting flavors that elevate your dish to a new level.
- Greek Yogurt Dip: A cool, creamy yogurt dip with a hint of garlic provides a savory balance to the sweet pastries, making each bite delightful.
No meal is complete without a refreshing drink. Try pairing with a light mint lemonade or unsweetened tea to cut through the richness.
- Fresh Fruits: Sliced oranges or berries not only add vibrant color to your plate but also offer a refreshing contrast, making the meal feel lighter.
- Coffee or Tea: A cup of strong coffee or traditional Middle Eastern tea enhances the flavor experience and connects beautifully to the regional roots of kataifi.
- Baklava: For a dessert extravaganza, serve with rich baklava, creating a themed feast that will have everyone talking for weeks to come.
- Spiced Lamb: A savory option like spiced lamb skewers brings a hearty note that contrasts nicely with the lightness of the kataifi. It’s a celebration of textures and flavors!
- Cinnamon Sugar Sprinkles: If you’re leaning towards sweetness, sprinkle some cinnamon sugar on top of warm kataifi for an added aromatic twist.
Let your creativity soar!
Make Ahead Options
These kataifi from scratch are perfect for busy home cooks who want to save time during meal prep! You can prepare the batter up to 24 hours in advance by mixing the dry ingredients (flour, cornstarch, sugar, and salt) and storing them in an airtight container. Additionally, combine the wet ingredients (vegetable oil and warm water) and keep them chilled until you’re ready to cook. When it’s time to serve, simply whisk together the wet and dry mixtures and pipe the kataifi as directed. This approach ensures your kataifi maintain their delightful texture and flavor, letting you enjoy this flaky masterpiece with minimal hassle!
Kataifi From Scratch Recipe FAQs
What type of flour should I use for kataifi?
Absolutely! For kataifi from scratch, all-purpose flour is essential as it provides the right structure to hold your pastry together during cooking. It’s best to avoid flour with high protein content, as that can make the dough too tough.
How should I store leftover kataifi?
Kataifi is best enjoyed fresh, but if you have leftovers, store them in an airtight container in the refrigerator for up to 2 days. To reheat, briefly place them in a preheated oven to refresh their crispness—about 5-10 minutes at 350°F (175°C) should do the trick!
Can I freeze kataifi, and if so, how?
Very! To freeze kataifi strands, spread them in a single layer on a baking sheet and flash freeze until firm—this takes about 1-2 hours. Once frozen, transfer them to a freezer bag, sealing out as much air as possible. They can be frozen for up to 2 months. When you’re ready to enjoy, bake straight from frozen at 350°F (175°C) for about 10-15 minutes for that perfect crunch!
What should I do if my kataifi strands don’t come out evenly?
Not to worry; this can be a common issue! If your kataifi strands are uneven, double-check your piping technique—maintain a steady hand and even pressure while piping. If clogs occur in the piping bag, ensure your batter is smooth with no lumps, which can hinder the flow. Practice makes perfect; you’ll get the hang of it in no time!
Are there any dietary concerns with kataifi?
Definitely a consideration! If you’re making kataifi for someone with allergies, ensure that all your ingredients are free from common allergens like gluten or nuts; there are gluten-free flour alternatives available if needed. Additionally, if you’re including fillings, double-check those for allergen information as well.
How do I know when my kataifi is perfectly cooked?
You’ll notice it’s done when the edges begin to lift and turn lightly golden, which takes about 2-3 minutes per batch on low heat. The texture should feel airy and flaky to the touch, perfect for layering or filling with your favorite goodies!
Kataifi From Scratch: Flaky, Fun Pastry for Any Occasion
Ingredients
Equipment
Method
- In a medium bowl, whisk together 2 cups of all-purpose flour, ½ cup of cornstarch, 1 tablespoon of sugar, and ½ teaspoon of salt until thoroughly combined.
- Pour in ½ cup of vegetable oil and 1 cup of warm water into your dry mixture. Blend until you achieve a smooth and thick batter.
- Fit a piping bag with a small round tip, then sieve the batter into it.
- Heat a non-stick pan over low heat. Squeeze the piping bag to create thin strands across the pan and cook for about 2-3 minutes.
- Once the edges begin to lift and turn golden, transfer the kataifi strands onto a plate using a spatula.
- Continue the process with the remaining batter, maintaining low heat.
Leave a Reply