
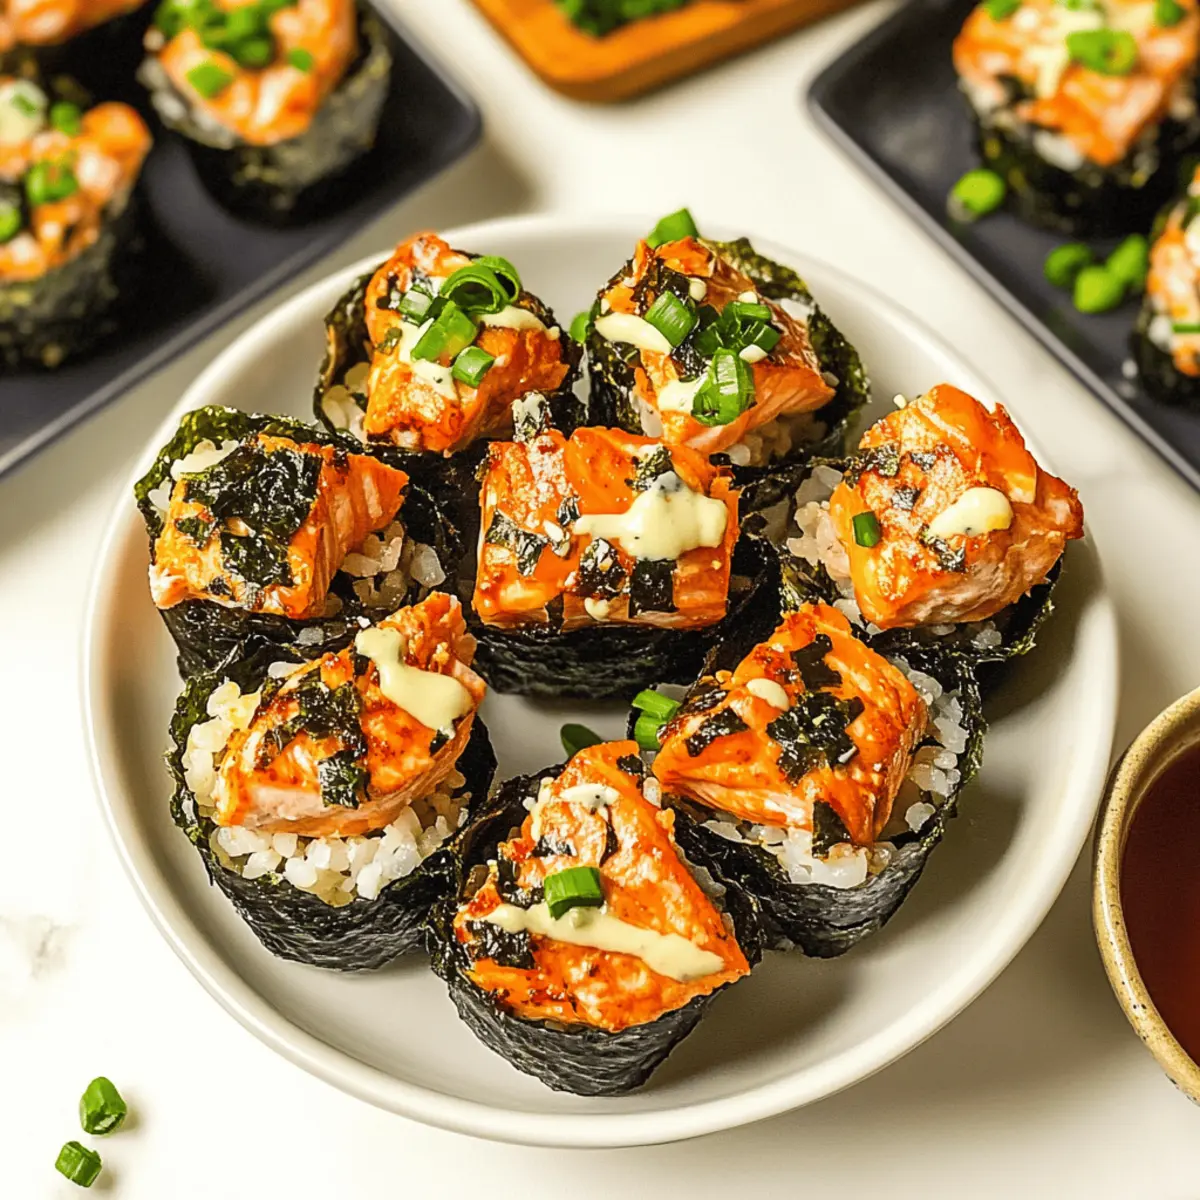
“Have you ever found yourself staring at those intricate sushi rolls on social media, wishing you could whip up something just as impressive without all the rolling and patience?” That’s exactly how I landed on these Easy Baked Salmon Sushi Cups. They capture the essence of sushi’s delightful flavors while offering the ease of a baked dish that’s perfect for gatherings or a cozy evening in. Not only are these baked sushi cups a crowd-pleaser, but they also give you a fun, deconstructed twist on traditional sushi rolls—no sushi mat required! Imagine indulging in warm salmon nestled in crispy nori, topped with creamy Kewpie mayo and a sprinkle of green onions for that fresh pop. Whether you’re a seasoned home chef or trying to impress with a quick, delicious appetizer, these Baked Salmon Sushi Cups are bound to steal the show. Ready to dive into sushi-making magic? Let’s get cooking!
Why are Baked Salmon Sushi Cups a Must-Try?
Baked Salmon Sushi Cups are a delightful twist on traditional sushi, offering a fun and simple way to enjoy these flavors. Endless versatility: Customize with your favorite toppings or protein substitutions like shrimp or veg. Perfect for gatherings: These bite-sized treats are easy to serve and share with friends. Quick preparation: With just a few ingredients and minimal cooking time, you can bring this dish to life faster than any takeout. Plus, they boast a warm, comforting texture that warms the soul, akin to my tasty Baked Feta Pasta and other easy recipes. Enjoy them fresh out of the oven or paired with a refreshing cucumber salad!
Baked Salmon Sushi Cups Ingredients
For the Salmon Mixture
- Salmon – Provides a rich, savory flavor and protein base; can substitute with tuna or cooked shrimp.
- Light Soy Sauce – Enhances the umami flavor in the salmon; use tamari for gluten-free options.
- Kewpie Mayo – Adds creaminess and a subtle tang; regular mayo can be used as a substitute.
- Sriracha – Offers a spicy kick to balance the richness of the salmon; adjust to taste or use a milder sauce if preferred.
- Sesame Oil – Infuses nuttiness into the dish; can replace with olive oil for a lighter touch.
For the Rice
- Uncooked Sushi Rice – Forms the base of the sushi cups, providing texture; substitute with short-grain rice for a different texture.
- Rice Vinegar – Used to season rice, adding a slight acidity; can substitute with apple cider vinegar for a different flavor.
- White Sugar – Balances the acidity in the rice vinegar; honey or agave syrup can be alternatives.
For the Nori Cups
- Nori Sheets – Create the structure of the sushi cups; rice paper can be an alternative for a different texture.
- Cooking Spray – Prevents sticking in muffin tins; use oil for greasing if preferred.
For Garnishing
- Furikake – Optional garnish that adds umami flavor and texture; can omit for a simpler finish.
- Green Onion – Provides freshness and color on top; can substitute with chives.
These Baked Salmon Sushi Cups bring together vibrant flavors and delightful textures for a perfect appetizer that everyone will love!
Step‑by‑Step Instructions for Baked Salmon Sushi Cups
Step 1: Cook Sushi Rice
Begin by preparing the uncooked sushi rice according to the package instructions, typically involving rinsing and cooking the rice with water in a pot or rice cooker. Once cooked, combine rice vinegar and white sugar in a microwave-safe bowl, heating for about 30 seconds until dissolved. Fluff the rice with a fork and gently fold in the vinegar mixture until fully incorporated.
Step 2: Prepare Salmon Mixture
In a mixing bowl, combine the chopped salmon with light soy sauce, Kewpie mayo, sriracha, and sesame oil. Stir well until the salmon is evenly coated with the creamy mixture, which will provide flavor and moisture. This will create the base for your filling, enhancing the overall taste of your Baked Salmon Sushi Cups.
Step 3: Preheat Oven
Preheat your oven to 400°F (200°C). This temperature is ideal for baking, ensuring the nori becomes crispy while cooking the salmon through. Meanwhile, gather your muffin tin and cooking spray, which will help prevent the sushi cups from sticking during the baking process.
Step 4: Prepare Nori
Take the nori sheets and cut them into squares that fit into the muffin tin. Each square should be approximately 5 inches, depending on your muffin tin’s size; this will help create cups to hold the filling securely. Ensure the squares are uniform in size for even cooking and a polished look.
Step 5: Assemble Cups
Spray the muffin tin generously with cooking spray. Place each nori square into the muffin cups, pressing it gently against the sides to create a well. Next, take a small portion of sushi rice and press it firmly into the bottom, followed by a generous layer of the salmon mixture. Gently pack the filling, ensuring it maintains its shape.
Step 6: Bake
Carefully place the muffin tin in the preheated oven and bake for approximately 15 minutes. You’ll know the Baked Salmon Sushi Cups are done when the salmon is golden and cooked through, and the nori edges appear crispy. Keep an eye on them during the last few minutes to prevent overcooking.
Step 7: Garnish & Serve
Once baked, remove the sushi cups from the oven and let them cool slightly before garnishing. Drizzle extra sriracha or Kewpie mayo on top, sprinkle with furikake for added flavor, and finish with chopped green onions. Serve warm for a delightful, bite-sized treat that everyone will love!

What to Serve with Easy Baked Salmon Sushi Cups
Transforming your meal into a culinary experience is easy when you pair these warm, savory bites with the right accompaniments.
-
Crispy Cucumber Salad: Refreshing and light, this salad elevates the sushi cups with crunch and vibrant flavors. Drizzle with a tangy dressing for an extra zing.
-
Pickled Ginger: A classic sushi companion, its sharpness can cleanse your palate, making each bite of sushi cup feel like a new beginning.
-
Miso Soup: This warm and comforting broth adds a delightful contrast to the sushi cups, creating a well-rounded meal that warms the heart.
-
Steamed Edamame: The gentle saltiness and tender texture of edamame blends perfectly with the sushi flavors, making it a simple yet satisfying side.
-
Sushi Roll Variations: Incorporate some traditional sushi rolls alongside for an exciting variety on the table, offering different textures and flavors in each bite.
-
Sake or Green Tea: Pair your meal with these drinks to enhance the dining experience. Sake adds an authentic touch, while green tea offers a calming finish.
-
Sesame Spinach Salad: The nutty flavors of sesame and the fresh, vibrant greens complement the sushi cups beautifully, adding nutritional value and color.
-
Mango Sticky Rice: End your meal on a sweet note with this dessert; it pairs wonderfully with the savory elements of the sushi cups, leaving your guests satisfied.
Each pairing not only adds delightful flavors but also enhances the overall dining experience with contrasting textures and fresh elements. Enjoy!
Make Ahead Options
These Baked Salmon Sushi Cups are a fantastic choice for meal prep, saving you time during busy weeknights! You can prepare the sushi rice and salmon mixture up to 24 hours in advance and store them in separate airtight containers in the refrigerator. When it’s time to serve, simply assemble the cups with nori and a layer of rice, followed by the salmon mixture, and bake as directed. This method allows you to enjoy all the delicious flavors just as fresh and vibrant. For optimal quality, be sure to keep the nori sheets separate until ready to bake, ensuring they stay crispy and prevent sogginess. Enjoy restaurant-quality sushi right at home, with minimal effort!
Expert Tips for Baked Salmon Sushi Cups
- Fresh Salmon Essential: Ensure salmon is fresh for optimal flavor and texture. Check for bright color and firm flesh when selecting your fish.
- Firm Rice Packing: Press sushi rice firmly into the nori cups to maintain their shape during baking. Loose rice can result in cups that fall apart.
- Watch Baking Time: Keep an eye on your sushi cups as they bake; adjust cooking times based on oven performance to achieve a golden, crispy finish.
- Customize Fillings: Feel free to experiment with different proteins or toppings for your baked salmon sushi cups. Shrimp or crab make delicious alternatives.
- Serve Immediately: These sushi cups are best enjoyed right out of the oven to savor their warm, comforting flavors and crispy exterior.
Baked Salmon Sushi Cups Variations
Feel free to mix things up and personalize these delicious sushi cups with your favorite flavors and ingredients!
-
Seafood Swap: Substitute salmon with crab or shrimp for a delightful seafood twist that adds unique flavors.
-
Veggie Delight: Use a mix of diced vegetables like bell peppers, cucumbers, and avocados for a fresh, vegetarian version that bursts with colors.
-
Saucy Kick: Top with a miso glaze or garlic aioli for an exciting flavor enhancement that will surprise your taste buds.
-
Nutrient Boost: Add some sautéed spinach or edamame into the salmon mixture for a nutritious punch that pairs beautifully with the original flavors.
-
Spice Level: Adjust the sriracha amount to suit your taste. You can use a milder sauce for less heat or add extra for a fiery kick that spices things up!
-
Crispy Panko: Sprinkle panko breadcrumbs on top before baking to give a delightful crunch to each bite, elevating texture in every mouthful.
-
Wrapped in Rice Paper: Swap nori for rice paper for a unique twist—create a lighter, different texture that complements the savory filling.
These variations can elevate your Baked Salmon Sushi Cups experience, making each bite as comforting and satisfying as the next. And if you’re up for more adventurous flavors, consider pairing your sushi cups with a refreshing cucumber salad or some pickled ginger on the side!
Storage Tips for Baked Salmon Sushi Cups
-
Fridge: Store leftover Baked Salmon Sushi Cups in an airtight container for up to 2-3 days. This helps maintain their flavors and texture while keeping the nori from becoming too soggy.
-
Freezer: For longer storage, place the sushi cups in a single layer on a baking sheet and freeze until solid. Then transfer them to a freezer-safe container for up to 1 month.
-
Reheating: To reheat, bake the frozen sushi cups at 350°F (175°C) for about 10-15 minutes, or until warmed through. Alternatively, you can microwave them, but be cautious as this may soften the nori.
-
Serving: Enjoy the Baked Salmon Sushi Cups fresh out of the oven for the best texture. If you store the leftovers, consider serving them with a drizzle of fresh Kewpie mayo or sriracha to revive their flavor!
Baked Salmon Sushi Cups Recipe FAQs
How do I choose the best salmon for my Baked Salmon Sushi Cups?
Absolutely! For the best flavor and texture, select fresh salmon that is bright in color, with a firm texture and no discoloration. Avoid any salmon that has dark spots, which indicates spoilage. It’s best to buy it from a trusted market and ask for sushi-grade salmon for the highest quality results.
What’s the best way to store leftover Baked Salmon Sushi Cups?
Great question! Leftover sushi cups can be stored in an airtight container in the refrigerator for up to 2-3 days. This helps preserve their taste and keep the nori from becoming too soggy. When you’re ready to enjoy them, just pop them in the oven at 350°F for about 10 minutes to revive their delightful texture!
Can I freeze Baked Salmon Sushi Cups?
Absolutely! To freeze your sushi cups, place them on a baking sheet in a single layer and freeze them until firm. Once solid, transfer them to a freezer-safe container or zip-top bag, where they can stay fresh for up to one month. When you’re ready to eat, simply bake them at 350°F for 10-15 minutes or until warmed through.
Why is my sushi rice not sticking together properly?
Very! If your sushi rice isn’t sticking, it may be because it hasn’t been properly cooked or seasoned. Ensure you rinse the rice before cooking to remove excess starch and prepare the vinegar mixture thoroughly. After cooking, stir the vinegar and sugar into the rice while it’s still warm, and be sure to pack the rice firmly into the nori cups during assembly.
Are Baked Salmon Sushi Cups safe for people with seafood allergies?
Absolutely! If you or your guests have seafood allergies, you can customize this recipe by substituting the salmon with cooked chicken, tofu, or even a medley of fresh vegetables. Just make sure to adjust the sauce and seasoning to fit the new protein or ingredient for an equally delicious result!
How long will Baked Salmon Sushi Cups last in the fridge or freezer?
Leftover Baked Salmon Sushi Cups can stay in the refrigerator for 2-3 days, while freezing them allows for storage of up to 1 month. Just remember, if you’re freezing them, it’s best to bake them to a perfect golden brown first, as they will maintain their taste better after reheating!

Baked Salmon Sushi Cups: The Perfect Bite-Sized Delight
Ingredients
Equipment
Method
- Cook the sushi rice according to package instructions, then mix with rice vinegar and sugar.
- Prepare the salmon mixture by combining salmon, soy sauce, mayo, sriracha, and sesame oil.
- Preheat your oven to 400°F (200°C) and prepare muffin tin with cooking spray.
- Cut nori sheets into squares and place in muffin tin to form cups.
- Assemble cups by pressing sushi rice at the bottom and layering with salmon mixture.
- Bake in the oven for 15 minutes or until salmon is cooked and nori edges are crispy.
- Garnish with sriracha, mayo, furikake, and green onions before serving.
Leave a Reply