
As I stood in my kitchen, the delightful scent of ripe bananas wafted through the air, instantly transporting me to my childhood. That nostalgia inspired my No Bake Banana Pudding Cheesecake, an easy dessert that melds the creaminess of classic banana pudding with the lusciousness of cheesecake—all without turning on the oven! This indulgent treat is not only a breeze to whip up, but it also allows for customization to suit any palate. Whether you serve it at family gatherings or enjoy a slice after a long day, it’s sure to be a hit. Not to mention, you can make it ahead of time, freeing you up for all sorts of fun, delicious moments with loved ones. Ready to dive into sweet satisfaction? Let’s get started!
Why is this cheesecake a game-changer?
Simplicity at its finest: This No Bake Banana Pudding Cheesecake requires no baking skills, making it perfect for all home cooks.
Endless Customization: You can easily switch the banana pudding for strawberry or vanilla, tailoring it to your tastes.
Time-Saving Delight: With minimal prep and chilling time, you can whip this dessert up in a flash, freeing you to enjoy more moments with family.
Nostalgic Flavor: The combination of creamy cheesecake and nostalgic banana pudding flavors delivers a comforting indulgence that’s hard to resist.
Perfect for Any Occasion: Whether it’s a family dinner or a casual gathering, this cheesecake is sure to impress your guests.
For more delightful desserts, check out my Fried Strawberry Cheesecake or try my Cheesecake Stuffed Baked for a fun twist!
No Bake Banana Pudding Cheesecake Ingredients
For the Cheesecake Filling
• Cream Cheese – Provides a rich, creamy base; use full-fat for optimal texture.
• Sweetened Condensed Milk – Adds sweetness and a luscious creaminess you’ll adore.
• Instant Banana Pudding Mix – Essential for thickening without baking; don’t substitute with cook-and-serve pudding for best results.
• Heavy Whipping Cream – Crucial for achieving that light and airy texture when whipped.
For the Crust
• Vanilla Wafers – Creates a crunchy base; feel free to swap with graham crackers or digestive biscuits if you prefer.
For the Topping
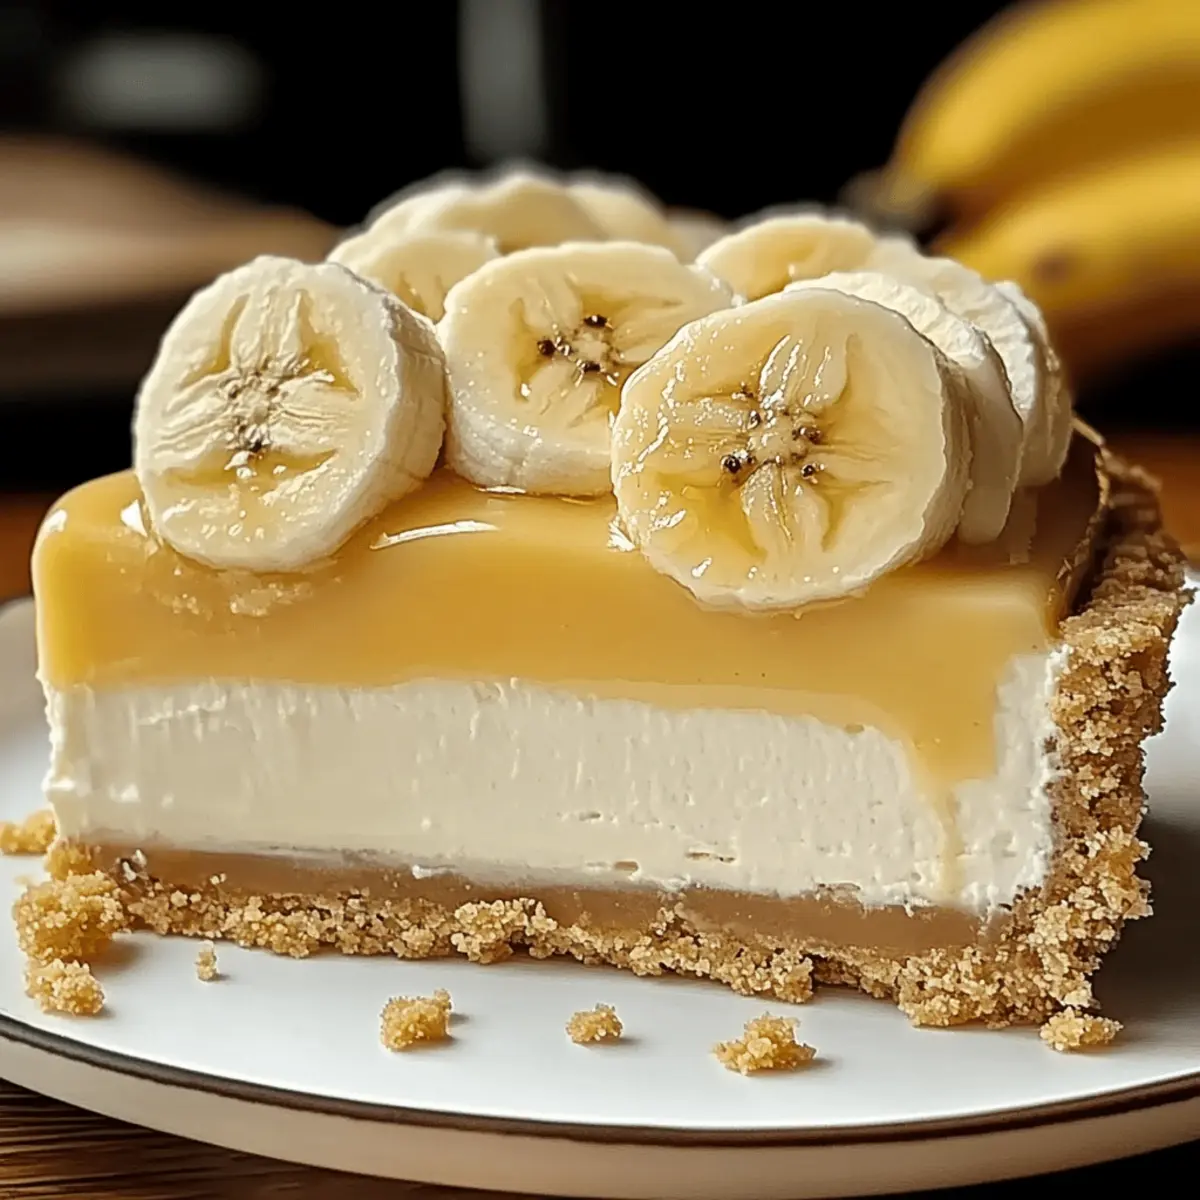
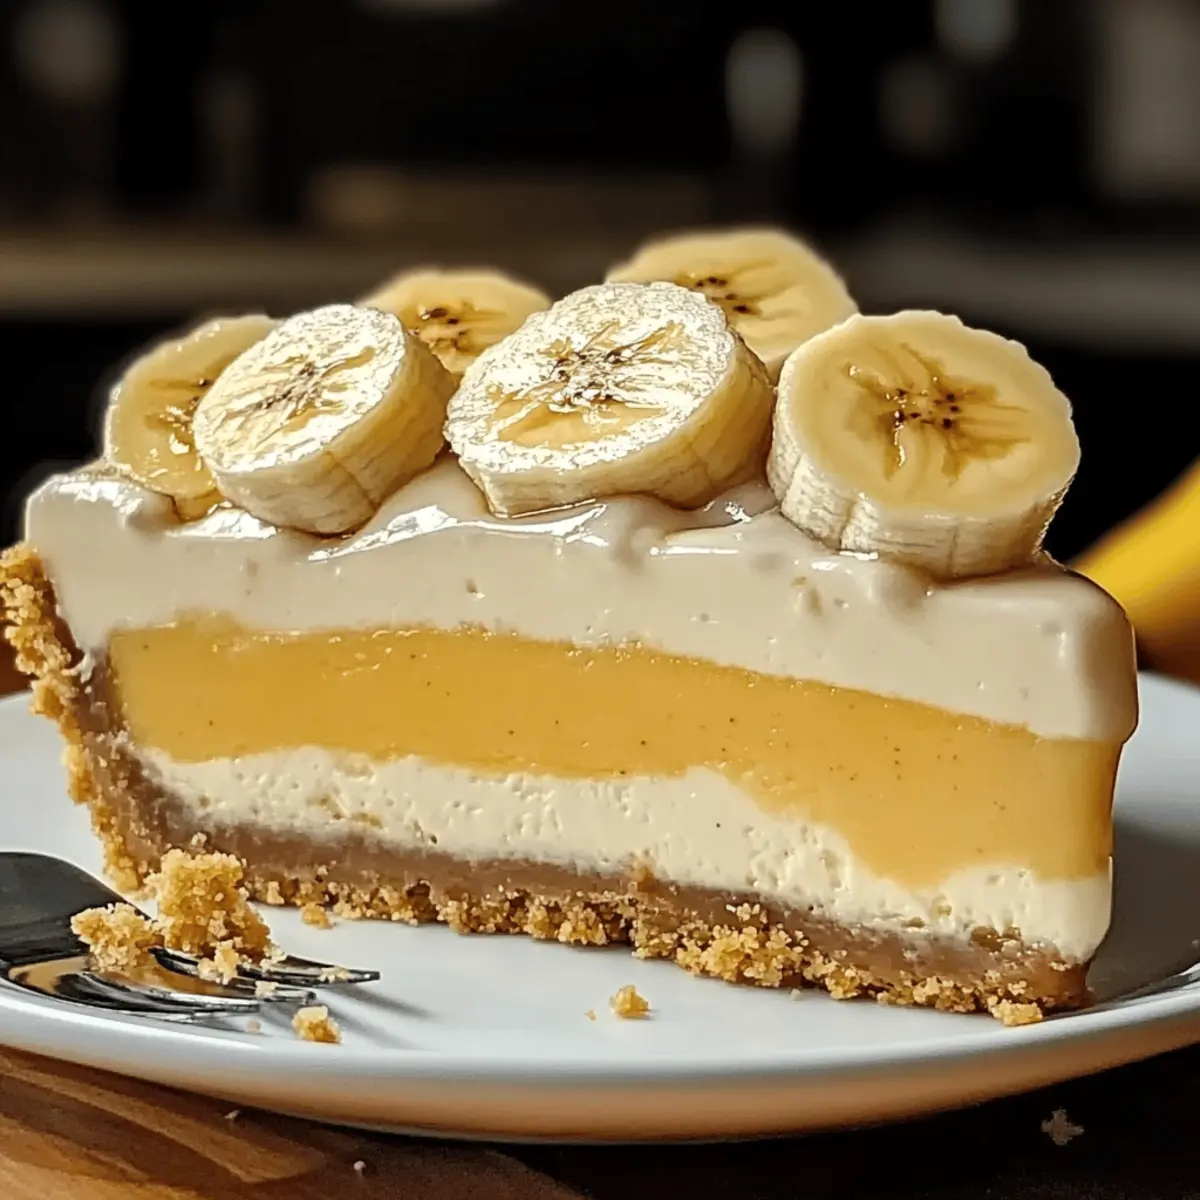
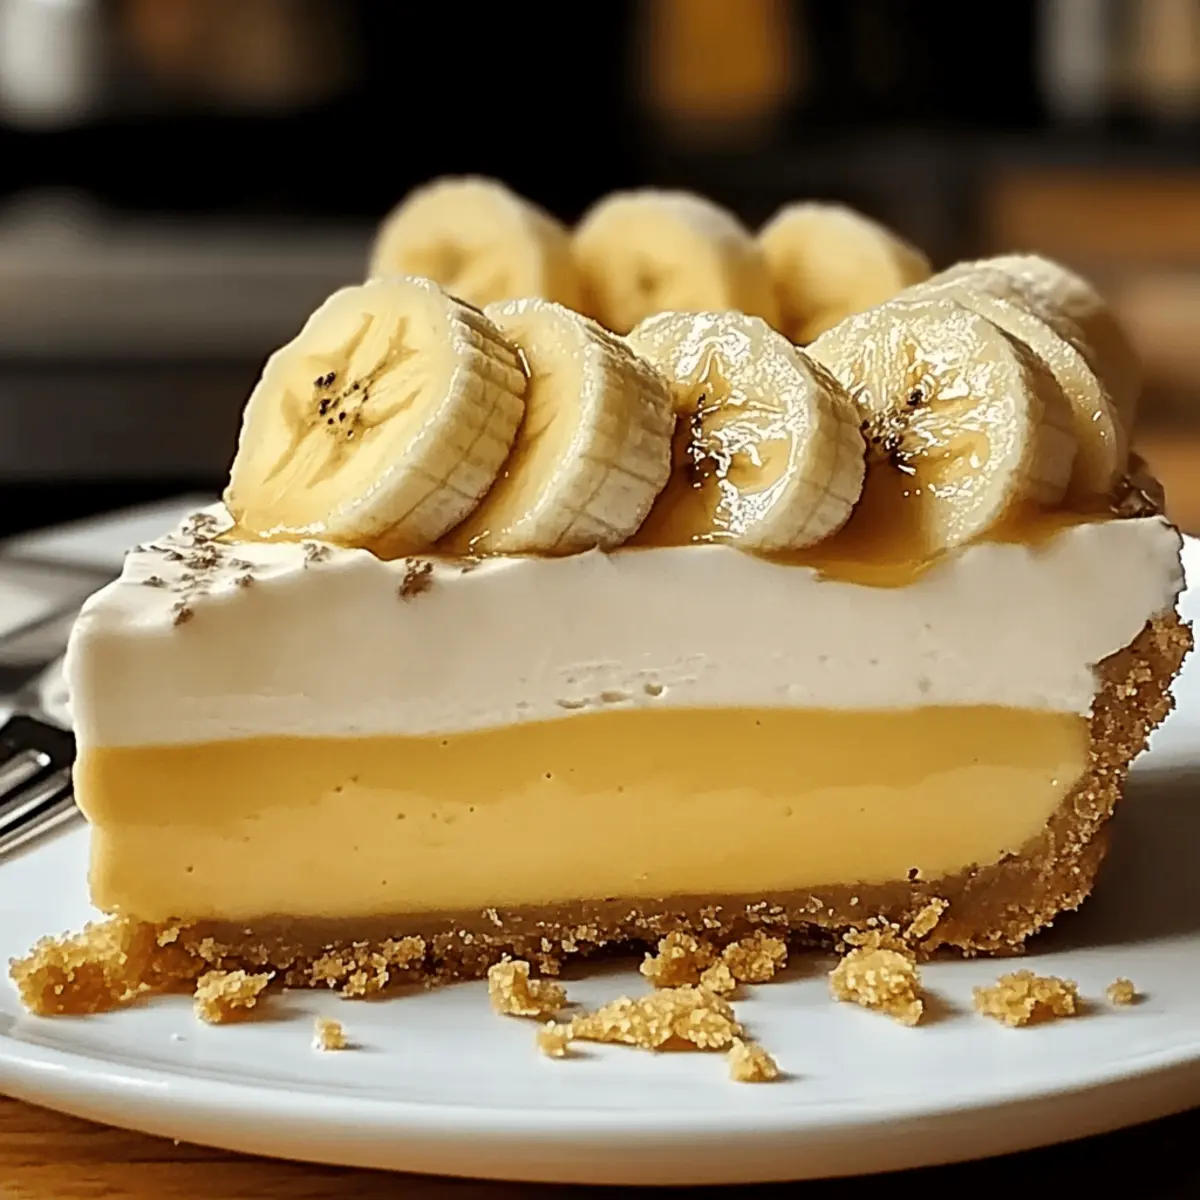
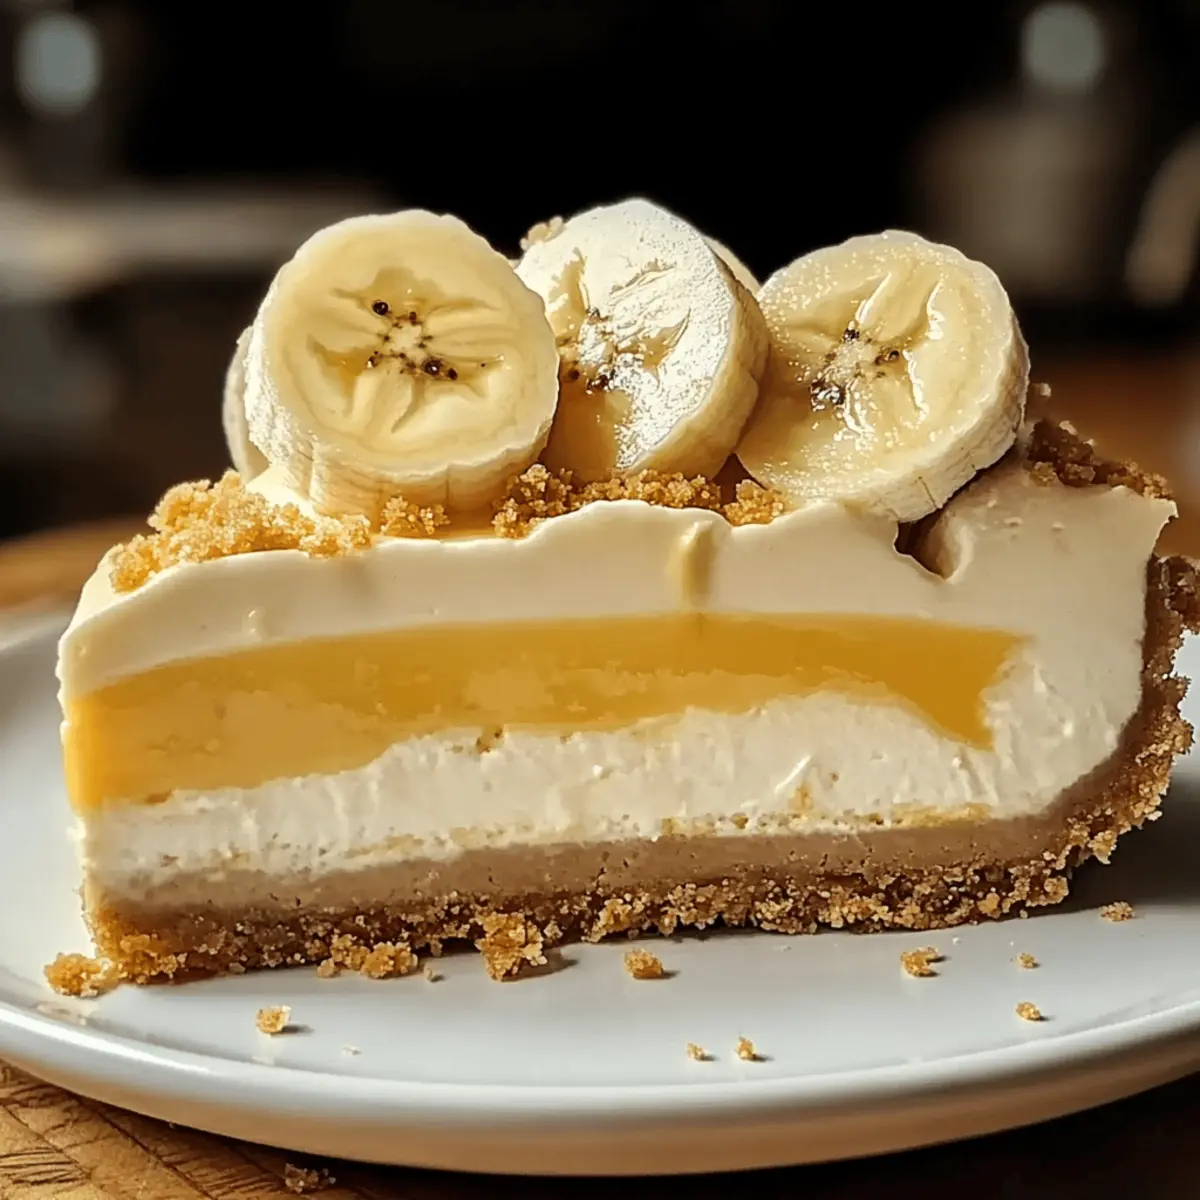
• Bananas – Freshly sliced, they add both flavor and visual appeal—don’t skimp on these!
Step‑by‑Step Instructions for No Bake Banana Pudding Cheesecake
Step 1: Prepare Crust
Start by crushing a generous amount of vanilla wafers until they resemble fine crumbs. In a mixing bowl, combine these crumbs with melted butter to achieve a wet, sand-like texture. Press this mixture firmly into the bottom of a 9-inch springform pan, ensuring it’s evenly distributed and compact—this will form the base of your No Bake Banana Pudding Cheesecake.
Step 2: Mix Filling
In a large mixing bowl, beat the cream cheese using an electric mixer until it’s silky smooth and lump-free. Gradually add in the sweetened condensed milk and instant banana pudding mix, mixing continuously until fully combined. The mixture should be creamy and thick, making it the ideal filling for your cheesecake—this will bring the banana pudding flavors to life.
Step 3: Fold in Whipped Cream
In a separate bowl, whip the heavy cream using a hand mixer until soft peaks form—this will take about 3-5 minutes. Gently fold the whipped cream into the banana pudding mixture using a spatula, being careful not to deflate the air you’ve incorporated. This step is crucial for achieving that light, airy texture in your No Bake Banana Pudding Cheesecake.
Step 4: Layer and Chill
Spread half of the luscious filling evenly over your prepared crust, creating a smooth layer. Next, add a layer of freshly sliced bananas, arranging them beautifully to enhance both flavor and presentation. Top with the remaining filling, spreading it gently. Cover the cheesecake with plastic wrap and refrigerate it for at least 6 hours, or overnight, allowing it to set beautifully.
Step 5: Serve
Once your No Bake Banana Pudding Cheesecake has chilled and set, carefully remove it from the springform pan. Slice it into pieces, and serve chilled. For an added touch, you can garnish with extra banana slices, whipped cream, or a sprinkle of crushed vanilla wafers before enjoying this deliciously comforting dessert!
No Bake Banana Pudding Cheesecake Variations
Feel free to play with these ideas to make your cheesecake uniquely yours!
-
Strawberry Twist: Substitute banana pudding with strawberry instant pudding mix for a fresh, fruity flavor.
-
Peanut Butter Delight: Swirl in creamy peanut butter into the filling before chilling for a nutty burst with every bite. It adds richness that beautifully complements the cheesecake base.
-
Chocolate Drizzle: Finish your cheesecake with a luxurious drizzle of chocolate sauce on top for an indulgent touch that’s always a crowd-pleaser.
-
Graham Cracker Crust: Swap vanilla wafers for graham crackers to create a different crunchy texture that enhances the overall experience, giving it a campfire s’mores vibe.
-
Layered Bananarama: Add layers of sliced bananas between the filling for a more pronounced banana flavor and a delightful visual appeal.
-
Coconut Cream Variation: Mix in shredded coconut for tropical flair. This twist adds flavor and elevates the texture with a delightful chewiness.
-
Spiced Cinnamon: Sprinkle a touch of cinnamon into the filling for added warmth and a hint of spice that elevates the whole dish. It’s perfect for cozy gatherings!
For more delightful desserts, consider making my Baked Feta Pasta for a savory alternative or perhaps enjoy some Strawberry Banana Bread for breakfast inspiration!
Make Ahead Options
These No Bake Banana Pudding Cheesecake is perfect for meal prep enthusiasts! You can prepare the crust and filling up to 24 hours in advance. Simply crush the vanilla wafers and mix them with melted butter, pressing them into your springform pan for a deliciously crunchy base. For the filling, combine the cream cheese, sweetened condensed milk, and banana pudding mix, then fold in whipped cream, storing it in an airtight container until you’re ready to assemble. When you’re ready to enjoy, layer the filling and fresh banana slices over the crust, cover, and refrigerate for a minimum of 6 hours or overnight to ensure it sets beautifully. This way, you’ll have a ready-to-serve, luscious dessert that’s just as delicious, allowing you more time to savor special moments with loved ones!
What to Serve with No Bake Banana Pudding Cheesecake
Delight in a well-rounded meal by pairing this creamy dessert with comforting flavors that will satisfy everyone at the table.
- Creamy Dreamy Coffee: A rich cup of coffee complements the cheesecake’s sweetness, enhancing its flavor and providing a delightful contrast.
- Fresh Fruit Salad: Bright, tangy fruits like strawberries, blueberries, and kiwi balance the sweetness, adding freshness and color to your dessert platter.
- Crunchy Almond Cookies: These provide a wonderful texture contrast, with a nutty flavor that pairs beautifully with the creamy cheesecake.
- Whipped Cream Topping: Adding a dollop of freshly whipped cream elevates the indulgence, bringing a lightness that offsets the richness of the cheesecake.
- Chocolate Drizzle: A drizzle of melted chocolate on top creates a decadent finishing touch, satisfying the sweetest of sweet-tooths in your family.
- Sparkling Lemonade: Refreshing and bubbly, this drink cuts through the creaminess, making for a light, invigorating companion to your cheesecake.
- Ice Cream: Vanilla or banana-flavored ice cream on the side adds extra creaminess, creating a perfect indulgent dessert experience.
- Chocolate-Covered Strawberries: These provide a romantic touch, offering a fun bite alongside the cheesecake, enhancing the overall dessert theme.
- Mint Tea: A warm cup of herbal mint tea soothes the palate, making it a perfect end to a deliciously sweet meal.
- Nutty Granola Parfait: Layered with yogurt, a parfait brings a wholesome twist and rhythmic crunch that complements the cheesecake’s softness beautifully.
Expert Tips for the Best No Bake Banana Pudding Cheesecake
• Chill Time: Ensure to refrigerate the cheesecake for at least 6 hours or overnight. This step is essential for achieving the perfect texture.
• Use Full-Fat Cream Cheese: Opt for full-fat cream cheese to maintain structure and creaminess; low-fat varieties can make the cheesecake too soft.
• Instant Pudding Only: Always use instant banana pudding mix; regular pudding needs cooking, which will prevent the cheesecake from setting correctly.
• Crust Considerations: When making your crust, make sure to press firmly and evenly into the pan for a solid base that holds together well.
• Banana Slicing: Use fresh bananas for layering. Slice them just before assembling to prevent browning and ensure a beautiful presentation.
• Topping Techniques: Experiment with toppings like whipped cream or chocolate shavings for an extra indulgent finish to your No Bake Banana Pudding Cheesecake!
Storage Tips for No Bake Banana Pudding Cheesecake
Fridge: Keep your cheesecake tightly covered in the refrigerator for up to 2 days for the best taste and texture.
Freezer: The No Bake Banana Pudding Cheesecake can be frozen for up to 1-2 months. Wrap it well in plastic wrap and then in aluminum foil for optimal freshness.
Defrosting: To enjoy, thaw the cheesecake in the fridge overnight before serving. This will help preserve its delightful creamy texture.
Reheating: There’s no need to reheat; simply slice and serve chilled straight from the refrigerator for maximum enjoyment!
No Bake Banana Pudding Cheesecake Recipe FAQs
What bananas should I use for the cheesecake?
Absolutely! Use ripe bananas that are still firm but have a few brown spots—this means they’re sweet and flavorful. Overripe bananas will work as well but may mush too easily during layering, jeopardizing the presentation.
How long can I store No Bake Banana Pudding Cheesecake in the fridge?
You can keep the cheesecake tightly covered in the refrigerator for up to 2 days. However, for optimal freshness and taste, it is best enjoyed within the first day or two after making it. Also, try not to slice the cheesecake until you’re ready to serve it to maintain the texture.
Can I freeze leftover cheesecake?
Certainly! You can freeze your No Bake Banana Pudding Cheesecake for up to 1-2 months. Wrap it well in plastic wrap, followed by aluminum foil, to prevent freezer burn. When you’re ready to indulge, just transfer it to the fridge overnight to thaw.
What if my cheesecake doesn’t set properly?
If your cheesecake isn’t setting, it might be due to the use of regular pudding instead of instant pudding. Make sure you whip the cream until soft peaks form before folding it in, as under-whipped cream will lead to a less stable cheesecake. If it’s too soft, try chilling it longer—overnight is often ideal for achieving that perfect texture.
Can pets consume any ingredients in this cheesecake?
It’s important to keep this cheesecake away from pets. Cream cheese, sweetened condensed milk, and bananas are not toxic to pets in small amounts; however, this recipe also contains sugar, which is not suitable for animals. For your furry friends, stick to safe fruits like plain bananas in moderation.
Delightful No Bake Banana Pudding Cheesecake for Easy Indulgence
Ingredients
Equipment
Method
- Crush vanilla wafers into fine crumbs, combine with melted butter, and press into the bottom of a 9-inch springform pan to form the crust.
- Beat cream cheese until smooth, then add sweetened condensed milk and instant banana pudding mix. Mix until creamy.
- Whip heavy cream until soft peaks form, then fold gently into the banana pudding mixture.
- Spread half of the filling over the crust, layer with sliced bananas, and then top with remaining filling. Refrigerate for at least 6 hours.
- Carefully remove from the springform pan, slice, and serve chilled. Optionally, garnish with extra banana slices and whipped cream.
Leave a Reply