
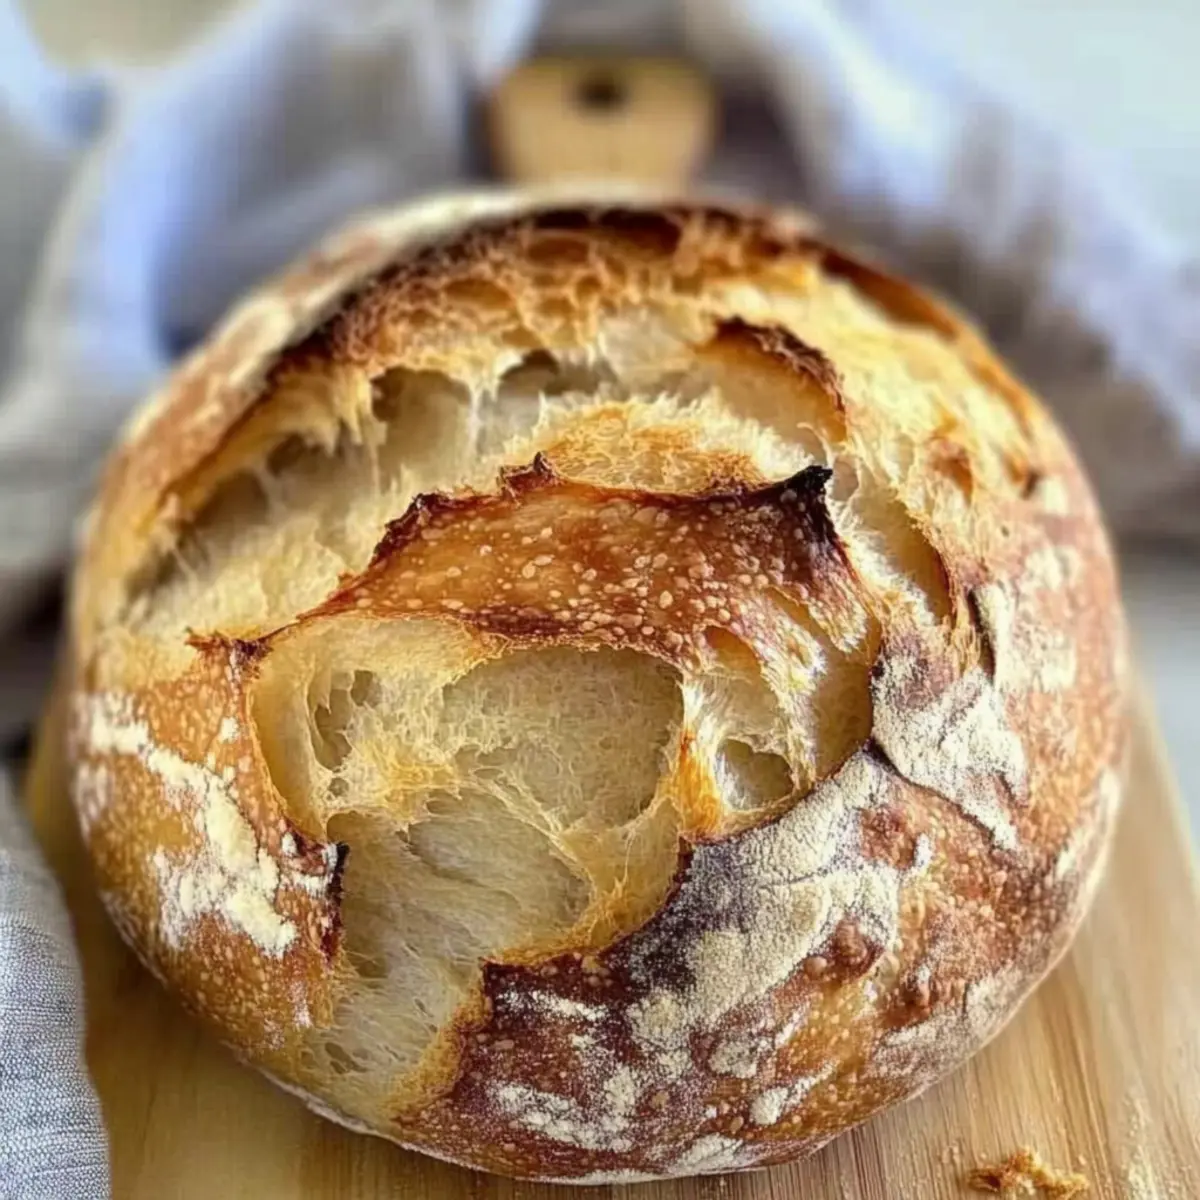
A warm, comforting aroma wafted through my kitchen, drawing curious family members as I prepared to make my No-Knead Rustic Artisan Bread. Nothing compares to the sensation of slicing into a crusty loaf, revealing a soft, chewy interior that begs to be slathered with butter or paired with a rich soup. This easy baking recipe embodies the joy of homemade bread—perfect for those tired of fast food and eager for something authentic. With minimal effort and just a few ingredients, you’ll impress everyone with your baking prowess as the delightful smell fills your home. Plus, the no-knead technique means you can spend less time in the kitchen and more time enjoying the delicious result. Are you ready to transform simple ingredients into a stunning masterpiece? Let’s dive into the world of artisan bread together!
Why Make Rustic Artisan Bread?
Ease of Preparation: This no-knead recipe makes baking as simple as mixing ingredients and waiting.
Incredible Aroma: As it bakes, your kitchen fills with a delightful scent that brings everyone running.
Artisanal Quality: Enjoy a bakery-worthy loaf that boasts a crusty exterior and soft interior, perfect for any meal.
Customizable: Feel free to experiment with different flours or add herbs and cheese for a personal touch; check out my Shrimp Scampi Bread for more flavor ideas!
Crowd-Pleaser: This rustic bread is an instant hit at gatherings, whether paired with soup or transformed into sandwiches.
With each bite, you’ll appreciate the delightful combination of simplicity and flavor. Let’s bring artisan bread into your home!
Rustic Artisan Bread Ingredients
- For the Dough
• Flour – Use all-purpose, bread, or fine Italian pizza flour for your bread’s structure and texture; note that different flours may require adjusting water.
• Sugar – 1 tbsp adds a hint of sweetness and helps activate yeast; honey or maple syrup are great alternatives.
• Quick Rise Yeast – 2 tsp is best for a quick rise; traditional yeast can work but may take longer.
• Sea Salt – 1.5 tsp enhances flavor; coarse salt can be substituted without impact.
• Olive Oil – 2 tbsp gives a softer crumb and added flavor; try avocado or vegetable oil for variation.
• Warm Water – 1.5 to 2 cups depending on flour type; slightly warmer than room temp helps activate the yeast.
Bring the essence of rustic artisan bread to your table with these simple ingredients and easy preparation!
Step‑by‑Step Instructions for Rustic Artisan Bread
Step 1: Mix Dry Ingredients
In a large mixing bowl, combine 3 cups of flour, 1 tablespoon of sugar, 2 teaspoons of quick rise yeast, and 1.5 teaspoons of sea salt. Stir the dry ingredients together until well blended, creating a uniform mixture. You want the sugar and yeast evenly distributed, as this will help the dough rise beautifully, giving your Rustic Artisan Bread the perfect texture and flavor.
Step 2: Add Liquid Ingredients
Pour in 1.5 to 2 cups of warm water, slightly warmer than room temperature, along with 1 tablespoon of olive oil into the dry mixture. Using a wooden spoon or spatula, mix everything together until a sticky dough forms, ensuring no dry flour remains. This mix will appear shaggy and sticky, typical for a no-knead artisan bread, leading to a delightful chewy interior.
Step 3: Second Oil Drizzle (Optional)
Drizzle 1 more tablespoon of olive oil over the top of the sticky dough in the bowl. This step is optional but adds an extra touch of flavor and moisture to the Rustic Artisan Bread. Using your spatula, gently fold the oil into the dough. This brief mixing helps enrich the dough while keeping its sticky consistency intact for the rise.
Step 4: First Rise
Cover the bowl tightly with plastic wrap and then place a tea towel over it. Let it rise in a warm location for about 2 hours or until the dough has doubled in size. Look for a puffy, airy texture, which indicates it’s ready for the next step. This slow rising method is what imparts incredible flavor to your artisan bread.
Step 5: Preheat Oven
Place a Dutch oven with its lid inside the oven and preheat to 450°F (232°C). Preheating the Dutch oven is crucial for achieving that coveted crusty exterior on your Rustic Artisan Bread. Allow it to heat for at least 30 minutes, giving it enough time to get hot enough for a perfect bake.
Step 6: Shape Dough
Once the dough has risen, gently turn it out onto a well-floured surface. Fold the dough over itself a few times until it forms a rough ball. Be careful not to deflate it too much, as the air bubbles created during the rise contribute to the final texture. Transfer this dough ball onto a piece of parchment paper for easy lifting later.
Step 7: Transfer to Oven
With the Dutch oven now preheated, carefully lift the parchment paper holding the dough and place it into the hot pot. Cover with the lid and bake for 30 minutes. This initial phase retains moisture and allows the bread to rise powerfully, ensuring a lovely crust develops on your Rustic Artisan Bread.
Step 8: Final Bake
After the initial 30 minutes, remove the lid from the Dutch oven and bake uncovered for an additional 5-10 minutes. Keep an eye on the bread, looking for a deep golden brown color on the crust surface, which indicates it’s done. This extra baking time creates a beautifully crunchy exterior while keeping the inside delightfully soft.
Step 9: Cool and Serve
Once baked, carefully transfer the Rustic Artisan Bread onto a cooling rack. Let it cool for at least 10 minutes before slicing. This cooling period allows the steam to escape, enhancing the moisture within the bread. Slice, and get ready to enjoy the comforting taste of your homemade bread, perfect for any occasion.
Make Ahead Options
These Rustic Artisan Bread loaves are perfect for busy home cooks looking to save time! You can prepare the dough up to 24 hours in advance and store it covered in the refrigerator. This slow fermentation process enhances the flavor and texture without sacrificing quality. Simply mix the ingredients as directed and let the dough rise at room temperature for about 2 hours before transferring it to the fridge. When you’re ready to bake, remove the dough and let it come to room temperature for about 30 minutes before shaping and baking as usual. This way, you’ll enjoy fresh, homemade bread with minimal effort on hectic days!
Expert Tips for Rustic Artisan Bread
- Flour Matter: Use a high-quality flour for the best structure. All-purpose might need more water; adjust accordingly for no-knead rustic artisan bread.
- Warm Water: Ensure your water is warm but not hot. Too hot can kill the yeast, while too cold won’t activate it effectively.
- Rise Time: Make sure to allow the dough to double in size; rushing this step can lead to dense bread. Patience equals perfect fluff!
- Preheating Crucial: Always preheat your Dutch oven well. This step is key to achieving that perfectly crusty exterior you’re after.
- Avoid Overmixing: While this recipe is simple, don’t overwork the dough. A gentle mix keeps those beautiful air bubbles, essential for that artisan texture.
What to Serve with No-Knead Rustic Artisan Bread
Nothing enhances the joy of homemade bread like the perfect pairings to elevate your meal experience.
-
Creamy Tomato Soup: The rich, tangy flavors beautifully balance the crusty bread, making each dip a symphony of taste.
-
Garlic Herb Butter: Slathering this aromatic spread on warm slices creates a decadent treat that’s irresistibly buttery and herb-infused.
-
Mixed Green Salad: A light, fresh salad with a zesty vinaigrette offers a refreshing contrast to the hearty bread, perfect for a light lunch or dinner.
-
Roasted Vegetables: Their sweet, caramelized flavors and tender textures complement the rustic bread, bringing earthiness and warmth to your table.
-
Homemade Hummus: The creamy, savory dip is perfect for slathering and scooping, adding delightful flavor and a nutritious touch.
-
Butternut Squash Soup: This sweet and creamy soup pairs stunningly with the bread, creating a cozy, comforting meal ideal for chilly evenings.
-
Wine Pairing: A light-bodied red wine, like Pinot Noir, enhances the bread’s flavors, making your dining experience feel special.
-
Chocolate Chip Cookies: For dessert, a warm chocolate chip cookie with a glass of milk feels indulgent after enjoying your rustic artisan bread.
Rustic Artisan Bread Variations & Substitutions
Feel free to get creative with your rustic artisan bread! Explore these variations to make it your own and elevate the flavors even further.
- Herb-Infused: Add 2 tablespoons of your favorite dried herbs to enhance the aroma and flavor of the bread. Consider rosemary or thyme for a delightful twist.
- Cheesy Delight: Fold in 1 cup of shredded cheese—like cheddar or mozzarella—before the first rise for a rich, savory flavor that pairs beautifully with soups.
- Whole Wheat: Substitute half of the all-purpose flour with whole wheat flour to boost nutrition and introduce a nuttier flavor. This variation adds a heartiness you’ll love!
- Honey Sweetened: Swap out sugar for 2 tablespoons of honey for a naturally sweetened loaf. This adaptation will create a slightly tender crumb with a lovely hint of sweetness.
- Spicy Kick: Incorporate 1 teaspoon of red pepper flakes into the dry mixture for a subtle heat that pleasantly surprises each bite. It’s fantastic with creamy soups!
- Garlicky Goodness: Add 3 cloves of minced garlic into the dough for a warm, savory bread. This addition enriches the flavor profile and tastes divine when served with butter.
- Seed Topping: Sprinkle a mixture of sesame, poppy, or sunflower seeds on top before baking for a beautiful presentation and delightful crunch. This simple touch adds both flavor and texture!
- Sundried Tomato & Olive: Fold in ½ cup of chopped sun-dried tomatoes and a handful of black olives for a Mediterranean twist that’s perfect for bruschetta or dipping in olive oil.
Each variation offers a delightful exploration of flavors. And if you’re looking for more inspiration, you may also enjoy trying out my Herb Cheese Bread or savor the sweetness of Strawberry Banana Bread. Happy baking!
How to Store and Freeze Rustic Artisan Bread
Fridge: Store your rustic artisan bread in a paper bag or wrapped in a kitchen towel for up to 3 days to maintain its crusty exterior without moisture loss.
Freezer: For long-term storage, wrap the cooled loaf tightly in plastic wrap, followed by aluminum foil, and freeze for up to 3 months. Thaw at room temperature before enjoying.
Reheating: To refresh, place thawed bread in a 350°F (175°C) oven for 10-15 minutes. This will help revive its crusty texture and make it taste freshly baked.
No-Knead Rustic Artisan Bread Recipe FAQs
What flour should I use for my rustic artisan bread?
I recommend using either all-purpose, bread, or fine Italian pizza flour for your bread. Each type offers a different texture; for example, all-purpose flour might need slightly more water, while bread flour provides a chewier bite. Experiment with what you have on hand for delightful results!
How should I store my leftover rustic artisan bread?
Store your rustic artisan bread in a paper bag or wrapped in a kitchen towel to maintain its crusty exterior for up to 3 days. This method helps prevent moisture loss and keeps the bread from becoming soggy. If you need it to last longer, consider freezing.
Can I freeze rustic artisan bread?
Absolutely! To freeze your rustic artisan bread, wrap the cooled loaf tightly in plastic wrap, then wrap it in aluminum foil. This will protect it for up to 3 months. When you’re ready to enjoy it, simply thaw it at room temperature, and then reheat in a 350°F (175°C) oven for about 10-15 minutes to restore its lovely crust.
What if my dough doesn’t rise properly?
If your dough doesn’t rise as expected, it might be due to the water temperature being too hot or too cold, which can kill the yeast or fail to activate it. Ensure your warm water is slightly warmer than room temperature but not scalding. Also, be certain to place your bowl in a warm location; a drafty area can hinder rising. If your dough still hasn’t doubled after 2 hours, give it more time—patience yields light and fluffy bread!
Is this recipe suitable for people with allergies?
This rustic artisan bread recipe is simple, but it does contain wheat (gluten), which can be problematic for those with gluten allergies or celiac disease. You can try substituting gluten-free flour blends, but be aware that the texture and rise may vary. If you have any specific dietary needs, feel free to reach out for alternative suggestions!
How can I improve the flavor of my rustic artisan bread?
To enhance the flavor of your rustic artisan bread, consider adding herbs like rosemary or thyme, or even garlic for an aromatic twist. You can also mix in cheese like cheddar or parmesan into the dough for a savory loaf. These simple additions can transform your baking into a more delightful experience!
Rustic Artisan Bread Made Easy – No-Knead Delight
Ingredients
Equipment
Method
- In a large mixing bowl, combine 3 cups of flour, 1 tablespoon of sugar, 2 teaspoons of quick rise yeast, and 1.5 teaspoons of sea salt. Stir the dry ingredients together until well blended.
- Pour in 1.5 to 2 cups of warm water and 1 tablespoon of olive oil into the dry mixture. Mix until a sticky dough forms, ensuring no dry flour remains.
- Drizzle 1 more tablespoon of olive oil over the sticky dough. Fold the oil into the dough gently.
- Cover the bowl tightly with plastic wrap and place a tea towel over it. Let it rise in a warm location for about 2 hours or until the dough has doubled in size.
- Place a Dutch oven with its lid inside the oven and preheat to 450°F (232°C). Preheating is crucial for achieving that coveted crusty exterior.
- Once risen, gently turn the dough out onto a floured surface and fold it over a few times until it forms a rough ball. Transfer it onto a piece of parchment paper.
- Lift the parchment paper holding the dough and place it into the hot Dutch oven. Cover with the lid and bake for 30 minutes.
- After 30 minutes, remove the lid and bake uncovered for an additional 5-10 minutes until golden brown.
- Transfer the Rustic Artisan Bread onto a cooling rack and let it cool for at least 10 minutes before slicing.
Leave a Reply