
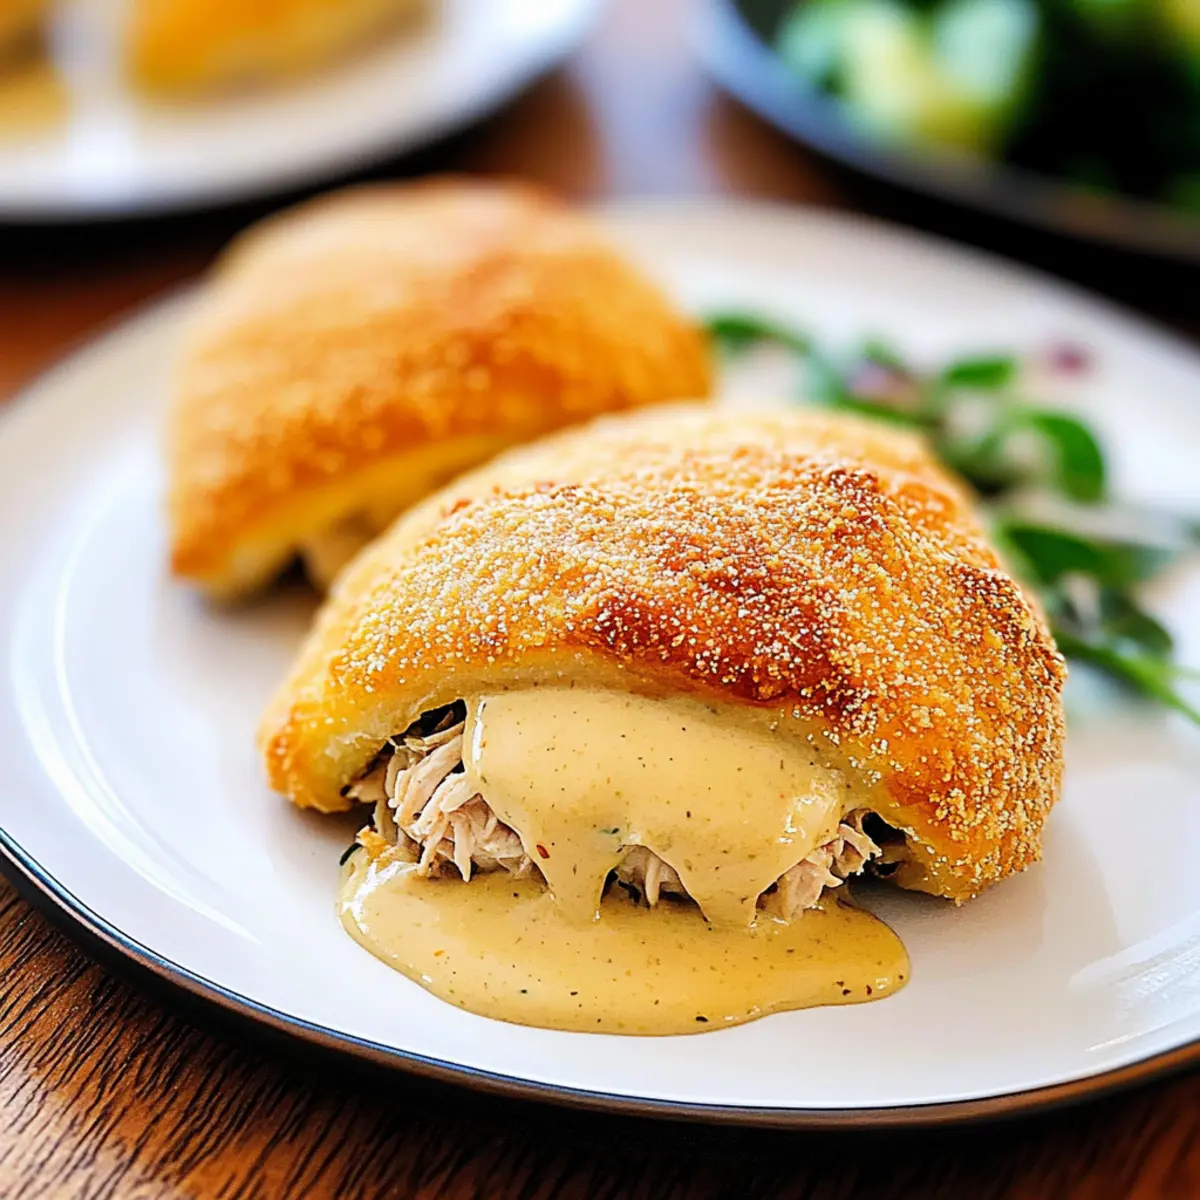
As my oven hummed softly, the rich aroma of buttery dough enveloped my kitchen like a warm hug. There’s something magical about homemade comfort food that fills the heart as much as the stomach, which is why I’m excited to share my recipe for Creamy Chicken Pillows. These fluffy delights, wrapped in flaky crescent dough, are not only a breeze to whip up, but they also deliver an impressively satisfying meal that’ll make any weekday feel like a special occasion. If you’re looking for an easy recipe that strikes the perfect balance of indulgence and simplicity, Chicken Pillows are your answer! Imagine those golden-brown pockets bursting with a creamy chicken filling, paired with a savory gravy — pure comfort in every bite. Ready to bring the warmth of home-cooked goodness to your table? Let’s dive in!
Why Are Chicken Pillows So Popular?
Simple, Delightful Preparation: With just a few ingredients and minimal fuss, anyone can master this dish — perfect for both novice cooks and seasoned chefs alike!
Warm, Comforting Flavor: Each bite reveals a buttery, flaky crust encasing a creamy chicken filling, making it the ultimate comfort food for cozy nights.
Versatile Adaptations: Switch up the filling with your favorite ingredients, like mushrooms or ham, to create a variety of flavors that everyone will love.
Time-Saving Meal: Ready in 30 minutes, Chicken Pillows fit seamlessly into your busy schedule, allowing you to serve up deliciousness without the hassle.
Crowd Pleaser: They not only satisfy your cravings but also impress guests, making them an ideal dish for gatherings or family dinners.
For a delightful variation, check out my recipe for Chicken Pillows Parmesan or try the ever-popular Fiery Chicken Ramen.
Chicken Pillows Ingredients
For the Filling
- Cooked, Shredded Chicken Breast – Provides the primary protein source and can be substituted with rotisserie chicken or turkey for convenience.
- Cream Cheese – Adds creaminess and richness to the filling; Greek yogurt is a lighter alternative.
- Salted Butter – Enhances flavor; use unsalted butter if you’re watching your salt intake.
- Dried Chives – Offers a mild onion flavor, but feel free to swap them out for fresh chives.
- Dried Minced Onion – Adds a nice depth of onion flavor; fresh onion can be used in smaller quantities for freshness.
- Salt and Pepper – Essential for seasoning to taste, making your Chicken Pillows flavorful.
For the Dough
- Refrigerated Pillsbury Crescent Roll Dough – Forms the fluffy outer wrapping; you can substitute with puff pastry or homemade dough if preferred.
For the Coating
- Italian Breadcrumbs – Provides a crunchy outer layer; panko breadcrumbs or crushed crackers work equally well as substitutes.
For the Gravy
- Cream of Chicken Soup – This creamy base forms the gravy; feel free to use another cream soup or a homemade version.
- Chicken Gravy Mix – Adds an instant flavor boost to the gravy; homemade chicken gravy is a great alternative.
- Water – Necessary for preparing the gravy, and helps bring everything together.
These Chicken Pillows are truly comforting and easy to create, promising to elevate your dinner experience!
Step‑by‑Step Instructions for Chicken Pillows
Step 1: Preheat and Prepare
Begin by preheating your oven to 350°F (175°C). While the oven warms up, prepare a baking sheet by lightly spraying it with non-stick cooking spray. This ensures your Chicken Pillows won’t stick and will bake evenly, creating that golden-brown exterior.
Step 2: Mix the Filling
In a medium bowl, combine softened cream cheese and salted butter, blending well until smooth. Next, add the cooked, shredded chicken, dried chives, dried minced onion, salt, and pepper. Stir everything together until the mixture is creamy and well combined, ensuring the flavors meld perfectly for your Chicken Pillows.
Step 3: Prepare the Dough
Unroll the refrigerated Pillsbury Crescent Roll dough on a clean surface, carefully pressing two triangular pieces together to form a rectangle. This creates a sturdy base for your Chicken Pillows. Repeat until you have four rectangles, making sure they are adequately sealed before adding the filling.
Step 4: Fill the Dough
Divide the chicken filling evenly among the four dough rectangles, placing a generous spoonful in the center of each. Be cautious not to overfill, as leaving some space around the edges will help in folding and sealing each Chicken Pillow securely without leakage.
Step 5: Shape the Pillows
Fold the corners of each rectangle over the filling, pinching and sealing the edges to create a ball shape. This process encloses the creamy filling inside the flaky dough. Ensure that the seams are tightly sealed to avoid any spills during baking, leaving you with perfectly formed Chicken Pillows.
Step 6: Coat and Arrange
Dip each sealed Chicken Pillow into melted butter, allowing it to coat the surface evenly for added richness. Next, roll the buttery pillows in Italian breadcrumbs, ensuring a generous layer of crunch. Place the coated pillows on the greased baking sheet, leaving some space between each to allow for expansion.
Step 7: Bake to Perfection
Slide the baking sheet into your preheated oven and bake for about 22-25 minutes, or until the Chicken Pillows are puffed up and beautifully golden brown. Keep an eye on them as they bake, and enjoy the delicious aroma that fills your kitchen, signaling that your comfort meal is almost ready.
Step 8: Prepare the Gravy
While your Chicken Pillows are baking, in a saucepan, combine the cream of chicken soup, chicken gravy mix, and water. Heat over medium-high heat, stirring until the mixture comes to a boil. Once boiling, reduce the heat and let it simmer, allowing the flavors to meld together beautifully until the Chicken Pillows are done.
Step 9: Serve and Enjoy
When the Chicken Pillows are out of the oven, let them cool slightly before serving. Drizzle the prepared gravy over each fluffy pillow or serve it on the side for dipping. Embrace the warmth and comforting flavors of homemade Chicken Pillows that fill your heart and home with every bite!
Chicken Pillows Variations & Substitutions
Feel free to customize these chicken pillows to cater to your cravings and dietary needs!
- Dairy-Free: Substitute cream cheese with cashew cream or a dairy-free cream cheese alternative for a lighter option.
- Vegetarian: Use a mixture of sautéed mushrooms, spinach, and ricotta cheese as a delicious filling, offering a vibrant twist!
- Herb Infusion: Add fresh herbs like parsley or thyme to elevate the flavor profile of your filling; they’ll bring a lovely freshness to each bite.
- Spicy Kick: Mix in diced jalapeños or a dash of hot sauce into the chicken filling for a zesty heat that will surprise and delight!
- Ham & Cheese: Swap out the chicken for diced ham and add Swiss cheese for a delightful take on Chicken Cordon Bleu, making a savory variation everyone will love.
- Flavor Variants: Experiment with different gravies like mushroom or even a homemade garlic parmesan sauce; there’s no limit to what these pillows can pair with!
- Crunch Factor: Instead of breadcrumbs, try crushed tortilla chips for an exciting crunch that adds a unique twist to the textures – you’ll be amazed by the difference!
- Make Ahead & Freeze: Prep your chicken pillows and freeze them unbaked. When you’re ready, pop them in the oven for a quick, comforting meal.
With all these delicious options, you can turn these Chicken Pillows into a delightful experience every time you make them. Enjoy the culinary journey!
How to Store and Freeze Chicken Pillows
Fridge: Store baked Chicken Pillows in an airtight container for up to 3 days. Ensure they are completely cooled before sealing to maintain freshness.
Freezer: For longer storage, freeze unbaked Chicken Pillows. Place them on a baking sheet to freeze individually, then transfer to a freezer bag for up to 2 months.
Reheating: To reheat, bake frozen Chicken Pillows directly from the freezer at 350°F (175°C) for 25-30 minutes or until heated through. Baked versions can be reheated in a microwave or oven until warm.
Make-Ahead: Prepare Chicken Pillows ahead of time and refrigerate before baking. They’ll taste best baked fresh, but can remain in the fridge for up to 2 days before cooking.
What to Serve with Creamy Chicken Pillows?
A cozy meal isn’t complete without a few signature sides to elevate your Chicken Pillows into a delightful feast.
-
Crispy Side Salad: Fresh greens with crunchy vegetables provide a refreshing contrast to the creamy pillows — perfect for balancing flavors.
-
Garlic Mashed Potatoes: Rich and creamy, these velvety mashed potatoes are the ultimate comfort food, soaking up any extra gravy beautifully.
-
Roasted Vegetables: Seasonal veggies roasted to caramelized perfection add a vibrant touch and a boost of nutrition, making every bite more colorful.
-
Steamed Broccoli: Tender, vibrant green broccoli offers a mild crunch that pairs wonderfully with the richness of Chicken Pillows and adds that needed freshness.
-
Homemade Coleslaw: This crunchy slaw dressed in a tangy vinaigrette brings a satisfying crunch and brightness, adding a pop of flavor to the dish.
-
Honey Glazed Carrots: Sweet and tender carrots contribute a delightful sweetness that contrasts perfectly with the savory chicken, enhancing the overall experience.
-
Buttery Cornbread: Soft, fluffy cornbread makes for a comforting side that’s ideal for soaking up gravy or enjoying on its own.
-
Cold Iced Tea: A glass of refreshing iced tea complements the rich flavors, providing a cooling and thirst-quenching experience during your meal.
Consider these pairings to create a comforting, inviting table that your loved ones will cherish.
Make Ahead Options
Chicken Pillows are an excellent choice for meal prep enthusiasts looking to save time during busy weeknights! You can prepare the creamy filling using shredded chicken up to 24 hours in advance. Simply mix the cream cheese, chicken, chives, and seasonings, then store it in an airtight container in the refrigerator to keep it fresh. The crescent dough can also be unrolled and formed into rectangles ahead of time, but it’s best to assemble them just before baking to maintain their flaky texture. When ready to enjoy, simply fill and bake your Chicken Pillows as directed, and you’ll have a warm, comforting dish that feels like a wonderful weeknight treat!
Expert Tips for Chicken Pillows
- Secure the Seams: Make sure to press the crescent dough edges tightly to avoid any filling leak during baking, ensuring perfect Chicken Pillows every time.
- Flavorful Additions: Enhance the filling further by incorporating sautéed vegetables like spinach or bell peppers for a twist of color and flavor.
- Keep it Cool: Work quickly to keep the crescent dough cool — warm dough can be tricky to handle and may lose its flakiness!
- Breadcrumb Coating: Use a generous layer of breadcrumbs for that extra crunch; it creates a lovely contrast with the creamy filling inside.
- Serve Warm: Chicken Pillows are best enjoyed hot out of the oven, so keep them warm while preparing your gravy for a delightful experience.
Chicken Pillows Recipe FAQs
What type of chicken should I use for Chicken Pillows?
I recommend using cooked, shredded chicken breast as the primary protein source. It adds great flavor and texture. However, for easy preparation, rotisserie chicken works wonderfully too! If you’re looking to lighten things up, you can even substitute with turkey.
How should I store leftover Chicken Pillows?
Store any baked Chicken Pillows in an airtight container in the fridge for up to 3 days. Be sure they are completely cooled down before sealing to help maintain their freshness and avoid sogginess.
Can I freeze Chicken Pillows? How do I do it?
Absolutely! For optimal storage, freeze unbaked Chicken Pillows. Place them individually on a baking sheet and freeze until solid, then transfer them to a freezer-safe bag or container. They can be stored for up to 2 months. When you’re ready to cook, bake them straight from the freezer at 350°F (175°C) for about 25-30 minutes until golden and heated through!
What should I do if my Chicken Pillows leak filling while baking?
If you notice any leaks, don’t fret! Make sure to securely press and seal the dough edges before baking. If they still leak, it may be due to overfilling. Simply use less filling next time, leaving some space around the edges to help seal them better.
Can I modify Chicken Pillows for dietary allergies?
Absolutely! If you or your family have dietary restrictions, be mindful of the cream cheese, butter, and chicken gravy mix. You can opt for dairy-free cream cheese and butter alternatives. Additionally, ensure the breadcrumbs are gluten-free if necessary, and feel free to play around with the filling to include your favorite vegetables or proteins.
How long does it take to cook Chicken Pillows?
Cooking up a batch of Chicken Pillows takes about 22-25 minutes in the oven. Make sure to preheat your oven to 350°F (175°C) and keep an eye on them until they’re golden brown and puffed up! Enjoy the delightful aroma that fills your kitchen while they bake!
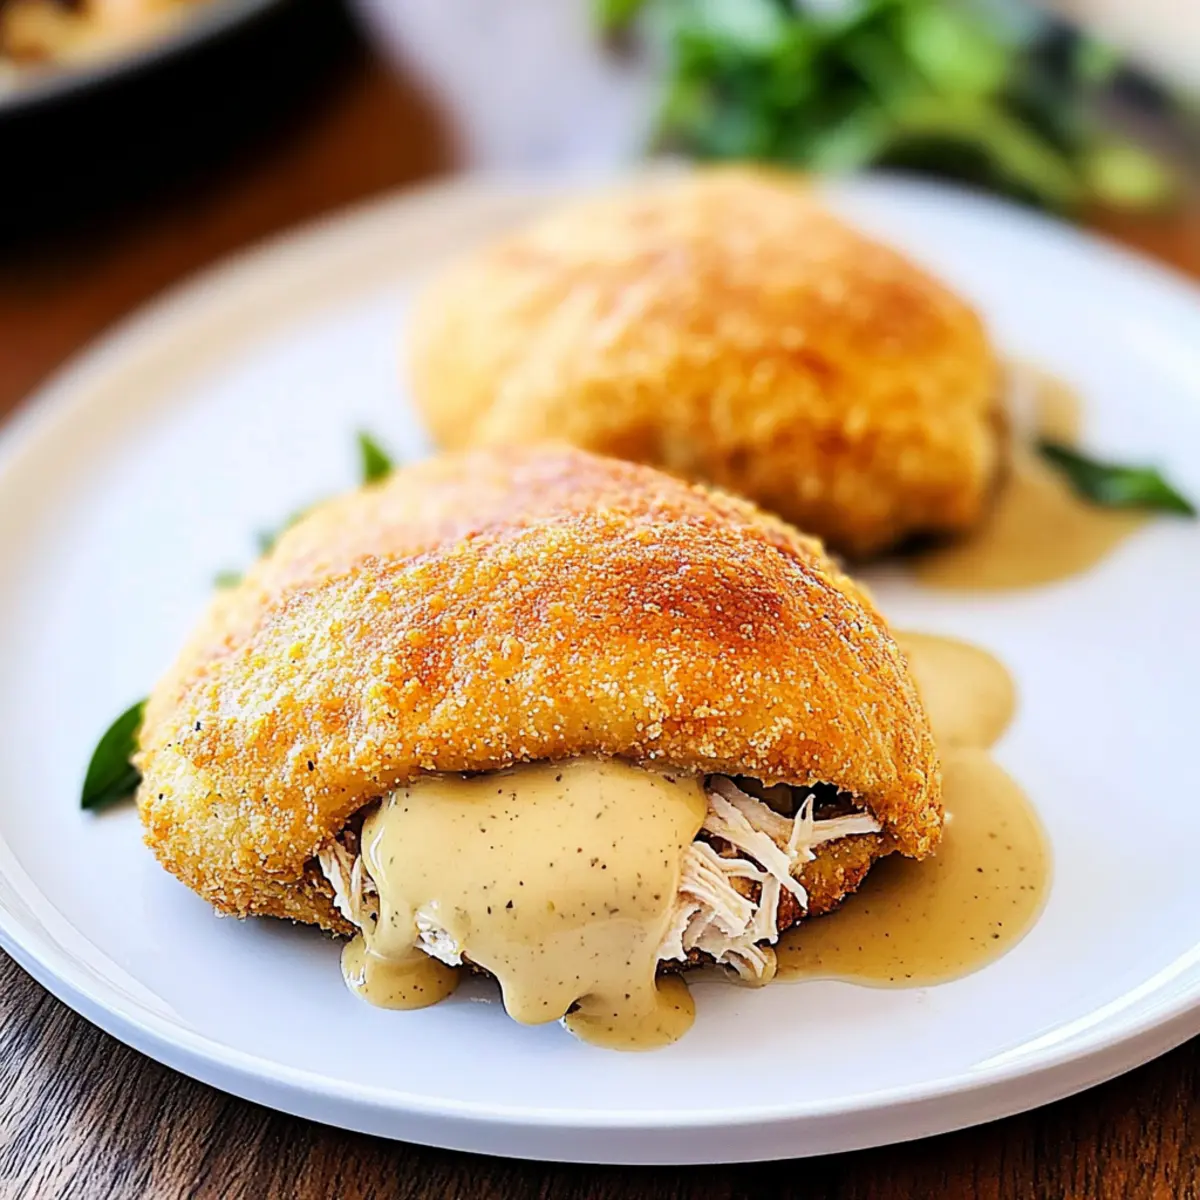
Irresistibly Creamy Chicken Pillows for Cozy Nights
Ingredients
Equipment
Method
- Preheat your oven to 350°F (175°C) and prepare a baking sheet with non-stick cooking spray.
- In a medium bowl, combine softened cream cheese and salted butter until smooth. Add shredded chicken, dried chives, dried minced onion, salt, and pepper. Mix until creamy.
- Unroll the crescent roll dough on a clean surface, pressing two triangles together to form rectangles. Repeat to make four rectangles.
- Divide the chicken filling evenly among the dough rectangles, placing it in the center of each.
- Fold the corners over the filling and pinch to seal the edges securely.
- Dip each pillow in melted butter, then roll in Italian breadcrumbs, and place on the baking sheet.
- Bake for 22-25 minutes until golden brown and puffed.
- In a saucepan, combine cream of chicken soup, chicken gravy mix, and water. Heat until boiling, then reduce heat to simmer until Chicken Pillows are done.
- Let Chicken Pillows cool slightly before serving. Drizzle with gravy or serve on the side.
Leave a Reply