
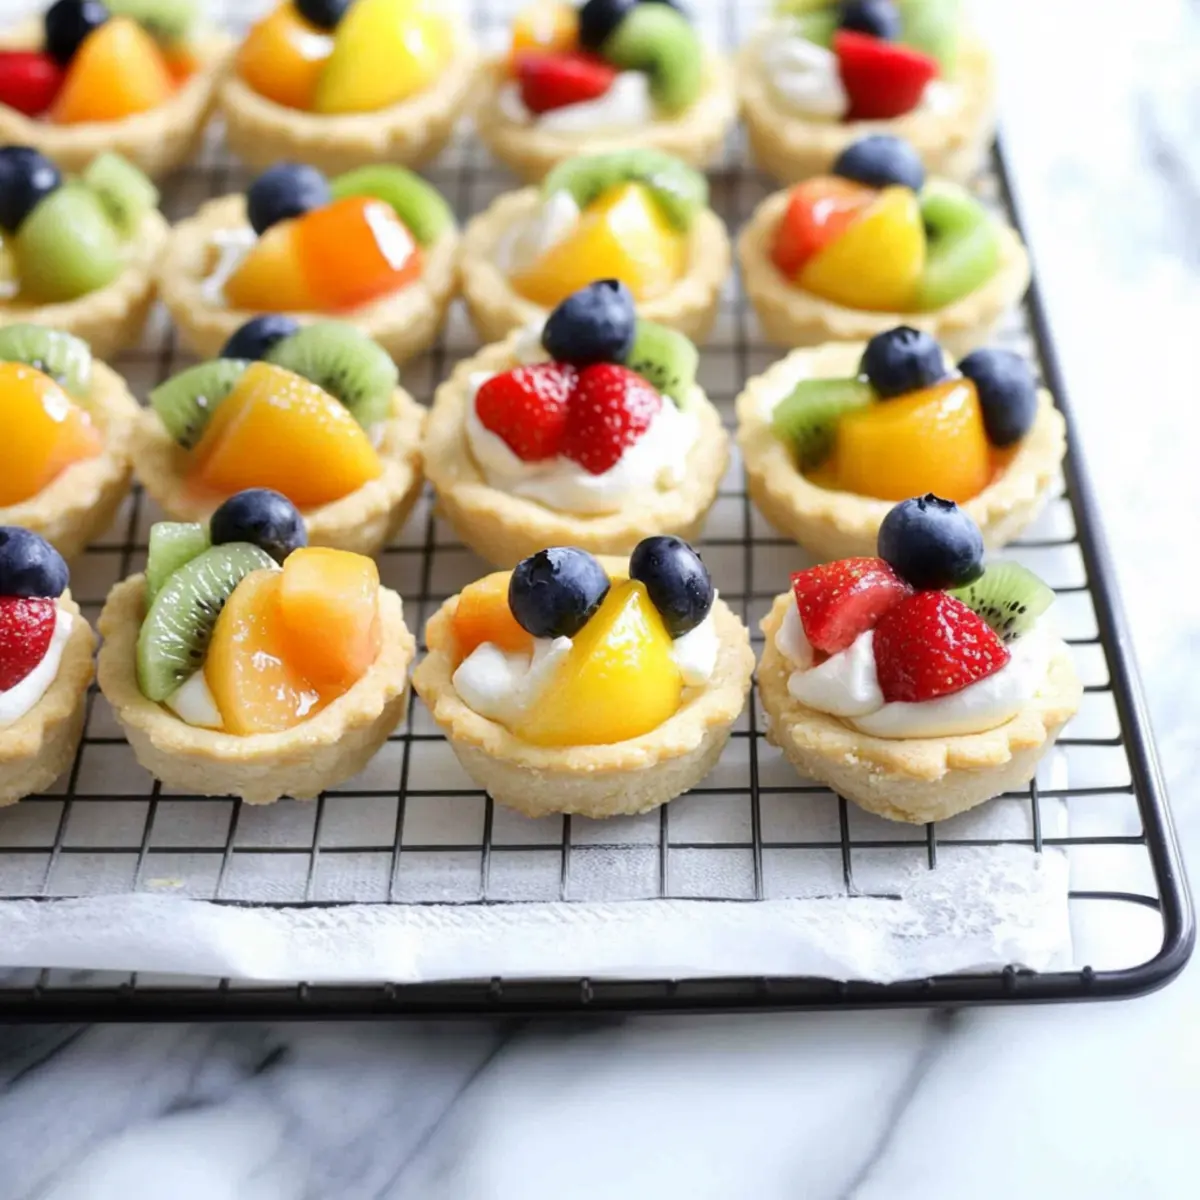
As I stood in my kitchen, the sun streaming through the window and the sweet scents wafting from the oven, I felt a wave of nostalgia wash over me. Those moments spent baking with family were treasures, and today, I’m excited to share my Easy Mini Sugar Cookie Fruit Tarts—a delightful recipe that’s perfect for any occasion. These bite-sized treats not only pack a buttery, soft cookie crust, but they also feature a creamy filling topped with vibrant, fresh fruit. Whether you’re hosting a summer brunch, a festive gathering, or just want a fun cooking project for the kids, these tarts are quick to prepare and sure to impress. So, are you ready to whip up a batch that’s as beautiful as it is tasty? Let’s dive in!
Why are Mini Fruit Tarts so irresistible?
Bite-Sized Bliss: These Mini Fruit Tarts are the perfect handheld dessert, making them a hit at any gathering.
Vibrant Toppings: With an array of fresh fruit on top, every bite is bursting with color and natural sweetness.
Quick and Easy: Whip these up effortlessly, even with little ones beside you—the simple steps make them a breeze for novice bakers.
Versatile Flavor: Swap the toppings or fillings to match any season or occasion; the options are endless!
Crowd-Pleaser: Whether at a tea party, birthday bash, or cozy family dinner, you’ll find everyone asking for seconds.
Mini Fruit Tarts Ingredients
For the Cookie Crust
• All-Purpose Flour – Provides essential structure; ensure you measure accurately for best results.
• Baking Soda – Helps the crust rise, adding a touch of chewiness to the texture.
• Baking Powder – Provides extra lift for a light and fluffy crust.
• Butter (1/2 cup, softened) – Adds richness and delightful flavor; margarine can be used for a dairy-free option, although the taste may differ.
• White Sugar (3/4 cup) – Sweetens the crust beautifully; consider coconut sugar for a lower glycemic index alternative.
• Egg Yolk – Acts as a binder and contributes to the crust’s structure; this ingredient is not replaceable for the best outcome.
• Vanilla Extract (1/2 teaspoon) – Enhances the overall flavor profile of the cookie crust.
For the Cream Cheese Filling
• Cream Cheese (1 – 8oz block, softened) – Make sure it’s at room temperature for the smoothest filling; Neufchâtel can be a lighter alternative.
• Powdered Sugar (2 cups) – Sweetens and thickens the cream cheese filling for just the right balance.
• Lemon Juice (1 teaspoon) – Adds a refreshing citrus note that brightens the flavor.
• Lemon Zest (1 teaspoon) – Provides an additional layer of zesty freshness that elevates the filling.
For the Topping
• Fresh Fruit (for topping) – Adds vibrant color and natural sweetness to each tart; recommendations include strawberries, blueberries, kiwi, and oranges for a beautiful presentation.
These Mini Fruit Tarts are not only adorable but also a conversation starter at any gathering. Enjoy making your delicious batch, and watch as friends and family delight in each bite!
Step‑by‑Step Instructions for Mini Sugar Cookie Fruit Tarts
Step 1: Prepare Mini-Muffin Tin
Begin by greasing a mini-muffin tin with cooking spray or butter, ensuring easy removal later. Preheat your oven to 350°F (175°C). This important first step creates a perfect, non-stick surface for your cookie crusts and allows them to bake evenly, resulting in delicious Mini Fruit Tarts.
Step 2: Cream Butter and Sugar
In a large mixing bowl, combine the softened butter and white sugar using a hand mixer or stand mixer. Beat them together on medium speed until the mixture becomes light and fluffy, about 2-3 minutes. This creaming process is essential for achieving a tender texture in your sugar cookie crust.
Step 3: Add Egg Yolk and Vanilla
Next, add the egg yolk and vanilla extract to the butter-sugar mixture. Mix on low speed until just combined, scraping down the sides of the bowl as needed. This step incorporates moisture and flavor into your dough, helping your Mini Sugar Cookie Fruit Tarts achieve a rich, buttery taste.
Step 4: Combine Dry Ingredients
In a separate bowl, whisk together the all-purpose flour, baking soda, and baking powder until blended. Gradually mix this dry mixture into the wet ingredients. Do this slowly to avoid flour clouds and overmixing. You want the dough to be soft and slightly sticky, perfect for shaping your crusts.
Step 5: Shape Dough Balls
Using a cookie scoop or your hands, portion out the dough into 1.5-inch balls. Roll each piece into smooth balls, which will form the adorable bases for your Mini Fruit Tarts. This step ensures uniform sizes, leading to even baking and beautifully shaped crusts.
Step 6: Fill Muffin Tin
Place one dough ball into each well of the greased mini-muffin tin. Gently press down on each ball with your finger or the bottom of a glass to make a little cup shape. This creates the perfect indentation for holding your creamy filling and fresh fruit in the final Mini Sugar Cookie Fruit Tarts.
Step 7: Bake
Bake the cookie crusts in the preheated oven for 8-10 minutes, until the edges turn a light golden brown. Keep an eye on them to avoid overbaking; the centers should remain soft and not overly brown. Once they’re done, remove them from the oven and allow them to cool completely in the tin.
Step 8: Prepare Cream Cheese Filling
While the cookie crusts cool, beat the softened cream cheese and powdered sugar in a clean bowl until the mixture reaches a thick and smooth consistency, about 3-4 minutes. Then, add the lemon juice and zest for an additional burst of flavor. This creamy filling is key to making your Mini Fruit Tarts irresistibly delicious!
Step 9: Fill Tart Shells
Once the cookie shells have cooled, carefully pipe or spread the cream cheese filling into each shell. Fill them generously to create a delightful contrast with the cookie crust. This step turns your baked cookie cups into delectable Mini Sugar Cookie Fruit Tarts ready for their fruity topping.
Step 10: Top with Fresh Fruit
Select your favorite fresh fruits, such as strawberries, blueberries, kiwis, and oranges, and arrange them artfully on top of each filled tart. Each piece of fruit not only adds beauty but also provides a refreshing balance to the sweet cream filling. Enjoy the vibrant colors against the backdrop of your Mini Fruit Tarts.
Step 11: Chill Before Serving
Finally, place the assembled Mini Sugar Cookie Fruit Tarts in the refrigerator to chill for at least 30 minutes before serving. This helps the filling set and allows the flavors to meld beautifully. Preparing them ahead of time also makes hosting a breeze—simply take them out and watch everyone enjoy!
Make Ahead Options
These Mini Sugar Cookie Fruit Tarts are perfect for busy home cooks looking to save time! You can prepare the cookie crusts up to 24 hours in advance; simply bake and cool them completely before storing in an airtight container at room temperature. The cream cheese filling can also be made up to 3 days ahead; just keep it refrigerated until you’re ready to fill your tarts. When it’s time to serve, fill the cooled crusts with the cream cheese mixture, top them with fresh fruit, and chill for 30 minutes. This way, you’ll enjoy the same delightful, fresh taste as if they were made right before serving!
Storage Tips for Mini Fruit Tarts
Fridge: Store assembled Mini Fruit Tarts in an airtight container in the refrigerator for up to 2 days. This keeps the cookie crust and cream cheese filling fresh while allowing the flavors to meld.
Freezer: For longer storage, freeze the baked cookie crusts without filling for up to 3 months. Thaw before adding the cream cheese filling and fresh fruit to maintain their taste and texture.
Preparation: If making these tarts in advance, prepare the crusts and filling separately; fill the tarts just before serving for optimal freshness.
Reheating: If you prefer your crust warm, briefly bake them at 350°F for 2-3 minutes before adding the filling and fruit, but this is usually unnecessary for the Mini Fruit Tarts!
Mini Fruit Tarts Variations & Substitutions
Get ready to customize your Mini Fruit Tarts with these fun and tasty variations that will tickle your taste buds!
-
Dairy-Free: Substitute cream cheese with cashew cream for a nutty flavor and a creamy texture that works beautifully.
-
Gluten-Free: Replace all-purpose flour with a gluten-free flour blend to make these tarts suitable for those with gluten sensitivities.
-
Chocolate-Lover’s Delight: Mix in cocoa powder to the crust for a delightful chocolate sugar cookie base. It’s a treat that’s hard to resist!
-
Fruity Fun: Swap out the lemon juice in the filling for orange juice to give your cream cheese an entirely new citrus twist.
-
Nutty Flavor Boost: Add a handful of finely chopped nuts to the crust for extra crunch and a rich, nutty flavor that adds depth to your tarts.
-
Spicy Kick: Sprinkle a pinch of ground cinnamon or nutmeg into the cookie dough for a warm, aromatic flavor that complements the cream and fruit.
-
Berry Medley: Combine different berries like raspberries and blackberries for a mixed berry topping that adds beautiful colors and flavors to your tarts.
-
Tropical Touch: Use tropical fruits like mango, pineapple, or passionfruit to transport your taste buds to an exotic paradise. Each bite will feel like a little getaway!
Feel free to browse more delightful ideas like my Fruit Tart Variations for even more inspiration, or maybe you’re curious about how to make a Dairy-Free Cream Filling? Let’s keep the deliciousness going!
What to Serve with Mini Sugar Cookie Fruit Tarts?
Imagine the joy of complementing your delightful mini tarts with dishes that elevate the festive atmosphere of any gathering.
-
Lemonade Spritzer: A refreshing, bubbly drink that balances the sweetness of the tarts while adding a zesty kick.
-
Creamy Vanilla Ice Cream: Indulge in a scoop of rich vanilla ice cream that naturally pairs with the fruity flavor of your tarts; it creates a lovely fusion of textures.
-
Berry Salad: A light salad of mixed berries drizzled with honey enhances the tart’s fresh fruit topping and adds a delightful contrast.
-
Chocolate Dipped Strawberries: Elevate your dessert spread with these luscious treats; the blend of rich chocolate and fresh fruit echoes the tart flavors beautifully.
-
Pistachio Crumble: Crunchy pistachios sprinkled on top of your tarts add a nutty element that balances the creamy filling and adds an unexpected twist.
-
Mint-Infused Iced Tea: A refreshing drink with a hint of mint that complements the sweetness of both the tarts and the cream cheese filling.
-
Pavlova: A light, airy meringue dessert that is a beautiful addition to any sweet table, providing a lovely contrast to the tarts’ structure.
-
An Assorted Cheese Platter: A mix of soft and hard cheeses provides savory depth, inviting guests to mingle flavors beyond sweet treats.
By featuring a mix of cool beverages, light salads, and decadent treats, your dessert table will not just serve as a finale but a full meal experience that lingers in your guests’ memories.
Tips for the Best Mini Fruit Tarts
• Softened Butter: Ensure your butter is truly softened; this aids in achieving that perfect, fluffy dough. Hard butter can make mixing difficult.
• Mixing Technique: Avoid overmixing the dough after adding the dry ingredients. This keeps your crust tender, which is key for delicious Mini Fruit Tarts.
• Cooling Time: Cool the crusts completely in the tin before removing them. This prevents them from breaking and helps maintain their shape.
• Chill for Flavor: Don’t skip the chilling time after assembling your tarts. This step allows flavors to meld and makes for a refreshing dessert.
• Fresh Fruit Variety: Experiment with different fresh fruits to top your tarts. Seasonal fruit not only adds color but also enhances the flavor and presentation.

Mini Fruit Tarts Recipe FAQs
What type of fruit is best for topping mini fruit tarts?
Absolutely! I recommend using a mix of vibrant fruits like strawberries, blueberries, kiwi, and oranges. They not only add color but also provide a delightful balance of sweetness and tartness. Choose fruits that are at peak ripeness for the best flavor.
How should I store mini fruit tarts?
You can store assembled Mini Fruit Tarts in an airtight container in the refrigerator for up to 2 days. This keeps your cookie crust and cream cheese filling fresh. If you’re preparing in advance, store the crusts and filling separately, and fill the tarts just before serving for optimal flavor and texture.
Can I freeze the mini fruit tarts?
Yes, you can freeze the baked cookie crusts without filling for up to 3 months. To do this, let the crusts cool completely, then place them in an airtight container or freezer bag. When you’re ready to enjoy, simply thaw them in the fridge before adding the cream cheese filling and fresh fruit.
What should I do if my cookie dough is too sticky?
If your cookie dough is overly sticky, it could be due to the butter being too warm or not enough flour. To fix this, sprinkle a little extra flour on your work surface and gently knead the dough until it firms up. Alternatively, you can chill the dough for about 15 minutes, which will also make it easier to handle.
Are mini fruit tarts suitable for a gluten-free diet?
Absolutely! To make these Mini Fruit Tarts gluten-free, simply substitute the all-purpose flour with a 1:1 gluten-free baking blend. Just be sure to check that your powdered sugar is also gluten-free if you or someone you’re serving has a gluten intolerance.
Can I use a different filling instead of cream cheese?
Very! If cream cheese isn’t your favorite, you can use whipped cream, yogurt, or even pudding as a filling for your mini fruit tarts. Just make sure whatever you choose has a thick consistency, so it holds up well inside the cookie crust.
Mini Fruit Tarts: A Fun & Easy Dessert Everyone Will Love
Ingredients
Equipment
Method
- Prepare Mini-Muffin Tin and preheat oven to 350°F (175°C).
- Cream softened butter and white sugar until light and fluffy, about 2-3 minutes.
- Add egg yolk and vanilla extract to the mixture and mix on low speed until combined.
- Whisk together all-purpose flour, baking soda, and baking powder, then gradually mix into wet ingredients.
- Portion the dough into 1.5-inch balls and roll them into smooth balls.
- Place a dough ball in each muffin tin well and press down to form a cup shape.
- Bake for 8-10 minutes until edges are light golden brown; remove and cool completely.
- Beat cream cheese and powdered sugar until thick and smooth, then mix in lemon juice and zest.
- Pipe or spread cream cheese filling into cooled tart shells.
- Top each filled tart with fresh fruit and arrange them artfully.
- Chill in the refrigerator for at least 30 minutes before serving.
Leave a Reply